- Skip to main content
- Skip to primary sidebar

7+ Really Useful Diy Travel Accessories to Sew
By Damjana Jakos • Last updated on Jun 13, 2024 • This post may contain affiliate links.
These free patterns will make your next trip so much easier!
Are you too, eager to get back to travel? Summer break is on my mind and I've been googling lovely getaway locations for our family (got a few planned actually) and now that's still plenty of time between now and then, I've pulled out my best travel patterns that I can revisit and sew.
I will admit that when I think of travel, I first think of what to sew for it. A fun travel sewing project will definitely put me in a summer travel mood! Here are more than 7 super useful items will definitely want to sew up before your next travel.
Also, these free travel sewing patterns will make your vacation easier : a storage bag, a free sleep mask pattern, tons of zipper pouches and jewelry storage bags, a backpack, a little sewing kit, a hat, even a hiking DIY water bottle carrier that will keep you hydrated anywhere you go!

These patterns are super popular right now:
- This perfect tote pattern is free
- Never travel without this little diy cell phone purse !
- Keep your phone cords and charger in these diy drawstring bags
Diy Travel Accessories
Before you start your next traveling adventure, make yourself a few diy travel accessories you'll love. These just might quickly become the top priority on your list to sew!
I'm listing several super useful items you can sew for your next trip: a hat, a sleep mask, a makeup pouch, and a few practical diy travel storage items with free patterns and tutorials. They will all make your vacation or travel for the holidays so much cozier!
Diy Shoe Storage Bag

If you only have time to sew one item from this list, then choose this free shoe storage pouch pattern ! It's a brilliant solution to store anything and everything on your vacation: in addition to keeping your shoes away from your clothes, it will also home your other travel gear like electronics or cables, it can serve as a great first aid kit, and think how brilliant it would be to store individual types of apparel in separate pouches - never search for socks again! Head over to the shoe travel pouch tutorial and grab the pattern in 3 sizes for FREE !
Travel Jewelery Organizer

No more searching for your earrings and a matching necklace - and no more tangled mess! I made this cute jewelry pouch to organize my jewelry when traveling. And I thought you might use it too, so I made a pattern for it - tutorial HERE .
My BEST Free Water Bottle Bag Pattern

What a great beginner-friendly sewing idea for summer travel, get the free water bottle bag pattern now - and keep hydrated!
Sleep Mask - FREE PATTERN

Sew your own diy sleep mask using the free sewing pattern and make it easier to relax on any trip!
Eyeglasses Case Sewing Pattern
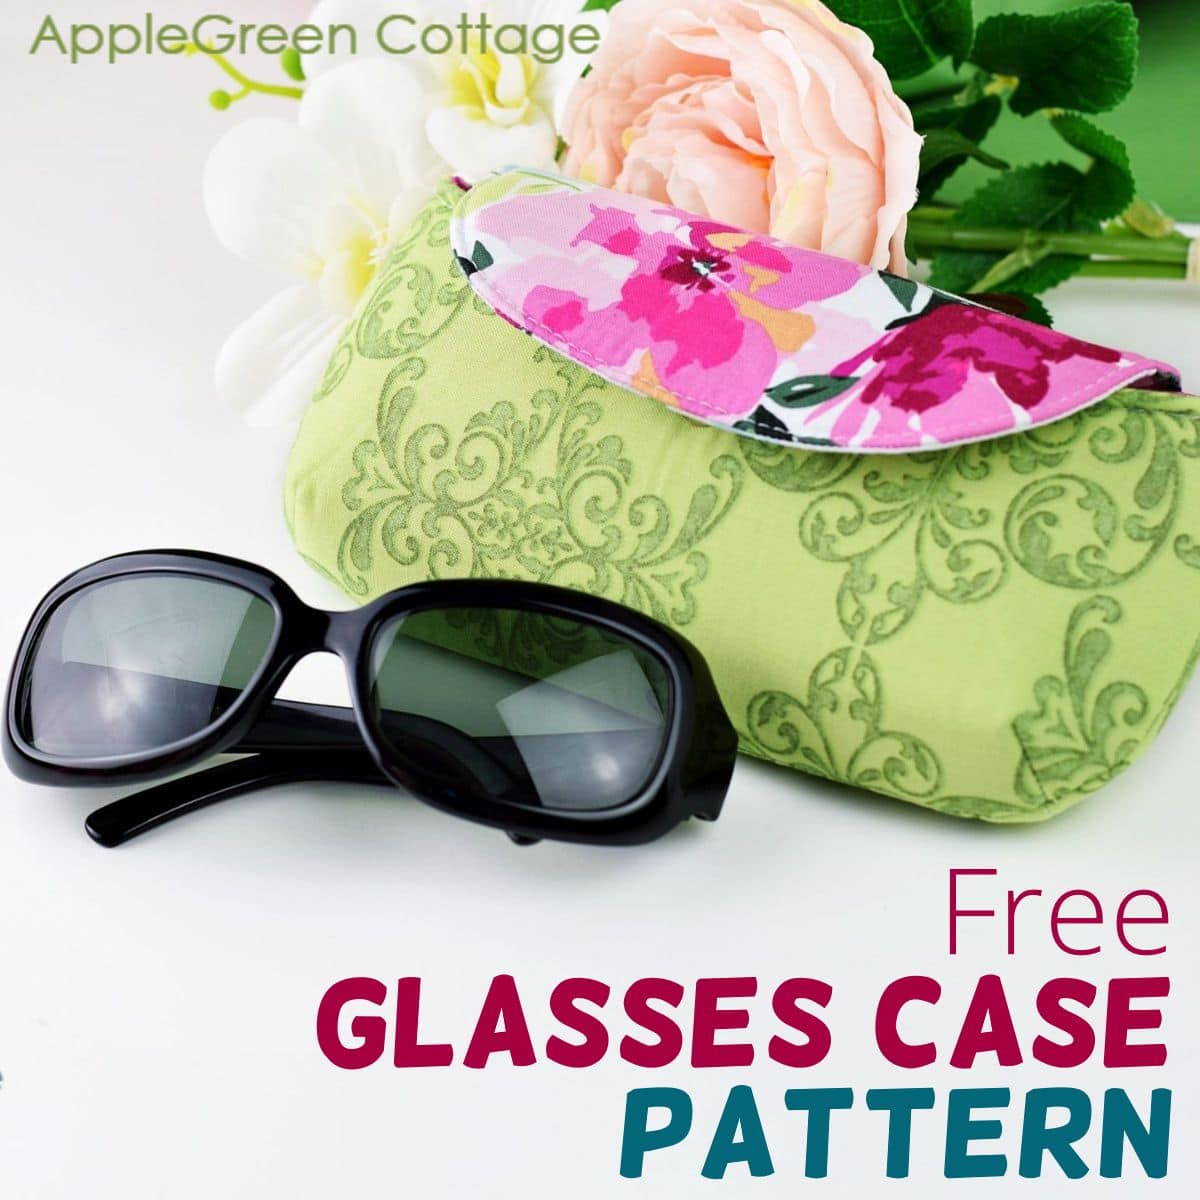
Never scratch your sunglasses again, with this cute and handy eyeglasses case to sew . This is a generously sized free pouch pattern for sunglasses with a wide opening (I call it easy-out pocket) - it will also fit larger sunglasses, and I can even use it as a phone pouch for my smartphone. Yay!
Small Jewelry Storage Pouch

Packing jewelry and want it to be totally safe - and in separate compartments? Use these mini pouches to store them separately, and put them into a larger pouch (see below). You'll always have a safe way to quickly store your earrings on the go - so practical! Grab the free pattern for the smallest pouch you'll ever make - and make them in matching prints with the next one:
Convenient Travel Cosmetic Bag Tutorial

An easy travel cosmetic bag to hold all the makeup you need on vacation. It comes with a free template you can use to make a bag with 4 small interior slip pockets and a main compartment - an easy and simple design you can make fit any style.
Boxy Makeup Zipper Pouch - Free Pattern

Need something more 'boxy'? Here's how to sew the perfect small boxy zipper pouch you can use in a gazillion of things. Makeup too! - Free pattern in 2 sizes.
My best drawstring Backpack

Make a cute diy backpack using this free drawstring backpack pattern . Choose between two sizes and sew your perfect diy travel backpack!
Tiny Travel Sewing Case (Emergency Sewing Set!)

Clever, practical and tiny! This small diy sewing case is easy and quick to make, and always good to have as an emergency sewing kit. It will house your sewing needle and a few safety pins, and a spare button you might need on your next trip. Take a look at the free tutorial.
Even More Diy Travel Accessories
There are never enough practical diy ideas for travel. I'll be on the lookout for more, and will be adding them to this list. Make sure to follow along, and right now here's one more pouch you might like to have, for anything you can think of:
. This one at AppleGreen Cottage is easy to make and you can use it for just anything (even for storing your sleep mask, yes!).")
You can never have enough zipper pouches when you are traveling, on vacation, or at home. This one is easy to make and you can use it for just anything - makeup pouch, first-aid kit, USB key storage and a cable tidy, even for storing your sleep mask! It will keep it safely separated from the rest of your stuff. Get your free round-bottom zipper pouch pattern .
- also, try this bucket hat with 5 free sizes
- or make this huge messenger bag to tote a lot of things around.
Do you like these free travel sewing patterns and tutorials? Share them, tell your friends about them, or sign up for the AppleGreen Cottage newsletter to get all the new tutorials to your inbox.
Or save it to Pinterest for later:

WANT MORE FREE TUTORIALS AND GOODIES?
Get email updates and never miss out on new patterns, printables, and tutorials:
Or …check out the popular Aiden Cell Phone Purse in our shop. Guess what's on the back of this cool phone bag!
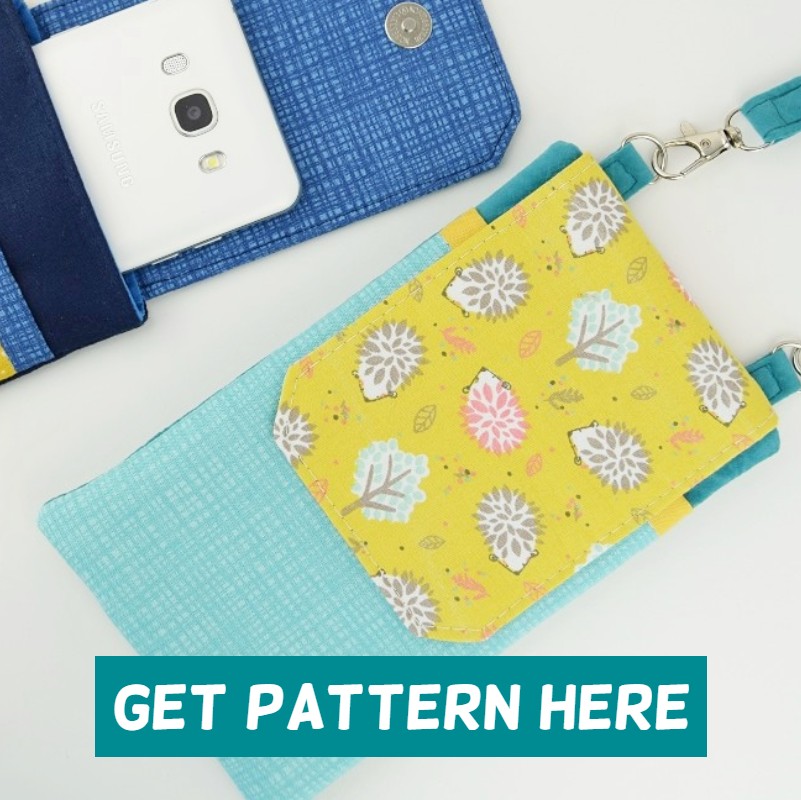
This pattern is just perfect for travel !

More Sewing Roundups

Reader Interactions
June 15, 2022 at 3:52 pm
I've made most of these patterns and I LOVE them! The shoe bag is FANTASTIC! I made 4 of them for a friend. She hung them up in her vacation closet to keep them up and away. I also made the eyeglass case, the cinch jewelry pouch and the boxed zipper pouch. I love AGC patterns. Thanks for making easy to follow patterns that turn out BEAUTIFUL every single time! You make me look good. 🙂
March 01, 2022 at 5:29 pm
Thank you so much for these lovely patterns.
Pamela Snyder
June 27, 2021 at 5:01 pm
Thank you for these wonderful patterns Damjana! We are RV shopping so I am about to begin making storage pieces for our dishes, glasses & so on..the fold down basket set is going to be perfect for sure. Do you have any other recommendations for RVer's out there?
August 26, 2020 at 11:50 am
Thanks! Some really lovely projects here for me to try. Really appreciate it!
August 26, 2020 at 12:00 pm
Ruth, you're welcome. I'd love to see what you sew up, tag me or add #applegreencottage if you post a photo anywhere! <3 Damjana
Josée Paquin
August 25, 2020 at 3:52 pm
Hello Thank you for the patterns.
Have a nice day Josée
August 25, 2020 at 10:15 pm
Josée hi, you're welcome. Enjoy!
August 25, 2020 at 3:16 pm
Thank you for the wonderful patterns!
August 25, 2020 at 10:17 pm
Jackie hi, means a lot, thank you! Happy sewing,
August 06, 2019 at 2:39 pm
I LOVE your ideas! Since I am a fairly new seamstress, they are perfect for me to start with!
August 06, 2019 at 2:58 pm
Happy to hear that <3 Happy sewing,
Sandra@Frogs-and-Faires
June 15, 2016 at 10:05 am
These are awesome ideas, Damjana! 🙂 Now in REALLY need to learn how to sew. 😛
Damjana at AppleGreen Cottage
July 02, 2016 at 7:26 pm
Haha, I think you do, Sandra! Have a great day!
Leave a Reply Cancel reply
Your email address will not be published. Required fields are marked *
Save my name, email, and website in this browser for the next time I comment.
12 Travel Bag Patterns
Stacy Fisher is an expert on crafting, sewing, and frugal finds, sharing her knowledge of hands-on DIY creations, finding freebies, and budgeting. Stacy was a guest on "The Dr. Oz Show" and featured in Woman's World Magazine. She has nearly two decades of writing and editing experience.
:max_bytes(150000):strip_icc():format(webp)/headshotcropped-5b74856f46e0fb0050e2bca0.jpg "diy travel storage bag")
Delia Creates
These travel bag patterns are the perfect solution to keeping organized on your next vacation, weekend trip, or a day out in the sun. You'll find free patterns so you can DIY your own duffel bag, tote, overnight bag, jewelry roll, tote bag , and more.
All of these travel bag patterns have everything you need to sew up a new bag for you or the kids. You'll find materials and supply lists, step-by-step assembly instructions, and finishing directions that will make your bag look awesome and be ready to use on your next trip.
A Beautiful Mess
This gym bag can be used for your next workout but it also makes a great travel bag. It's a roomy bag so you can use it at the beach, on your next weekend getaway, or any other time you need a dependable bag to use. A side pocket is perfect for keeping track of smaller belongings.
Gym Bag from A Beautiful Mess
The Big Beach Bag
Oh Oh Deco
If your next adventure takes you to the beach, you're going to need a travel bag pattern to hold everything you need for a day on the sand. This big beach bag will hold everything you need for your day out, beach towels, toys, books, sunscreen, and anything else you want to bring. There's also a small pocket on the outside of the bag, perfect for holding sunglasses or something else you don't want to lose.
The Big Beach Bag from Oh Oh Deco
Weekender Bag
Delia Creates
If you're headed out for an overnight or weekend trip, this weekender bag will hold everything you need. It's a large duffel style bag that features leather handles and a crossbody strap, making it easy to haul wherever you're going. There's an inside zippered pocket which is great for storing smaller items.
Weekender Bag from Delia Creates
Drawstring Travel Bag
These drawstring travel bags can be used for just about anything, from makeup to books. They're medium-sized, making them great to use on their own or as an extra bag you throw into a bigger bag to keep everything organized. Since they're drawstring, they're easy to use but will still keep your belongings secure.
Drawstring Travel Bag from Sew DIY
Large Tote Bag with Pockets
The Spruce Crafts
No matter what type of trip you are taking, you'll want to have a large bag that can hold lots of stuff, especially if you have kids. This large tote bag is perfect for road trips or a day out at the beach. Secure straps and a large pocket are just some of the highlights of this bag.
Large Tote Bag with Pockets from The Spruce Crafts
Laminated Toiletry Travel Bag
This travel bag pattern sews up a toiletry bag that you can use for all your travel toiletries, makeup, and any other small items. It's made with laminated fabric, making it a breeze to wipe away any spills or messes.
Laminated Toiletry Travel Bag from Sew 4 Home
Polka Dot Chair
This adorable makeup bag is perfect for toting around your makeup or toiletries. It's an oversized toiletry bag so you can fit everything you need in it. You don't have to use it just for makeup either, it would work well for backseat toy bags for the kids on your next road trip.
Makeup Bag from Polka Dot Chair
Quilted Travel Duffle
Sew 4 Home
This quilted travel duffle has a sleeve on the bag so it fits perfectly on top of a rolling suitcase. Features of this travel bag pattern include handles, a detachable cross-body strap, a secure front pocket, and several interior divided pockets to keep everything in its place.
Quilted Travel Duffle from Sew 4 Home
Wash and Wear Travel Bag
The Crafty Gentleman
Here's a travel bag pattern that will keep you organized while you're on your vacation. The bag is divided into two sections, one for clean clothes and the other for dirty clothes. It's meant to be used for socks and underwear, but you could make several of them to organize all your clothes.
Wash and Wear Travel Bag from The Crafty Gentleman
Wet Swimsuit Bag
Make It & Love It
This travel bag is for a wet swimsuit bag that can be used to keep your wet swimsuit separate from all your other belongings. It's perfect for throwing in a larger bag that you'll take to the beach or pool. The inside of the bag is lined with a waterproof fabric, making it perfect for swimsuits or wet clothes.
Wet Swimsuit Bag from Make It & Love It
Leather Jewelry Roll
The Merrythought
If you have some jewelry you'd like to take on your travels, consider making this leather jewelry roll. It has a place for earrings, necklaces, rings, and pocket that holds other small jewelry. Simply roll it up when you're finished using it and tie with the leather strips to keep it all in its place.
Leather Jewelry Roll from The Merrythought
Travel Bag for Kids
Ginger Snap Crafts
If you're travelling with kids, you'll want to keep them organized too. They'll love this tote bag that features their name and a picture of what they love. It uses an already made canvas tote, so it's a quick project that couldn't be easier.
Travel Bag for Kids from Ginger Snap Crafts
More from The Spruce Crafts

7 DIY Travel Bag Patterns So You Can Travel In Style
Have you ever noticed that when you are shopping for various travel bags, there are two options? You can get cheaply made nylon bags or extremely overpriced “bland” looking bags.
But how do we get around these two options? The answer is simple: DIY travel bags.
Today, I want to go over the different types of travel bags and supplies and how to create them, and then show you some beautiful travel bag patterns that you can use to create your traveling accessories.
Page Contents
Types of Travel Bags
Before we jump into the how-to or the patterns list, I want to go over the different kinds of bags categorized as “travel bags.” Remember that this post focuses on travel bags you can create, not factory-made luggage.
- Jewelry bag
- Toiletry bag
- Garment bag
- Travel tote
- Backpack
Supplies You Will Need to Make Your Own Travel Bag
The supplies you will need will vary depending on the specific item you are making. The following list will include various notions and supplies you will need to make different travel bags.
- Travel bag sewing pattern
- Interfacing for structure
- Trimming (optional for decoration)
- Scissors or rotary cutter and mat
- Sewing machine
How Do You Make a Travel Bag?
Now that we know the different types of travel bags and the supplies we may need to create them let’s go over the steps of making a travel bag.
I recommend using a pattern when doing a project like this since it will have detailed instructions for the different steps. These are essential steps to give you an idea of what’s involved when making a large bag.
- Step 1: Choose a pattern
When looking for the perfect pattern, you want to make sure you are looking for one that is within your skill level and will meet your traveling needs. There are thousands of travel bag patterns available on the market, so you shouldn’t have a problem finding something that will work for you.
- Step 2: Cut all fabric and interfacing pieces
The pattern you choose either has specific cutting instructions or may even come with templates you can use to cut the fabric pieces you will need. Remember the age-old tip: “measure twice, cut once.”
- Step 3: Attach notions to the fabric pieces
Where you add the notions will vary depending on which ones you are using and when the pattern tells you to add them. I wanted to include this so you can think about when you need to add them. There’s nothing more frustrating than realizing you forgot to add a D-ring or other notions and have to take apart part of your project and add it. *Speaking from personal experience*
- Step 4: Sew the exterior pieces together
The pattern writer will do a great job of explaining how to do this step. Ensure you keep your raw edges lined up at all times to ensure an even seam allowance.
- Step 5: Create and attach the straps
This is a fun step; you can make straps from various materials like canvas, leather, quilting cotton, denim, nylon strapping, etc. Some patterns will have you attach the straps before you sew the lining and exterior parts together. Others will have you connect them to the exterior first.
- Step 6: Sew the lining pieces together
This step will be where you add pockets for the bag’s interior and create the lining. I like to use a fun, funky fabric inside my bags. It gives it a little more personality and pizazz.
Tip: If you use a weekender bag pattern and want a sizeable wide-open bag, you can skip creating a lining. To conceal the raw edges of the exterior parts, take bias tape and sew it along all the raw edges. This will give the bag a more finished look; plus, when you wash it, the edges won’t unravel.
- Step 7: Sew the lining and exterior parts together
This final step is always exciting since you see the entire bag come together. Follow the instructions in the pattern you’ve used to complete the bag. Once you’ve finished the bag, take a moment to admire your work and show it off to your friends and family!
7 Travel Bag Patterns For You To Peruse
For this compilation, I tried to find a good selection of travel bag patterns to give you a glimpse into what is possible with a bit of fabric, thread, and imagination. Without further ado, let’s dive into this fun collection!
- Rollie Pollie Organizer

You can use this fun little organizer to store all kinds of things for your trip, from toiletries to makeup to jewelry. This toiletry bag sewing pattern includes instructions and templates to create this unique roll-up organizer. It features four removable pouches, and the pattern has instructions for three different sizes. The skill level for this project is intermediate.
- Convertible Travel Bag

How cute is this convertible bag? This bag would be great if you are planning a day trip to the city or if you want to take your laptop to the local coffee shop to do some work. The maker of this bag used an existing messenger bag pattern and made some changes to the straps to make it convertible. The straps can be used either as a messenger bag or backpack.
- DIY Easy Makeup Bag

Here is a free tutorial to make this cute pleated makeup bag. The maker gives a supplies list, written instructions with photos, and a YouTube video to accompany the tutorial. The finished bag will measure approximately 9”x5”x5”, the perfect size for travel.
- Retro Travel Bag

I found this pattern on Etsy in the shop PolkaDotChair. The pattern will show you how to create your duffel bag that measures 20”x11”x6”. The pattern includes templates and gives you three different strap options depending on what look you are going for with your bag.
- Got Your Back 2.1

This backpack pattern might be the right choice if you like to travel light. The backpack has multiple pockets to store items and keep your things organized while traveling and has a convenient handle on top if you don’t want to put it on your back while walking around. The finished size of the backpack is 14”x12”6”.
- Divide and Conquer

This pattern is perfect for those who like to organize their belongings while traveling. There are two size options for you and optional straps for carrying. You could use this bag for toiletries, makeup, craft supplies, electronics, kid’s toys, etc.
- Townsend Travel Bag

This beautiful bag can be made using the Townsend Travel Bag sewing pattern. You can tell the designer pays attention to detail by the professional finishes of this bag. Adding the train case bottom is a massive bonus if you need to bring shoes or other bulky items with you. You can use it for an overnight bag, carry-on, diaper bag, or gym bag, to name a few options. The final measurements of this bag are 16”x13”x6”.
I hope you enjoyed this group of travel bag patterns. I want to make a complete set of luggage for my next trip! How about you? Which bag was your favorite? Let me know in the comments below.
Happy Stitching!

Share this:
Similar posts.

A Super Simple Mug Rug Tutorial for Beginners

The Absolute Best Sewing Chair for Quilters and Sewists

13 Beginner Sewing Project Kits to Help You on Your Sewing Journey

Hop On Over and Check Out These 13 Amazing Easter Sewing Projects

5 Felt Crafts For Kids: Imagine What You Can Make With Felt!

A Super Simple and Fun Quilt As You Go Tutorial: Part One + 5 Quilt As You Go Patterns to Try
One comment.
- Pingback: 11 Crossbody Bag Patterns
Leave a Reply Cancel reply
Your email address will not be published. Required fields are marked *
Save my name, email, and website in this browser for the next time I comment.
- Home →
- Projects & Tutorials
- → DIY Travel Bag or Compact Folding Shopping That Fits in Your Purse

DIY Travel Bag or Compact Folding Shopping That Fits in Your Purse
These days, to avoid the impacts of climate change, we are encouraged to carry travel bags with us rather than buying more plastic to choke up the oceans or the earth. While fabric shopping or travel bags are significant, we really want fabric ones that fold into almost nothing to save storage space. Enter the compact foldable travel bag that can easily slip into a purse and be whipped out when you need it. You can use it for carrying shopping items, packing up the kids’ toys for a playdate with a friend, or snacks for an afternoon in the park. Follow our easy step-by-step travel bag tutorial, and you’ll have a bag ready to whip out and use in a few minutes.

Create a gift for yourself or a friend, reduce your fabric stash and save the planet all in one with our foldable DIY travel bag. These are three great goals as we near the end of the year. Follow the step-by-step shopping or travel bag tutorials with great visuals to help you make these foldable DIY travel bags in a hurry. Instead of mountains of bags taking up space, these travel bags fold away to virtually nothing and can be hauled out to transport groceries, gifts, snacks, or toys. They can even be used for visits to the markets or the beach when you go on holiday and don’t want to fill your bag with bulky beach bags. Instead, leave space for that beautiful resort wear!

Below you will find my step by step written tutorial how to make a travel bag with VIDEO instructions for all the visual learners.
We occasionally link to goods offered by vendors to help the reader find relevant products. Some of the links may be affiliate meaning we earn a small commission if an item is purchased.
Table of Contents
- 1 How to Make a Travel Bag
- 2 Travel Bag Supplies and Tools
- 3.1 DIY Folding Compact Travel Bag VIDEO TUTORIAL
- 3.2 Travel Bag INSTRUCTIONS:
- 3.3 STEP 1:
- 3.4 STEP 2:
- 3.5 STEP 3:
- 3.6 Step 4:
- 3.7 Step 5:
- 3.8 Step 6:
- 3.9 Step 7:
- 3.10 Step 8:
- 3.11 Step 12:
- 3.12 Step 13:
- 3.13 Step 14:
- 3.14 Step 15:
- 3.15 Step 16:
- 3.16 Step 17:
- 3.17 Step 18:
- 3.18 Step 19:
How to Make a Travel Bag

Travel Bag Supplies and Tools

(1) 23 ¾ inch (60 cm) x 35 ½ inches (90 cm) piece of cotton fabric
(2) 3 ¼ inches (8 cm) x 11 ½ inches (29 cm) for the handles
(2) 4 3/8 inches (11 cm) x 2 inches (5 cm) for the seam covers
(1) 10-inch (25 cm) piece of elastic string .
- 24″ (61cm) zipper
- matching thread
- scissors (or rotary cutter and a cutting mat )
- ruler or measuring tape
- iron and ironing board
- sewing clips or pins
- a sewing machine
- erasable fabric marker
How to Sew a Travel Bag
Watch the diy travel bag video first and then follow the written step by step instructions below. Please enjoy and don’t forget to Like and SUBSCRIBE over on YouTube to be kept up to date with new videos as they come out.
DIY Folding Compact Travel Bag VIDEO TUTORIAL
Travel Bag INSTRUCTIONS:
Cut your fabrics:

- (1) 23 ¾ inch by 35 ½ inches (60 cm x 90 cm) piece of cotton fabric
- (2) 3 ¼ inches x 11 ½ inches (8 cm x 29 cm) for the handles
- (2) 4 3/8 inches x 2 inches (11 cm x 5 cm) for the seam covers
- (1) 10-inch (25 cm) piece of elastic string
Place your 23 ¾ inches x 35 ½ inches (60 cm x 90 cm) piece of light cotton fabric on the worktop, folded in half on the 35 ½ inch side (90cm), so you have a piece that measures 23 ¾ x 17 ¾ (60 x 90cm).
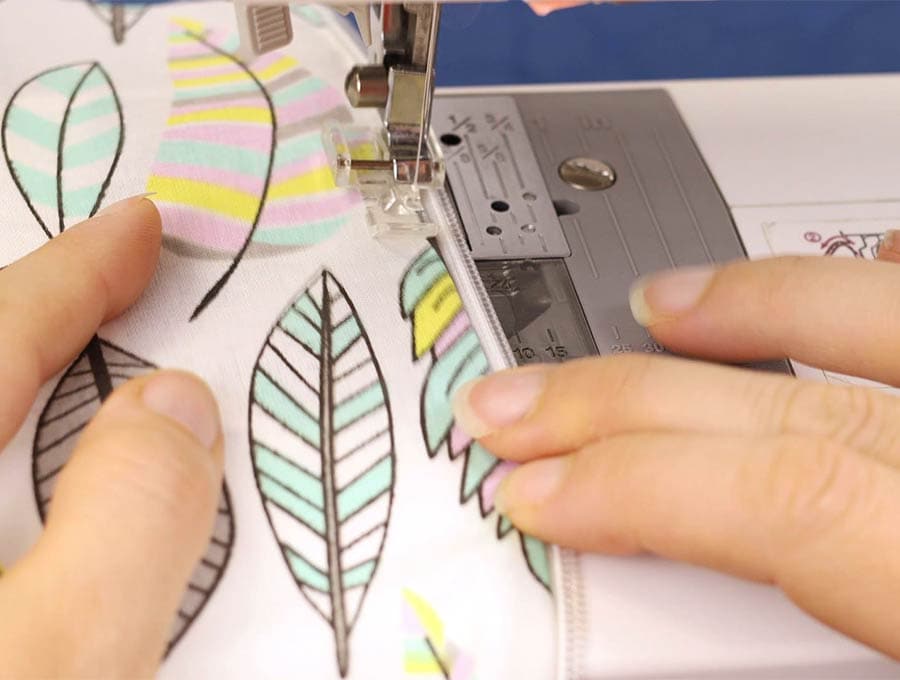
Attach the zipper. First remove the zipper pull, then pin the right side of the zipper to right side of the fabric. Sew using a zipper foot
Flip the fabric and topstitch right next to the zipper

Separate the zipper and attach the other part of the zipper tape to the fabric. Flip the fabric and topstitch along the zipper
The next step is to create the pleats that allow the shopping bag to fold easily. Take one edge where a handle is attached. With the right side of the fabric facing the worktop, fold over the seam with the handle 2 inches (5cm) towards the middle of the fabric and press in place. Clip the ends, flip the fabric, so the wrong side of the fabric faces the worktop and make another fold 2 1/8 inches (5.5 cm) and press in place. Clip the two folds together, then flip again and create another fold by measuring 2 3/8 inches (6 cm). Press and clip, then flip to complete the last fold on the side by measuring 2 3/8 inches (6 cm), folding and clipping and then pressing.

Repeat the previous step on the other side of the fabric, so you have two sets of folds. Place the handles parallel to the top of the worktop and with the right side of the fabric face down on the tabletop.

Fold the elastic in half and carefully clip the ends into place on the right-hand side, 1 inch (2.5cm) down from the corner, with the loop you created facing towards the left. Stitch over the ends of the elastic through the layers of the fold at the edge of the fabric four times, going forward and backward, to ensure the elastic string does not pull loose with use.
Take the two small pieces of contrasting fabric that measure 4 3/8 inches x 2 inches (11 cm x 5 cm) and press a 3/8-inch (1cm) seam on either side of the 4 3/8-inch (11 cm) side.

- Now, it seems wrong, but fold each piece along the middle of the length so the seams you pressed into the fabric face OUTWARDS. We usually fold over so the raw edges are hidden but not in this case. Fold both pieces as described and clip the short ends.
- Stitch along the short edges 3/8 inch (1 cm) from the edge, back-tacking at the start and finish.
- Turn the little pockets you created the right way out, so the raw edges are hidden. See how neat they are!
- Slip a pocket over the end of the folded bag, clip in place and stitch 1/8 inch (3mm) from the edge. Repeat with the other side of the bag. Don’t forget to back tack at the start and finish of the lines of stitching.

Take the two big strips of fabric and fold 3/8 inch (1 cm) over on each of the four short ends and iron in place

Fold each of the two handles in half along the length of fabric and press the center, then open out and fold each of the sides toward the center and press. Fold over the fabric along its length so you have four layers. Clip into place, ready for sewing.

Stitch along each side of the handles 1/8 inch (3mm) from the edge, back-tacking at the start and finish of each seam. Do not stitch across the short end pieces.

We will now work on attaching the bag handles in the correct position. Take the large piece of fabric and place it right side up on the worktop, with one of the two seams at the top. Find the center by folding it in half and marking it with a pin or an erasable fabric pen on the right side. Now find the center of one of the handles. Pin the center of the handle piece to the center of the fabric, in line with the top edge of the seam. Repeat for the other side of the fabric.
At the end of the handle, where it is nearest to the top of the bag, make a dot with an erasable fabric pen 1 inch (2.5cm) in from the end of the handle on each end. Repeat with the other side of the fabric where the handle is pinned in place.

Now at the bottom of the handle on each end, make a mark 2 inches (5cm) from the edge. Use a ruler to join the mark at 1 inch (2.5cm) to the mark at 2 inches (5cm) with a diagonal line.

Stitch the end of the handle going from the diagonal line to the outer edges all around the handle. It will look like a rectangle with one side sloping. Repeat until both ends of the handles are joined to the fabric. When you sew the box shape, remember, for a neat finish, to leave the needle in the fabric when you want to turn the corner, lift the presser foot, swing the fabric around, then depress the presser foot and keep on sewing. Now that the handles are attached, you can remove the pins in the center that kept them in position before sewing.

The magic happens now. Grab the handles and shake out the bag – it unfolds to a roomy size to store your shopping. When you are done, pull the ends, which will fold back into shape. Fold in half along the length, then fold over twice more, pull the elastic string out and wrap it around the shopping bag, and you have a tiny little bundle ready to store until you need it.
If you loved creating this awesome little shopping bag, hit our subscribe button. You don’t want to miss out on the valuable ideas we have coming up. These shopping bags make adorable gifts. Best of all, you will know you are doing your bit to reduce single-use plastics by creating these DIY foldable shopping bags.
Do you like this? Pin for later:
Wanna be friends? Click HERE and follow me on Pinterest
Handy, durable market bag – durable enough to become your go-to bag for your daily errands, but fashionable enough to take with you on lunch dates or to a night on the town.
This is a great bag! Do you have patterns for backpacks?
Leave a reply:
Save my name, email, and website in this browser for the next time I comment.
for a very simple drawstring backpack = here’s the link https://hellosewing.com/diy-drawstring-backpack/
Shouldn’t the zipper be at least 25 inches? When you look at the zipper opening in the finished bag the zipper is a lot longer than the handles which run the same direction as the zipper. That is why I am thinking the zipper should be 25 inches.
the zipper should be at least 24″ (60cm) – same as the short side of the fabric. Apologies fir the mistake in the video
Thanks for the correction.
I love the feather fabric used for the travel bag. Do you have a link where I may purchase the fabric?
Thank you. I love receiving your emails!
It’s from a small local shop. I haven’t seen it online, but if I do I’ll make sure to update the post with a link in the supplies section
This really is a great bag. I love the pattern of the fabric.
Very practical and it looks fairly easy to make.
I love this bag, what a clever idea. I can’t wait to try ot out soon. Thanks for sharing at Handmade Monday 🙂
What an amazing bag! I’ve pinned your post.
What a neat bag pattern! Thank you so much for sharing with us at Encouraging hearts and Home.
Leave a Reply:
Grab a copy of our FREE Handbag eBook!

F REE HANDBAG EBOOK! Get your copy! >
How to Make a Travel Bag with Pockets

For those of you who follow Sew Very Crafty you know that I love to make bags. This is a terrific travel bag with pockets that is perfect for overnight or any trip. It is an intermediate sewing project that is both fun and functional. Choose a fun fabric to make this sewing project truly your own. I really enjoyed making this travel bag with pockets and fully intend to use it. I hope you will give it a try too. If you would like to see some other travel bags my simple travel bag or my large travel tote.
What you will Need: How to Make a Travel Bag with Pockets
- Pattern you can get by clicking on this link
- 2 yds outer Fabric and Lining Fabric
- 1 yd fusible fleece like Pellon 987F
- 1/2 yd accent fabric
- 23″ zipper
- 9″ zipper
- 2 x 1″ D ring
- 1 x 1″ triglide
- 1 magnetic snap
Step 1: Create the Travel Bag Pattern
Print out the pattern pieces and tape them together. You should have three pattern pieces for this project. Take the “B” piece and cut it in half lengthwise keeping in mind that both pieces will be cut on the fold.
Step 2: Cut out your Fabrics
Outer fabrics
- 2 pieces — 17 3/8″ x 13 3 /8″
- 1 piece — 3 5/8″ x 7″
- 2 pieces — 3 1/2″ x 22″
- 2 pieces — 7″ x 8 5/8″
- 1 piece — 18 1/8 x 8 5/8″
- 2 Pieces — 3 1/2″ x 8 5/8″
- 1 Piece — 34 7/8″ x 7 1/8″
- 2 Pieces — 7 7/8″ x 8 5/8″
Lining fabrics
- 1 piece — 18 1/8″ x 11 3/4″
Accent Fabrics
- 2 pieces — 7″ x 3 1/8″
- 2 pieces — 4 3/8″ x 4″
- 1 piece — 59″ x 4″
- 2 pieces — WOF x 4″
Fusible Fleece
- 1 Pieces — 3 1/2″ x 8 5/8″
Step 3: Cut the Travel Bag Pattern Pieces
From the appropriate fleece piece cut out the pattern pieces you printed and taped. Make sure to cut them on the fold.

Step 4: Fuse the Fleece
Fuse the fleece to the corresponding outer fabric pieces. Trim the outer pieces to match the fleece pieces leaving a 3/8″ seam allowance.
Step 5: Create the Straps
Take the 59″ x 4 3/8″ accent fabric and fold it in half lengthwise and press used two pieces of fabric to race the 59″ length. Open up and fold the raw edges to the center fold and press. Fold in half again to enclose the raw edges. Repeat for the other accent fabrics. Topstitch the shorter straps on both sides starting and finishing 11″ from each end. Topstitch along the long sides of the rest of the accent fabrics. For the shortest pieces, fold the fabric over the D-Rings and stitch to secure.

Step 6: Create the Outer Zipper Pocket
Take the outer piece that measures 8 5/8″ x 18 1/8″ and place it right sides up on your work station. Place the 9″ zipper right sides down on the outer piece then lay the corresponding lining piece right sides down on top of the zipper creating a zipper sandwich. Stitch the zipper through all layers. Turn right sides out and topstitch. Fold up the outer fabric to meet the other side of the zipper and fold up the lining piece to create your zipper sandwich. Stitch the zipper through all layers and topstitch. Fold the pocket so that the zipper is 1 1/8″ from the top of the pocket and press. Zigzag stitch along both sides of the pocket

Step 7: Create the Flap Pocket
Take the two outer pieces that measure 7 7/8″ x 8 5/8″ and the outer pieces “D”. Place the 7 7/8″ x 8 5/8″ pieces right sides together and stitch along the two long sides using a 3/8″ seam allowance Turn right sides out and press. Topstitch along one of the seams. Take the outer piece “D” and stitch around the sides and bottom using a 3/8″ seam allowance. Turn right sides out and press. Topstitch.

Step 8: Add the Flap Pockets
Take the main outer piece “A” and find the center of the bottom. Measure up 1 1/2″ from the bottom and place zipper pocket you created in the center. Stitch along the sides leaving the bottom open. Take the other main side and repeat the process by placing the other pocket piece. Stitch on both sides and the bottom.

Step 9: Add Handles
Take the handle pieces and place them along the sides of the pockets. Stitch along both sides and across the top at the 11″ mark.

Step 10: Add the Flap
Place the flap piece Right sides together just above the pocket piece and stitch. Fold the flap down and topdstitch to enclose the raw edge underneath.

Step 11: Add the Kam Snaps
Find the center of the flap toward the bottom and place half of the Kam Snap. place the other half of the Kam Snap in the center of the pocket measuring so that the flap snaps into the pocket. If you would like to know how to install Kam Snaps check out the below video.

Step 12: Create the Lining
Take the main outer piece and use as a pattern for the lining. Cut the lining.

Step 13: Stitch the Lining Pocket
Take the 18 1/8″ x 11 3/4″ and fold it in half right sides together. Stitch along the sides and bottom leaving an opening in the bottom for turning. Turn right sides out and press. Topstitch along the fold.

Step 13: Add the Lining Pocket
Find the center the lining piece. Measure up 1 1/8″ from the bottom and place the pocket piece in the center. Stitch along the sides and bottom.

Step 14: Create the Side Pockets
Take the 7″ x 8 5/8″ outer and lining pieces along with the accent pieces that measure 7″ x 3 1/8″ . Place the outer and lining pieces right sides together and stitch on one short end each. Turn right sides out and press. Place the seam on the bottom. Lay the accent pieces on the top of each pair of fabric pieces on the lining side. Stitch to through all layers. Fold the accent piece twice to the right side of the pocket pieces and stitch.

Step 15: Add the Side Pockets
Take the Pattern piece “C” and find the center. Measure up 8 1/4″ from the center mark on both sides and place the pocket pieces so that the accent fabric faces toward the top on both sides. Trim the pocket pieces to match the pattern piece. Stitch the pockets along the sides and bottom.

Step 16: Create the Zipper Placket
Take the pattern pieces “B” outer and place them on your work surface. Take the lining pieces that measure 31/2″ x 22″ and use the corresponding outer pattern pieces as a pattern and cut the lining pieces to match. Place one of the outer pieces face up on your work surface. Place the zipper right sides down on the outer piece and the lining piece on top of the zipper. Stitch the zipper through all layers. Repeat for the other side. Topstitch on both sides of the zipper.

Step 17: Add the D-Rings
Place the D-Ring tabs at each end of the zipper placket at the ends of the zipper. Stitch.

Step 18: Add Pattern Piece C
Place outer pattern piece “C” right sides together with the corresponding lining piece and trim off the excess lining fabric so that the lining fabric and outer piece match. Place the zipper placket right sides together with the outer piece “C” and clip. Lay the lining piece right sides together with the other side of the placket so that the zipper placket is sandwiched between the outer and lining gusset and clip using the same clips. Stitch both short ends using a 3/8″ seam allowance. Topstitch along the seams. Stitch layers together on the top and bottom to secure using a zigzag stitch. This creates the gusset.

Step 19: Add the Outer Bag Piece
Fold the gusset in half and find the center. Mark the centers on both sides on top and bottom. Fold in half the other way matching the previous marks and mark again. Take one of the outer pieces and mark the centers in the same way you did the gusset. Place the outer main piece right sides together with the gusset matching the center marks. Make sure the top is on the zipper side of the gusset. Clip so that the main outer piece is wrapped by the gusset.

Fold in the gusset and place a lining piece on top right sides together. Start stitching 5″ from the side of the bottom of the bag but exclude the top lining piece. Stitch until you get to 5″ from the other side then start to stitch all layers of the bag using a 3/8″ seam allowance, Clip the curves and turn right sides out.

Step 20: Add the Other Outer Bag Piece
Place the other bag piece right sides together with the gusset matching the marks you previously made. Turn the whole piece so that the lining is facing up. Fold the sides of the bag to the center and place the final lining piece on top. Clip all the way around. Stitch all the way around the bag leaving an opening in the bottom. Clip the curves and turn right sides out. Stitch the opening closed using ladder stitch.

Step 21: Add the Shoulder Strap
Place one end of the long accent piece that you stitched around a D-Ring tab. Stitch to secure. Place the other end of the bag strap through the Tri-glide then through the opposite D-ring and back through the Tri-glide Stitch to secure. Your travel bag with handles is now complete. Fill it up and travel to far off places or just stay overnight. It is perfect.

I hope that you enjoyed this travel bag with pockets. If you would like more sewing and crafting projects subscribe to our newsletter and receive your free eBook of 15 handbag patterns and tutorials taken from the blog.
If you would like video tutorials of some of Sew Very Crafty’s most popular posts subscribe to our free YouTube channel here.

SIGN UP TO RECEIVE THE LATEST FROM SEW VERY CRAFTY !
We don’t spam! Read our privacy policy for more info.
Check your inbox or spam folder to confirm your subscription.
Share this:
- Click to share on Facebook (Opens in new window)
- Click to share on Pinterest (Opens in new window)
- Click to share on Twitter (Opens in new window)
- Click to email a link to a friend (Opens in new window)
- Click to print (Opens in new window)

Hi, Welcome to Sew Very Crafty a place for beginner and intermediate sewists and crafters to learn and create. Here at SVC we create simple and fun projects that anyone with basic to intermediate skills can create and grow with. My name is Diana and I am a lifelong learner, sewing enthusiast, parent, spouse, lawyer, and die hard St. Louis Cardinals fan. I live in California with my husband. I love God and my country but am proud of my Irish heritage. I enjoy sharing my creativity and the things that I love with others.
Similar Posts

How to Add a Purse Clasp Turn Lock

How to Make a DIY Cell Phone Bag

How to Make a KitchenAid Cover

How to Make a Custom Gym Bag

5 Minute Autumn Wreath

How to Make a Dollar Tree Foam Dice Wall Hanging
Hello! When cutting out the pieces I noticed that the size 7″ by 8 5/8″ was repeated. Do you need 2 or 4 of those sizes? Also for the pattern printed pieces are those just for the fusible fleece or do we cut those in the outer and lining fabrics as well? Thanks! Such a cute bag.
I believe that here are just two but it has been a while since I have made this project.
Looking Forward to Reading your Thoughts on this Project Cancel reply
This site uses Akismet to reduce spam. Learn how your comment data is processed .
Privacy Overview
- Skip to primary navigation
- Skip to main content
- Skip to primary sidebar
- Skip to footer
Free DIY Patterns & Tutorials
Travel Storage Bags Tutorial
July 8, 2016 by Denise 1 Comment
Learn how to make a set of travel storage bags for next to no cost – shoe bag, laundry bag, socks bag, lingerie bag, dirty clothes bag. See this Travel Storage Bags Tutorial and keep your luggage organized when you travel.
This tutorial submission is great for the beginner as well. Storage bags made from pillowcases is a fast sew and great for trips. Find the link to the tutorial below.

If you like to see the full scoop on how to make storage bags from pillowcases, check it out today! This tutorial was submitted by Threading My Way :

Are you interested in submitting your own DIY projects such as sewing, crochet, quilting, recipes or other helpful do-it-yourself tips? Hop over HERE to submit your projects!
—- Have fun sewing! Share some pictures in our facebook group ! We’d love to see them! If you enjoyed this free tutorial, would you like us to email you when we have a new post up? You can choose what interests you! Then hop on the list by entering your email below! We promise, we only send you 1-2 emails per week!

- Recent Posts

- Free Snowflake Tumbler Wrap Designs for Download - September 24, 2023
- Free Welcome To Our Farm SVG File - July 17, 2021
- Professional Overthinker SVG File – Download Today! - July 8, 2021
Reader Interactions
July 9, 2016 at 6:49 am
Thanks so much, Denise. I’d love to be packing my bags and heading off on a holiday right now.
Leave a Reply Cancel reply
Your email address will not be published. Required fields are marked *
Notify me via e-mail if anyone answers my comment.
Sign me up for the list!
See us on Pinterest
Looking for something, privacy overview.
- PRO Courses Guides New Tech Help Pro Expert Videos About wikiHow Pro Upgrade Sign In
- EDIT Edit this Article
- EXPLORE Tech Help Pro About Us Random Article Quizzes Request a New Article Community Dashboard This Or That Game Happiness Hub Popular Categories Arts and Entertainment Artwork Books Movies Computers and Electronics Computers Phone Skills Technology Hacks Health Men's Health Mental Health Women's Health Relationships Dating Love Relationship Issues Hobbies and Crafts Crafts Drawing Games Education & Communication Communication Skills Personal Development Studying Personal Care and Style Fashion Hair Care Personal Hygiene Youth Personal Care School Stuff Dating All Categories Arts and Entertainment Finance and Business Home and Garden Relationship Quizzes Cars & Other Vehicles Food and Entertaining Personal Care and Style Sports and Fitness Computers and Electronics Health Pets and Animals Travel Education & Communication Hobbies and Crafts Philosophy and Religion Work World Family Life Holidays and Traditions Relationships Youth
- Browse Articles
- Learn Something New
- Quizzes Hot
- Happiness Hub
- This Or That Game
- Train Your Brain
- Explore More
- Support wikiHow
- About wikiHow
- Log in / Sign up
- Home and Garden
- Housekeeping
- Home Organization
How to Make Your Own Vacuum Sealed Storage Bags
Last Updated: June 23, 2024
This article was reviewed by Claudia & Angelo Zimmermann . Claudia and Angelo Zimmermann are the founders of Everneat, an Eco-Friendly Cleaning Service based in New York City and in Connecticut. They are also the founders of Clean Code, a DIY 100% natural cleaning product line. This article has been viewed 134,172 times.
Vacuum sealed storage is useful because it reduces the size of clothing, blankets, quilts, towels etc. and enables them to be stacked evenly. If you cannot find, or afford, the real deal, here is how to make an equally good substitute of your own.

Expert Q&A
Things you'll need.
- Extra strong garbage bags
- Vacuum cleaner
- 6 rubber bands per bag, minimum
- Clean clothing, linen etc. for storage
You Might Also Like

About This Article

- Send fan mail to authors
Did this article help you?

Featured Articles

Trending Articles

Watch Articles

- Terms of Use
- Privacy Policy
- Do Not Sell or Share My Info
- Not Selling Info
Don’t miss out! Sign up for
wikiHow’s newsletter
17 Storage Ideas to Organize Your Luggage and Travel Gear
LUGGAGE , Packing Tips

Support TFG by using the links in our articles to shop. We receive a small commission (at no extra cost to you) so we can continue to create helpful free content. We earn from qualifying purchases made to the featured retailers. Thank you, we appreciate your support!
After that post-travel glow, what happens to your luggage and accessories when you get home? Get your travel gear sorted by taking on our TFG readers’ top home organization ideas and suitcase storage solutions!
Travel Gear Organizing Ideas
Written By: Laura Pulling
Table Of Contents
We all like to plan and be organized for our travels, but sometimes post-trip it can be hard to get motivated to pack away luggage and accessories until the next bucket-list destination.
To help inspire you, Editor-in-Chief Alex shows some of her travel storage organization ideas :

TFG Editor-in-Chief’s Travel Organizing Corner featuring her favorite home organizers
Alex has organized her travel gear as follows:
- Red striped basket: toiletries categorized in reusable ziploc bags
- Clear jars with lids : 10-20 gram reusable toiletry pots
- Small white baskets (similar) : 2-3 oz toiletry containers , travel size hair tools, small travel items, electronic travel items
- Two big baskets : toiletry bags, packing cubes

TFG Editor-in-Chief’s Above Cabinet Travel Organization featuring her favorite home organizers
Here, Alex has put these items in storage bins, above and off the floor:
- Travel pouches
- Shoe bags
- Packing cubes
First Step: Where to Store Luggage?
When it comes to how to store suitcases, it can be tough to come up with bag storage ideas and find a suitable spot to keep luggage out of the way but still accessible.
Some people have smaller houses, so luggage storage at home can be difficult. Try to ensure your cases are clean and dry when you put them away to prevent mold and damp creeping in. Some people keep their luggage in lofts and attics, others don’t have that luxury, so put theirs on top of a wardrobe or in their closet.
If space is limited, you might even want to invest in bed raisers, to lift your bed a few inches from the floor, and your suitcase can fit underneath. To protect suitcases, some readers recommend using a cover.
Second Step: Ways to Organize Travel Accessories
Other essentials like TSA padlocks, luggage tags, travel-sized toiletries, packing cubes, and adapters could stay in your suitcase, and admittedly, some TFG readers do just that until the next trip.
However, trying to sort through items when planning another getaway or wanting to find something quickly can be tough. Which is where bins, containers, racks, and even labeling items can help one stay sane, as well as, organized! Ultimately, the best way to maximize storage tools is by using the space around you and figuring out a system that works for you (and can help you remember where things are).
. Now that you’ve seen examples, take note from our savvy and knowledgeable readers who’ve chipped in with their top tips too!
Best Travel Storage Bags and Containers to Organize

TopZK Clear PVC Suitcase Cover
Store Travel Gear in Empty Suitcases
The easiest place to store your travel accessories is in your empty suitcases. Plastic luggage covers can help your suitcases stay dirt and dust-free between trips. In some houses where your only storage options are lofts or garages, a plastic cover can help prevent damp creeping in. Just ensure your case is completely dry before packing it away.
These PVC covers can also be used on your trip to help prevent your bags from getting super dirty and bashed around by baggage handlers. Simply slide them on and fasten the velcro.

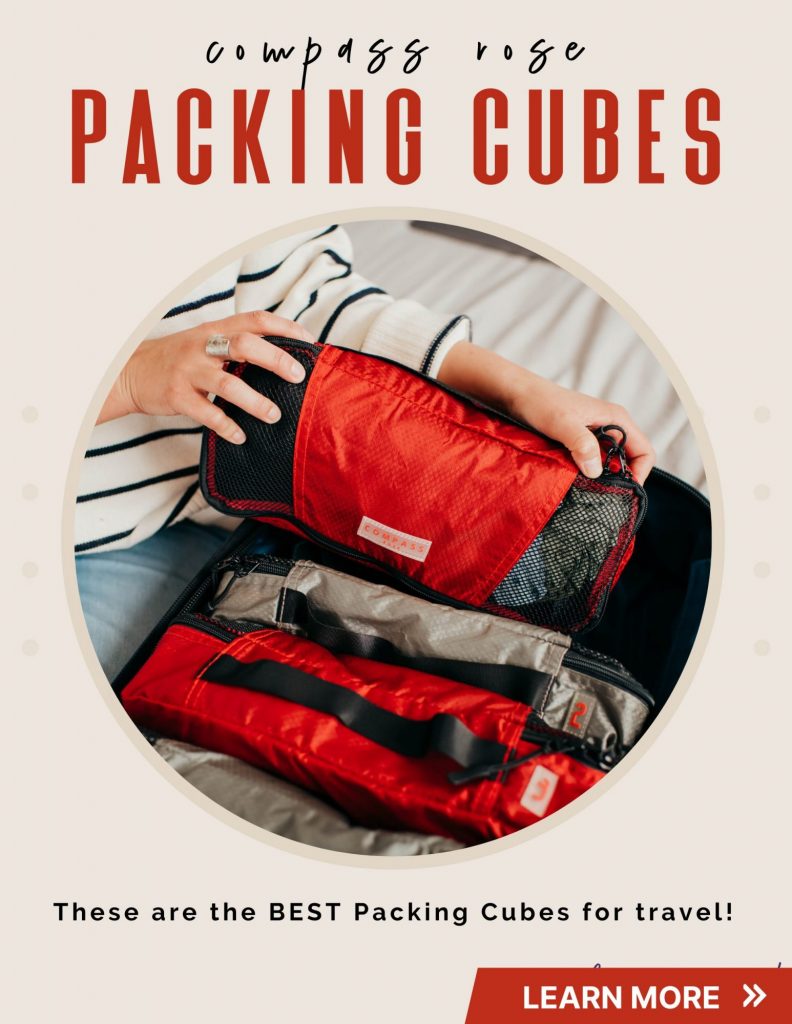
Compass Rose Packing Cubes
Use Packing Cubes Between Trips
Your packing cubes can be utilized at home as well as on vacay! Between trips, you can use them to store your travel wardrobe pieces that you wouldn’t normally wear at home, (maybe swimwear, or beach cover-ups). These can then be kept in your luggage, ready to go on your next trip. You can even use packing cubes to store other packing cubes!
To get more information on Compass Rose packing cubes, watch this video to learn packing hacks!

Ecoigy Reusable Sandwich Bags
Put Travel-Size Toiletries into Reusable Ziplock Bags
For how to store travel toiletries at home, many readers use reusable bags , just like Editor Alex, to organize those smaller travel items. A reader says, “I have a bin of organized ziplock bags. I can see what I have, and then pack what I need.” Another keeps travel-sized items in a bin and uses her ziplock bags to organize by categories such as skin care, oral health, shampoos, and conditioners.

EZOWare Fabric Tweed Storage Organizer Cube Set
Store Items in a Decorative Fabric Basket
These pretty, yet functional fabric drawers can be used independently for easy closet storage. Put anything from toiletries to packing cubes, or even those tangled electronics. Plus, they fold flat when they aren’t being used. Did we also mention they’re pretty (oh right, already did), and blend well with home decor.

Plastic Weave Storage Basket
Put Travel Accessories in Household Storage Containers
Storage bins can hold all of your bits and pieces together and these ones work well for travel toiletries and accessories. They come in neutral colors and a basket weave, which means they also look nice on open shelves too. Larger bins can also be the best way to store purses so they don’t get squashed.
A TFG reader says, “I keep my travel accessories in a nice plastic basket I bought, on a top shelf in the wardrobe. Hats etc., live in another. Works well.”

Life Story 6 Quart Clear Shoe Storage Box
Keep Shoes or Boots Organized in Storage Boxes
TFG readers love to organize their travel shoe collections. Some shoes might be specifically for travel and might not suit the climate you live in, such as winter shoes or hiking boots. Storing shoes in these clear plastic boxes will mean they will be as good as new when you come to use them again.

Sterilite 3-Drawers Unit
Add Bigger Clothing Items in Home Storage Drawers
If you have larger items in your travel wardrobe that needs something more substantial than boxes, storage drawers could be a viable option. These drawers come in a gorgeous shade of teal and reviewers say they are great sized for closet essentials, such as shirts, sweaters, pajamas, and underwear.
Many TFG readers use drawers like these and then label each drawer, for things like toiletries, packing cubes, clothes, and travel gadgets.
For other storage drawer options, click here .
Pack light and pack smart with these travel packing tips !

ABO Gear and Storage Bags
Fold and Stack Items in Travel Storage Bags
This bag storage combo is a cute 3-set that is also practical to store clothes or bigger items like travel blankets or microfiber towels. One review says, “They are durable and spacious. They fit right underneath my bed and looks very good. When not in use, I can fold them flat and put them in my closet.”
Readers give tips on how to store bags like this. They say you can put them on a closet shelf out of the way, under the bed, or in a safe spot in your basement. Talk about ingenious and convenient suitcase storage bags!

Sterilite 6 Quart/5.7 Liter Storage Box
Try Lidded Boxes for Travel Electronics
TFG readers suggest using smaller sized plastic bins . You can use them for chargers, cords, SIM cards, GPS devices, and more. These ones can be bought in a six or 12 pack.
One savvy TFG traveler shares how she uses them, “For smaller items, I use plastic clear shoe boxes, sorted by category and the boxes labeled… categories such as electronics, dental supplies, medical supplies, chargers/converters, hair supplies. Then I pick from each bin what I need for each particular trip.”

Whitmore Over the Door Shoe Rack
Use a Space-Saving Shoe Rack Over the Door
Many TFG readers say that a shoe rack that goes on the back of your door can free up closet space. This one by Whitmore is adjustable and can hold up to 36 pairs. Plus, the bars are adjustable to take shoes of all sizes.
A reader explains, “I keep current shoes on the back of the door, daily ones on the floor because I wear them on a rotating basis and out of season shoes in clear, plastic shoe boxes on the top shelf of a closet.”
Give yourself a break and read our top 75 packing tips !

Felidio Natural Wood Coat Hooks Wall Mounted
Utilize Hooks for Bags, Scarves, and More
TFG readers tout wall hooks to store bags, scarves, or other hangable things not being used. They also made some crafty interior design features in their closets from them!
One explains, “I put a bunch of hooks on an empty wall in my closet and hung all my purses to and covered it practically to the ceiling. It looked pretty awesome!”

IRIS Stack and Pull Storage Box
Get Locking Storage Boxes for General Travel Gear
These locking storage organizers have a secure click-to-lock lid so nothing can get in. They’re transparent and you can see what’s in each one easily. You can stack them too, so you can pile them up safely.
A ton of TFG readers use clear plastic bins and rate it as one of their top organizing ideas: they share, “I use clear storage bins, labeled, so I can see at a glance. A large one for snorkel gear, beach towels, etc. A medium tote for packing cubes, airplane blankets, travel pillows. A smaller one holds toiletries, gadgets, etc.”
While another explains, “I have clear plastic totes under the beds in my guest room. One has “bags” of all sorts. Another tote has all the travel size toiletries and yet another has miscellaneous odds and ends.”

SimpleHouseware Over The Door Hanging Shoe Organizer
Use a Door Shoe Organizer for Bits and Bobs
If you need a slimmer and more economical back-of-the-door option, this home organizer can hold up to 24 pairs of shoes (and other stuff too!). It fits closer to the back of the door and shoes won’t fall out. TFG readers also tout the transparent pockets for how to organize travel toiletries at home.
One explains, “My favorite organizing travel tip of all time is an over-the-door shoe organizer for all your toiletries.” While another uses hers differently, “I use one in my laundry room to keep my vacuum cleaner attachment tools for my stick Dyson.”
Ingenious TFG readers going on a cruise take one of these with them to help maximize storage space.

Lynk Floor Standing Pivoting Scarf Rack
Store Scarves or Jewelry on a Rack
A reader recommends buying a scarf rack if you have a rainbow of scarves in your collection. The bars on twist 360 degrees and the heavy base won’t fall over easily. You can also use it for jewelry or storing bags and purses. A reader touts, “I bought this scarf tree and have it in the corner of my bedroom. It’s very colorful.”

Homz Plastic Underbed Storage
Put Random Trip Things Under the Bed
Sometimes organizing isn’t easy to come by, let alone enough space! And you need to maximize the options you have available. Underbed storage is a great way to use that forgotten space, and using plastic lidded boxes ensure that your belongings stay dust-bunny free!
One TFG reader explains, “I have an under the bed plastic box with all sorts of travel items. It includes my travel set of tech cords, binoculars, travel games (a deck of cards, and some other small games), travel blanket, and so many other items. When I go somewhere everything I might need to grab is in one place.”

Ziz Home Under Shoe Organizer
Keep Traveling Shoes in Underbed Storage
If you want to use your underbed storage for your shoe collection, maybe these divided under bed shoe organizers could be just what you need. You could also use it for organizing travel items using different compartments! One TFG reader explains, “This is awesome for storing stuff if you have space under your bed.”
Here are simple space saving packing hacks !

Brother P-Touch Label Maker
Label Your Gear Like a Boss
As well as sorting their belongings into boxes, drawers, and bins, most of our TFG readers label whatever containers they use, so that they know what is in each box.
For a professional edge, why not use a label maker to create neat and uniform labels for each storage box. This one can print in a variety of different fonts, plus you can get different colored tape too!
Storage and Organization Comparison Chart
What are your storing luggage solutions? Share your tips below!
For more help with organizing travel gear, please read:
- Confused About the Best Luggage Organizer? Here’s How to Choose
- Packing Organizers: These Luggage Accessories Help You Travel Carry-on
- Discover the Best Purse Organizer for Your In-Flight Personal Item
- Alternate Uses for Packing Cubes Organize your Closet Space
LIKE THIS POST? PIN THIS PIC TO SAVE IT!

We hope you liked this post on the best bags storage ideas . Please share with your friends on Facebook, Twitter, and Pinterest. Thanks for reading!

Love this post! I highly recommend anything by Sterilite. I have the 3 drawer chests, weave baskets, and other storage tubs. They are all great.

Hi Liz, thank you for your feedback, so pleased you enjoyed the article!!! Thank you you also for sharing your recommendation for storing your luggage. Wishing you all the best ?
Submit a Comment Cancel reply
Your email address will not be published. Required fields are marked *
Save my name, email, and website in this browser for the next time I comment.
Sabrinas Organizing
- Home Organization
- Healthy Recipes
- DIY Home Projects
- Browse Gift Ideas
- Donate Stuff
- Recycling Events 2024
- Solution Consultations
- Virtual Organizing
How to Make a Travel Tech Organizer Kit
Last Modified: March 26, 2024 Sabrina Quairoli This blog uses cookies. It also has affiliate links. We earn sponsored content income.
****Visit our "Disclosure Policy and Cookies" for details. Affiliate links appear on this page from Google Adsense, Amazon, Order Out of Chaos, Impact affiliate members, Release, Repurpose, Reorganize, and Shareasale affiliate members.****
The best gift I ever received was a travel tech organizer kit my husband made for me a few years ago. My husband is pretty organized when it comes to his electronic cables. He has been a tech guy in the technology industry for over 25 years, so he knows his stuff. We recently made this kit for our young adult kids. See how we made them and what you can add to your customized tech organizer.
Who would appreciate a travel tech organizer kit?
How to make a travel tech organizer kit, items i used to make an android tech organizer kit., how do you make an android tech organizer kit, items i used to make an ios tech organizer kit., how to make an ios tech organizer kit, what else can i put in this tech organizer kit, how much does it cost to make this organizer kit, tips when making these tech organizer kits., the big reveal.

Anyone who travels or moves around often. Keeping a travel organizer like this in your carry-on bag or luggage is super easy as a backup to your cables or just taking the organizer and leaving the other cables at your home.
Some people would love this gift.
College students
People traveling for work
Working professionals who take public transportation
Kids who travel for sports
Anyone who carries electronics needs to charge them when on long trips.

My husband made me one, and here's what he included: you can make your own with these products from Amazon or any other online provider.
Full Disclosure: If you click through and buy on Amazon, I will receive a small referral fee at no additional cost to you. Happy Shopping!
Free Shipping and Free 60 Days Returns
Two tech organizer kits are described below. One is for Android, and one is for iOS.

1. ProCase Travel Gadgets Organizer Bag, Universal Electronic Accessories Cable Roll-Up Pouch Portable Gear Storage Carrying Cover for Cords SD Memory Cards Earphone Hard Drive –Black or Double Layer Electronic Accessories Organizer, Travel Gadget Bag for Cables, USB Flash Drive, Plug and More, Perfect Size Fits for iPad Mini (Medium, Black)
2. Anker [3-Pack] Powerline Micro USB (3ft) - Charging Cable for Samsung, Nexus, LG, Android Smartphones, (Black)
***This item above has three, but you probably only need two.
3. USB C Cable, Anker [2-Pack, 6 ft] Type C Charger Premium Nylon USB Cable, USB A to Type C Charging Cable Fast Charge for Samsung Galaxy S10 S10+ / Note 8, LG V20 and Other USB C Charger (Black)
4. Anker PowerCore 13000 Portable Charger - Compact 13000mAh 2-Port Ultra-Portable Phone Charger Power Bank with PowerIQ and VoltageBoost Technology for iPhone, iPad, Samsung Galaxy (Black)
5. USB Charger, Anker Elite Dual Port 24W Wall Charger, PowerPort 2 with PowerIQ and Foldable Plug, for iPhone 11/Xs/XS Max/XR/X/8/7/6/Plus, iPad Pro/Air 2/Mini 3/Mini 4, Samsung S4/S5, and More
6. Alcohol Prep Pads - this item is handy for a quick case cleaning.
7. Lens Cleaning Wipes - these items are great for cleaning lenses on your phone or laptop.
Cordless Earbuds and case

Now that you have all the items you will add to the travel tech organizer, it's time to assemble.
Layout items on the table.
Separate the cleaning wipes pack from one another if they are attached.
There are plenty of pockets, so laying them out and fitting them into the pockets are pretty straightforward.
The center pocket is excellent for the portable charger and is a perfect size for that area. You can also run the cables through the bottom and close the case altogether to charge a device without taking it out of the case.
Add the wall charger to the zipper pocket to prevent it from falling out. This pocket is also good for earbuds and watch chargers.
Use the band at the top to hold the wrapped cables in place.
If you have iOS devices, you must swap out a few of these items to be compatible with them.
2. Anker PowerCore 13000 Portable Charger - Compact 13000mAh 2-Port Ultra-Portable Phone Charger Power Bank with PowerIQ and VoltageBoost Technology for iPhone, iPad, Samsung Galaxy (black)
3. USB Charger, Anker Elite Dual Port 24W Wall Charger, PowerPort 2 with PowerIQ and Foldable Plug, for iPhone 11/Xs/XS Max/XR/X/8/7/6/Plus, iPad Pro/Air 2/Mini 3/Mini 4, Samsung S4/S5, and More **if you have a newer phone you will need to find another charger.
4. Anker USB C to Lightning Cable [3ft MFi Certified] Powerline II for iPhone 13 13 Pro 12 Pro Max 12 11 X XS XR 8 Plus, AirPods Pro, Supports Power Delivery (Charger Not Included) (White) **get as many as you need depending on how many devices you have.
5. Alcohol Prep Pads - These are good for quick disinfectant case cleaning.
6. Lens Cleaning Wipes
7. Digital Watch charger
8. Cordless Earbuds and case
Disclosure: at no additional cost to you, if you click through and buy something on Amazon, I will receive a small referral fee. Thank you for supporting my small business.

Now that you have all the items to make the iOS tech organizer kit, here is how to do it.
The screen cleaner wipes are great for cleaning your computer (Affiliate Link) and phone. Adding them to the front mesh pocket lets you see them at a glance.
If you have an iPad, and it is a newer version, you can add an extra cable for that one as well.
Since the watch has its cable, you will need to add one.

For the AirPods, you must bring a regular iOS charger to charge the case and earbuds. Add the earbuds and case to the zipper pocket.
Visit the video to see how I put it together!
I'm glad you asked; I added some other items you can add to this tech organizer kit.
Your watch charger cable
Disinfectant wipes .
SIM ejection tool that came with the phone to reset the phone.
Reuseable lens or glass cleaning cloth
Portable keyboard —this wouldn't fit in the case I mentioned here, but you could add it if you have a larger case.
MicroSD Memory cards for phones .
Thumb drives .
Noise-canceling or regular earbuds
The total cost to make two was $ 204.49 (including tax) . Each of them costs about $100.00. Remember that these are higher-end chargers and cables, and you can find cheaper ones online or on sale.
IMPORTANT: When you buy the products, make sure they are compatible with your device or your recipient's device.
You can choose a black or white color on the chargers, whichever you want.
Using the zipper pocket, you can add your car charger.
You can add extra long cords (6 feet or longer) instead of shorter ones.
Well, there you have it! Here is what the organizer kit looks like. It's excellent and very useful for tech family members. Who will you be making this for?

Visit our other gift kit or other popular organizing gift posts below:
8 GREAT GIFT KIT IDEAS FOR YOUR LOVED ONES
THE BEST GIFT IDEAS FOR ELDERLY PARENTS
QUARANTINE GIFT IDEAS AND WAYS TO GIVE GIFTS SAFELY
10 FABULOUS STRESS RELIEF GIFT IDEAS FOR LOVED ONES IN YOUR LIFE

Connect with Me on Social Media!
Facebook - Instagram - Twitter - Linkedin - Pinterest

More Handmade Gifts

About Sabrina Quairoli
I love sharing my passion for organizing life and home. I hope you get inspired when visiting my home organizing tips, quick weeknight recipes, party planning ideas, and DIY organizing projects. Visit the About Me page to read my story.
- Search Please fill out this field.
- Manage Your Subscription
- Give a Gift Subscription
- Newsletters
- Sweepstakes
We independently evaluate all of our recommendations. If you click on links we provide, we may receive compensation.
- Travel Products
The Best Travel Organizers for Shoes, Jewelry, Tech, and More
Give everything its own place next time you travel with these convenient containers and pouches.
:max_bytes(150000):strip_icc():format(webp)/Austa-Somvichian-Clausen-4b9e70d494324a56a3ee717d03e57eff.jpg "diy travel storage bag")
In This Article
- Our Top Picks
- Tips for Buying
Frequently Asked Questions
- Why Trust T+L
Travel + Leisure / David Hattan
Owning a dependable suitcase is already a game changer for easeful travel, but any piece of luggage can be improved drastically with the addition of the right organizers. Travel organizers, from packing cubes to cosmetic bags, can help maximize space within your bags by neatly compartmentalizing items, preventing over-packing, and ensuring that every inch of your suitcase is utilized effectively. This not only allows you to pack more efficiently, but also helps keep your belongings easily accessible. Without organizers, even the best packed suitcase can transform into chaos after a week on the road. Meanwhile, the dedicated compartments of organizers help keep your clothes, toiletries, jewelry and more in their intended spaces no matter how many times you unpack and repack.
Since the world of travel organizers is incredibly vast, we’ve rounded up some of the best in each category, from shoe bags to innovative compression bags, to tame the unruly chaos of clothes, toiletries, and accessories. Say goodbye to the tangled mess and hello to a meticulously organized suitcase, paving the way for a journey where every item always finds its perfect place.
Best Packing Cubes
Gonex compression packing cubes.
The compression capability and high-quality construction make these packing cubes a must.
They aren’t technically waterproof.
What sets the Gonex Compression Packing Cubes apart is their ability to maximize packing efficiency beyond the standard. Their robust zippers not only make compressing the cubes a breeze but also nod at the longevity of these organizers, thanks to their durable construction and stitchwork.
Despite the non-waterproof nylon material, our tests revealed that they still repel water when a bit is splashed on the exterior. Coupled with the added protection of a suitcase, this ensures that the contents, particularly clothing, remain dry during travel.
An additional highlight is the user-friendly design, featuring convenient handles on the top of each cube. This thoughtful addition simplifies the process of grabbing the bags for both packing and unpacking, enhancing overall travel convenience. Lastly, the set's inclusivity of extra-large, large, medium, and small bags provides versatility.
The Details: 3 or 4 bags included | 17.3 x 13 x 3.54 inches (extra large), 14.5 x 10.6 x 3.54 inches (large), 11.8 x 8.9 x 3.54 inches (medium), and 9.8 x 7.5 x 3.54 inches (small) | Ripstop nylon
Best Cosmetics Bag
Béis the cosmetic case.
It’s durable, capacious, and nice to look at — plus, it has a large built-in mirror.
We feel it could benefit from interior straps to hold products down.
The Béis cosmetics case effortlessly blends reliability, style, and compact design with surprising spaciousness, making it a standout option for travel cosmetic bags. Besides an easy open and close main compartment, it has a versatile central compartment designed for brushes and smaller items that can be removed depending on your needs. The thoughtful design extends with multiple additional pockets, pouches, and discreet slots, providing designated spaces for all your beauty essentials. A large attached mirror also makes for a handy companion for on-the-go makeup application during travel.
Our own tests showed that when combined, the PU leather and hardware resulted in efficient padding that protected the case's contents from bumps and drops. Also, impressively, the bag maintained its shape and aesthetic despite the inevitable wear and tear of being on the go. Available in a spectrum of colors, this cosmetic case ranges from classic beige to navy, olive, and slate blue.
The Details: 9.5 x 4 x 7 inches | PU leather, nylon, PVC, poly | Zipper closure
Travel + Leisure / Jhett Thompson
Travel + Leisure / Leticia Almeida
Best Shoe Bag
Eneteck shoe bags.
Individual compartments keep shoes clean and organized.
It’s better for slim profile shoes like flip-flops and sneakers.
For short trips where versatile footwear is a must, Eneteck's multi-pocket shoe bag is super ideal. This breathable bag, capable of accommodating three pairs of shoes, provides individual compartments to prevent any potential dirt or scuffs, keeping your footwear in top condition and totally organized.
The outermost pocket, designed with partial mesh, adds an extra layer of functionality — perfect for storing damp flip-flops or any shoes that benefit from additional ventilation. A notable feature, per our tests , is one compartment's spacious design, tailored to accommodate larger and heavier footwear like sneakers. We love that it also includes a convenient trolley sleeve with an extra zipper pocket, providing quick and easy access to your essential items such as keys or a cellphone.
The Details: 11.8 x 8.7 x 5.5 inches | Fits 3 pairs | Twill, mesh
Best Toiletry Bag
Away large toiletry bag.
Its minimalist design is surprisingly spacious.
If you only plan on bringing a carry on you might want to consider their smaller size.
You probably already own an Away suitcase, but did you know they make travel accessories, too? One of them is this editor-loved toiletry bag with a versatile design that effortlessly accommodates all your travel essentials and more.
Zip open this minimalist travel bag, and you’ll see what sets it apart is its thoughtful interior organization, featuring a range of compartments for all your travel must-haves. The exterior pocket, strategically placed for easy access, proves handy for stowing sharp items like razors and nail clippers, while a zippered middle pouch is perfect for a travel toothbrush and toothpaste. The bag's grab-and-go zip functionality allows it to expand generously, offering convenient access to all your products. Inside, a clear cosmetic-type bag, a middle zipper pouch, two mesh linings mean there’s a designated space for every essential. The lightweight, water-resistant material is also a plus.
The Details: 10.2 x 3.7 x 5.9 inches | 8.8 ounces | Nylon | Water-resistant
Best Travel Document Organizer/Passport Wallet
Leatherology zip around travel wallet.
Its RFID-blocking capabilities means you’ll be safe from cyber hacking of your credit cards.
It’s larger than your typical wallet, since it also accommodates a passport.
This travel-perfect wallet by Leatherology stands out thanks to its sleek leather exterior and adaptable design, making it a great choice whether you’re headed to the airport or just running errands. Unlike typical passport wallets featuring snap closures, this one boasts a wraparound zipper instead — ensuring the secure storage of passports, credit cards, cash, and more during your journeys. Not only does it offer ample space, accommodating multiple passports, up to eight credit cards, and currency without adding bulk, but an additional exterior pocket creates convenient access to boarding passes, so you don’t have to rummage around in a moment’s notice. While its larger size can make it difficult to fit into smaller purses, you can also opt to carry it as a chic clutch or pop it into a larger bag like a backpack or tote.
The Details: 9 x 4.75 inches | Full grain leather | RFID blocking
Best Travel Tech Organizer
Calpak tech organizer.
Its soft design makes it easy to pack inside any bag or suitcase.
Be careful not to pack overly bulky items inside of the retention bands, or they may lose elasticity.
Who said tech organizers need to look monotonous? This one by Calpak is slim, light, and available in a multitude of colors and patterns, making it easy to spot and pluck from inside your bag when you need to reach for any tech essentials. Its clamshell design is also extremely convenient, putting all your items on display for you once you zip the organizer open. Its built-in padding and storage pockets keep your valuables snug and secure, and its soft design makes it easy to pack away without the bulk.
The top handle also makes it easy to grab and carry, and all three full-size storage pockets feature convenient pull-tab zippers, with two having front mesh fabric for easy content assessment. During tests , the two interior slip pockets proved spacious enough to accommodate a portable charging bank, and we appreciated the effectiveness of the four elastic retention bands in keeping cords separated, snug, and readily accessible. It's worth mentioning that these bands may stretch out over time, especially if used with very thick or bulky cords.
The Details: 9.5 x 7 x 1.5 inches | 0.25 pounds | Polyester, polyethylene
Best Travel Jewelry Organizer
Cuyana travel jewelry case.
The small, attractive organizer is the perfect size for a shorter getaway.
We wish there were specific latches for necklaces and bracelets.
This deceptively spacious case by Cuyana fits more than it leads on to at first glance, which is why we gave it the top spot on our list of the best travel jewelry organizers . The attractive oval-shaped design is far from bulky, helping it to easily fit inside our carry-on bag and keep our favorite jewelry safe during our travels. It’s a great pick for minimalist jewelry wearers considering it is still on the smaller side, but it has plenty of room inside its soft, padded interior for rings, earrings, and more. Slip pockets on each side of the case could be a great fit for jewelry or small watches, but run the risk of getting tangled since there aren’t specific latches to hold them tight.
The Details: 5 in. x 3.5 x 1.25 inches | Italian leather
Travel + Leisure / Joy Kim
Best Travel Pouches
Mark & graham fillmore vegan diamond travel pouch.
Besides these handy pouches, Mark & Graham has an entire matching travel system available to build from.
It can be tough to fit into slimmer profile bags.
If you despise rummaging around the deep well of a storage pouch looking for your items, you’ll love the unusual diamond-style zipper of this one by Mark & Graham, which came out on top of our list of best travel pouches . It allows the bag to lay out nearly flat, providing you with easy visual access to everything you have packed inside. The smooth vegan leather and shape of the bag also makes it very attractive, looking good in or out of your luggage. The pouch comes in several water- and sun-resistant hues, and we love that the brand has an entire travel pouch collection, from small structured options to larger travel organizers and flat pack styles.
The Details: 3.5 x 8.5 x 3.5 inches | Vegan leather
Travel + Leisure / Alexander Huang
Best Vacuum Compression Storage Bags
Vmstr vacuum storage bags.
These bags come with a convenient USB-compatible electric pump.
Larger-sized bags will take a while to fully compress.
Compression storage bags are perfect for longer trips, or making an entire week’s worth of clothing fit in a small rolling suitcase. These VSTR Travel Vacuum Storage Bags are a must for compression and available in a range of sizes, from small to extra large, depending on your packing needs. This versatility allows you to efficiently pack different clothing items, from swimsuits for a beach getaway to thick coats for snowy destinations, without wasting valuable space. Through our tests , we found the larger bags conveniently fit into standard wheeled carry-ons, while the compact sizes easily slide into backpacks, totes, or other travel bags. We love that these bags come with a lifetime guarantee, and that each has a dual-zipper seal that provides an extra layer of protection, ensuring the bags remain securely closed and compressed during your travels. With the electric pump, you'll experience less effort compared to using hand-pump compression bags, and the convenience of a travel-friendly USB vacuum means you're not limited to using a wall socket.
The Details: Vacuum compression | 8 bags (2 small, 2 medium, 2 large, 2 extra-large) | 11 x 8.6 (small); 12.6 x 10 (medium); 14.1 x 12.6 (large); 17.7 x 12.6 (extra-large)
Best Pill Organizer
Sukuos weekly pill organizer.
Each compartment is super roomy, and removable.
Made of rigid plastic, it can’t bend or shift to fit into all bags.
This handy pill organizer is a must-have for those on a daily regimen of medications, vitamins, or supplements. Its lightweight design is compact but still maintains generous storage space, accommodating pills of all sizes, as proven by our tests . With seven detachable containers, each a different color, labeled for the day of the week, and conveniently segmented for morning and night doses, managing your medication schedule becomes a breeze. The roomy compartments are designed to hold multiple pills with ease.
The secure snap-shut lids ensure your capsules stay in place, while the transparent plastic material provides a clear view of the contents in each section. Its practical size makes it a travel essential, fitting effortlessly into carry-on bags or luggage without sacrificing space. We also love that the smaller daily containers are portable enough to slip into your pocket.
The Details: 5.94 x 2.83 x 2.52 inches | Plastic | 14 compartments
Best Travel Hair Tool Organizer
Usa gear large hairstylist traveling bag.
The compartments are customizable, and it’s extremely spacious.
It’ll take up a significant amount of room in your luggage.
This hair stylist case is perfect for anyone with several heat tools and hair styling accessories they’d like to bring on the road. Made from extremely durable RipStop nylon, the case will keep your gear safe within its sturdy walls, and it includes both a hand strap and sturdy shoulder strap if you decide to carry it on its own, rather than fit it into a larger suitcase. Hook and loop dividers allow you to easily change the size of the interior pockets depending on your needs at any time, making it easy to pack in and organize anything from bulkier items like blow dryers and straighteners to grooming scissors, hair ties and more. The center divider ensures that your tools on both sides of the organizer stay in their place, rather than banging into each other while you make your way from point A to point B.
The Details: 16 x 13 x 6.5 inches | RipStop nylon
Best Briefcase Insert
Leatherology bag insert.
It’s versatile and helps organize the contents of almost any briefcase or tote bag.
Check the dimensions before purchase to make sure it will fit within your briefcase.
If you’re looking to add structure and organization to your briefcase or tote bag, this bag insert by Leatherology will definitely do the trick. We love that it’s made from water-resistant nylon, meaning it will help protect your bag from any unfortunate spills and smudges, and that it features several different types of pockets for whatever you might need to stash on the go.
Insulated pockets in the core of the organizer are great for anything you need to keep warm or cold, and it also features an easy access front pocket and mesh side pockets. If you have multiple bags you use on any given work week, use the organizer’s two handles to easily move it from one briefcase to another.
The Details: 7.9 x 11.8 x 5.9 inches | Water-resistant nylon
Best Travel Cosmetics Containers
Ries refillable travel bottles.
These reusable bottles feature airless pumps for easy use.
They’re a bit pricey.
These refillable travel bottles are stylish and durable alternatives to what you’d typically find at your local drugstore. Crafted from a recycled plastic resin that is FDA-approved and safe for skin and hair, we like that there are not only different sizes available but also several colors to pick from, such as sky blue, dark brown, or tan.
Their very own patented airless pump makes it easy and sanitary to access your products, from shampoo and conditioner to face lotion, serums, and more. This removes the need to open the container and introduce the product to potential bacteria or the threat of oxidation.
The Details: 5.3 x 1.8 for a 3.4-ounce bottle | PCR (a recycled plastic resin)
Tips for Buying Travel Organizers
Consider what you’re packing.
Before investing in travel organizers, it's essential to take a thoughtful inventory of what you own and carefully consider your packing habits. Understanding the types and sizes of items you typically carry in your luggage will help you choose organizers that best suit your needs.
Consider the variety of belongings you travel with, from clothing and accessories to gadgets and toiletries, and assess the dimensions of your luggage. This necessary evaluation ensures that the organizers you select will align with your packing style and the available space in your bags. By taking stock of your possessions and packing preferences, you can make the best decisions about the types and sizes of organizers that will maximize efficiency and keep your belongings neatly arranged during your travels.
Opt for high-quality materials
Another crucial factor that demands your consideration when it comes to travel organizers is materiality. The choice of material significantly influences the organizers' durability, weight, and flexibility. Make sure to assess your specific needs and preferences before selecting between options like lightweight fabrics for easy maneuverability, or sturdier materials if you have delicate or especially pricey belongings.
Water-resistant or waterproof materials may be essential for those venturing somewhere rainy or rugged, helping them to safeguard the contents of their luggage from unexpected weather conditions. Investing in organizers that have high-quality zippers (we’re partial to YKK), handles, and seams can provide longevity to your organizers — making them a smarter investment than those that are merely attractive or lower in price.
Prioritize additional built-in organization
Finally, before purchasing your travel organizers, make sure to assess which ones have the correct quantity and type of interior compartments and dividers for the items you need to store. All organizers are designed with purposeful compartments and pockets, but only the ones that actually have the correct built-in storage potential will enhance efficiency and accessibility during your journeys. Looking at the number of pockets and pouches on an organizer prior to purchase, and where on the organizer they are located, will help save you time and money in the long run.
Likely, yes. Travel organizers can significantly enhance your travel experience by keeping your belongings neatly arranged and easily accessible. They help prevent the frustration of rummaging through a disorganized suitcase, saving you time and effort during packing and unpacking. With dedicated compartments for various items, travel organizers not only maximize space but also contribute to a more efficient and enjoyable journey, making them a valuable addition to any traveler's toolkit.
It depends on what kind of suitcase you’re using. Pack your luggage organizers strategically to maximize their effectiveness. For example, consider placing smaller organizers within the mesh pockets or other dedicated compartments of your suitcase for easy access to essentials like toiletries or chargers. Make sure you’re packing toiletry bags in your checked luggage if they have liquids containers over 3.4 ounces. Jewelry organizers and other high value items should usually stay with you in your carry-on. For larger organizers, such as packing cubes, position them within the main compartment to keep clothing neatly organized and prevent excessive shifting during travel.
Why Trust Travel + Leisure
T+L contributor Austa Somvichian-Clausen is a travel writer and published author living in New York City. She has been covering travel and lifestyle content since 2017, and travels frequently for work, often with multiple stops and several different accommodations. Her irregular travel schedule makes it necessary for her to streamline her packing style and organize her luggage for efficiency. To find the best travel organizers, she also relied on research, gear tests, and more.
Love a great deal? Sign up for our T+L Recommends newsletter and we’ll send you our favorite travel products each week.
Related Articles
- Pop Culture
- DIY Classes
- Brit+Co Picks
- Relationships
This Week’s Stories
Your weekly horoscope for august 19-25 is here — these signs will feel extra radiant, i finally found a hydrating shampoo for dry scalps that actually removes buildup, 9 lightweight amazon knit dresses that will take you from summer to fall, 'palm royale' creator teases "bigger" season 2: "expect the unexpected", you know the 3 beverage rule. here's the 3 tv show rule., 15 young adult books and middle grade must-reads for back to school season, 'emily in paris' season 4 part 1 ending, explained, celebrate this year's 'one tree hill' anniversary with the cast (yes, really).
Style On-the-Go: How to Make a DIY Travel Jewelry Organizer

Time to vote! Which one is worse: Tangled necklaces or losing one earring? They’re both pretty terrible. Our solution: this all-in-one travel jewelry case! This is a MUST for your next trip, whether it’s a two-week-long journey or a quick overnight to Southern Cali. If you’re not sure what else to pack, may we suggest cute sandals to match your summer dresses and a punny beach cover-up for lounging at the pool? ;)
– patterned and solid fabric
– clear pouches
– sewing machine
– sewing pins
Instructions:
1. Cut 2 rectangles out of canvas that measure 10 x 13 inches. Then cut one rectangle that measure 11 x 15 inches out of canvas and another out of your patterned fabric.
2. Find the center of your 11 x 15-inch canvas rectangle and then pin on your desired pouch. Sew onto the canvas.
3. Use your solid colored fabric to create a pocket and loops for necklaces to hag from. Sew onto the canvas.
4. Once you have prepared the desired jewelry holders on your canvas, pin to the patterned fabric with the pockets (good side) facing in.
5. Sew around 3/4 of the rectangle, then turn right-side out and sew up the hole.
6. Do this same process for the 10 x 13-inch rectangles. Attach your desired pockets and sew.
7. Cut a piece of paracord and sew to the front side (patterned) of your rectangle.
8. Pin the center line of the smaller rectangle to the center line of the larger rectangle. Then sew down this line.
9. Fill with your favorite jewelry and head off to your tropical vacay!
Fire up that sewing machine, and let’s get started.
You will need canvas and a fun patterned fabric to complete this DIY. Cut two canvas rectangles that measure 10 x 13 inches, one canvas rectangle that measures 11 x 15 inches and one pattern rectangle that measures 11 x 15 inches.
Since we’re making a travel jewelry book, find the center of each sized rectangle. This will make it easier for you to center your pieces on your “page.”
Pin your pouch to the canvas page and sew. We used fun neon thread to amp up the neutral canvas.
Use your solid colored fabric to add loops and pockets to your canvas page. You’ll want to create pieces that are about 8 inches wide. When pinning, add extra space so your jewelry can slide in.
Pin your canvas to the patterned fabric. Make sure to pin good sides facing in. Sew 3/4 of the way around and then turn right side-out and sew closed.
Follow the same process for the 10 x 13-inch piece of canvas. Sew your desired add-ons to the inside page.
Pin the center of the pages together and then sew. You’re almost ready for vacation.
Cut a long piece of paracord, pin and sew onto the patterned side of the rectangle.
Check it out! A four-page jewelry-holding slice of heaven.
When choosing your color palette, try to use brights that will pop and complement each other.
Pop in your jewelry. Canvas is a great material to hold your earrings. Stick the posts through the canvas and attach the back on the other side. The neutral color makes the earrings pop and easy to spot.
Attach your bracelets to the sewn loops. Wait — is that a Katy Perry fast food charm bracelet? Yes. Yes it is.
The clear pouches are perfect for extra long necklaces that could get tangled.
The loops paired with the bottom pouch will keep delicate chains separated and not tangled when traveling. Total win!
All packed and ready to go!
Summer plans? Tell us where you’re going and your favorite packing tips and tricks.
- 25 Inventive Ways to Organize Your Shoes - Brit + Co ›
- 23 Inventive Ways to Organize Your Shoes - Brit + Co ›
Trending Stories
Trending topics.
- Blake Lively + Taylor Swift
- Starbucks Spring Menu
- Easy Potluck Ideas
- Interior Design Style Quiz
- Join our Newsletter
- Indian Food Recipes
- B+C Classes
- Selfmade Business Accelerator
- Crockpot Recipes
- Easy Lunch Ideas
- Healthy Dinner Ideas
16 Travel Organizers to Keep Your Luggage & Bags Tidy

The best travel organizers eliminate clutter, bring order to your life, and make packing a cinch.
If you aim to keep your travel gear organized on the go, you made it to the right place.
After all, when you’re dialed in, you won’t panic nearly as much over your passport’s whereabouts.
But there’s more to it than safeguarding government-issued documents.
Packing cubes, ditty bags, toiletry kits, laundry bags, jewelry organizers, and more each help you maximize your space and ensure you bring what you need and know exactly where to find it.
With that in mind, we looked at all the most trusted brands in the travel organizer space, like Eagle Creek, Nomatic, Osprey, and more to help you pack with intention.
So, if you’re ready to streamline your life on the go, the best travel organizers for your luggage and otherwise are just a scroll away.
Best Travel Organizer Gear
- Best Overall: Eagle Creek
- Ultralight Cube Set: Osprey
- Cubes on a Budget: Suited Nomad
- Best Overall: UltraLite Sacks
- RFIDsafe Travel Organization: Pacsafe
- Drawstring Bags on a Budget: Outdoor Products
- Best Padded Pouch: Minaal
- Best for Photography Gear: Peak Design
- Waterproof Laptop Case: AquaQuest
- Best Overall: Nomatic
- On a Budget: BAGSMART
- Portable Makeup Bag: Relavel
- Mesh Laundry Bag: Nomatic
- Lightweight Shoe Bag: pack all
- Velvety Jewelry Case: Benevolence LA
- Underwear/Bra Bag: Toplive
- Factors We Considered When Picking Products
- Final Thoughts: Best Travel Organizer Gear
Packing Cubes
Packing cubes are one of the most efficient tools to organize clothing before, during, and after any big adventure.
With just a few cubes, your backpack goes from a place of anarchy and dissonance to one of order and harmony.
Perhaps that’s a bit of an exaggeration, but by packing well and coordinating clothing to specific cubes, you’ll find your pants, underwear, and that favorite shirt in record time.
Best Overall Packing Cubes Eagle Creek

MSRP : $40 Dimensions : 14″ x 10″ x 3″
Shaped like a pair of laptop cases, Eagle Creek’s pack-it compression cubes expand to fit all your clothing and then zip down tight to make them compact and manageable.
But compression alone isn’t what differentiates Eagle Creek’s cubes from the rest.
Rather, this set completely unzips along the perimeter of the cube for full access to its interior, making packing and unpacking your clothes a snap.
Pros : Durable, lightweight, well constructed, mesh front makes seeing contents easy Cons : Zipper can get stuck when compressing Best for : Travelers who want to make their clothing more compact and manageable
Ultralight Cube Set Osprey

MSRP : $42 Dimensions : Small (1L) : 7.5″ x 5″ x 2″, Medium (2L) : 10″ x 7″ x 2″, Large (5L) : 14″ x 10″ x 2″
Compared with the Eagle Creek clothing organizers above, you won’t find compression zippers on this ultralight set.
But for minimalist travelers, compression might not be necessary, and the extra materials used to make it work may weigh you down a bit.
On the other hand, Osprey’s Ultralight cube set weighs just 6.3 ounces for the entire three-pack.
Pros : Durable, smushes down next to nothing when not in use Cons : Small for some, top access might make retrieving items at the bottom an annoyance Best for : Backpackers, minimalist travelers, and hikers who don’t want to tote around empty weight
Cubes on a Budget Suited Nomad

MSRP : $35 Dimensions : Medium : 11″ x 8″ x 4″, Large : 15″ x 11″ x 4″
Buying little bags to fit into your bigger bag might seem silly at first.
Maybe that’s your rationale behind not wanting to overspend on packing cubes.
And if you’re on a budget, I get it.
But just because you don’t have money to throw around on packing cubes doesn’t mean you can’t get a high-quality set.
SuitedNomad’s travel organizer bags are made of tremendously durable materials with reinforced seams that can handle everyday use and frequent compression.
Plus, because they come in a three-pack, you score more storage space for fewer cash than Eagle Creek.
Pros : Lightweight, well made, zippers feel sturdy and robust, double zipper compression saves space Cons : Don’t fully unzip, making clothing retrieval difficult at times Best for : Travelers looking to get a good deal on three good-sized bags
Ditty Bags for Odds ‘N’ Ends
Small bags and pouches, also called ditty bags , help keep small personal items like toiletries, first aid supplies, and repair tools organized and ready to grab at a moment’s notice.
So, instead of rummaging through your backpack looking for that small thingamajig that always seems to get lost, you’ll always know exactly where to find it since you dutifully placed it in your ditty bag.
Best Overall Ditty UltraLite Sacks

MSRP : $19 to $26 Dimensions : Regular : 9″ x 4″ x 2″, Large : 10″ x 4″ x 3″, XL : 13.5″ x 5″ x 4″
You’ll never know that the best ditty bag on the market is in your pack until you jam some of your travel essentials inside of it and hit the road.
Weighing in at just 29 grams for the highest-volume ditty of the bunch, all your miscellaneous items will remain firmly in one place without adding extra heft.
And because it’s made of high-quality materials like Challenge ULTRA, the Zippered Cube won’t break down in the middle of an adventure.
Pro Tip : Grab a couple of UltraLite Sacks’ zippered pouches and ultralight wallets to add internal organization to your ditty.
Pros : Exceptionally strong yet lightweight, waterproof YKK zipper keeps your battery-powered items safe, comes in nine colors/patterns, easy to reach in and retrieve stuff Cons : Some might consider it pricey for a simple pouch Best for : Backpackers, hikers, and travelers who value lightweight yet durable materials
RFIDsafe Travel Organization Pacsafe Gadget Pouch

MSRP : $119.95 Dimensions : 5.9″ x 10.6″ x 3.5″
In the digital age, travelers have more small objects to corral than ever before.
Plus, many items like passports and credit cards use RFID technology to simplify identification and payment.
But that convenience comes at the cost of security.
A bad actor could steal your personal information with the right tools, and you’d never know it.
Stop that thief dead in their tracks while keeping your cords, wireless earbuds, and external battery packs in order with Pacsafe’s Gadget pouch.
Not only will you gain peace of mind, but you’ll always know where to find your AirPods.
Pros : Made from seven plastic bottles to mitigate plastic waste, water-repellent fabric keeps your gadgets safe, RFID blocking keeps skimmers from stealing your info Cons : Expensive Best for : Digital nomads who seek security and organization
Minimalist Drawstring Set on a Budget Outdoor Products

MSRP : $14 Dimensions : Small (1 L) : 4″ x 9″ x 4″, Medium (5 L) : 5″ x 11″ x 5″, Large (6 L) : 6″ x 13″ x 6″
Ditty bags don’t have to be all flash and pizzazz like the Pacsafe Gadget Pouch.
Sometimes you need a basic stuff sack to cram your necessities into.
Thankfully, Outdoor Products’ three-pack of color-coded drawstring bags wrangle all your gear without fuss.
And because a set is made up of three sizes, you’ll have a bag for items as small as a comb to as big as camp kitchenware.
Pros : Inexpensive, lightweight, simple, lifetime warranty Cons : Lose storage space at the top due to drawstring Best for : Campers and hikers who want to keep their areas and backpacks organized without spending a bunch of money
Padded Organizers for Tech & Electronics
Remote work in faraway lands represents freedom.
But you can’t work without a laptop, cell phone, and the cords and accessories that accompany them.
Some of you may also need to bring a camera along for the ride.
If you want to protect your investments, padded organizers work like a charm, so we rounded up the best ones just for you.
Padded Pouch for Delicate Electronics Minaal Tech Toolcase

MSRP : $49 Dimensions : 7.9″ x 5.9″ x 2.0″
If you’re like me and you stuff chargers, cables, and earbuds haphazardly throughout your backpack and promptly forget where you put them, you need the Tech Toolcase from Minaal.
This case safely stores everything that makes your gadgets work, so you’ll never wonder precisely where you wedged that laptop charger or external battery.
Ultimately, it’s a great tool to help keep your gear organized, charged, and at the ready so you’re never caught off guard while boarding a plane.
Pros : Made from very durable and strong 150D Bean Chaff, EVA foam protective walls handle bumps and drops well, moveable dividers ensure your gear fits Cons : Price may scare some off Best for : Travelers who need to retrieve all their tech gear in an instant and put it away just as fast
Made for Photography Gear Peak Design Camera Cube

MSRP : Small : $50, Medium : $70, Large : $90 Dimensions : Small : 12.6″ x 6.3″ x 6.7″, Medium : 12.6″ x 12.6″ x 6.7″, Large : 12.6″ x 18.1″ x 6.7″
Traveling with a camera presents several challenges, with the chief concern resting on how to protect the darn thing.
I’ve packed my camera and lenses into a traditional camera bag, an oddly shaped padded case, and loosely into my backpack.
Problems arose from all three.
Carrying around separate bags and cases makes travel cumbersome, and letting your camera jostle freely in a backpack hardly inspires confidence.
That’s where Peak Design’s Camera Cube comes in.
With three available sizes, you’ll have the space you need for all your photography, videography, and drone equipment.
It’s just a matter of accounting for your gear and choosing the correct size.
Pros : Fits in any Peak Design Travel Bag, weatherproof recycled 400D nylon canvas shell protects your sensitive electronics from water, foam lining absorbs bumps and drops, durable material stands up to rigorous use Cons : Odd sizing, smaller cube doesn’t fit in smaller backpacks Best for : Travelers who use Peak Design products already, those with the need for a full-sized photography backpack
Padded Waterproof Laptop Case AquaQuest

MSRP : $50 Dimensions : Sizes available to fit 11″ to 17″ laptops
Arguably, the most important piece of tech in any traveler’s bag is their laptop. But laptops have one glaring weakness: water.
Because rain, snow, and water balloons can strike at a moment’s notice, you need the assurance of a 100% waterproof sleeve that will stand up to rain, snow, and flying latex.
For those who don’t want to risk it, AquaQuest’s Storm sleeve will protect your investment from summertime storms in the city, random April dustings in the high country, and errant tosses from Steve.
Pros : Padded inner sleeve provides additional protection, sizes available to fit most laptops, provides peace of mind in inclement weather Cons : Sizing issues for some laptops Best for : Travelers who know water is in the forecast, anxious types (like me) who can’t afford to replace their laptop
Travel-Friendly Toiletries Bags
Reaching into your backpack only to pull out a shampoo-covered hand sucks.
It’s happened to me, and I wouldn’t be surprised if it’s happened to you.
End such annoyances with one of our favorite toiletry bags on the market.
While they can’t prevent all spills — you’ll want to tighten down those soap bottle lids — you can at least confine your mess to a standalone bag.
Our Top Pick Nomatic

MSRP : Small : $55, Regular : $75 Dimensions : Small : 10.5″ x 5″ x 1.7″, Regular : 10.5″ x 5″ x 3.1″
Well-thought-out design, quality materials, and sizing choices make for the best organizers you can buy.
With Nomatic’s Toiletry Bag 2.0, you get all three.
Featuring a dedicated toothbrush pocket, optional hanger, and see-through internal windows, Nomatic put a lot of thought into their bag.
And with waterproof materials and zippers, water should never leak in, and contact solution should never leak out.
Pros : Cleans out easily, zippers positioned so items won’t fall out when the bag is hung, moveable inner wall accommodates larger items Cons : A bit pricey Best for : Travelers who demand durable products that make sense, minimalists who value every square inch of their bags
Best on a Budget BAGSMART

MSRP : Medium : $20, Large : $23 Dimensions : Medium : 9.4″ x 6.3″ x 4.6″, Large : 11.8″ x 7″ x 5.9″
Keeping your gels, goops, toothpaste, and other essential toiletries organized doesn’t mean you have to spend more than 20 bucks.
BAGSMART’s dopp kit for men and women enables travelers to keep all their most crucial bathroom goods safe and secure while on a budget.
Plus, water-resistant materials ensure that clean-up times are minimal when a spill occurs.
Pros : Lots of storage for everything you need, comes in two sizes, inexpensive, works great for on the road and at home, centerpiece unzips for full access Cons : Some quality control issues Best for : Travelers who don’t want to spend an arm and a leg toting their bathroom essentials
Makeup Case Relavel Cosmetic Case

MSRP : $30 to $80 Dimensions : Small : 10.3″ x 9″ x 3.6″, Medium : 13.4″ x 9″ x 4.7″, Large : 16.5″ x 12″ x 5.5″, XL : 16.5″ x 7.3″ x 12.6″
Makeup comes in all different sizes and containers, which makes it challenging to pack.
Plus, there’s always the threat of leakage.
Never fear; with Relavel’s Cosmetic Case, even the most oddly shaped products will fit snugly and securely, thanks to the case’s removable inner dividers.
And with four different sizes to choose from, you can carry everyday go-to items or size up depending on the number of items you need to bring along.
Pros : Water-resistant material keeps liquids in or out, made of durable Oxford fabric, brush compartment in the top of bag keeps them dry, handle for easy carrying, removable frame gives the bag more utility Cons : A tad heavy Best for : Travelers who don’t mind a little extra heft as long as it means they can bring whatever they want
Other Miscellaneous Organizers
By now, you’ve noticed there’s an organizer for just about anything you might need during your travels.
But perhaps you need a more niche product — something for a specific purpose that we haven’t covered so far.
You’ll find it here.
Breathable Mesh Laundry Bag Nomatic

MSRP : $30 Dimensions : 11.5″ x 6″ x 1.5″
Finding a place for your dirty laundry can be a hassle.
Maybe you put it in a plastic grocery bag, find an unused packing cube to stash it in for a few days, or just let it hang loose in the corner of the room. I’ve tried all three to varying levels of success.
That’s why Nomatic’s Laundry Bag is so convenient.
With a hanging strap, you can elevate your clothes off the floor and make it look like you give a damn for once.
Pros : Extremely packable and compact with a collapsible wire frame, breathable mesh enables wet or sweaty clothes to dry, makes laundry day a breeze keeping dirty clothes separate Cons : Could be bigger Best for : Travelers who are sick and tired of wondering what to do with their dirty laundry
Lightweight Shoe Bag pack all

MSRP : $25 Dimensions : Regular : 15.7″ x 8.7″, Large : 17.7″ x 9.8″
Like laundry, another item that can quickly become an annoyance while traveling is your shoes.
If you’re the type who likes to get in long walks or strenuous workouts, bringing a pair of sneakers enables you to get that sweat you’re after.
But putting loose shoes in with your clothing isn’t exactly the most hygienic practice.
Enter the Shoe Bag from pack all.
With a shoe bag, you can isolate your shoes from the rest of your clothing and stop worrying about what you may or may not have stepped in on the way to the gym.
Pros : Lightweight, water-resistant, traps smelly shoe odors inside, comes in two sizes to accommodate most shoes Cons : Handle can tear off Best for : Keeping your shoes away from your tee-shirts
Velvety Jewelry Case Benevolence LA

MSRP : $25 Dimensions : 3.75″ x 3.75″
Every five seconds, a traveler loses a precious family heirloom.
Okay, that’s a made-up statistic, but it feels plausible, right?
Don’t become a statistic, real or imagined, with a compact jewelry case that’ll fit just about anywhere you can think of.
It’s how Grandma would want you to protect the family jewels.
Pros : Velvet finish feels good in the hand, each purchase supports Water Mission, keeps your necklaces from knotting up Cons : Very small, but perfect for travel Best for : Organizing jewelry and keeping it in one spot
Discrete Underwear Bag Toplive

MSRP : $21 Dimensions : 11″ x 6.3″ x 4.95″
I don’t know the first thing about traveling with bras, but I imagine their odd shape and the fact they can get crushed make them difficult to pack.
Thankfully, you can wrangle all your underwear, bras included, into a convenient case from Toplive.
With space for up to five bras, eight pairs of underwear, and a bunch of socks, you can centralize your undergarment packing situation.
Pros : Great as an all-around bag for toiletries and underwear, waterproof compartment keeps your dry stuff dry Cons : Some durability concerns, underwear pockets not big Best for : Keeping your bras safe from the rest of your bag
Factors We Considered for Travel Organization

Choosing an organizer is more than grabbing a random bag and jamming your stuff inside.
If that were the case, using one wouldn’t make sense.
You’d just pile your stuff in a backpack and move along.
To help you better organize, we considered several key factors to help you find organizational bliss.
Travel demands durable yet lightweight materials like the ULTRA you’ll find in the UltraLite Sacks Zippered Cube.
That’s why we picked products that use quality fabrics and materials that stand up to frequent use.
Ease of Use
Enough can go wrong while traveling; you don’t need your organizers to become another pain point.
So, we made sure to include products that are intuitive and simple to use.
Because if they’re not straightforward, you won’t use them.
For the best example of an easy-to-use product, check out Nomatic’s Toiletry Bag.
Its zippers are oriented, so your gear won’t ever fall out, even while hanging.
Padding & Protection
If you’re a remote worker, you know just how important your devices are.
Without them, you’ll have a rough time financing your next adventure.
That’s why we included products like Minaal’s Tech Toolcase to ensure your gear remains operational when you need it most.
Dimensions, Weight & Packability
Nobody wants to carry extra weight on their back if they don’t have to.
Plus, packability ensures you take up as little space as necessary in the vessel you carry your stuff in.
So, for this list, we included the dimensions for every product.
If it’s too heavy or won’t fit in the bag you already own, why bother?
Water Resistance
You never know when a storm will hit and threaten your gear.
Plus, toiletries are notoriously leaky.
That’s why we included products like AquaQuest’s Storm laptop case to protect your laptop from sudden downpours and Relavel’s Cosmetic Case to keep liquids from leaking into your luggage.
The most crucial factor for many of us comes down to price, which is why for every category of product you’ll find on this list, we include a range of costs.
Organization isn’t a privilege reserved for the traveler with the most money; it’s a tool for all.
Final Thoughts: Best Travel Organizers

Thanks for taking a look at the best travel organizers on the market today.
By keeping your travel gear organized on the go, you’re one step closer to getting the most out of the space you have.
So, whether you were looking for packing cubes, ditty bags, toiletry kits, laundry bags, jewelry organizers, or anything else, we did our best to nudge you one step closer to organizational nirvana.
Be sure to check back in for all the best minimalist travel and ultralight gear you can find, not just the best travel organizers for your luggage.
Until next time, safe travels.
Last Updated on July 12, 2024

Ryan Squires
Affiliate Disclosure : Some of the links in this post may be affiliate links. If you click an affiliate link and make a purchase, we may receive a small commission at no extra cost to you. Affiliate links help support this website and keep it 100% ad-free.
Leave a Comment Cancel reply
This site uses Akismet to reduce spam. Learn how your comment data is processed .

DIY Travel Toiletry Bag
- Post author: sewingtimes
- Post published: November 24, 2022
- Post category: DIY Zipper Pouch Tutorial / Handmade Bag Tutorial / Learn to Sew / Pouch Bag Tutorial / Sewing Crafts Tutorial / Sewing for Beginners
Today, I’m showing you how to make this DIY Travel Toiletry Bag. There is a external pocket that provides convenience and various storage spaces in real life. It is a zipper pocket, but the zipper is not visible, so it is designed to look neat and tidy. Make your own Toiletry Bag using my video tutorial.

How to make a Dopp Kit Tutorial

The finished measurements of this bag are approximately 9⅛″(23㎝) W × 5⅛″(13㎝) H × 3¼″(8㎝) D.
CLICK HERE TO WATCH THE VIDEO TUTORIAL
You may watch the full video tutorial on my Youtube channel.

Share this video with a lot of people who need it.
Seam allowances are 3/8″ unless otherwise specified.
Let's get started!!
To make this you will need:.
Contrast Color Fabric ( quilting cotton ) 1 9⅞″ × 3¼″ (25㎝ × 8㎝) 1 9⅞″ × 2½″ (25㎝ × 6.2㎝) 2 12⅝″ × 2¼″ (32㎝ × 5.5㎝) 1 2⅜″ × 2⅜″ (6㎝ × 6㎝)
Outer layer ( Quilting Cotton ) 1 9⅞″ × 4¼″ (25㎝ × 11㎝) 1 9⅞″ × 4 5/16″ (25㎝ × 10.8㎝) 1 16¼″ × 4″ (41㎝ × 10㎝) 1 6″ × 3¼″ (15㎝ × 8㎝) 2 1⅛″ × 1⅝″ (3㎝ × 4㎝)
Lining ( Quilting Cotton ) 1 9⅞″ × 2″ (25㎝ × 5㎝) 1 9⅞″ × 4¼″ (25㎝ × 11㎝) 3 9⅞″ × 6″ (25㎝ × 15㎝) 2 12⅝″ × 2¼″ (32㎝ × 5.5㎝) 1 16¼″ × 4″ (41㎝ × 10㎝)
Zipper 1 8″(20㎝) , 1 11⅞″(30㎝)
4㎝ wide bias tape 63¼″ (160㎝)
Fusible fleece (It is similar to Pellon 987F ‘ or ‘Vilene H630’) 2 9⅛″ × 5⅛″ (23㎝ × 13㎝) 2 11⅞″ × 1 7/16″ (30㎝ × 3.5㎝) 1 15½″ × 3¼″ (39㎝ × 8㎝)
Mid-weight woven fusible interfacing (Pellon SF-101 Shape Flex’ or ‘Vilene G700’) 1 9⅛″ × 1¼″ (23㎝ × 3㎝) 1 9⅛″ × 3½″ (23㎝ × 9㎝)

Place the right sides together of the upper and lower fabric and sew with an allowance of about 3/8″.

Cut the interfacing into the shape of the pattern. Attach the interfacing to the center of the wrong side of the fabric. Cut by adding 3/8” from the edge of the interfacing.

Place the zipper right sides together on top of the outer layer.

Place the lining on top of the zip. Sew with an allowance of about 3/8″.

Open out, press pieces away from the zipper.

Attach the outer and lining to the other side of the zip the same way.

Fold the outer fabric with the zipper closed.

Place the wrong sides together of the outer and lining and sew all the way around.

With assembled lining right side up, center zipper right side facing up along top edge. Pin in place. Place the outer layer, right side down on top. Pin in place. Using your zipper foot, sew along top edge using a 3/8″ seam allowance.

Open out, press pieces away from the zipper. Attach the outer and lining to the other side of the zip the same way.

Open out, press pieces away from and top stitch on both 1/8” away from the zipper.

Align both ends of the zipper panel between the outer and lining of the bottom fabric. Sew with an allowance of about 3/8″.

Turn right side out.

Fold the handle piece in half, wrong sides together to make a crease. Then fold each edge in toward the middle and press. Stitch along both long edges of the strap, 1/8” from the edge. Place the handle on the right side of the guesset and sew.

Mark the quarters of the front, back and side panels.

Pin the Gusset to the Main Panel, pinning first at the center. Then pin the ends in place. Continue to pin along only the straight edges of the Main Panel, there is no fiddling for these points. With sharp scissors make small snips on the gusset at the round shape of the main panel. The small snips will help the curved edge of the pouch. Sew with an allowance of about 3/8″.

Use the same process to sew the front panel to the other side of the gusset.

The bias tape is placed and pinned as pictured, stitch up to the end.

Stitch from the right side seam into seam, or sew manually from the backside.

YOU ARE FINISHED!
Happy sewing!
Share this:
You might also like.

DIY FISH DRAWSTRING BAG

Beginner-Friendly Zipper Pouch Tutorial with Contrasting Edges

DIY One Handle Bag
Omsk Oblast, Russia Map

By placing your order, you agree to our Terms of Use

Product Details
Developer info.
- More apps by this developer
Product features
- GPS location feature
- Showing nearby places
- Compass feature
- All vector maps are stored on your phone
Product description
User data privacy, technical details.
- Access coarse (e.g., Cell-ID, Wi-Fi) location
- Access fine (e.g., GPS) location
- Access extra location provider commands
- Access information about networks
- Required to be able to access the camera device
- Open network sockets
- Read from external storage
- Record audio
- Access storage
- Access the vibration feature
- PowerManager WakeLocks to keep processor from sleeping or screen from dimming
- Write to external storage
- Allows sending in-app billing requests and managing in-app billing transactions
Customer reviews
- 5 star 4 star 3 star 2 star 1 star 5 star 0% 0% 0% 0% 0% 0%
- 5 star 4 star 3 star 2 star 1 star 4 star 0% 0% 0% 0% 0% 0%
- 5 star 4 star 3 star 2 star 1 star 3 star 0% 0% 0% 0% 0% 0%
- 5 star 4 star 3 star 2 star 1 star 2 star 0% 0% 0% 0% 0% 0%
- 5 star 4 star 3 star 2 star 1 star 1 star 0% 0% 0% 0% 0% 0%
Customer Reviews, including Product Star Ratings help customers to learn more about the product and decide whether it is the right product for them.
To calculate the overall star rating and percentage breakdown by star, we don’t use a simple average. Instead, our system considers things like how recent a review is and if the reviewer bought the item on Amazon. It also analyzed reviews to verify trustworthiness.
No customer reviews
- Amazon Newsletter
- About Amazon
- Accessibility
- Sustainability
- Press Center
- Investor Relations
- Amazon Devices
- Amazon Science
- Sell on Amazon
- Sell apps on Amazon
- Supply to Amazon
- Protect & Build Your Brand
- Become an Affiliate
- Become a Delivery Driver
- Start a Package Delivery Business
- Advertise Your Products
- Self-Publish with Us
- Become an Amazon Hub Partner
- › See More Ways to Make Money
- Amazon Visa
- Amazon Store Card
- Amazon Secured Card
- Amazon Business Card
- Shop with Points
- Credit Card Marketplace
- Reload Your Balance
- Amazon Currency Converter
- Your Account
- Your Orders
- Shipping Rates & Policies
- Amazon Prime
- Returns & Replacements
- Manage Your Content and Devices
- Recalls and Product Safety Alerts
- Registry & Gift List
- Conditions of Use
- Privacy Notice
- Consumer Health Data Privacy Disclosure
- Your Ads Privacy Choices
- Bahasa Indonesia
- Slovenščina
- Science & Tech
- Russian Kitchen
Omsk: Western Siberia's hidden gem

A city view of Omsk. Source: Dmitry Feoktistov
Omsk was founded in 1716 when a wooden fort was constructed to house a Cossack unit in the area to protect the expanding Russian frontier from Central Asian nomadic incursions. It served various administrative functions throughout the 1800s and became infamous as a place of exile and incarceration. The city was rundown when selected as a hub for the Trans-Siberian railway in the 1890s. Many international trade companies and foreign consulates relocated here and the remnants of their offices can still be found in the city today.
The mystery of Kolchak’s gold
Omsk became the headquarters of the anti-Bolshevik white army led by Admiral Aleksandr Kolchak in 1918. In late 1918 there was a revolt in the city initiated by a leftist faction (Socialist Revolutionary Party or SPs) with 500 rebel deaths at the hands of Cossacks and Czechoslovak soldiers, a major factor in convincing the SPs to join the Bolsheviks. There is a large Soviet-era monument to the uprising at the corner of Lenina street and Broz Tito street.
Kolchak was entrusted with a large portion of the Tsarist’s gold reserves, yet amazingly lost much of it. Supposedly 250 million rubles were lost (about $8 million at the time). Legend has it that they were buried near the village of Taiga, yet numerous excavations have turned up nothing. The area still attracts the occasional fortune seeker.

Kolchak’s headquarters are located at what is today the Omsk Regional Archives at Broz Tito St., 3. Nothing shows how much times have changed as the imposing Kolchak statue that was unveiled in 2012 around the corner. The statue guards Kolchak restaurant , a four-story culinary complex featuring a steak house, an Irish pub, a Central Asian café and an Italian eatery. For more details on where and how to dig Kolchak's gold, see Top Ten Mysterious Lost Treasures of Russia
Dostoevsky and the Tsar
At 1.15 million people Omsk dwarfs the region’s second largest city, Tara (population 28,000). The city is split by the River Irtysh into two sections (all places of interest are on the right bank) with downtown emanating from the River Om.
Most foreigners have heard of Omsk via writer Fyodor Dostoevsky who spent four years here as a prisoner (1849-1853). He spent most of his time in Omsk in squalor and chains and with no books besides the Bible, however, it left an indelible mark on his memory and influenced his future literary output. There is a statue of the writer in chains grasping a Bible at the corner of Partizanskaya and Spartakovskaya streets, where Dostoevsky undoubtedly stepped many times. A museum dedicated to the author's time in Omsk is located nearby at Dostoevskogo St. 1. The local university is also named for him.

A view of the Assumption Cathedral, Omsk. Source: Lori/Legion-Media
Tarskaya Street is one of the city’s oldest thoroughfares. It features a monument to victims of Stalinist repressions and the Tara gates, originally built in 1792 as one of the four entrances to the Omsk fort. Nearby stands the Assumption Cathedral, one of the largest churches in Siberia. Future Tsar Nicholas II laid the first stone here in 1891 when making his way back to St. Petersburg after his Eastern journey.
In Omsk you are never more than a few steps from the village, made clear when one exits the center to the north, where most houses are wooden and roads unpaved. Stroll along Bulatova and Rabinovicha streets, a well-preserved ensemble of wooden architecture.
Omsk’s cultural heritage
The Pushkin State Library is worth a look with busts of Russian literary figures adorning the front side of the building. At the corner under the big “M” is one of several stations of the never completed Omsk metro. Construction began in 1992, but as of 2014 the project is again dormant due to financing problems.
One of Omsk’s most famous sons is Symbolist painter Mikhail Vrubel (1856-1910). Vrubel ignored contemporary trends and focused on themes from fairy tales, demons and religious subjects and also designed a majolica frieze for the Metropol Hotel in Moscow. Omsk’s Fine Arts Museum is named for him and features a number of his works .

Milhail Vrubel's painting 'Demon Seated in a Garden' (1890)
Over the years a number of tourists have tripped over the monument to Stepanych. This bust of a plumber rising from a sewer was the idea of Omsk’s former mayor after a trip to Slovakia in the 1990s. Stepanych has become one of the symbols of the city.
Omsk is a hockey town, with one of the major teams, Avangard , in the KHL, Russia’s premiere professional league. Russian champions on several occasions, check out a match at Omsk Arena. But if you can’t catch a game there’s a large kiosk featuring the team’s merchandise at the airport.
Siberian punk, jazz and the classics
While Omsk may not be on everyone’s radar musically, it does host a musical theater built just after the war. The building on 10 Let Oktyabrya Street is in the form of an enormous sloping grand piano.
A monument to Stepanych, Lenina Street, Omsk. Photo credit: RIA Novosti/Pavel Lisitsyn
Perhaps Russia’s most famous punk band, Grazhdanskaya oborona (Civil Defence), was formed here in 1982. The band was active until 2008 when lead singer Yegor Letov died of heart failure at age 43. Letov is buried at the Staro-Vostochnoe cemetery. A sprawling graveyard with thousands of graves, fans should stop at the administration for help in locating his grave.

In Russia, Omsk is known among the younger, tech-savvy generation primarily because of the “Omsk bird,” also known as Winged Doom. The origin of what became one of Russia’s most ubiquitous memes comes from a painting by German artist Heiko Müller. One day in 2009 an Internet user posted this painting with the line, “Welcome to Omsk,” at the top. Additional versions menace viewers stating, “Don't try to leave Omsk,” and “Omsk is closer than you think.” Like many popular memes on the Internet, this one went viral and has become something like an unofficial symbol of the city.
All rights reserved by Rossiyskaya Gazeta.
to our newsletter!
Get the week's best stories straight to your inbox
This website uses cookies. Click here to find out more.
IMAGES
COMMENTS
Finished Sizes of the Expandable Pouch. The finished sizes are as follows: SMALL: flat 12 ½" long, 8" wide - expanded 3" tall (32 x 20 cm, exp. 7.5cm tall) MEDIUM size: flat 15" long, 9" wide, expanded 4" tall (38 x 23 cm, exp. 10 cm tall) LARGE size: flat 16" long, 10" wide, expanded 4" tall (40 x 25.5 cm, exp. 10 cm tall) The small bag ...
Here are more than 7 super useful items will definitely want to sew up before your next travel. Also, these free travel sewing patterns will make your vacation easier: a storage bag, a free sleep mask pattern, tons of zipper pouches and jewelry storage bags, a backpack, a little sewing kit, a hat, even a hiking DIY water bottle carrier that ...
12 Travel Bag Patterns. These travel bag patterns are the perfect solution to keeping organized on your next vacation, weekend trip, or a day out in the sun. You'll find free patterns so you can DIY your own duffel bag, tote, overnight bag, jewelry roll, tote bag, and more. All of these travel bag patterns have everything you need to sew up a ...
Step 2: Cut all fabric and interfacing pieces. The pattern you choose either has specific cutting instructions or may even come with templates you can use to cut the fabric pieces you will need. Remember the age-old tip: "measure twice, cut once.". Step 3: Attach notions to the fabric pieces.
The next step is to create the pleats that allow the shopping bag to fold easily. Take one edge where a handle is attached. With the right side of the fabric facing the worktop, fold over the seam with the handle 2 inches (5cm) towards the middle of the fabric and press in place. Clip the ends, flip the fabric, so the wrong side of the fabric ...
From the Blogger: "Learn how to make storage bags to organise all manner of bits and pieces in your suitcases whilst travelling. All you need is a pre-loved button down shirt and a little time. The tutorial will show you just how easy it is. In literally minutes, you will have one large bag, or several small bags to store clothing, electronic ...
In this video DIY tutorial I show you an easy way to make the purse bag by own hands from scratch. Materials you need to make this DIY storage bag:- fabric-...
Place the 7 7/8″ x 8 5/8″ pieces right sides together and stitch along the two long sides using a 3/8″ seam allowance Turn right sides out and press. Topstitch along one of the seams. Take the outer piece "D" and stitch around the sides and bottom using a 3/8″ seam allowance. Turn right sides out and press. Topstitch.
See this Travel Storage Bags Tutorial and keep your luggage organized when you travel. Travel Storage Bags Tutorial. This tutorial submission is great for the beginner as well. Storage bags made from pillowcases is a fast sew and great for trips. Find the link to the tutorial below. If you like to see the full scoop on how to make storage bags ...
Today, I made a convenient and practical large-sized travel bag. This Bag has a full wraparound zip opening to give easy access to the spacious main compartment. And its trolley sleeve perfectly secures to any away suitcase. With a 15″ laptop pocket, we also love it as a daily work bag or gym bag. Let's make it with Sewingtimes.
Download Article. 1. Put your linen, blankets or clothing into the extra strong garbage bag. 2. Pull the open end of the bag together and form a small circle shape. 3. Place the vacuum cleaner pole into the circle shape and hold it firmly around the pole. 4. Suck out the air by turning on the vacuum cleaner.
Credit: The Container Store. 8. Use purse storage bins. Another way to organize purses and keep them from flopping all over each other is with a purse storage bin like this one. It keeps things upright and tidy, and of course, you can use multiple bins if needed to house your collection. Credit: Urban Outfitters.
ABO Gear and Storage Bags . Fold and Stack Items in Travel Storage Bags . This bag storage combo is a cute 3-set that is also practical to store clothes or bigger items like travel blankets or microfiber towels. One review says, "They are durable and spacious. They fit right underneath my bed and looks very good.
ProCase Travel Gadgets Organizer Bag, Universal Electronic Accessories Cable Roll-Up Pouch Portable Gear Storage Carrying Cover for Cords SD Memory Cards Earphone Hard Drive -Black or Double Layer Electronic Accessories Organizer, Travel Gadget Bag for Cables, USB Flash Drive, Plug and More, Perfect Size Fits for iPad Mini (Medium, Black) 2.
1. Fold the two binding strips in half lengthwise and press. 2. Pin a binding strip to the wrong side of the bag body piece along one of the short edges with raw edges aligned. Stitch with a 1/4'' seam allowance. 3. Fold the binding away from the wrong side of the fabric and press. Then flip the bag body piece over.
Available in a spectrum of colors, this cosmetic case ranges from classic beige to navy, olive, and slate blue. The Details: 9.5 x 4 x 7 inches | PU leather, nylon, PVC, poly | Zipper closure ...
Once you have prepared the desired jewelry holders on your canvas, pin to the patterned fabric with the pockets (good side) facing in. 5. Sew around 3/4 of the rectangle, then turn right-side out and sew up the hole. 6. Do this same process for the 10 x 13-inch rectangles. Attach your desired pockets and sew. 7.
RFIDsafe Travel OrganizationPacsafe Gadget Pouch. MSRP: $119.95. Dimensions: 5.9″ x 10.6″ x 3.5″. In the digital age, travelers have more small objects to corral than ever before. Plus, many items like passports and credit cards use RFID technology to simplify identification and payment.
Place the zipper right sides together on top of the outer layer. Place the lining on top of the zip. Sew with an allowance of about 3/8″. Open out, press pieces away from the zipper. Attach the outer and lining to the other side of the zip the same way. Fold the outer fabric with the zipper closed.
Omsk Oblast, Russia Offline Map For Travel & Navigation is a premium, very easy to use and fast mobile application. EasyNavi has developed the Omsk Oblast, Russia Offline Map For Travel & Navigation app to provide you with the world's best mobile offline map. OFFLINE MAPS: • Fully offline vector map with incredible zoom level! • Detailed and informative map - because it is based on ...
Best Buffet Restaurants in Omsk, Omsk Oblast: Find Tripadvisor traveler reviews of THE BEST Omsk Buffet Restaurants and search by price, location, and more.
Best Late Night BBQ Restaurants in Omsk, Russia. Find 6,840 traveler reviews of THE BEST Omsk Late Night BBQ Restaurants and search by price, location and more.
Omsk was founded in 1716 when a wooden fort was constructed to house a Cossack unit in the area to protect the expanding Russian frontier from Central Asian nomadic incursions. It served various ...