Pack Hacker is reader-supported. When you buy through links on our site, we may earn an affiliate commission. Learn more
How to choose the

Best Travel Camera Kit
For short and long trips, beginners and professionals. We cover it all.
- 01. Introduction
- 03. Point & Shoot
- 04. Mirrorless
- 06. Other Cameras
- 07. Conclusion
This is a long one. Let's take a look at the big picture first (pun intended).
Connect in a new country with an eSIM. Check it out →
How to Pick The Best Camera For Travel Photography
Photography has come a long way over the years. It used to be an art form that was limiting due to expensive gear coupled with a steep learning curve. There were darkrooms and labs involved. Nowadays, with digital cameras being affordable, accessible, and able to fit inside your pocket—everyone is shooting on a daily basis. Whether you just want to grab a couple snaps on your next trip or you want to start exploring things in a more professional light, you’ll want to have a good camera that matches your skill level, budget and interest.
But how do you choose the best camera for travel? Well, you come here of course.
What This Guide is
When it comes to photography, there are so many options nowadays it can cause a bit of paralysis when choosing the best camera for travel photography. Gear isn’t cheap, so you want to make sure you’re choosing the right system before you fork over a couple paychecks and a sliver of your liver.
You’ll learn very quickly that there’s no real right or wrong answer, and there is no one-size-fits-all for photography—as much as you’d like there to be. There are a number of different types of kits that could work incredibly well for you and deciding which is the best travel camera for you will depend on a number of factors.
What This Guide is Not
We’re not going to tell you how to shoot photography. We’ll happily provide you with some information on the different systems and tips on how to optimize them, but if you’re looking for a guide to becoming a professional photographer… You’ll want to look elsewhere.
Everyone has their preferred way of shooting and travel style. We’re not ready to make those decisions for you, but hopefully these tips will help you make an informed decision on which camera kit will be the best for your travel photography.
Considerations
So how do you choose between each of these kits? Well, first you need to be like Kris-Kross and go backwards (with your decision making, not your jeans). Instead of just thinking about what you want to do with your camera, try to take a step back and look at the bigger picture. Yeah, watch out—we’re just getting started on the photography puns.
How Do You Plan to Use Your Images?
Try thinking about how you plan to use your images, rather than just what you want to take pictures of. If you’re intending to use your images solely for Instagram you won’t necessarily need the quality and resolution a DSLR can give you. Sure, you can get quick and light with a point & shoot, but if you want to capture those massive landscapes in low light you may want a wide lens on a camera that can handle that boost in ISO.
How Do You Plan to Travel?
Hiking the Pacific Crest Trail over the course of a couple months? You’ll probably be just dandy with a small, lightweight kit to capture your experiences and create a slideshow for friends and family. Traveling to go shoot a wedding? You might want to consider upping the ante with a mirrorless or DSLR. Need a pretty snap for your Instagram feed of your latte? A mobile phone will do.
What’s Your Budget?
When we talk budget, it can be in terms of money and weight. Bag check fees can add up quickly on long international flights, and the weight on your body from carrying around heavy gear can make or break a trip. Carrying lots of weight can even cause you long term pain, infringing on your photography career. Plus, who needs a crick in their neck? We don’t.
We’ll get into all this and more with our 4 main photo kits below – Mobile, point and shoot, mirrorless, & DSLR. We’ve also talked with experts in each of these categories to get their real-world experience and interspersed their knowledge throughout this guide.
You’re the expert on the systems that work for you, but we’ll provide our thoughts on gear from a feasibility sense. We always shoot (see what we did there?) to fit everything in one backpack , so our goal is to bring as little as we can while still getting by.
When it comes to photography—and especially photography gear—there are a lot of terms that might sound like gibberish to the average passerby. While the professional photographers of the world don’t bat an eye to this stuff, we wanted to take a minute to do some explaining for the newer, budding photographers who may be reading this. To the professionals out there—just go ahead and skip this section.
Without further ado, here is some common lingo that you will hear thrown around in this guide:
- Aperture: The amount of light your lens lets in + the depth of field in your photo. Lower number (1.8) = shallow depth of field, lets lots of light in.
- Depth of Field: The area that is in focus in your image.
- Digital Noise: Those tiny coloured specks that make your image look uneven and grainy, caused by shooting in low light with a high ISO.
- Focal Length: Always measured in millimeters, the focal length measures how “zoomed in” you are. Low numbers will give you a wide angle, high numbers will be telephoto.
- F-Stop: F-Stop is another term for aperture.
- ISO: A measure of how light sensitive your sensor is. A higher ISO will mean a brighter picture, but potentially more digital noise too.
- Prime Lens: Only one focal length. Lighter and smaller than a zoom lens.
- RAW: The uncompressed image, basically the negative of digital photography.
- Sensor: The area that captures your image – the film of digital photography.
- Shutter Speed: How quickly your camera opens and closes to expose your sensor, or take the photo. The longer it stays open, the more light is let in.
- Zoom Lens: Multiple focal lengths. Heavier and bigger than a prime lens, but more versatility.
Our Contributors That Made This Guide Possible
- Adrienne Tam: Architect and photo enthusiast.
- Corey Tenold: Professional fashion photographer.
- Frances Beatty: Professional wedding photographer.
- Jared Martin: Professional real estate photographer.
- Tam Le: Self-taught photographer.
- Tara Lilly: Professional wedding photographer.
Sign up to get our 5 Minimalist Travel Hacks Guide. Plus, a weekly digest of our newest content in the newsletter.
The camera that's probably in your pocket right now. Chances are, it's more capable than you might realize...
Why Mobile Photography?
We’re willing to wager that you don’t know a single person who doesn’t own and carry around a mobile phone with them at all times—which makes this the most convenient of all of the camera kits in this guide. Convenience and size are the two biggest reasons to choose a mobile phone camera for your adventures. For some people, it might be the best camera for travel.
Mobile phones are so easy to operate, children can—and often do—take pictures with them. The learning curve is very minimal—far less than what you get with a DSLR or a mirrorless camera. You can just grab it and go, which only adds to the convenience of these little items.
The price point should also be a consideration. If you already have a phone with a camera in it, you have no real need to drop money on a travel camera, outside of adding some accessories to your phone. Smartphones may not be cheap, but it will almost always be cheaper than buying a phone AND a camera.
“A lot of people think that in order to take good photos, they need to invest a lot of money. That’s not true. You just need to have interest and be persistent, and over time your photography will dramatically improve” —Tam Le, Self-taught Photographer
One final point to mention is that there’s nothing extra to pack with mobile phone photography—because you already have your camera in your pocket! This also means you can skip the fancy and expensive camera bags.
The Nitty-Gritty
When choosing a mobile phone, don’t worry too much about the Android vs iPhone debate. There are great cameras with both and we have people on the team that use both. That being said, if you’re interested in using a smartphone as your primary camera there are a few things you want to look into, regardless of brand.
At a basic level, a mobile phone camera contains a lens, a sensor, and some software. Not every mobile phone camera is built the same, however—the quality of materials used in your phone will make a difference in the quality of your images.
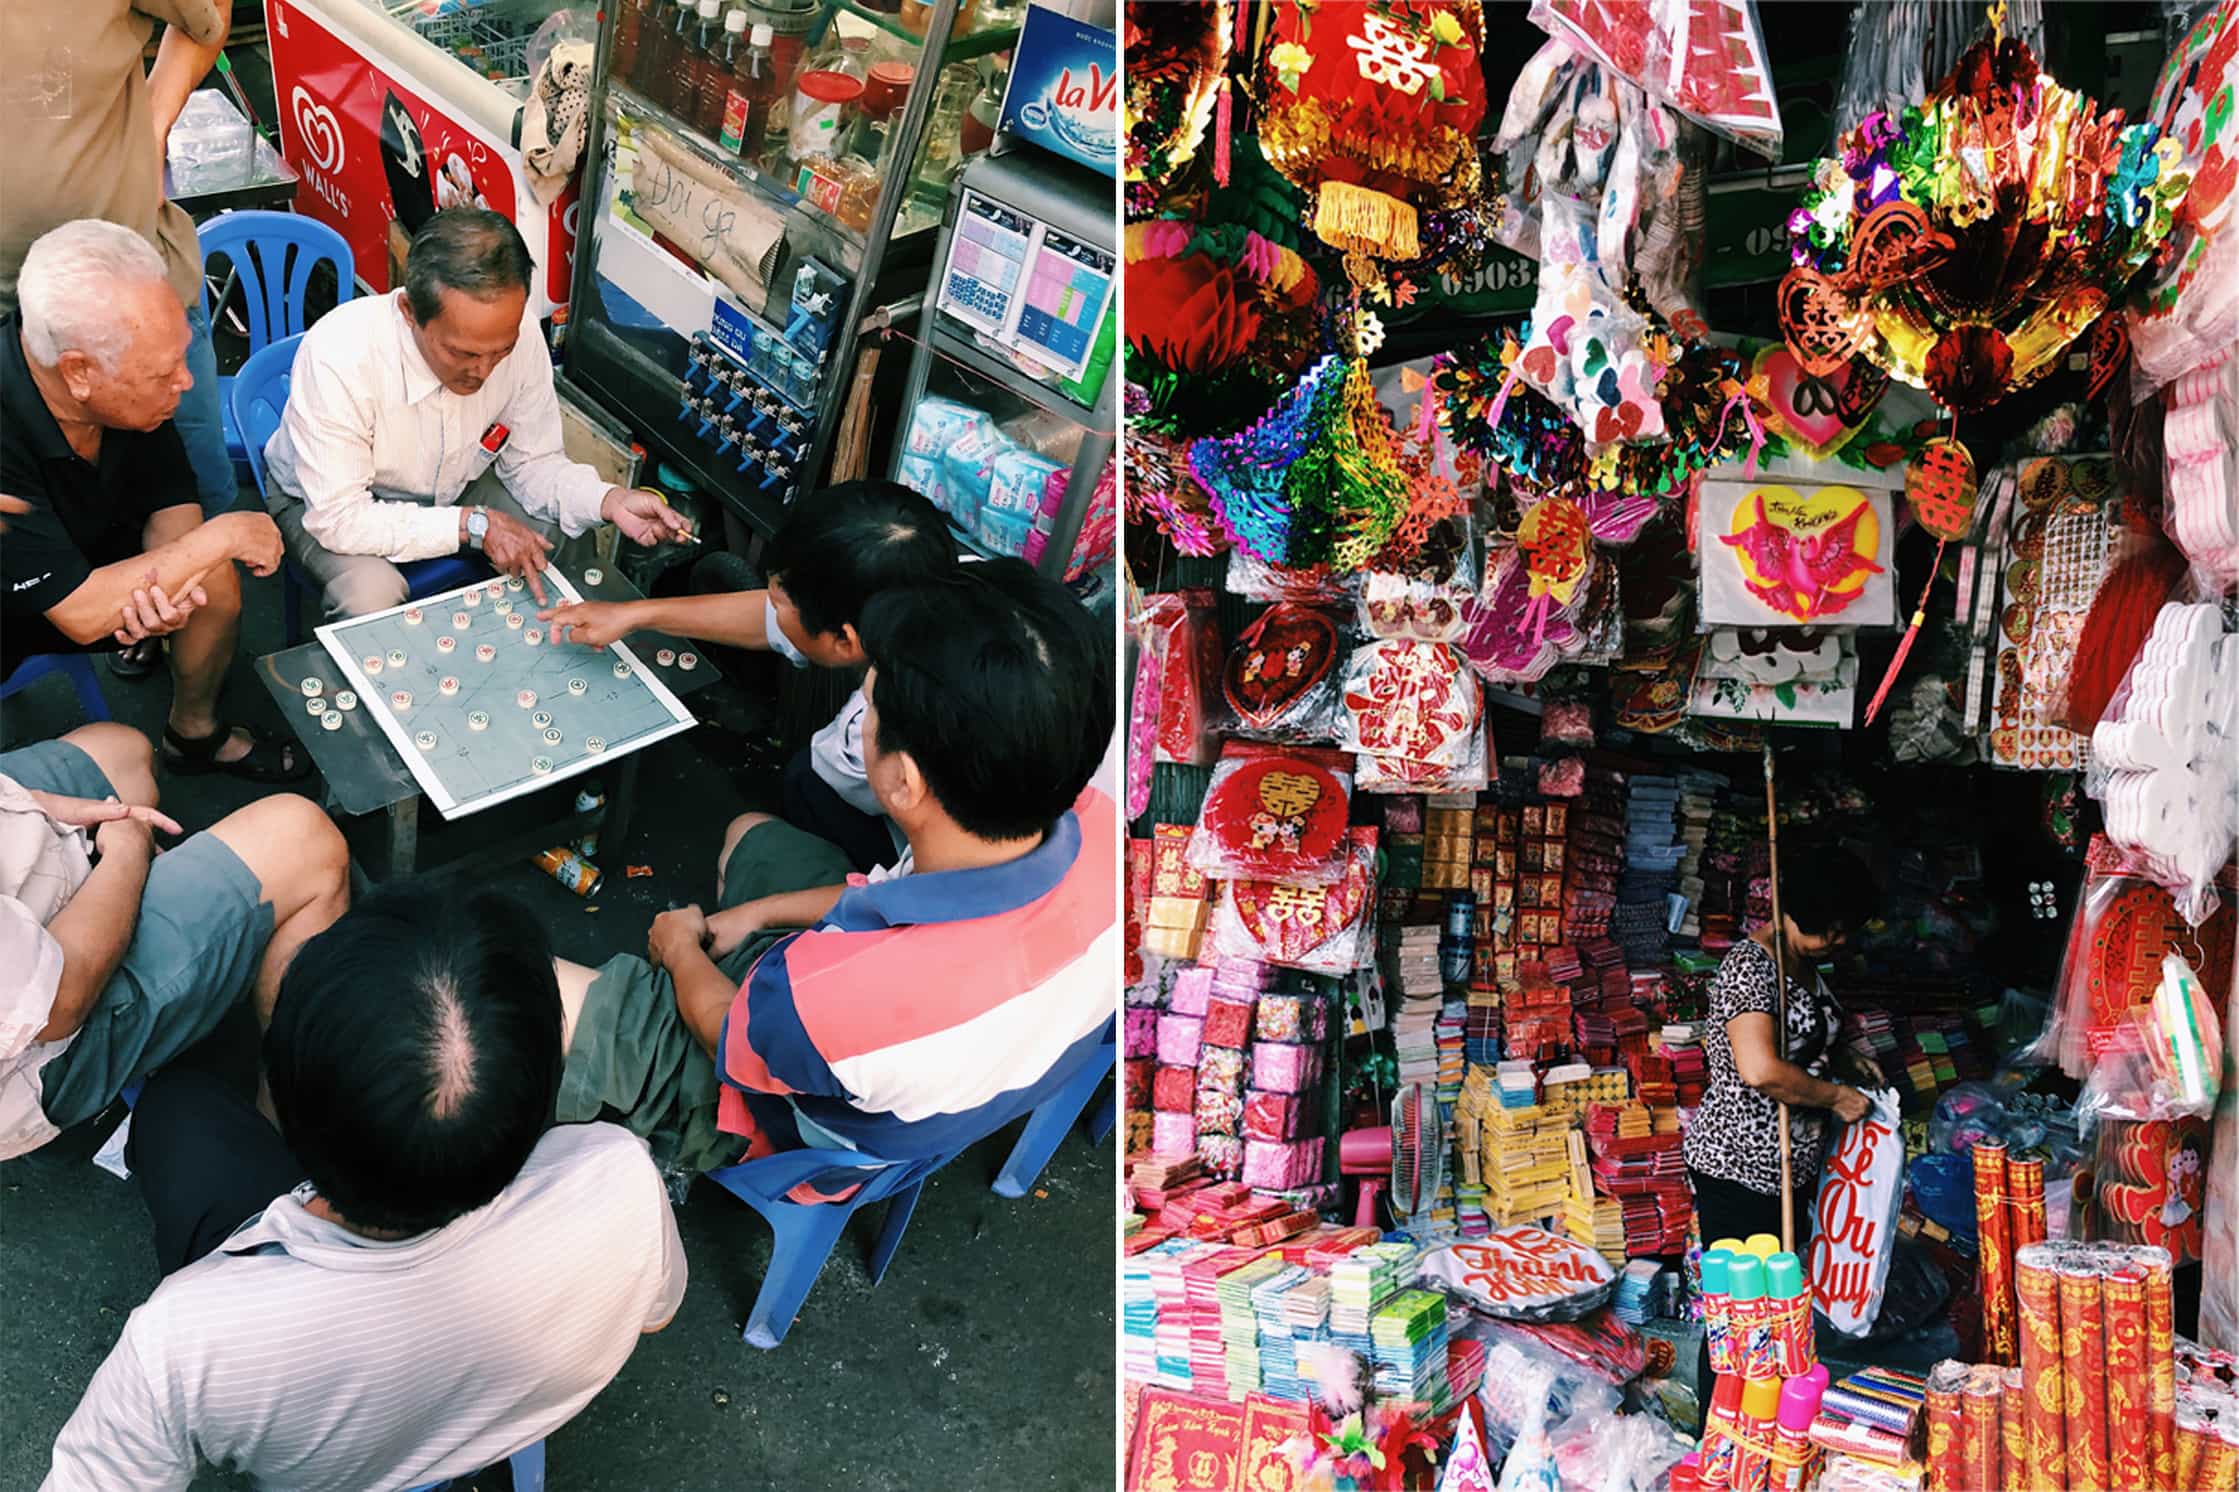
Whether you have the newest smartphone model or an old flip phone in your pocket, you probably have a camera in that phone. These cameras are pretty basic but powerful. The latest iPhone XS has a 12 megapixel (MP) rear camera, and the OnePlus 6T has an impressive 20MP rear camera—making these two options comparable to even some DSLRs in terms of megapixels. Generally speaking, more megapixels = better, but that won’t always be the case. If you’re looking at two different models and one has a 12MP camera while the other has a 16MP camera… If they both have the same size sensor, the 12MP camera is actually going to be your better option.
Sensor size is a very important puzzle piece in picking the best camera for you. Most phone cameras will have a sensor that is ⅓ of an inch, but some have up to an inch. The iPhone XS, for example, is ⅓ of an inch. The bigger the sensor, the higher quality an image you will get. Unfortunately, this information isn’t always the easiest to secure when you’re looking into a new phone.
Aperture is a pretty big deal when it comes to photography. Aperture is the amount of light that is allowed into your sensor, which controls the depth of field of your photo. If you’re looking to take images in low light situations without using your flash, you’ll want to look for a camera that has an aperture of at least F1.8—like the iPhone XS or the OnePlus 6T , which have apertures of F1.8 and F1.7, respectively.
An additional consideration when looking for a mobile phone camera is whether or not it has digital or optical zoom, and how good those two are. If you’re into zooming, you’ll want to look for optical zoom—which many phone cameras do not have. Digital zoom is just zooming in on the pixels, not actually zooming in with the focal length. This can affect the quality of your image.
Most people have probably experienced this—you’ll start zooming in on your iPhone only to see the image quality lower drastically. When fully zoomed in, the image can be pixelated to the point of being virtually unusable. That is because the phone has digital—as opposed to optical—zoom.
A Note on Storage
One final consideration with mobile phone cameras is storage. Now, remember when we said Android and iPhone are the same? Well, we probably should have put a little asterisk there because when it comes to storage, Android phones do often have an advantage. There are a handful of Android phones that offer removable SD card slots, which is great for the traveling photographer. This means you can carry a few SD cards and offload photos as you see fit, plus you could even have another SD card with a bunch of movies or music for those long flights.
The iPhone, on the other hand, does not have removable storage. There is no way you can add extra storage to an iPhone outside of buying a new one with a higher capacity. The same goes for a bunch of Android phones as well—including the popular Google Pixel (both versions 1 and 2).
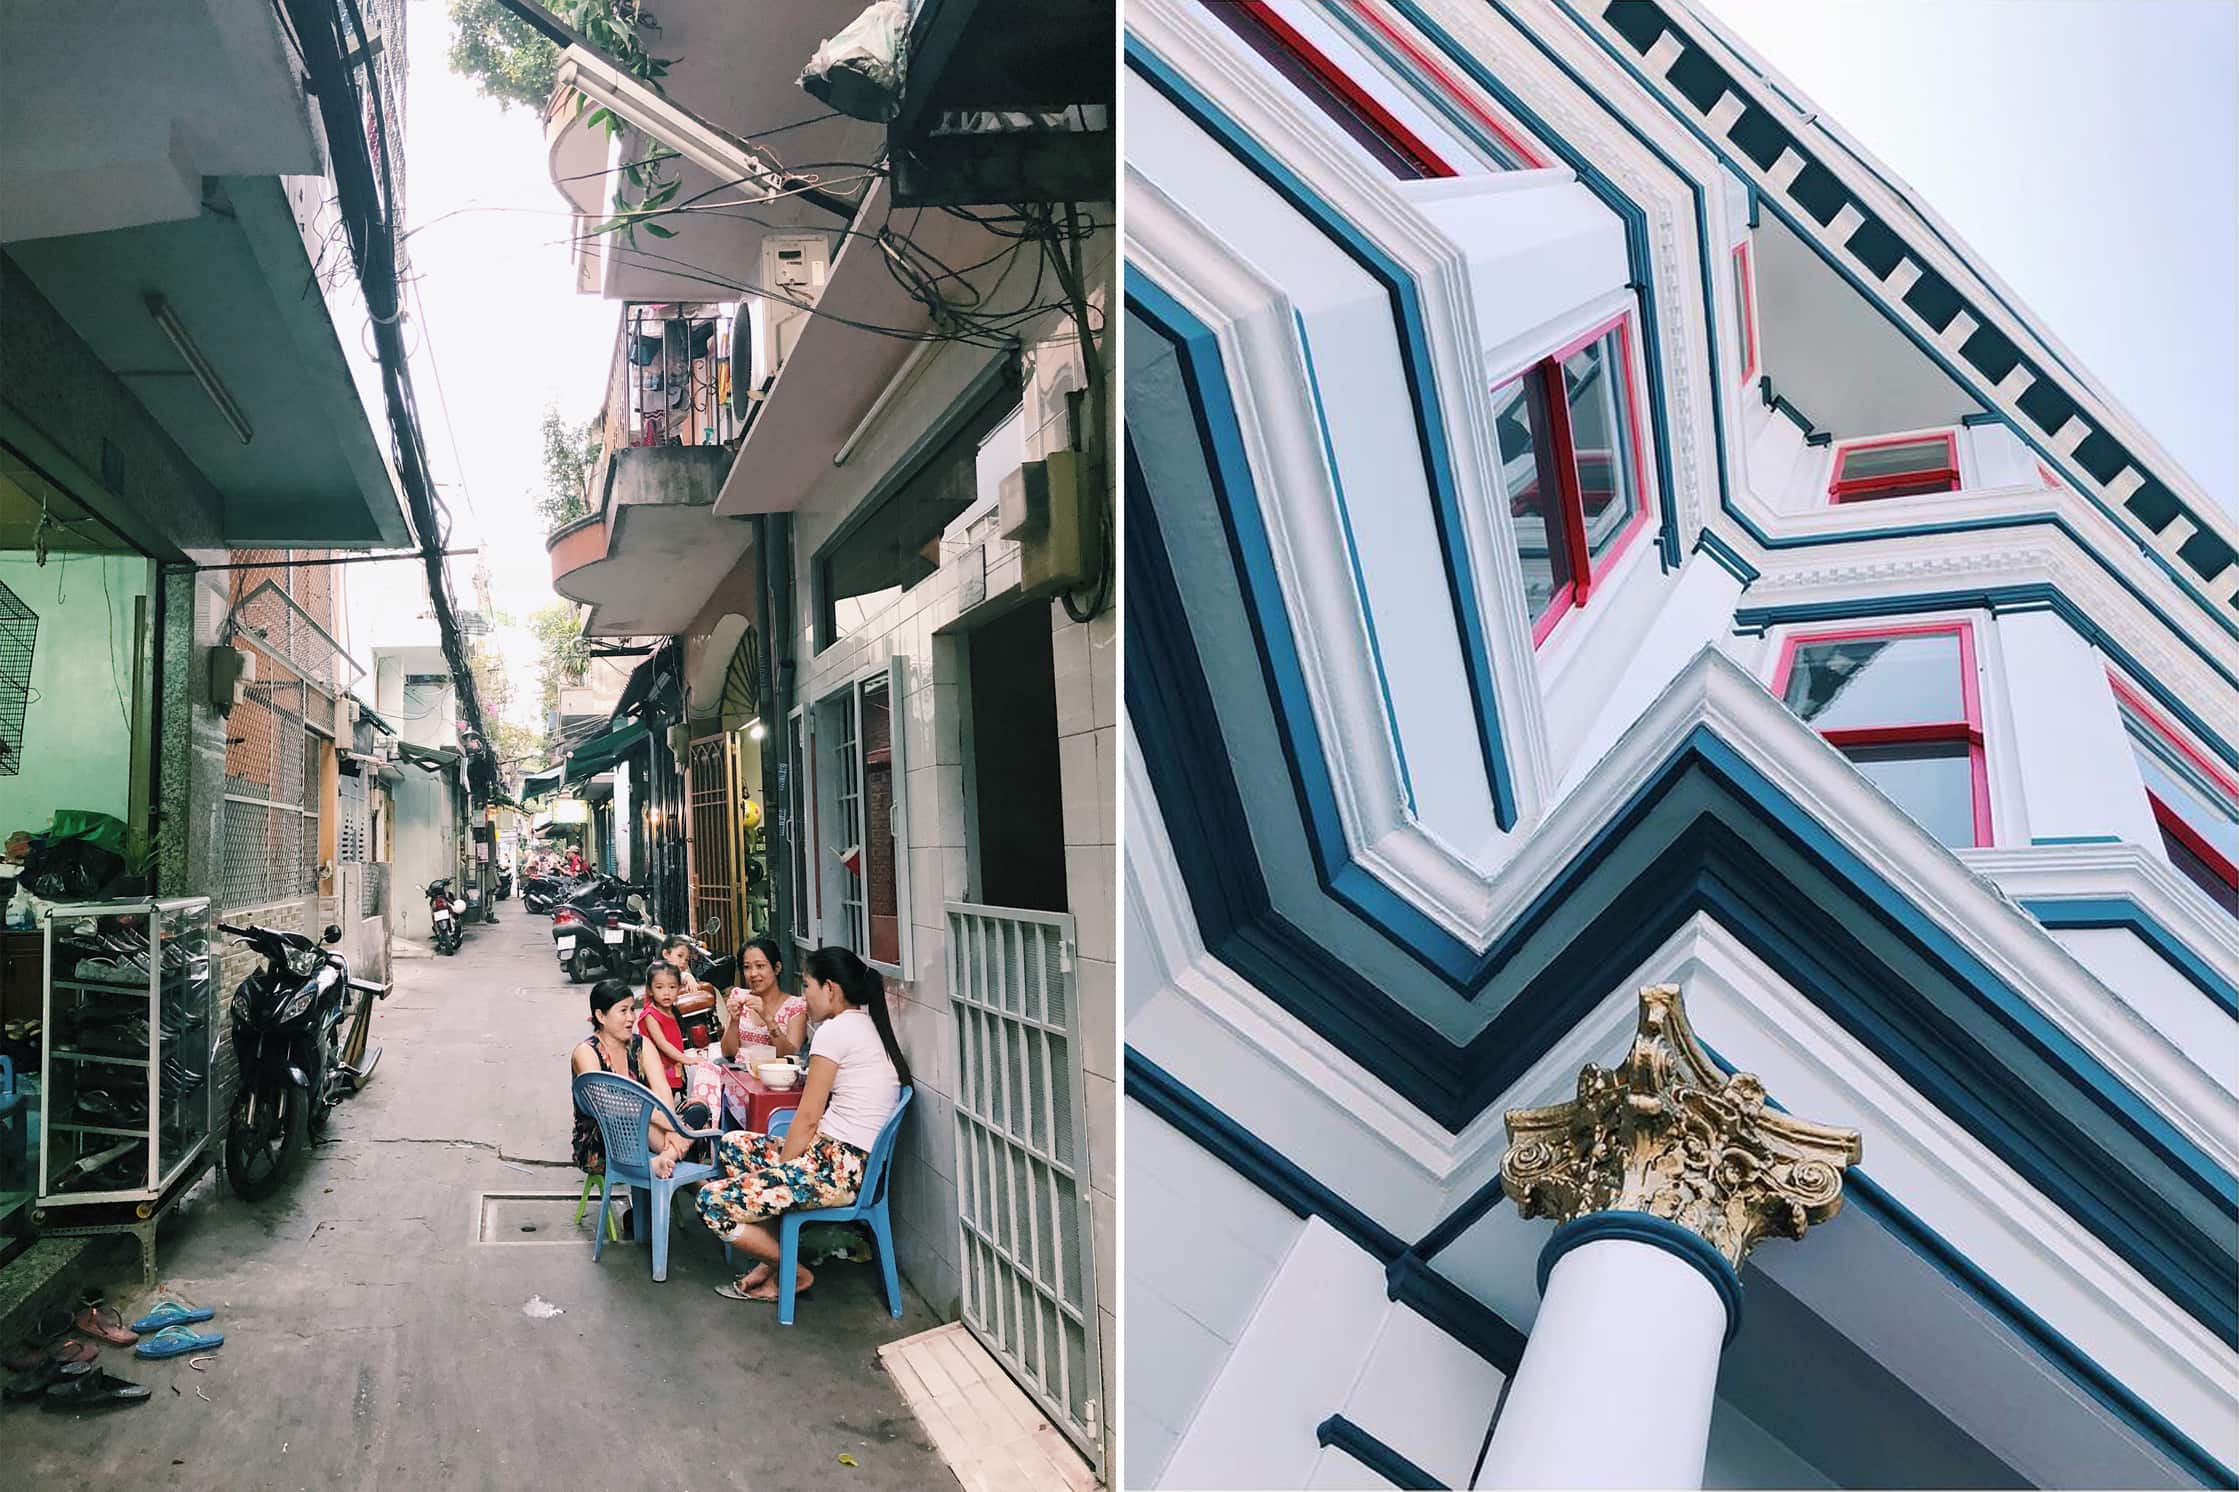
For those phones without removable storage, you’re going to be sharing all of your storage with other aspects of your phone, including any music, movies, or videos you may have on it. Long story short, your phone will fill up quickly. We’ve all been there, right? You go to take a photo only to get an error on your phone. Now you have to choose between that selfie with your cat or a picture of your nephew. Tough choice.
In a larger sense, we wanted to take a second to give an overarching photography PSA before we get too far into this guide…
Whether you’re traveling or at home, professional or amateur—backing up your images is crucial. We’ve all heard the horror stories of someone having a computer crash and losing all of their precious memories. Avoid being that person by sticking to this rule:
This applies to everything, but most importantly, to your images. Always have at least two copies of your images so you don’t end up being that person . Whether you’re backing your photos up on the cloud, on an extra SD card, a portable hard drive, or a laptop—just do it. Back that s#%! up!
Traveling With a Smartphone Camera
Having a camera in your phone means you’re always going to have it on you, so packing is a cinch. You don’t need to worry about a separate bag to keep your camera safe, and it’s not going to take up any more space. Maybe you can take that book with you after all!
If you’re looking for ways to keep your phone/camera safe while traveling, there are plenty of options for covers and cases. It’s not a bad idea to keep something on your phone to avoid cracking your screen and your camera lens. Having a dual purpose item like a smartphone is fantastic for so many reasons, but it also means that if you break your camera you break your phone—and vice versa.
Another thing to consider is that by using your phone as your camera as well as your navigational and communication system, you’re going to chew through your battery—and it’s not like you can just pop a fresh one in there. It’s not a bad idea to pack a power bank with you. There are plenty of options that are small and portable, although we recommend Anker as they have a solid track record. When it comes to chargers and cables, you’re almost always better off paying a few extra bucks for something that won’t crap out halfway through your trip.
Mobile Photo Gear We Can’t Live Without
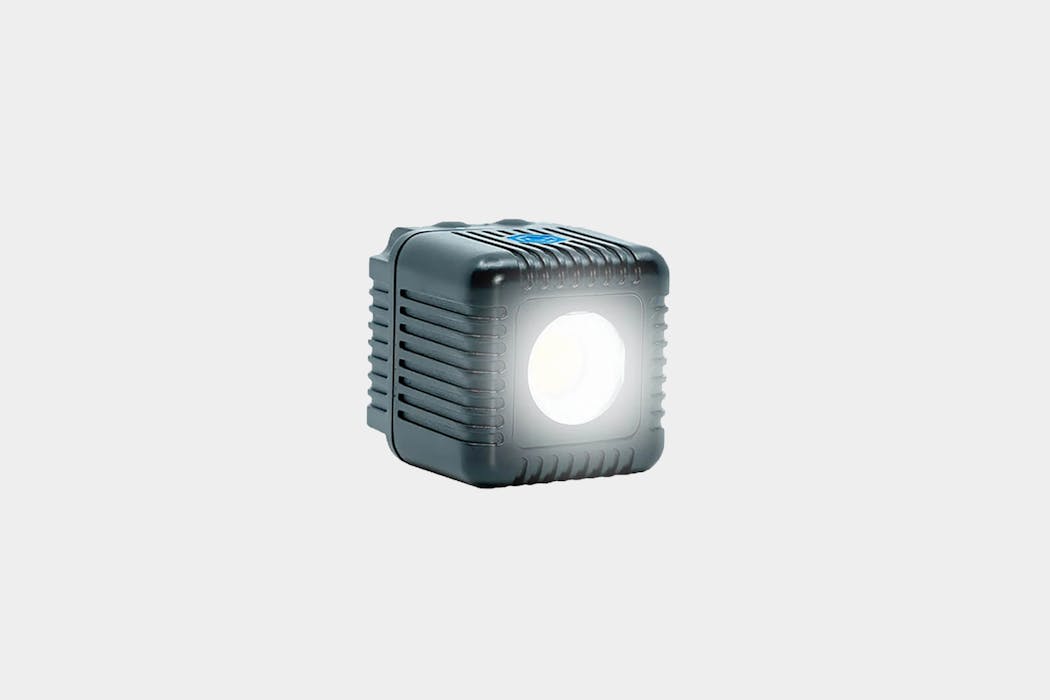
A teeny tiny light source that may blow your mind. An off-camera light source, this can be used in constant mode and also in flash mode. This isn’t just for your mobile phone camera, it can also be used with action cameras like a GoPro or even with a DSLR.
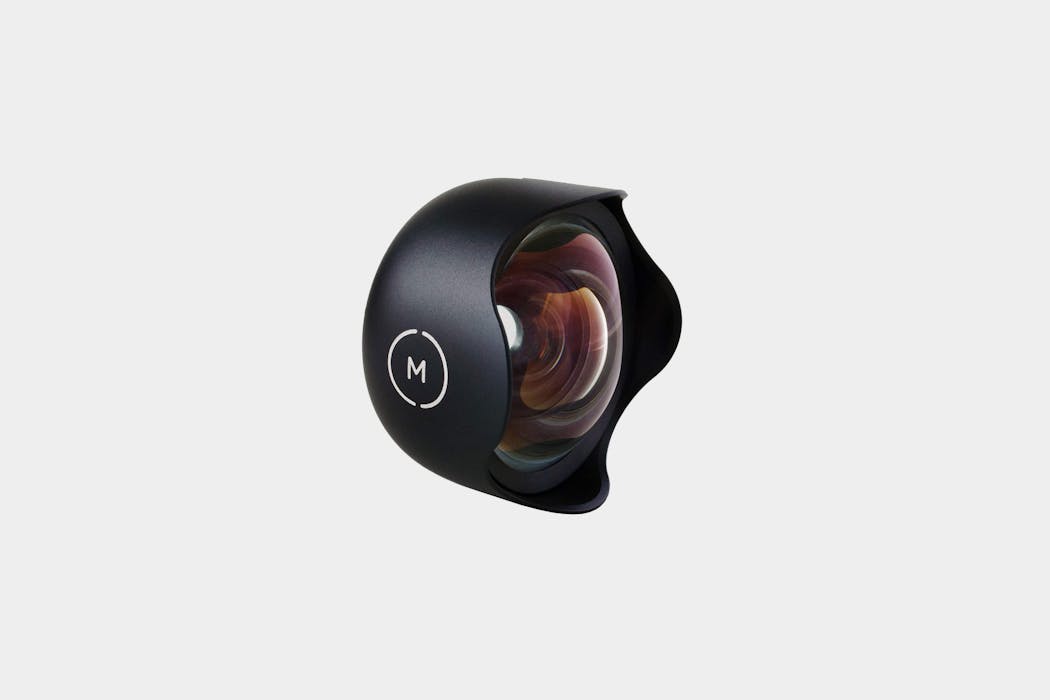
One of the ways you can really take your mobile photography to the next level is by using a lens other than the one that comes with your camera. Unlike a DSLR or a mirrorless camera, you can’t remove the lens from your mobile camera—but you can put a lens on top of the original lens to get a different desired look. Moment has 5 different lenses. Everything from fisheye, to macro to telephoto. Keep in mind that you’ll need the moment case in order to attach your lenses to your camera.
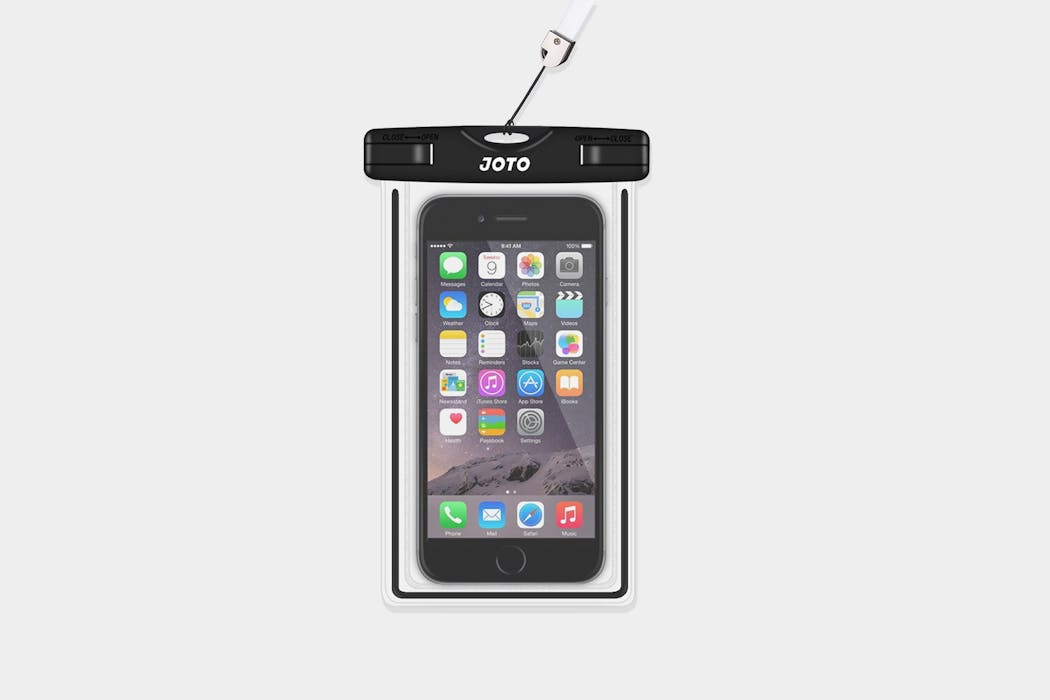
For anyone who likes to upgrade their phone from time to time, it’s not a bad idea to have a universal case. The Joto is waterproof, which we hope doesn’t come in handy but probably will. This case will fit a phone up to 6” diagonally and still have room for some important things like money or credit cards. Versatile and durable—we love it.
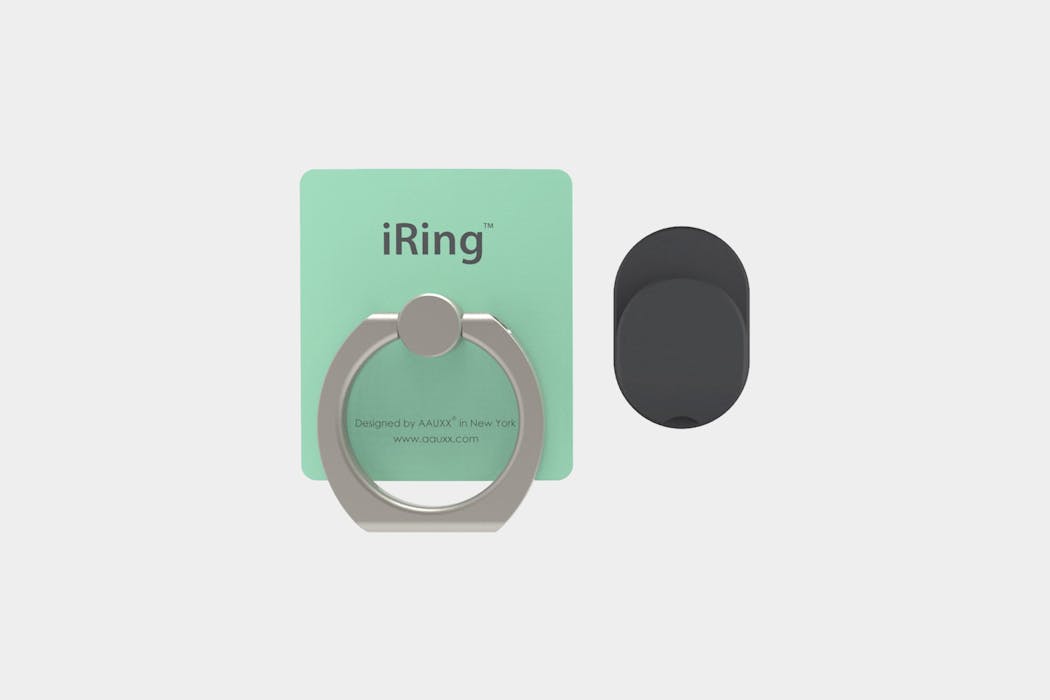
A solution for butterfingers, the iRing attaches to the back of your smartphone and gives you something to hang onto while you take photos or respond to messages. As an added bonus, it will also act as a stand if you want to prop your phone up and watch Netflix on your flight.
“An additional benefit of this is that in countries like Vietnam or Brazil, it makes it harder for someone to run/drive by and snatch your phone out of your hands while you’re lining up that perfect shot. Unfortunately, that’s the reality of traveling in many countries.” —Tam Le, Self-taught Photographer
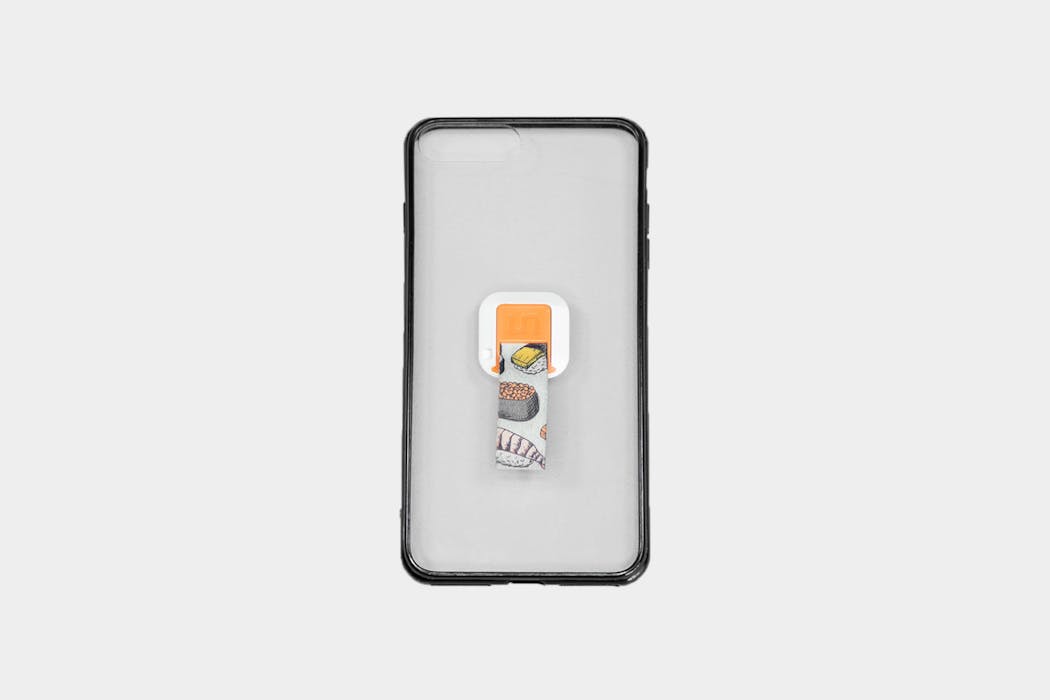
The Ungrip provides a comfortable way to carry your phone, plus, there’s a ton of colors and styles to choose from.
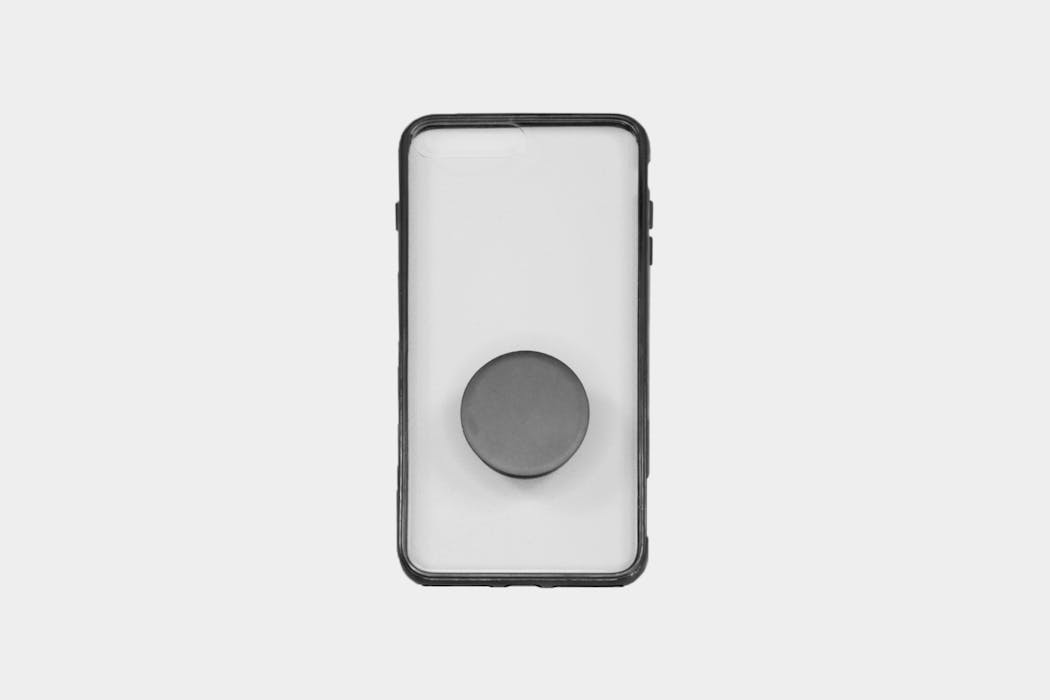
PopSockets provide a nice additional grip to stabilize your phone for photography & video. The durability isn’t outstanding on them, but they get the job done.
Apps We Love
Lightroom mobile app.
Lightroom is the tried, trusted and true software used by professional photographers everywhere to edit their photos. Having it right in your phone means you can edit on the fly, whether it’s images from your mobile camera or your DSLR. Another great benefit of the Lightroom app is the ability to shoot directly within the app. The software is more advanced than the native software that comes with your phone, so you’ll be able to shoot in RAW—giving you the freedom to alter your images more easily.
Dropbox File Management
One of the most important things to consider with your memories is how you’re going to keep them safe. If your phone doesn’t have removable storage, you’re going to want to look into a way to dump your pictures. Syncing to your laptop isn’t exactly the quickest—or easiest—method, so Dropbox is a great alternative. You can access your images from your phone or your computer and it doesn’t matter if you end up switching from iPhone to Android. This might also mean you can skip bringing your laptop with you on your trip . As an added bonus, Dropbox makes it very easy to share photos with others—whether it’s your coworkers, friends, or family.
Disclaimer: Many companies offer their own proprietary cloud storage systems, like Apple iCloud and Google Photos. These will work fine but might be incompatible across various operating systems, which is why we’d rather not recommend one over the other. We like Dropbox because you don’t have to worry about that stuff, but to each their own.
Chase Jarvis, professional photographer and CEO of CreativeLive, once said, “the best camera is the one that you have with you.” You may have the greatest camera on the market, but if it’s not with you, it’s not the best travel camera.
Size and convenience will be your biggest reasons for choosing a smartphone camera as the best camera for travel. Chances are you’re already planning on taking it with you, so now there’s one less thing to have to insure or worry about.
Having such great cameras in our mobile phones now means that you don’t necessarily have to give up quality for the sake of convenience. With the ability to shoot in raw with apps like Lightroom, you don’t even have to sacrifice your editing capabilities after the fact.
You may never match the quality of a DSLR or a mirrorless camera, but with all of the new accessories like lenses and flashes, it could be good enough. You may not be able to pass these off to clients, but you’ll be able to print photo books of your adventures or have an epic Instagram grid.
With next to zero learning curve for this camera, it’s an excellent choice for anyone who doesn’t have the time or energy to devote to learning a new skill but wants to take some pretty pictures while exploring.
Our Favorite Mobile Phones That Have Great Cameras
- Google Pixel 3
Point. Shoot. Repeat. A simple option that's great for travel.
Why Point and Shoot Photography?
The next step up in terms of both quality and size is the good old-fashioned point-and-shoot—the digital upgrade to those old disposable film cameras you’d bring to the zoo when you were a kid. The point-and-shoot is also sometimes referred to as a “compact camera.” This is our first step outside the smartphone cameras we all know and love, into the world of devices that do one thing and one thing only—take images.
The biggest selling point (hah) of a point-and-shoot camera is the size and weight. In terms of depth, it will generally be larger than your smartphone. But in every other way, it will be smaller. Many of the newer point-and-shoot cameras are slimmer and come close to the waistband of a smartphone. Finding a spot for it in your carry on bag or slipping it into your pocket as you head out the door shouldn’t be an issue.
A good point-and-shoot camera will give you some control over your settings if that’s what you’re looking for in your travel camera. If you’re not interested in spending time learning your camera, no big deal—the point-and-shoot camera is designed to be used by someone straight off the couch.
The price point is also much more approachable than some of the more serious options we’ll cover later in this guide. The point-and-shoot camera is smaller and less complex making it an easier pill to swallow when you throw down cash in search of the best travel camera around.
A point-and-shoot camera is still one of the most common cameras in the world. The reason for this is simply ease of use. Just like its name suggests, it’s designed to let you simply point in the direction of what you want to take a picture of and click the shutter. So easy, in fact, that your 102-year-old grandmother can take photos of you at your wedding even though she still can’t seem to check her email.
The simplicity of this camera means you probably don’t even have to look at the screen to see what you’re shooting, but we suggest you do. Chances are you’ll take better photos, but hey—go with what you feel. When you do look at your camera to set up that shot, you’re going to be looking at the LCD screen rather than the viewfinder, as most point-and-shoot cameras don’t even have a viewfinder anymore. Keep in mind that cameras without viewfinders will go through battery much quicker than one that has both (or one with no LCD screen, although that is almost non-existent at this point). If you have a viewfinder you can turn off the LCD screen to conserve a significant amount of battery life.
If your point-and-shoot camera does have a viewfinder, it will basically be a window through the camera body or right above. This means you aren’t looking through the exact same spot as your lens—it will take a bit of getting used to because what you are seeing is not what you are taking a picture of.
Point-and-shoot cameras come with a fixed lens, which means you will not be able to change lenses at any point. Most point-and-shoot cameras will have a zoom lens as their fixed lens, so you should still have some versatility with your camera. A zoom lens will give you a range of focal lengths (check the glossary if you need a refresher!) and will extend out of the camera body a little bit. What makes this different from the digital zoom found in mobile photography is that you are physically zooming in rather than just magnifying the pixels, which will give you better quality pictures.
The inability to upgrade or change out accessories, like your lens, can be a downside to a point-and-shoot camera. If you really want to dive into photography and fully explore what the medium has to offer, a point-and-shoot may not be the right camera for that. While easy to pick up and use, you’ll find yourself quickly hitting the limits of what your little camera can offer. If this sounds like you, we’d recommend moving on to the Mirrorless and DSLR sections of this guide.
On the other hand, if you’re just looking for something to document things while you’re traveling, this camera will do the trick. Not having to worry about changing lenses or packing accessories can be incredibly freeing while you’re on the road. For those looking to get off the grid, this can be a nice alternative to a smartphone camera as you can leave your phone—and the baggage that comes with it—behind. A point-and-shoot will also generally offer higher image quality than a smartphone.
One camera we have our eyes on is the Canon PowerShot SX730 HS . It’s an ultracompact point & shoot that weighs only 300g but still packs in 40x optical zoom and a tilt screen—which makes it an ideal choice for those looking for minimalist travel photography gear. This little camera can go from 24mm-960mm and still fit in your pocket. For someone looking to have a versatile travel camera, this is a great option. It will only shoot in JPEG, so if you’re looking to manipulate your images afterward, it may not be the camera for you. But if you just want awesome photos from a trip and you want to skip the processing time it could be a prime candidate for the best travel camera for you.
The size of your camera is a major consideration while traveling, and that is where the point-and-shoot really shines—it’s one of the smallest of all the camera kits out there. It won’t take up much space in your bag and can be easily concealed while you’re out and about, as it fits in most pockets.
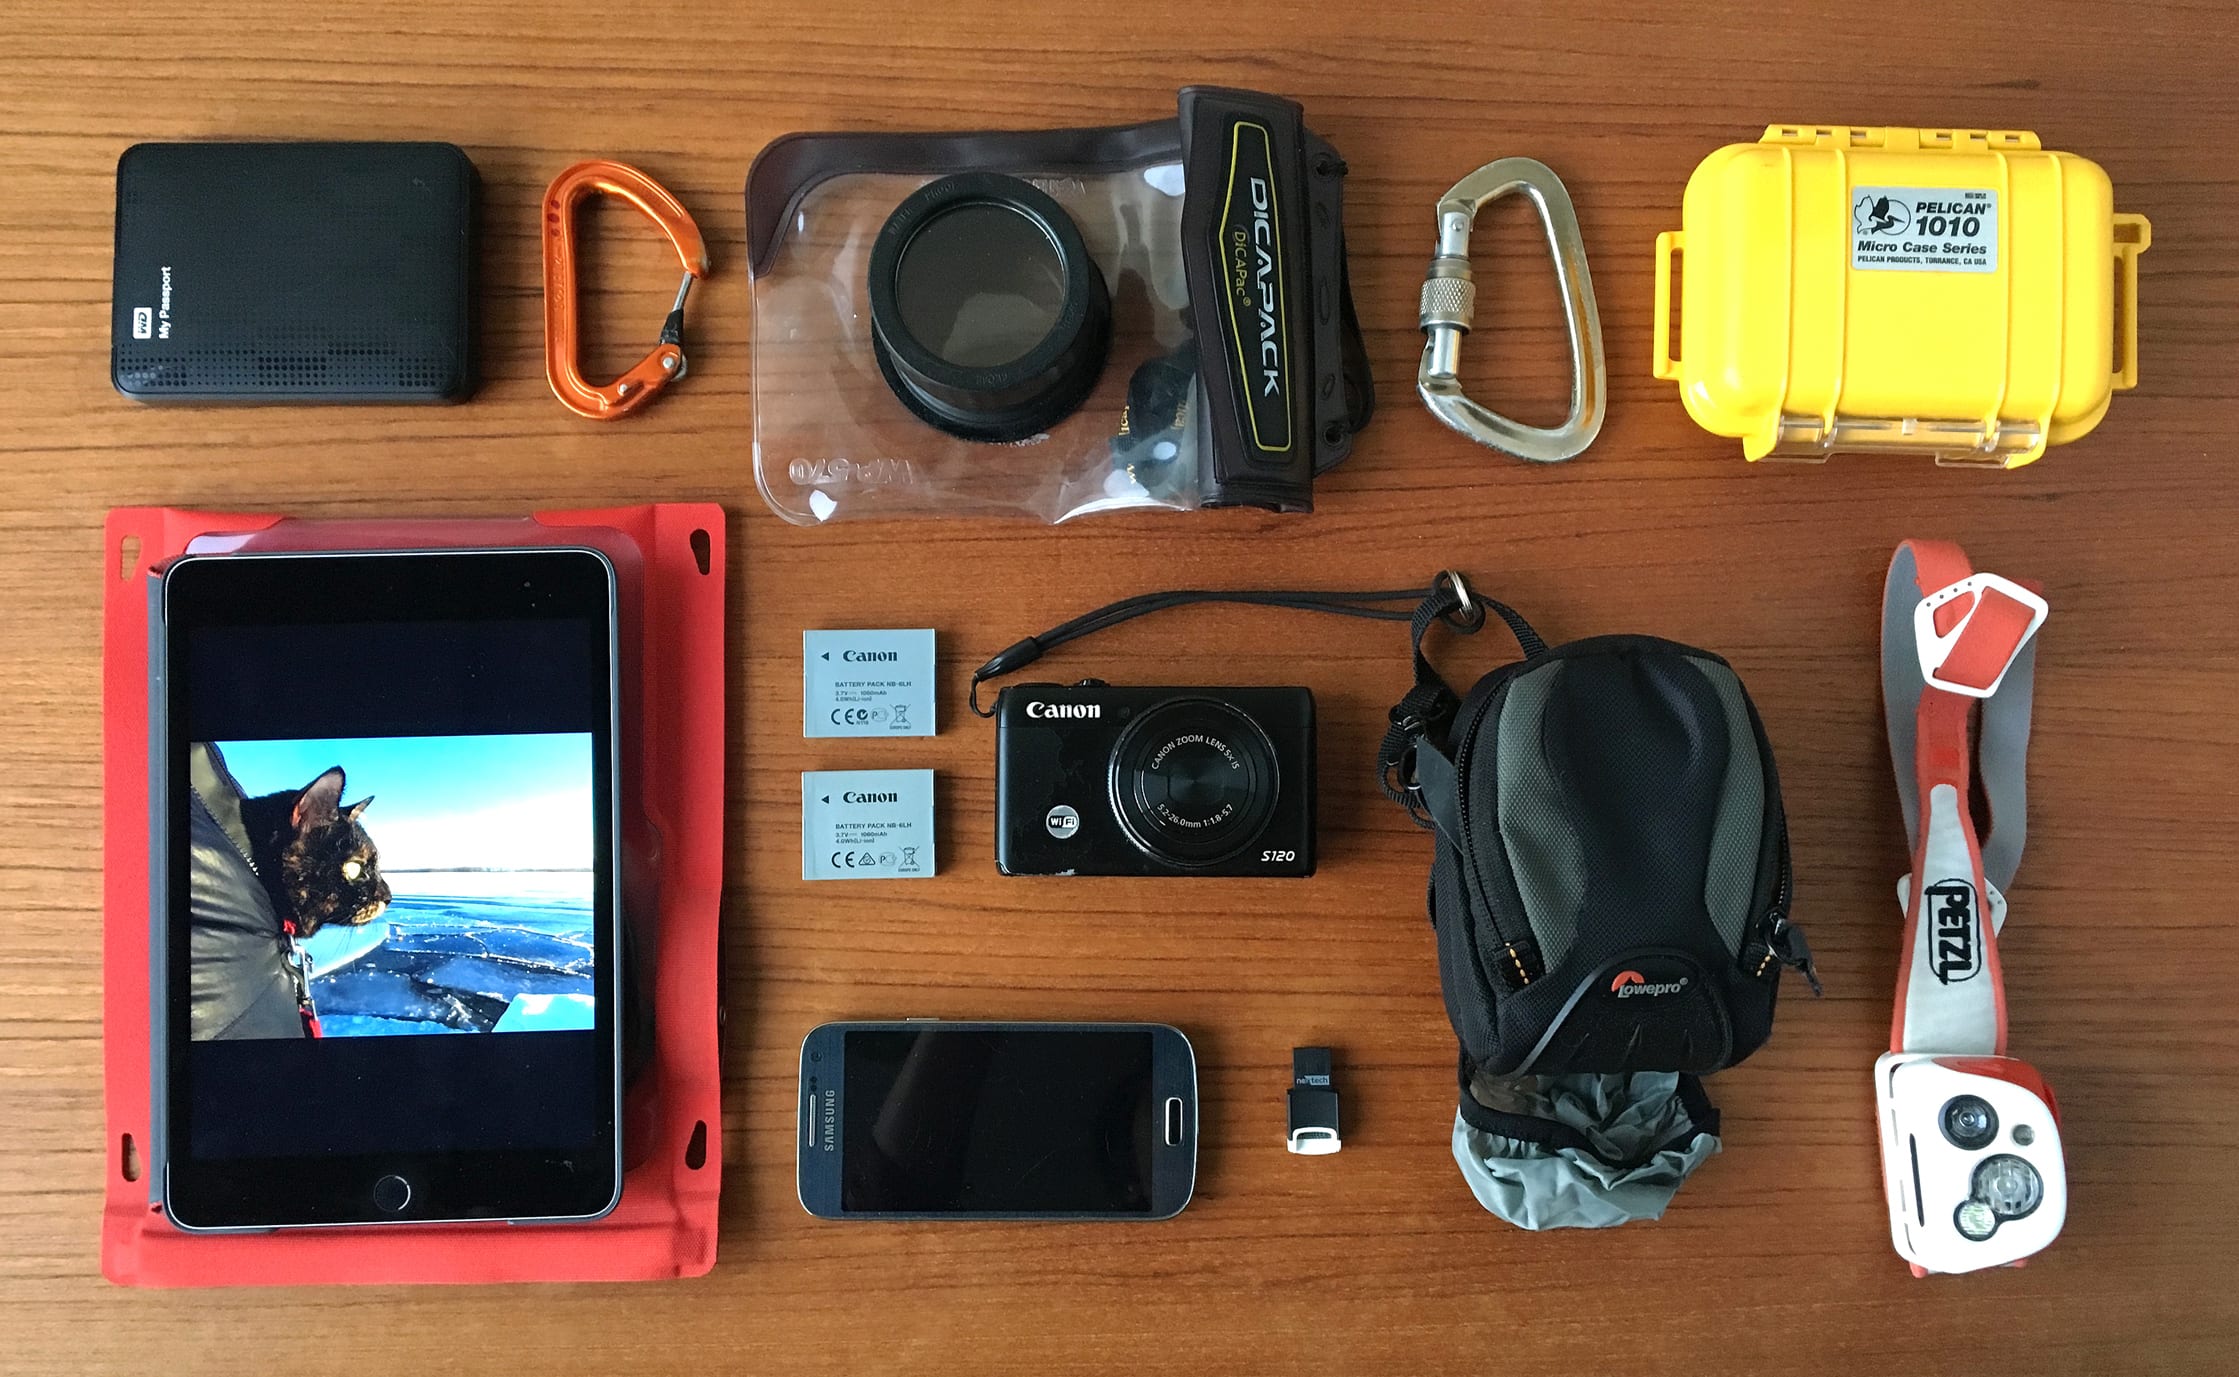
“I’m a rock climber and my point-and-shoot is small enough to lock to my harness in a padded case and go up long routes. Climbing with the DSLR was a bit nerve-racking as I was always restricting my movement to avoid bumping it into the rock. Generally, the S120 is compact enough to carry on me almost all the time (even for daily use in the city when I do site inspections) without feeling bulky.” —Adrienne Tam, Architect and Photo Enthusiast
The smaller size also means that you’re not expected to purchase a beast of a camera bag to keep it safe. A simple small padded camera carrying case will do the trick, or wrapping it in a beanie or sock in your bag. You’ll want to make sure that there’s something around it to avoid damage, but you don’t have to get too extravagant. That being said, it’s never a bad idea to have a decent camera case with a built-in rain cover.
A downside to the smaller size is that it can be left behind, unnoticed. This could be devastating not just because you’ll be without your camera for important moments, but also because chances are there’s a memory card in that camera that contains some important bits you don’t want to lose track of.
Another downside is that point-and-shoot cameras aren’t known for their low light capabilities. The smaller sensor means that you’ll lose quality when the light starts to get too dim—your camera will kick in a higher ISO or slower shutter speed and your images will come out with digital noise, which is not a good look. Luckily, your camera comes with a built-in flash. This means that you can still take that portrait of your friend blowing out their birthday candles, as the flash will fill in any of the light you may be missing. Adding more light with the flash means your ISO can stay in a range, which will keep your images looking crisp and clean without any digital noise.
There are also other workarounds, like placing your camera on a tripod and increasing the exposure time rather than the ISO. A higher ISO generally means more noise, even though the photo is “brighter” on the LCD screen. Although the technology gets better every single year so give it time and this shouldn’t be an issue.
“Full manual control and enough dials to actually make use of it. I have been able to use it for long exposures in Iceland to capture the northern lights.” —Adrienne Tam, Architect and Photo Enthusiast
Traveling with a point-and-shoot camera should be as easy as changing a lightbulb. Being so small, there’s not really much to think about other than making sure it’s charged up. We’re pretty confident a point-and-shoot will fit into your carry on bag without any issues. Make sure you take extra batteries and memory cards—you don’t want to find yourself without them in a pinch.
Point and Shoot Gear We Can’t Live Without
You’ll be able to take your camera literally anywhere with this universal waterproof case. There’s a case designed for each type of camera, so make sure you choose the right one for the camera kit you have. Not only will this keep your camera safe if you get caught in the rain, you can also take it right in the water with you.
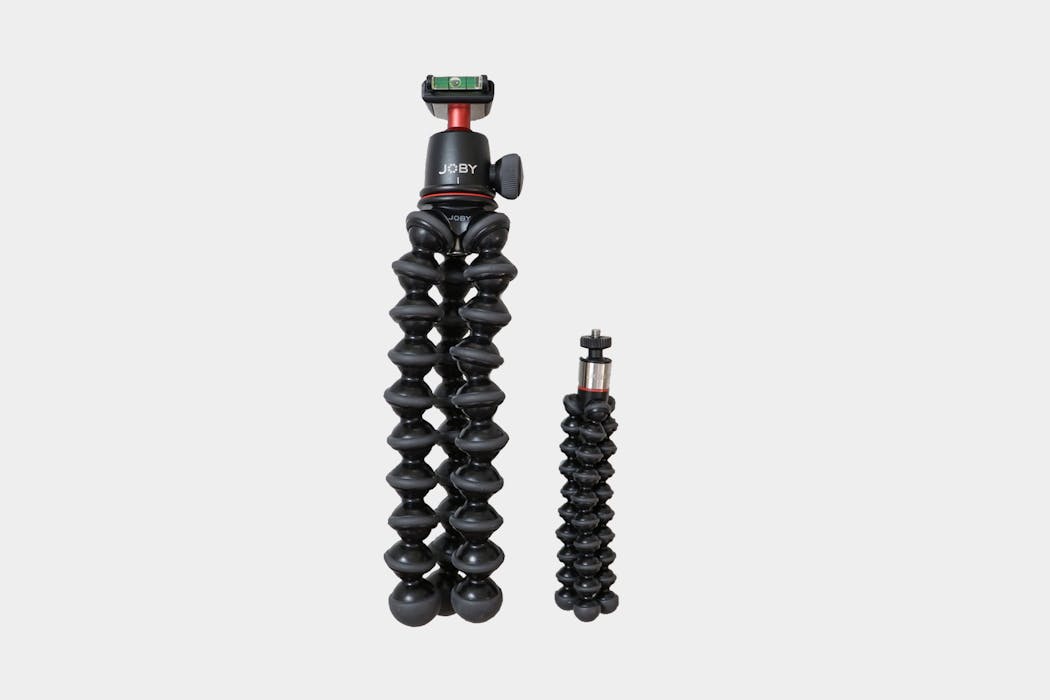
Compact and versatile, this tripod is a great option for traveling. It may look a little funny, but the design has a great purpose. This tripod doesn’t just stand on it’s own legs, it can also be wrapped around various objects to give you more versatility with where you’re shooting from. Want a birds eye view? Wrap it around a tree branch. We recommend size “500” for most point-and-shoot cameras, although there’s a ton of different sizes to choose from based on the size of your camera.
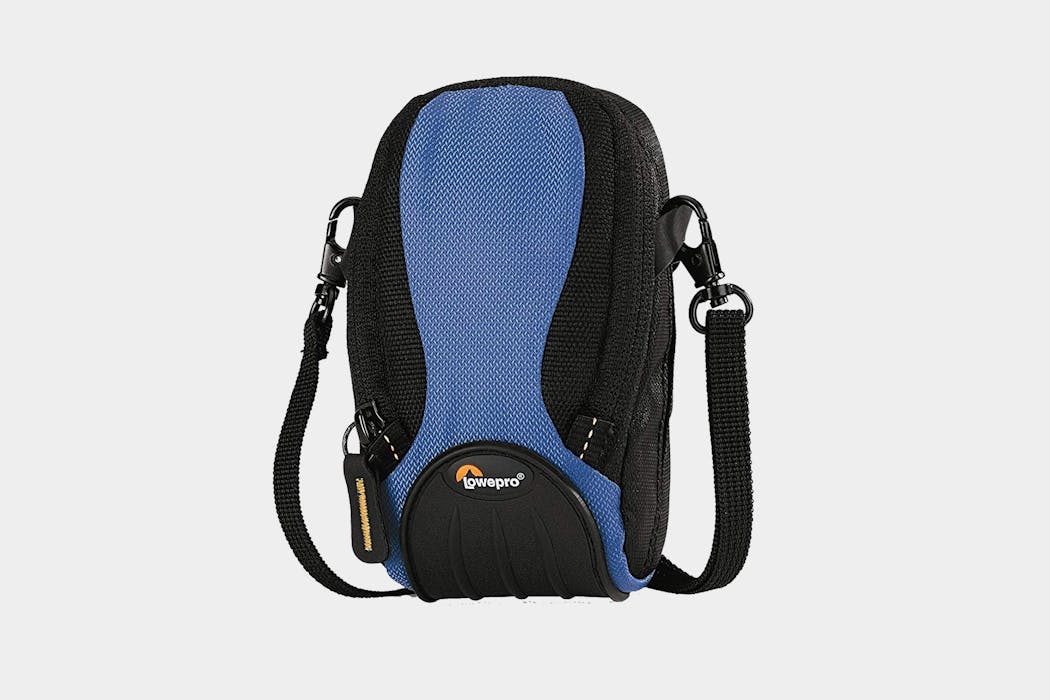
A low profile, rugged camera case. The pockets will hold extra batteries or memory cards, keeping them close and handy for when you need them. There’s also a rain cover tucked in the bottom of the bag so that if you do get caught in the elements, you can keep the important bits dry and safe.
This camera system is the second easiest to use, and one of the smallest. Both of these things make it an excellent candidate for travel. Is it the best camera for travel? We don’t like to deal in absolutes, but it’s definitely in the running.
If you’re seriously interested in photography and can see yourself wanting to upgrade and grow as you learn and experiment with your camera… you’ll be better off with a mirrorless or a DSLR camera. But if taking quick snaps to show your family when you get home from Mexico is your game plan, this camera couldn’t be a better choice.
Our Favorite Point and Shoot Cameras
- Sony RX100 VI
- Panasonic Lumix LX100
- Canon G7 X Mark II
Who even needs mirrors anymore? These cameras pack a big punch in terms of quality while saving weight and space in your bag.
Why Mirrorless Photography?
Mirrorless cameras could be imagined as the middle child between the big, bad DSLR, and the young, innocent point-and-shoot. While they’re a little shy, you can just envision them growing into their skin and giving their older sibling a run for their money. In baseball terms, they’re in AAA, getting ready for their big break in the major leagues.
Okay, we’ll stop with the analogies. Mirrorless cameras are very similar to DSLRs in almost all regards but function a bit differently in terms of the actual mechanics. At the end of the day, DSLRs do tend to trump mirrorless cameras in terms of image quality and craftsmanship—but by a very, very small margin.
The most common reason for choosing a mirrorless camera setup is size & weight. These little gems are still producing quality images, but they’re significantly smaller and lighter than a DSLR. When mirrorless cameras first hit the scene, they were not able to provide the quality of images or focus speed as a DSLR, but they’re pretty darn close now.
Most mirrorless cameras weigh in at around 1.5lbs, and the average size is 3.5”x5”. That will definitely leave more room in your carry on for an extra sundress or your favorite pair of noise-canceling headphones.
Depending on your exposure to digital photography—especially in recent years—you may be thinking “What the heck is a mirrorless camera?!” A mirrorless camera is also commonly referred to as a compact camera system. It’s still a digital camera with interchangeable lenses, but it’s a lot slimmer, smaller and lighter than a DSLR camera. This makes it a perfect candidate for many of your travel photography needs.
But mirrorless cameras aren’t just for traveling—they’ve been adopted by a number of professional photographers as their main camera kit. There’s been a recent push for wedding photographers in particular to make the leap from DSLRs to mirrorless cameras, as the weight is much easier to handle during hour 12 of a wedding day. At the time of posting this, we are currently using a mirrorless camera for most of our YouTube videos (a Sony a6500 with wide lens kit , if you’re curious).
Bear with us here, we’re about to get a little technical. To give you some context, we’re going to explain how a mirrorless camera works by comparing it to the DSLR, its close cousin. If you’re interested in learning more about DSLRs in particular, you can check out the next section for a more in-depth look.
A DSLR uses an optical viewfinder and a mirror for you to see what you’re about to take a picture of. So the light comes through the lens, it hits the mirror and gets directed to your viewfinder. When you’re ready to take the photo, the mirror flips down to expose the sensor (or film if you’re using analog) and the light from whatever you’re shooting comes through the lens and hits the sensor, where it morphs into a digital picture. That is why when you click the shutter on a DSLR your viewfinder will go dark.
How does it go from light to image in the sensor? Magic. At least that’s what we’ve been assuming all these years.
The reason a mirrorless camera is able to get away with being so small is that it ditches the mirror inside the camera (clever name for it, huh? No mirror = Mirrorless). It uses a digital viewfinder rather than an optical one, so there’s no need for the mirror. This means that what you’re seeing is simply a digital representation of what is coming through the lens—just like an LCD screen. It also saves quite a bit of space.
How does a digital viewfinder work, exactly? How does it transform that light into some sort of digital feed that you can see? Well, buckle up because we are going to dive into all the specifics on this and totally blow your mind…
Just kidding. We have no idea. It’s magic.
The smaller body may be a plus for traveling and taking care of your body—especially for those of us who carry around a camera for 12+ hours a day—but when it comes to ergonomics, the size can sometimes be an impediment. The smaller body size gives you less surface area to wrap your hand around, which is great for people with small hands, but for some, it can be a little uncomfortable to hold onto for long periods of time. You’ll be using mostly your fingers to grip your camera, rather than your whole hand.
This is a common complaint from people with larger hands who made the switch from DSLR to mirrorless. Besides being uncomfortable, this can also affect the stability of the camera, causing you to lose the ability to shoot with slower shutter speeds without noticing camera shake. One workaround for this issue is adding a battery grip, as it will extend your battery life and give you more area to hold onto your camera. This will nix the whole lighter and smaller quality of a mirrorless camera though, so you’ll have to weigh your options to decide which is best for you.
A mirrorless camera is going to be less expensive than a DSLR in terms of the body and all the lenses and accessories. Having fewer internal components plays a major role in this. The lowered cost of entry makes a mirrorless camera an excellent choice if you’re ready to step up in the photography world from a point-and-shoot or a mobile camera, but don’t quite have the budget for a beast of a DSLR.
Similar to a DSLR, a mirrorless camera allows you to manually manipulate the exposure and depth of field of your images. You can adjust things like ISO, aperture and shutter speed, giving you more creative control of how your images will turn out.
One thing to consider with mirrorless cameras is that you’re forced to rely on the digital viewfinder or the LCD screen to frame your image. There are definitely some perks to using a digital viewfinder/LCD screen, but also some downsides. One perk is that the screen often tilts, so if you’re vertically challenged you can lift the camera over your head and still see—as if you’re a foot taller than you actually are.
One final mention is that a lot of mirrorless cameras use a crop sensor, like the Fuji XT-3 . This isn’t a deal-breaker—in fact, if you haven’t used a camera much you may not even notice some of the differences.
What is a crop sensor? It literally means it crops the edges of the frame/photo. A full frame sensor is 35mm, just like the size of 135 film (which is the film you used in your grandpa’s film camera or that disposable you picked up for a birthday party). With a crop sensor, the focal length of your lens will be magnified from what it actually is, so a 35mm acts more like a 50mm, etc. If you’re switching from a full frame DSLR to a mirrorless, this may take a little bit of getting used to but will eventually become second nature.
“Size often comes at a cost—using a smaller sensor size in a camera makes for noisier images, especially when it gets dark out. Cameras at lower price points will lack certain features and performance that certain folks might find essential to their photo taking habits. You often get what you pay for in the camera world; however, skills and resourcefulness are always the most important.” —Jared Martin, Professional Architectural Photographer
There still aren’t as many options for mirrorless cameras as there are for DSLRs, which may make your decision process a little easier. The ones you’ll probably hear the most about are the SONY A7 Series and the FUJI XT Series. That’s not to say there aren’t more options out there, but these two brands have really paved the way for mirrorless cameras and continue to produce outstanding models. Both of them have well-built cameras that can create incredible images and equally stunning videos, making them strong candidates for the best travel camera.
When looking for a mirrorless camera, you’ll need to consider whether you want a fixed lens or a body that offers interchangeable lenses. Having a fixed lens mirrorless will add some challenges that can both hold you back and also challenge you to get better. It will force you to really move in order to get the image you want—your feet basically become the zoom. That being said, it could also put you in a position where you’re unable to take the photo you want because the focal length you have is just not enough to capture said image.
If you choose to go the other route, interchangeable lenses will allow you to give yourself more options for focal length—just like a DSLR. Don’t be deceived by the size or weight of the little lenses for a mirrorless camera. They still manage to take quality images with a sharpness you’ll be proud to share with your clients or print for your wall.
Here are some lenses to consider for your mirrorless camera. There will be more out there, and it may be a little overwhelming to choose if you’re new to this. If you’re really unsure about which one to go with, try renting from your local camera shop first to see what works best for you. Camera gear isn’t cheap, and it does start to lose its value almost immediately after purchase. Better safe than sorry.
- Fuji 14mm 2.8: This will act more like a 21mm. This wide angle lens is great for landscapes.
- Fuji 23mm F2: This will act like a 35mm lens for your crop sensor. A great story telling lens, it offers a wide perspective without distorting things.
- Fuji 56mm F1.2: This will act like an 85mm lens. A perfect portrait lens.
- Fuji 35mm F1.4: This will act more like a 50mm lens. It’s your all-around lens, usually referred to as the “normal” lens.
Many of the mirrorless cameras have taken a page from the film days in their styling. The Fuji XT-2 and Fuji XT-3 offer a silver & black model that could be mistaken for a 35mm film camera, except it’s not going to stop you from taking pictures after shot #24. Sidenote: how did we ever live with only 24 photos per roll? You would never have been able to get that perfect selfie.
And it doesn’t just look like a film camera, it has a similar feel too. If you have experience with a 35mm camera, you’ll probably ooh and ahh over being able to change your f-stop using the lens ring, rather than a dial on the camera body. This gets both hands involved, rather than relying just on your right hand like a DSLR does. Finally, someone is looking out for the lefties!
Mirrorless Accessories: Beef That Baby Up
Mirrorless cameras have the ability to be souped up with whatever accessories you choose. As they are relatively new, there are not as many options for accessories as there are for DSLRs, but that is likely to change. There are accessory options for both video and still imagery, depending on which you’re most interested in. To make this even more interesting, Sony has adapters for their camera bodies so you can use Canon lenses with your Sony mirrorless camera. This is not a common occurrence with Mirrorless cameras. For most cameras, you will need to purchase lenses from the same brand as your camera body.
Here are some common accessories to consider adding to your kit.
- Battery Grip: As battery life can sometimes be an issue with mirrorless cameras, this is a great addition to your kit. Extend the life of your camera, while sacrificing weight and size. That being said, some people do like the additional weight and size as it can conform to your hand better and add a nice heft.
- Remote Shutter Release: Most mirrorless cameras will have wifi and an app for your smartphone, allowing you to snap a photo from a distance with no chance of jostling things around with your sausage fingers.
- Tripods: Being smaller and lighter than a DSLR, you can get away with a lighter weight tripod.
- Camera Straps: Your camera will come with a strap, but feel free to upgrade this to something you feel more comfortable with. A wrist strap or a sling bag might be the right fit for you.
- Camera Bag: Now that you have your camera, you should have a safe way to carry it around with you.
- Extra Batteries: This is a big one for the battery gulping mirrorless cameras.
- Extra memory cards: This one really applies to every camera kit that requires memory cards. Grab a few extra, you’ll thank us.
- External Flash: So you can continue taking photos when it gets dark, or play with light in more interesting ways.
- Lenspen: For cleaning your lens of dust and smudges.
Traveling With a Mirrorless Camera
You are going to love traveling with a mirrorless camera. It’s lightweight and small but takes pretty pictures. (Well, technically you take the pretty pictures, but it will definitely give you the ability to use your talents.) It’s like a DSLR and a point-and-shoot had a baby and that baby grew up to be badass and sexy as hell (is that weird?). This camera is small enough that it can easily fit in your purse—which means it’s great if you’re looking for minimalist travel photography gear.
Choosing a mirrorless model with interchangeable lenses will give you the most versatility while traveling. Unlike DSLR lenses, mirrorless camera lenses don’t take up much room in your bag, so you’ll be able to pack a few extras. You’ll definitely want to consider what you plan on photographing before you pick your lenses. If you’re mostly interested in landscapes, make sure you pack a wide angle lens like a 14mm, 18mm or a 21mm.
When packing your lenses, you can always tuck them into thick socks or a beanie if you want to maximize on space. And make sure you’re packing a number of extra batteries and memory cards so you don’t run into a situation where you’re without when you want to shoot. Also, you don’t want to forget your charger.
“All of my photography gear and electronics fit into an F-Stop Gear Small Pro ICU. When the ICU is put into a carry-on size roller bag, it only takes up about half the space. That leaves me enough space to carry all of my clothing and personal items to travel for a month at a time.” —Tara Lilly, Professional Wedding Photographer
Wedding Photographer Tara Lilly’s Mirrorless Camera Kit
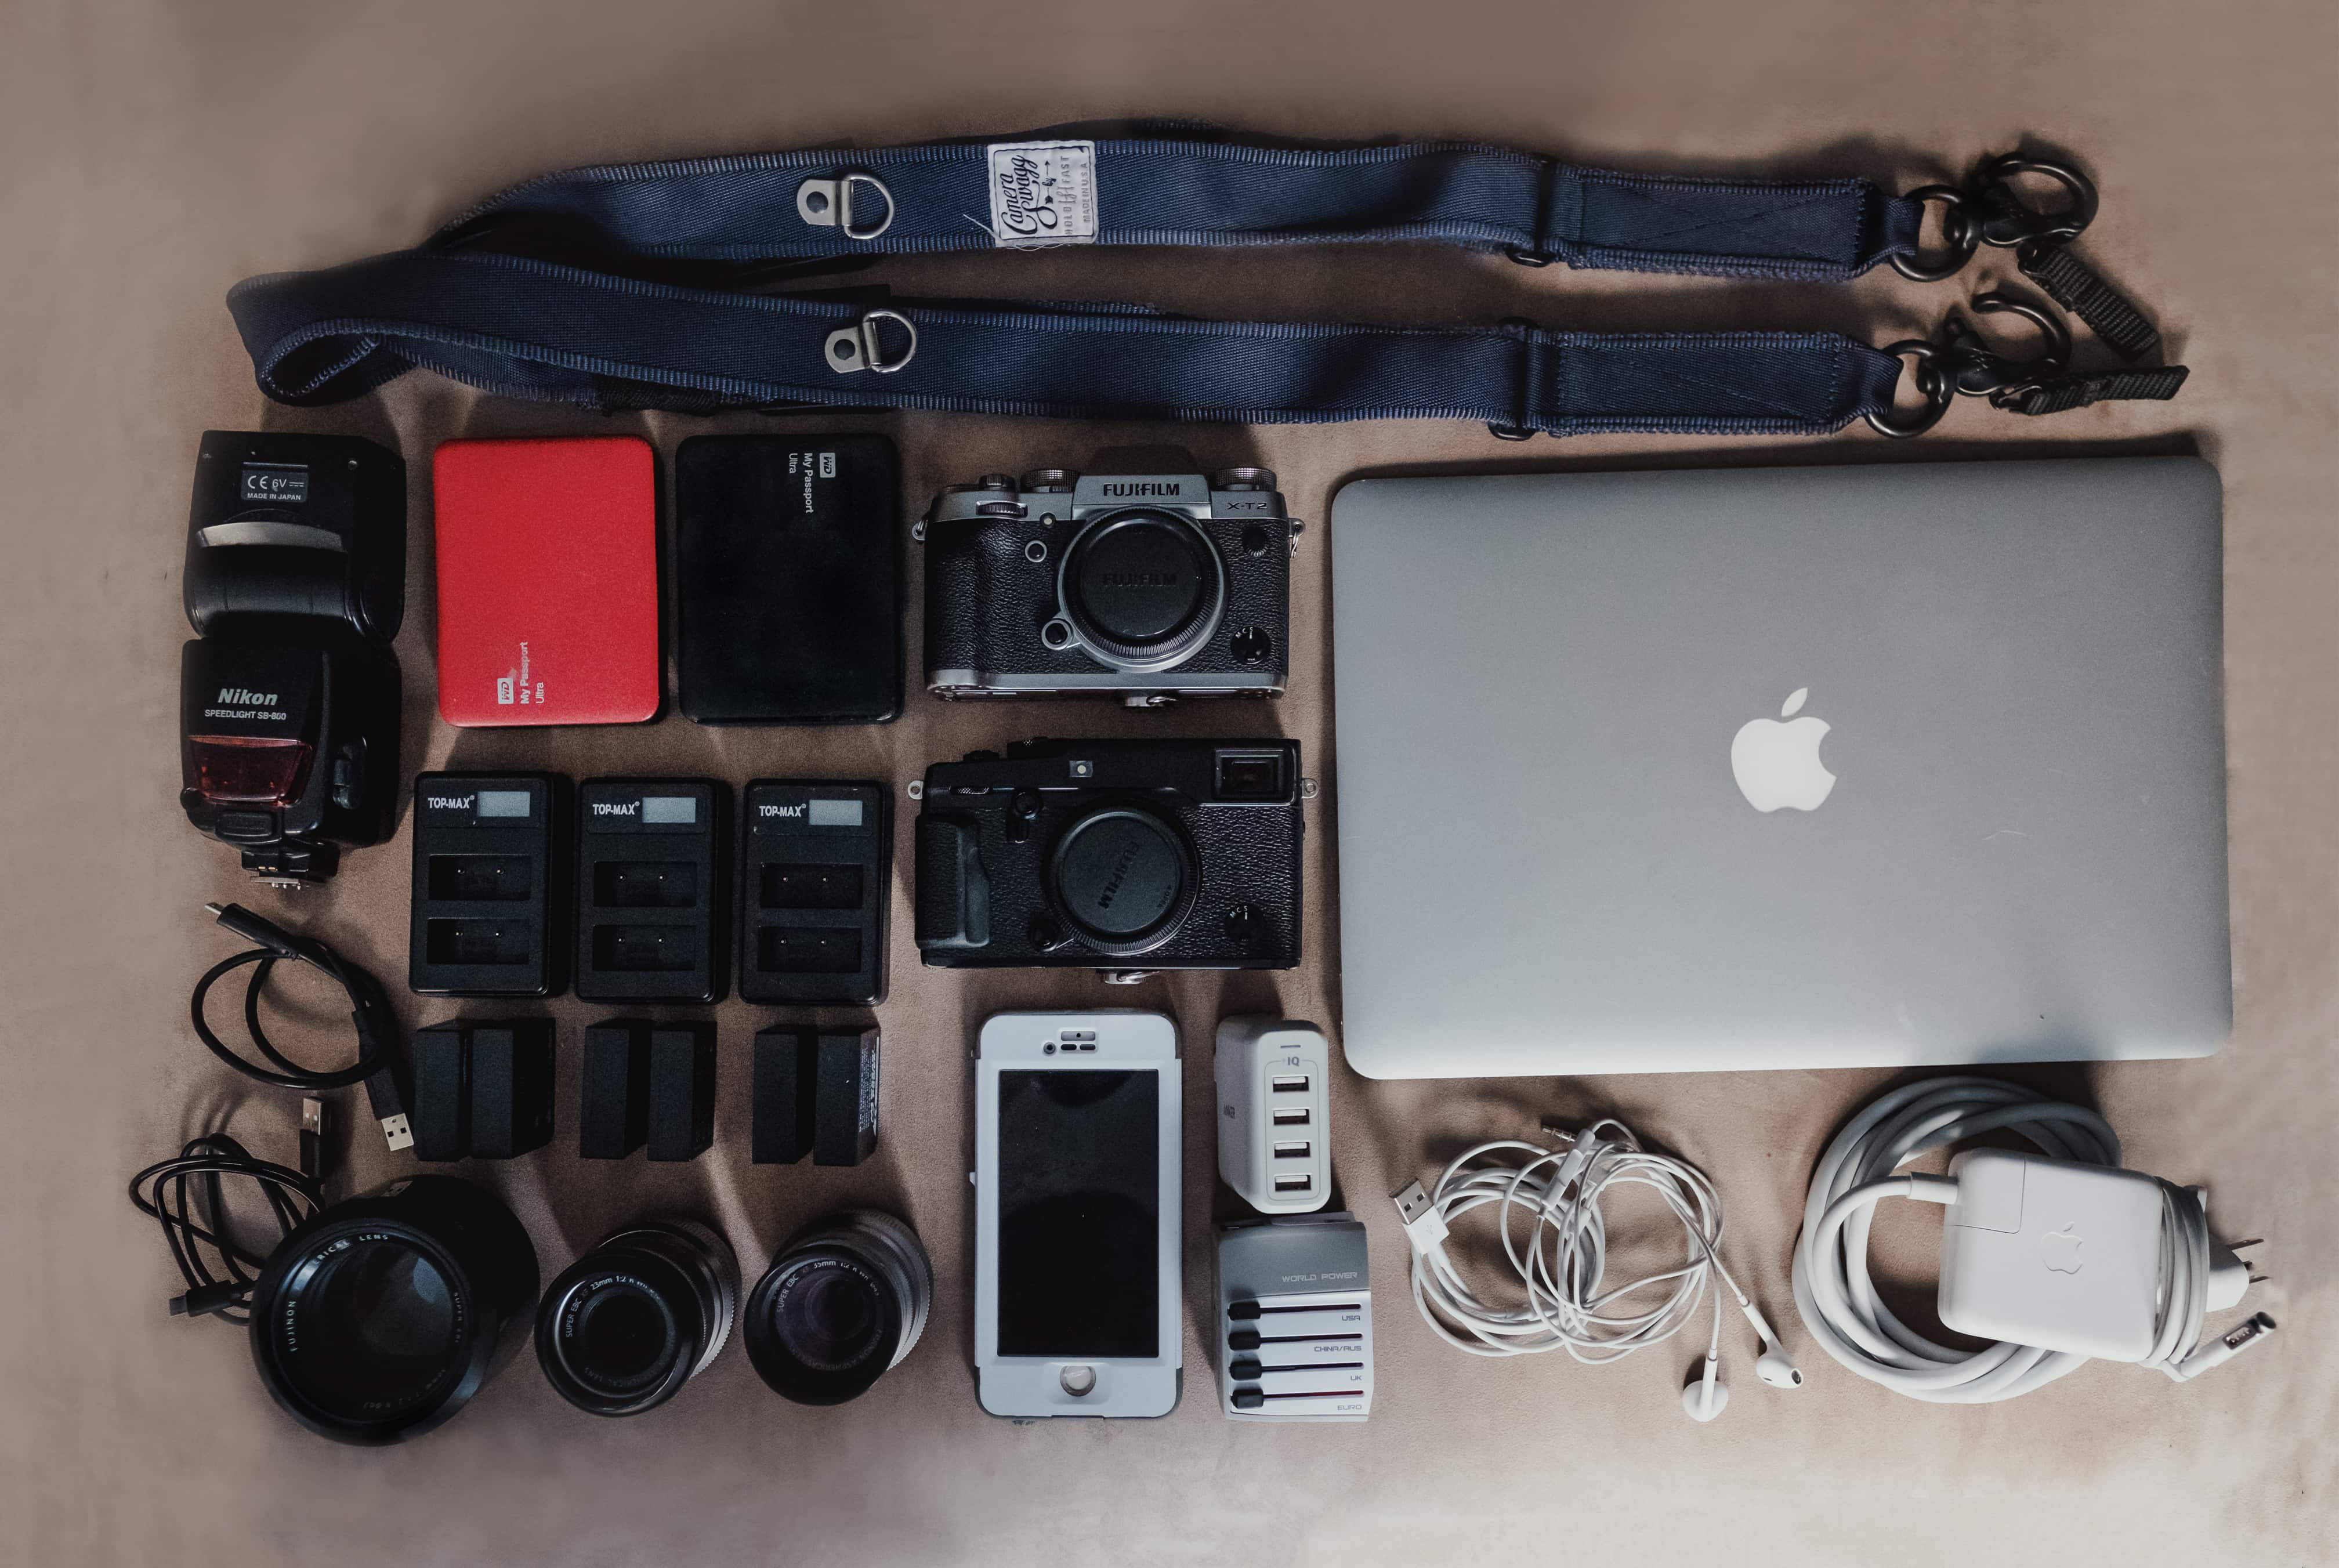
- Hold Fast CameraSwagg Dual Camera Strap
- 2010 MacBook pro with custom SSD upgrade
- Headphones and Lightning Charger
- Universal Outlet Converter
- Anker 4 port usb charger
- Fujifilm XT2 Mirrorless Camera
- Fujifilm X-Pro2 Mirrorless Camera
- Western Digital My Passport Drives
- 3 Top-Max Dual chargers for Fujifilm NP-W126S Batteries
- 6 Fujifilm NP-W126S Batteries
- Fujinon 23mm F2 Lens
- Fujinon 35mm F2 Lens
- Fujinon 56mm F1.2 Lens
- Nikon SB800 Speedlight Flash
- Small Pro ICU Camera Cube
Mirrorless Gear We Can’t Live Without
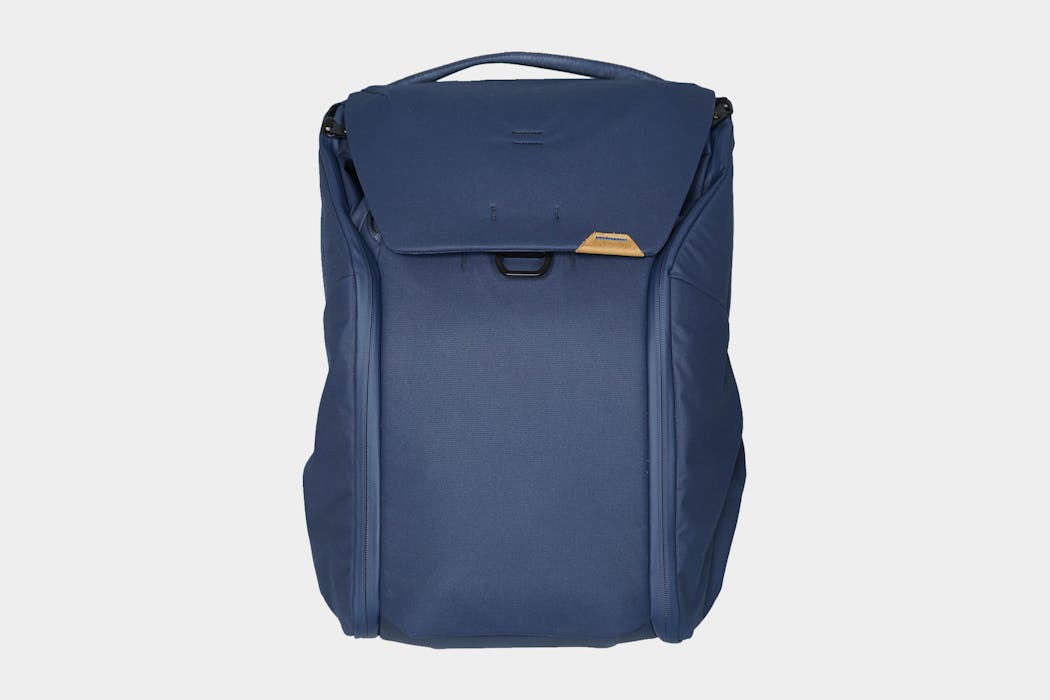
A camera backpack designed with organization and accessibility in mind. A great option for the photographer on the go, this pack has access points on the top and either side, so you can swing it around to get what you need without even taking it off. The interior is well padded and comes with a handful of dividers that you can use to customize the bag to your liking while protecting your gear.
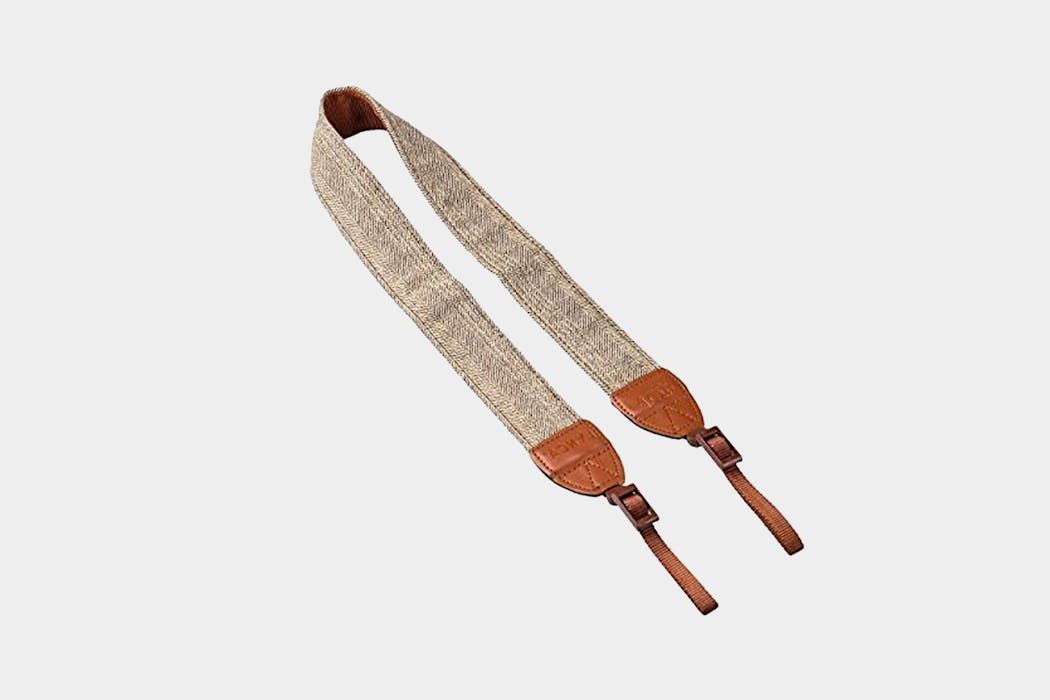
A stylish and pocketbook-friendly strap for your camera. It will give you more padding than the strap that comes with your camera, and you’ll look good while wearing it. The retro-style helps match the look of your mirrorless camera. For around 10 bucks, you really can’t go wrong with this strap.
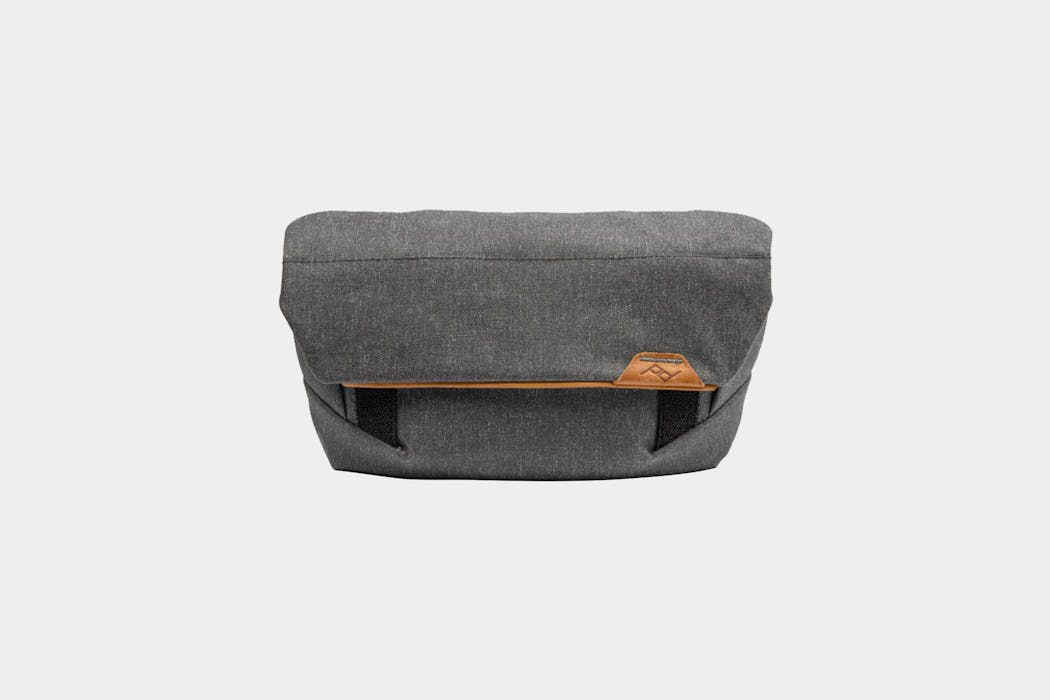
Once you’ve arrived at your destination and you’re out and about, you’ll need a place to keep your extra memory cards and batteries. The Field Pouch offers just that, but it’s also big enough for some mirrorless cameras and your lenses. It can strap to your belt or you can attach it to any of the peak design straps. It’s weatherproof and has a handful of pouches and zippered pockets to keep things organized and safe.
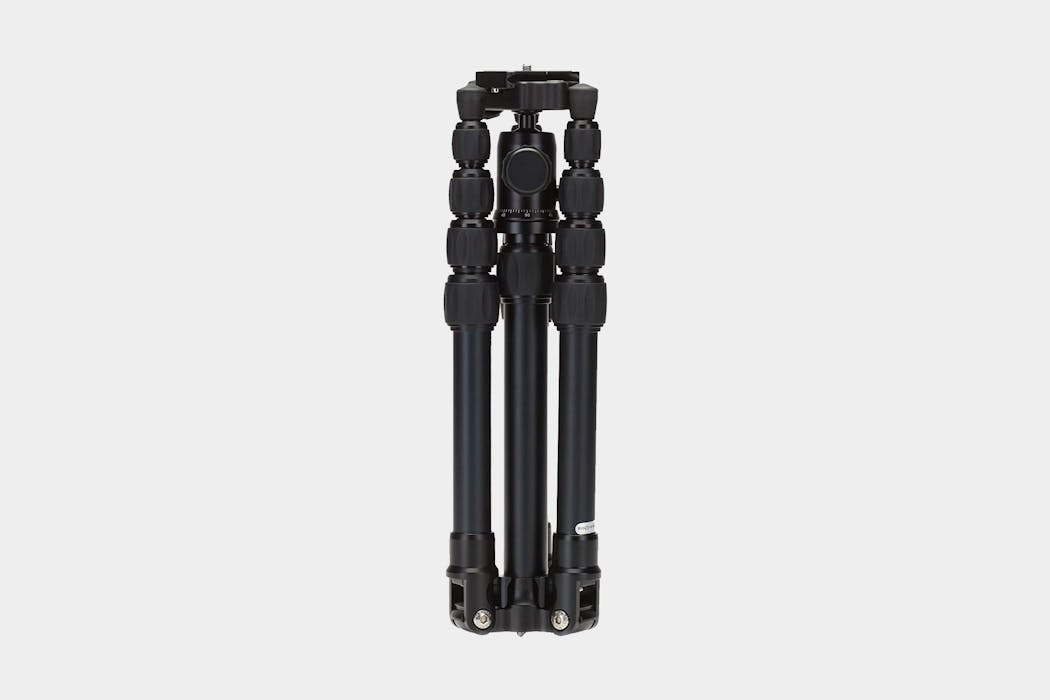
This aluminum alloy tripod is compact and sturdy, which makes it the best travel companion tripod. It comes in a travel case and can fold down to 12.6”, so it can easily pack into a backpack or a suitcase. At only 8.8lbs, this tripod won’t break your back and shouldn’t push you over your weight limit for plane travel.
Mirrorless cameras are new and exciting, especially for travelers. They’re quickly becoming a favorite amongst photographers, and there are lots of reasons why. Having almost all of the benefits of a DSLR without the same hefty price tag, weight, or size means it should be on your radar as a potential best travel camera.
As much as everyone believes lighter and smaller is obviously better, there are some cons to having a smaller camera body. The ergonomics of the smaller camera body can cause problems for some and have even caused photographers to make the switch back to a DSLR. It’s not as comfortable in your hands as you’d expect, especially if you have large hands.
For traveling, the mirrorless is basically a dream come true. This DSLR and point-and-shoot baby will take up more room than a point-and-shoot or a smartphone, but it will also give you versatility and manual capabilities to take your photo game to the next level—which the other cameras just can’t give you. You can add and upgrade your kit as you go, making this a camera you’re not likely to grow out of anytime soon. Just make sure you invest in plenty of batteries, as these little guys do get hungry.
In a lot of ways, mirrorless cameras and DSLRs are neck and neck. For this reason, if you’re interested in taking spectacular images while traveling but can’t stomach the thought of lugging around the weight of a DSLR, it’s time to check out a mirrorless camera.
Our Favorite Mirrorless Cameras
- Fujifilm X-T2
- Sony A7R III
- Panasonic Lumix GH5S
The big guns. The trusty DSLR can do it all... The question is, can you handle it?
Why DSLR Cameras for Travel?
The number one, overarching benefit of a DSLR is quality—both in terms of image quality and the build quality of the actual cameras and their components. A DSLR can take incredible photos in any environment you could think of, and with a bit of care and precaution, it can last a lifetime.
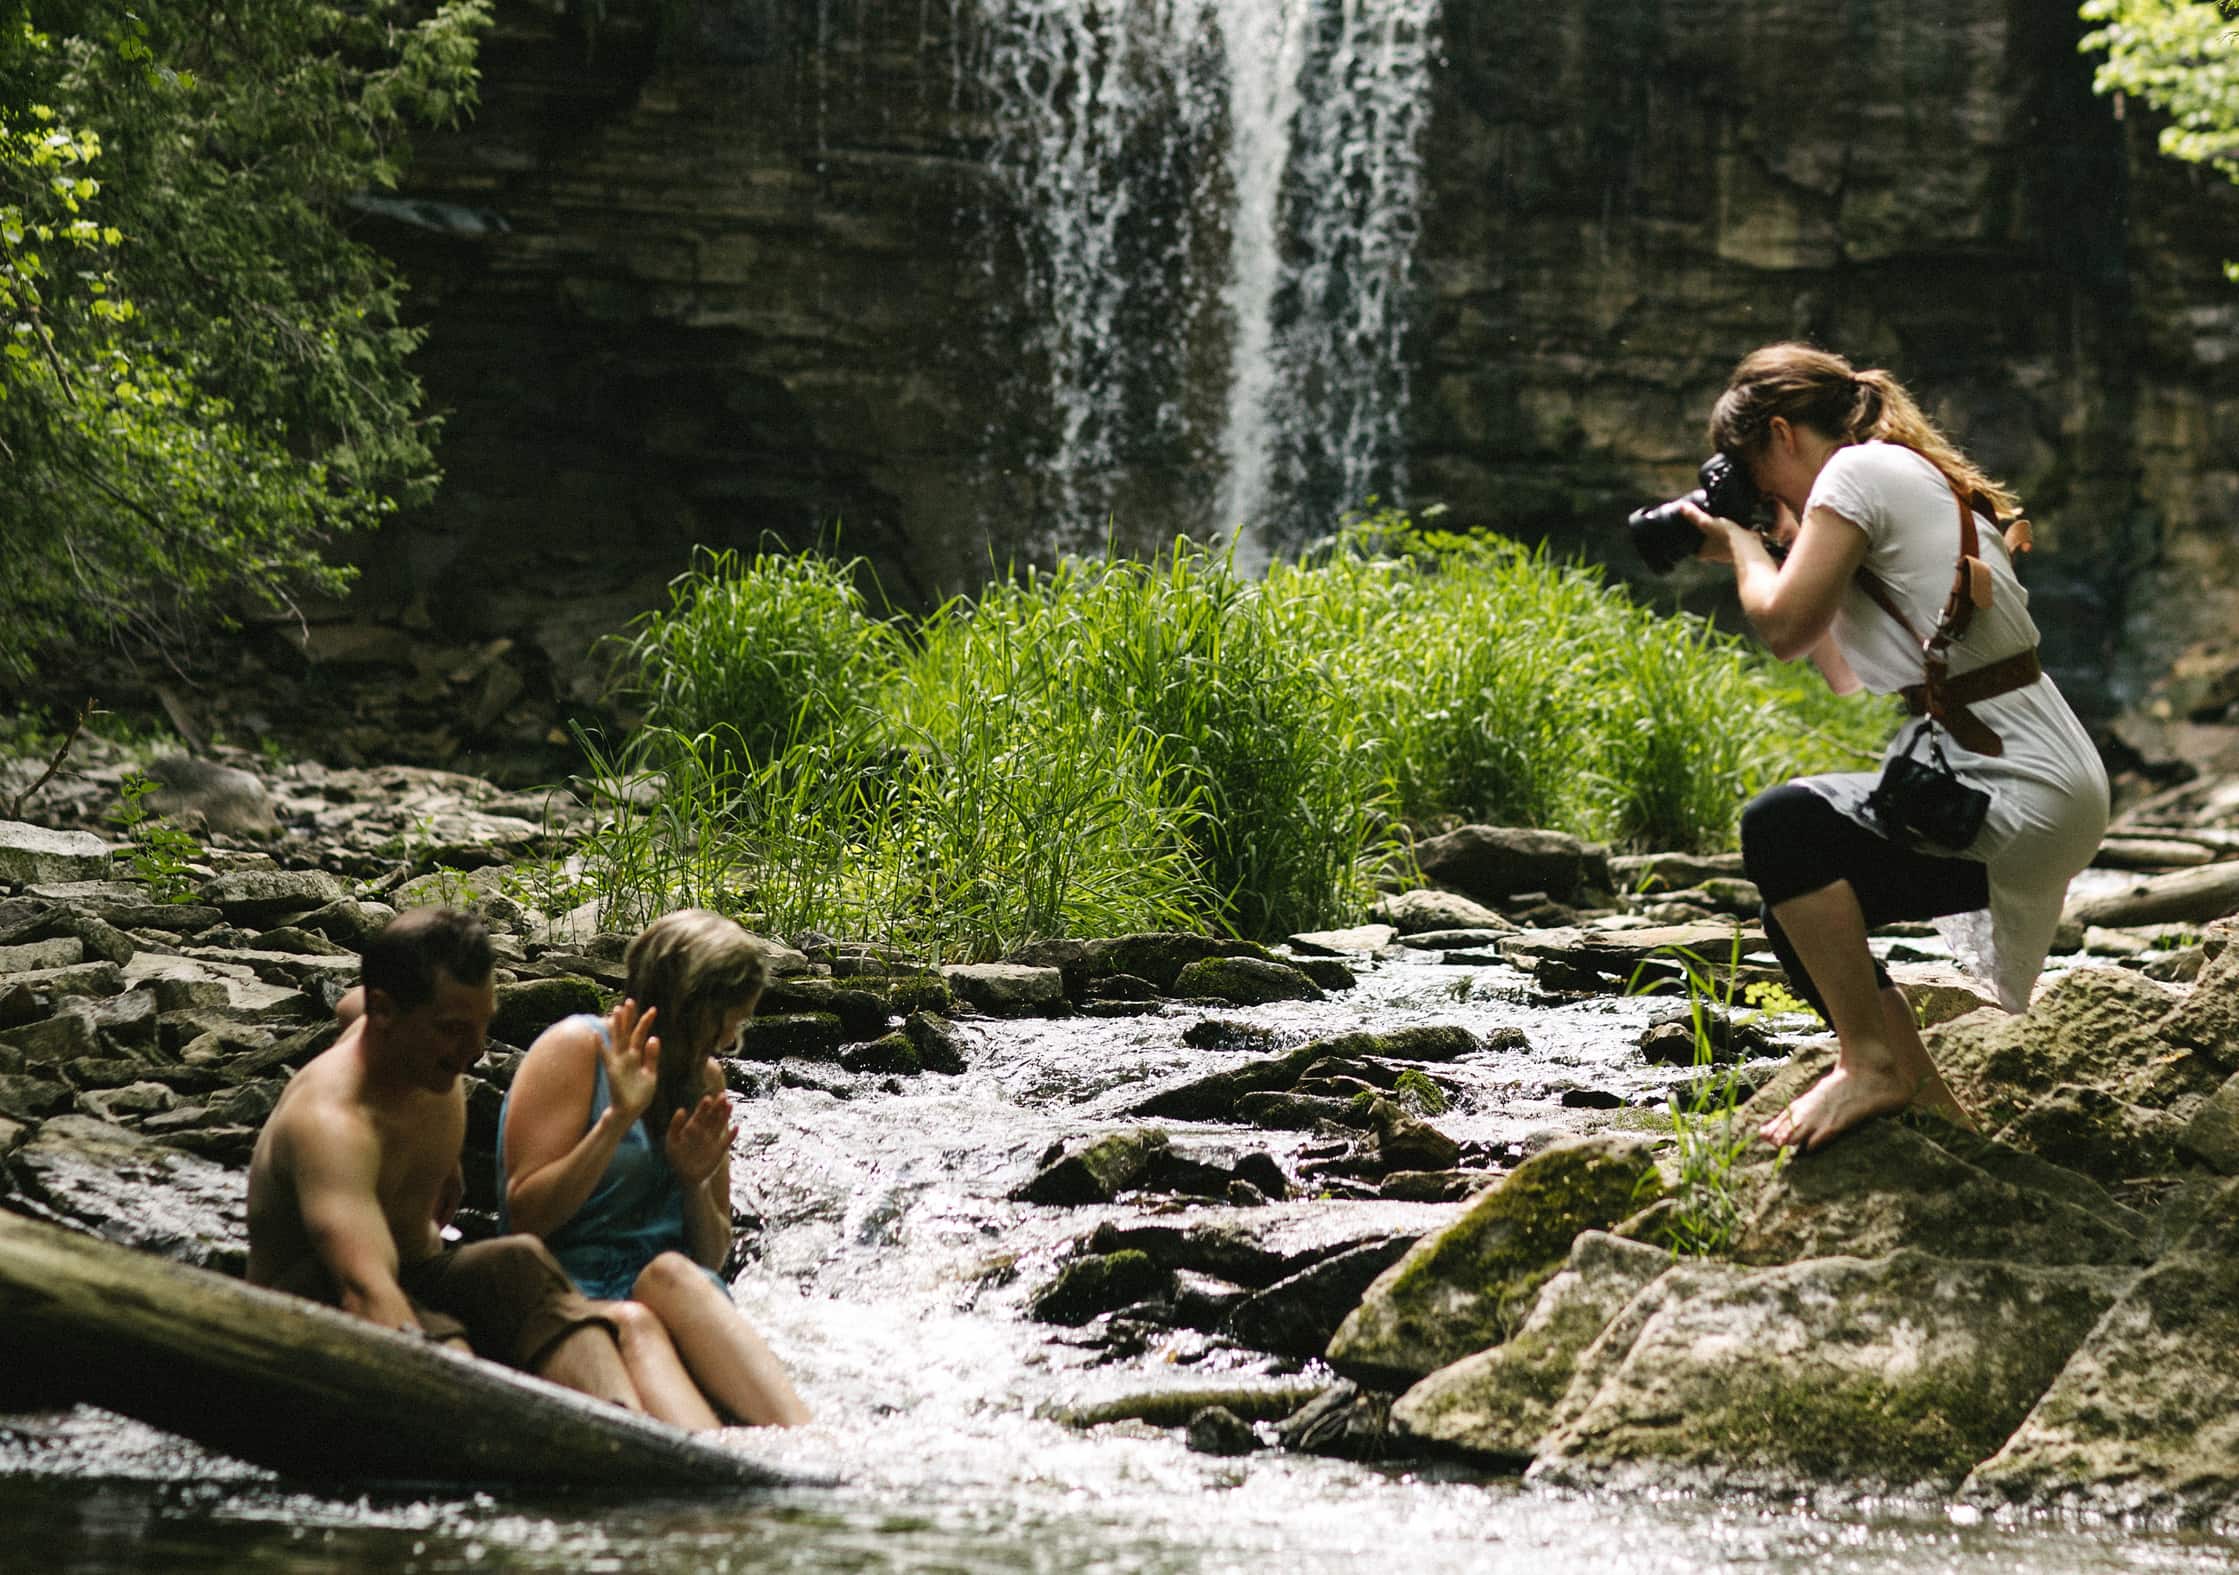
DSLRs offer a slightly ridiculous amount of versatility. At a basic level, a DSLR is a camera body with a lens attached—just like a mirrorless camera. This alone offers an incredible amount of versatility, as swapping lenses out can drastically change the nature of the camera and the photos you can take with it. DSLRs can work seamlessly with studio lighting, city streets, or wild landscapes. You can even turn these bad boys into little video-making machines if you grab the right tools.
And just like a mirrorless camera, DSLRs can be customized to best suit your needs with a variety of accessories, such as flashes or battery grips. The difference is that the amount of accessories available to DSLR users is miles ahead of what is currently offered for mirrorless cameras.
Keep in mind if you’re upgrading from a camera such as the Fuji XT-2 to the Fuji XT-3, you’ll need to upgrade your battery grip too, as the camera bodies are different sizes.
Are you starting to get the picture? (Pun intended.)
Of course, we can’t list all these benefits without a disclaimer. While the DSLR may seem like the perfect all-around package, it does come at a cost—both in terms of money, weight, and space. Jumping into the world of DSLR’s will mean buying a camera body, one or two lenses, batteries, memory cards, and maybe a few other doodads. This comes at a hefty price and will take up quite a bit of space and weight in your bag. Enough space that you may, in fact, need to commit one bag to hold all of your camera gear—which makes DLSR cameras a less-than-ideal choice for those who value minimalist travel photography gear.
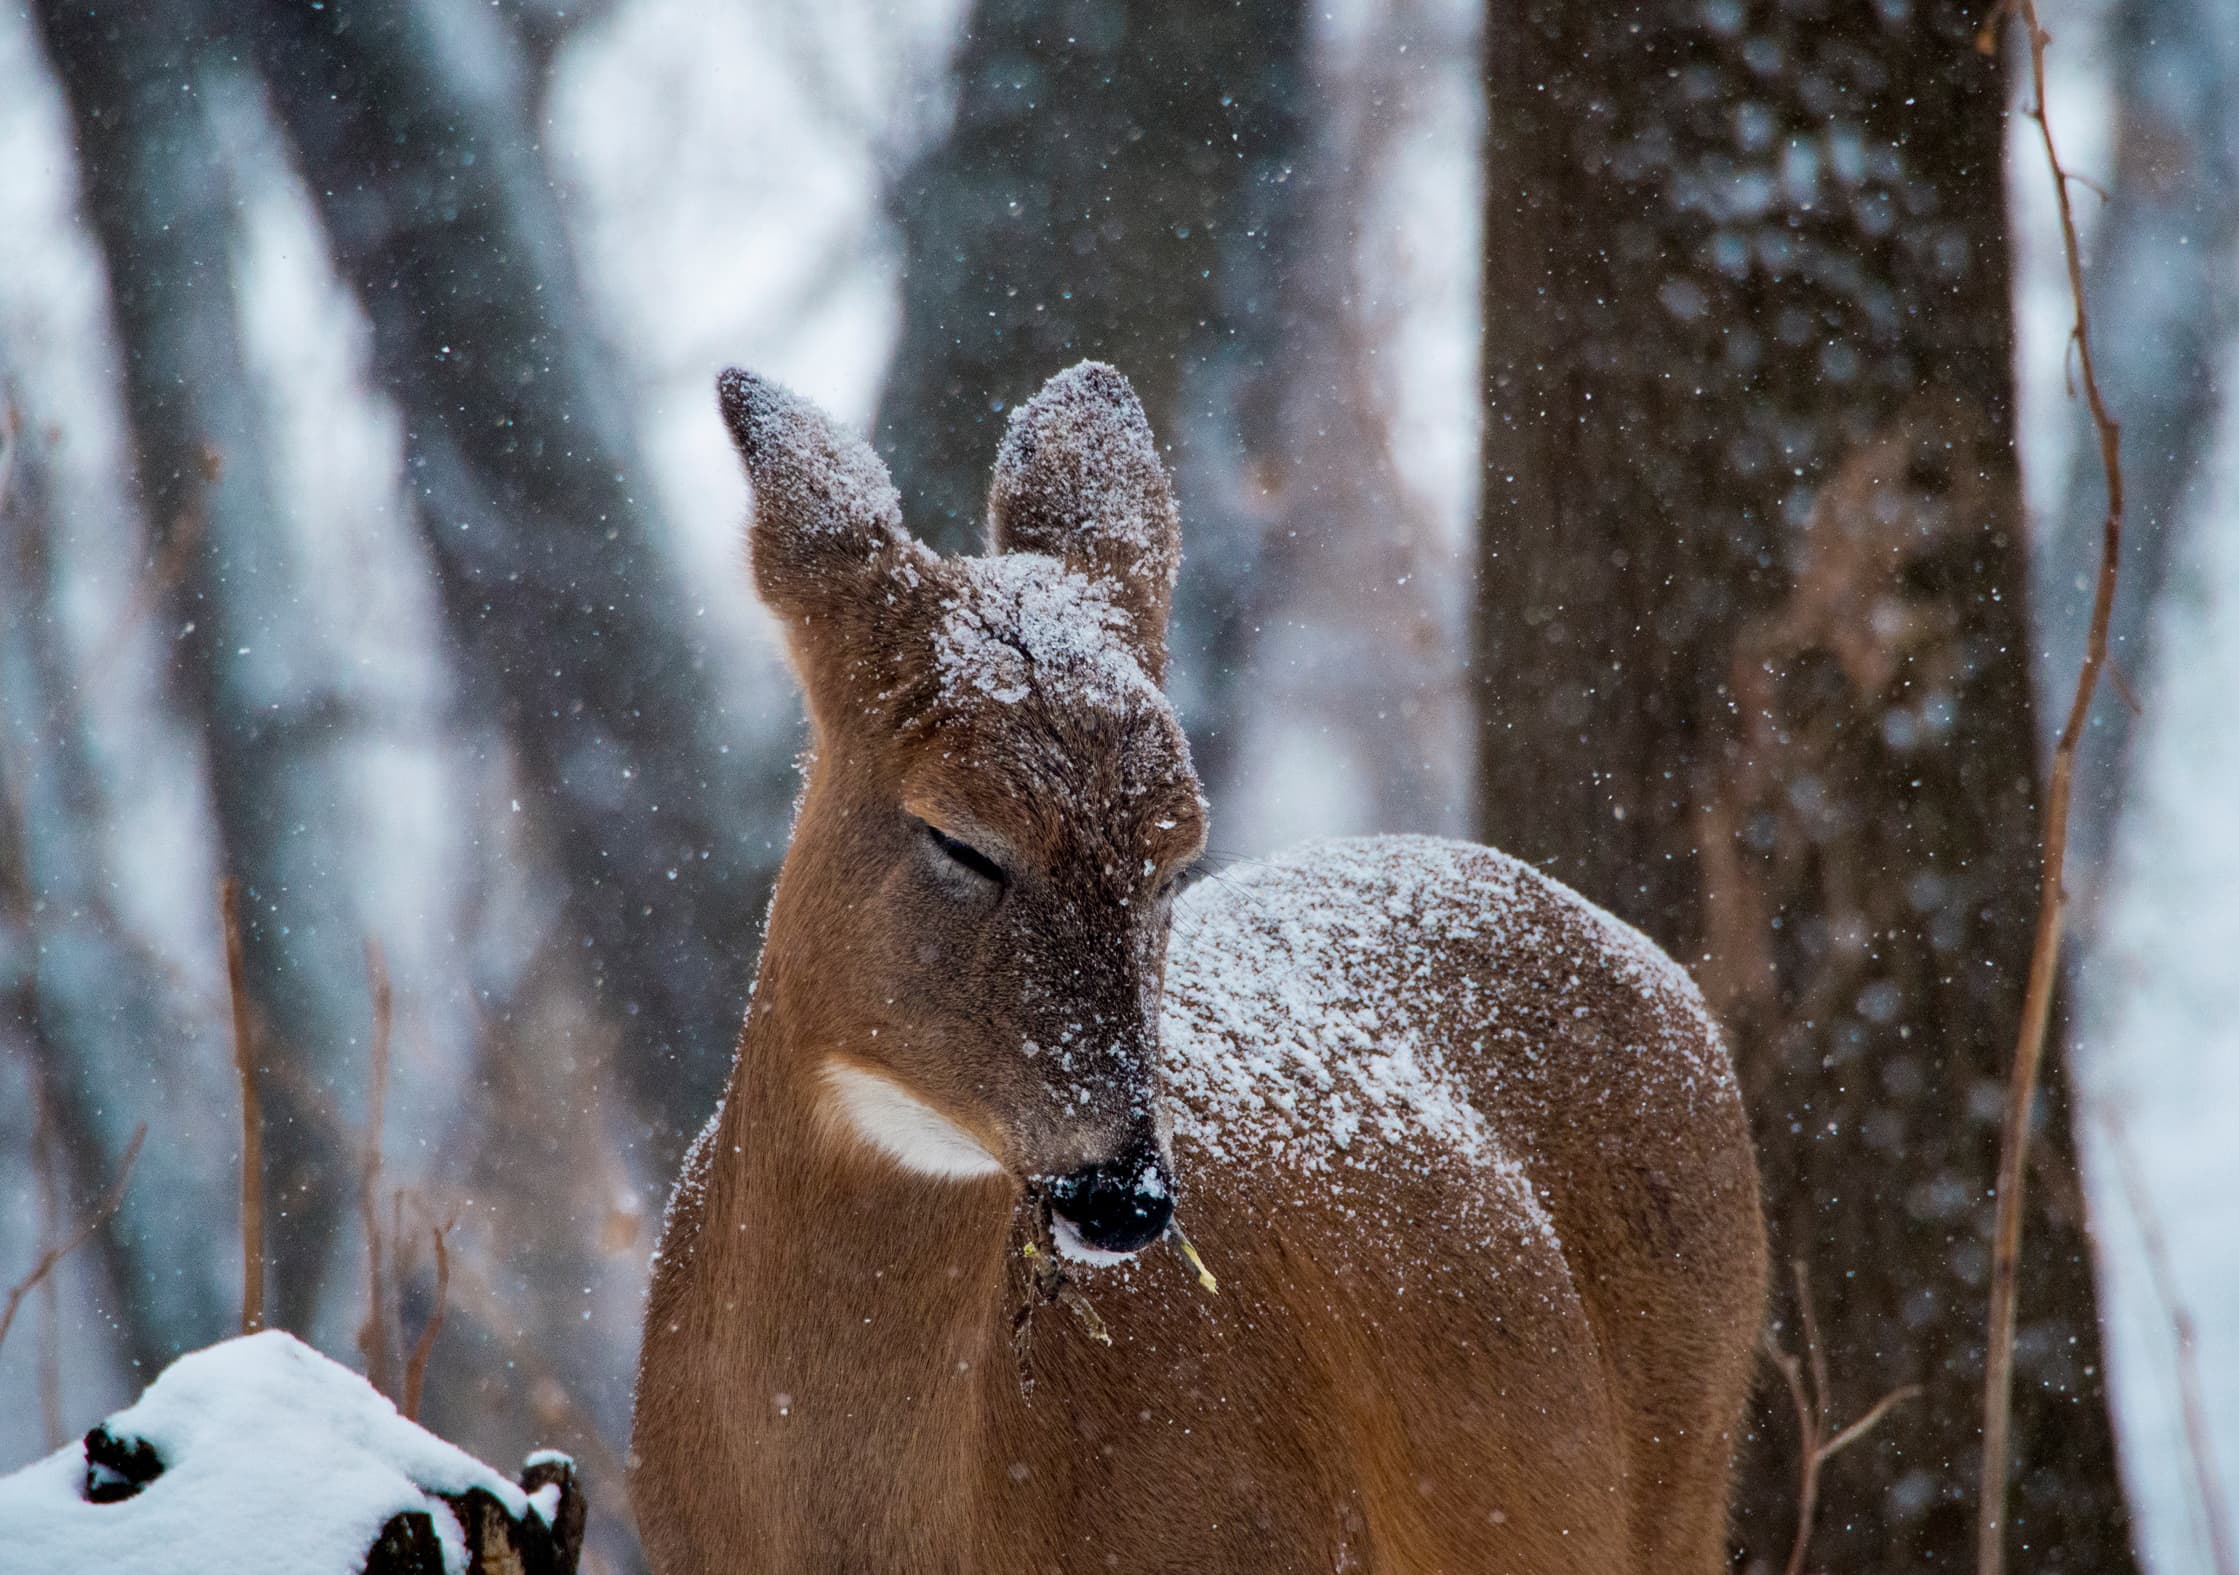
That being said, the results speak for themselves. Nine out of ten professional photographers are rocking a DSLR setup. Wedding photographer? Yep. Portrait photographer? Check. That landscape photographer that takes the most unbelievable sunrise photos you’ve ever seen (and also makes you question what time they woke up)? They’re rocking a DSLR, guaranteed.
While the weight and size of a DSLR setup may deter some travelers, it is not uncommon to encounter one bag travelers that simply couldn’t leave their DSLR behind. Once you get your hands on one, there’s a good chance you’ll be a convert for life.
“As much as I would love to ditch some of the weight of my DSLR, especially when traveling, I just can’t find anything that I love as much and I can’t compromise on quality for my clients.” —Frances Beatty, Professional Wedding Photographer
DSLR stands for Digital Single-Lens Reflex. It’s an adaptation of the old camera you probably saw your grandfather use at family reunions. A marriage between analog and digital, the DSLR takes the mechanical elements of an SLR camera and adds in a digital sensor to replace the film found in an old analog SLR.
The two major components of a DSLR are the body and the lens. Inside the body, there’s a mirror that takes what the lens is looking at and either directs it to the viewfinder or the sensor, which makes this an optical viewfinder. What you see is what you get, in real-time.
All DSLRs have interchangeable lenses, which means the sky’s the limit for what and how you can shoot. For example, you can shoot portraits on the street one second and swap out your lens to shoot a beautiful landscape the next.
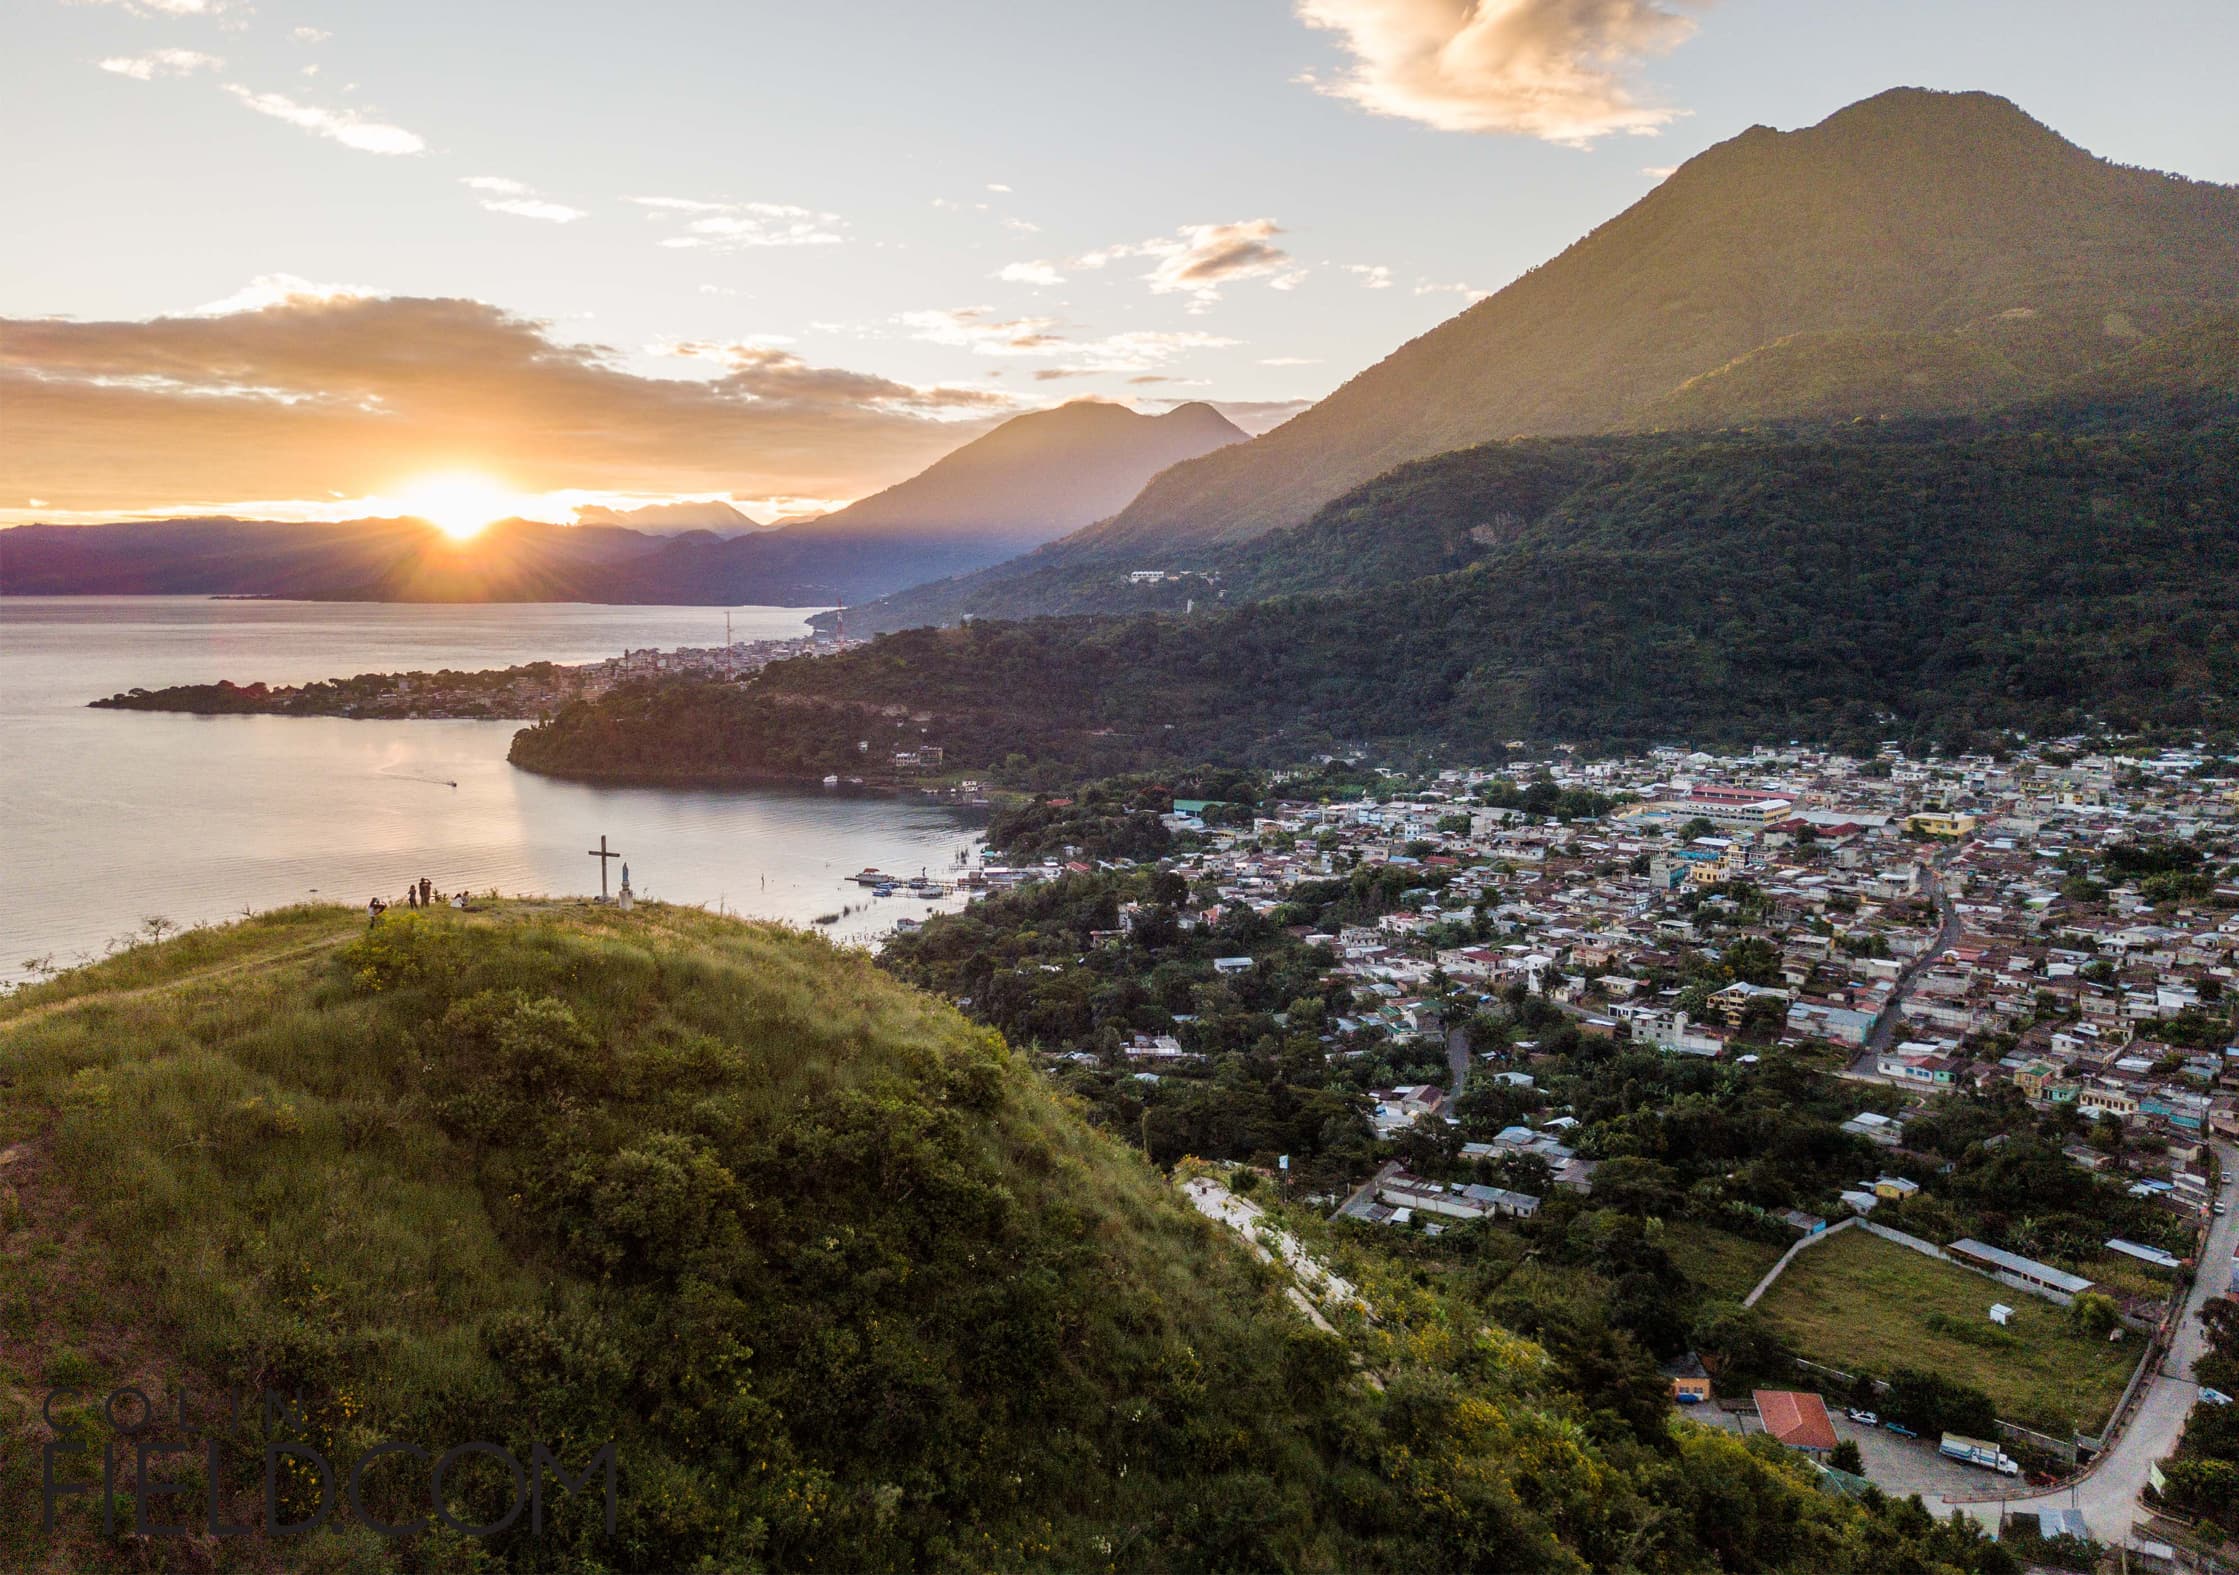
The choices when it comes to both camera bodies and lenses are pretty extensive. One of the reasons DSLRs are still the most popular type of camera to date is that you’re not limited to only one focal length—the camera kit can grow with you. You can easily start with the handy-dandy kit lens that comes with your camera at purchase, or slowly upgrade to some faster and better quality glass. There’s a lens for every purpose and every price point imaginable.
When choosing a lens you’ll want to work backward from what you plan to shoot. Start with the two main categories—zoom and prime—and then look into the actual numbers. If you’re new to photography, you might want to refresh yourself with the terms in our glossary.
Here are some examples of lenses you might want to consider for traveling. We’ve used all Canon lenses as an example. Other brands will have their own suite of comparable lenses.
Zoom Lenses
- 18-55mm f3.5-5.6 (kit lens): Comes with most entry-level DSLRs. It’s lightweight and will give you a good range of focal length. A good starter lens.
- 24-105mm f4 (kit lens): A standard lens that comes with most pro-level DSLRs if they come with a lens. Heavier and faster than the 18-55mm, the glass is better quality and provides a sharper image. A good step up if you’re interested in moving towards Pro.
- 24-70mm f2.8: Great for low light, and commonly used by professional photographers working in portraits or weddings.
- 70-200mm f2.8: A good range from portrait-telephoto. This is a heavy beast, but its low light ability is excellent, and it’s a sharp lens: Used by wedding photographers and videographers alike.
- 200-400mm f4: Telephoto. Mainly used by wildlife photographers.
Prime Lenses
- 24mm f2.8: Wide angle. Landscapes.
- 35mm f1.4: Storytelling. Used by many street photographers and wedding photographers.
- 50mm (f1.2- or 1.8): Standard lens. This focal length is very similar to what we see with our eyes. The aperture available on these lenses also make them a great option for low light.
- 85mm f1.4 IS: Portrait lens.
- 135mm f2: Telephoto for those hard to reach places.
- 400mm f4: Sports and wildlife.
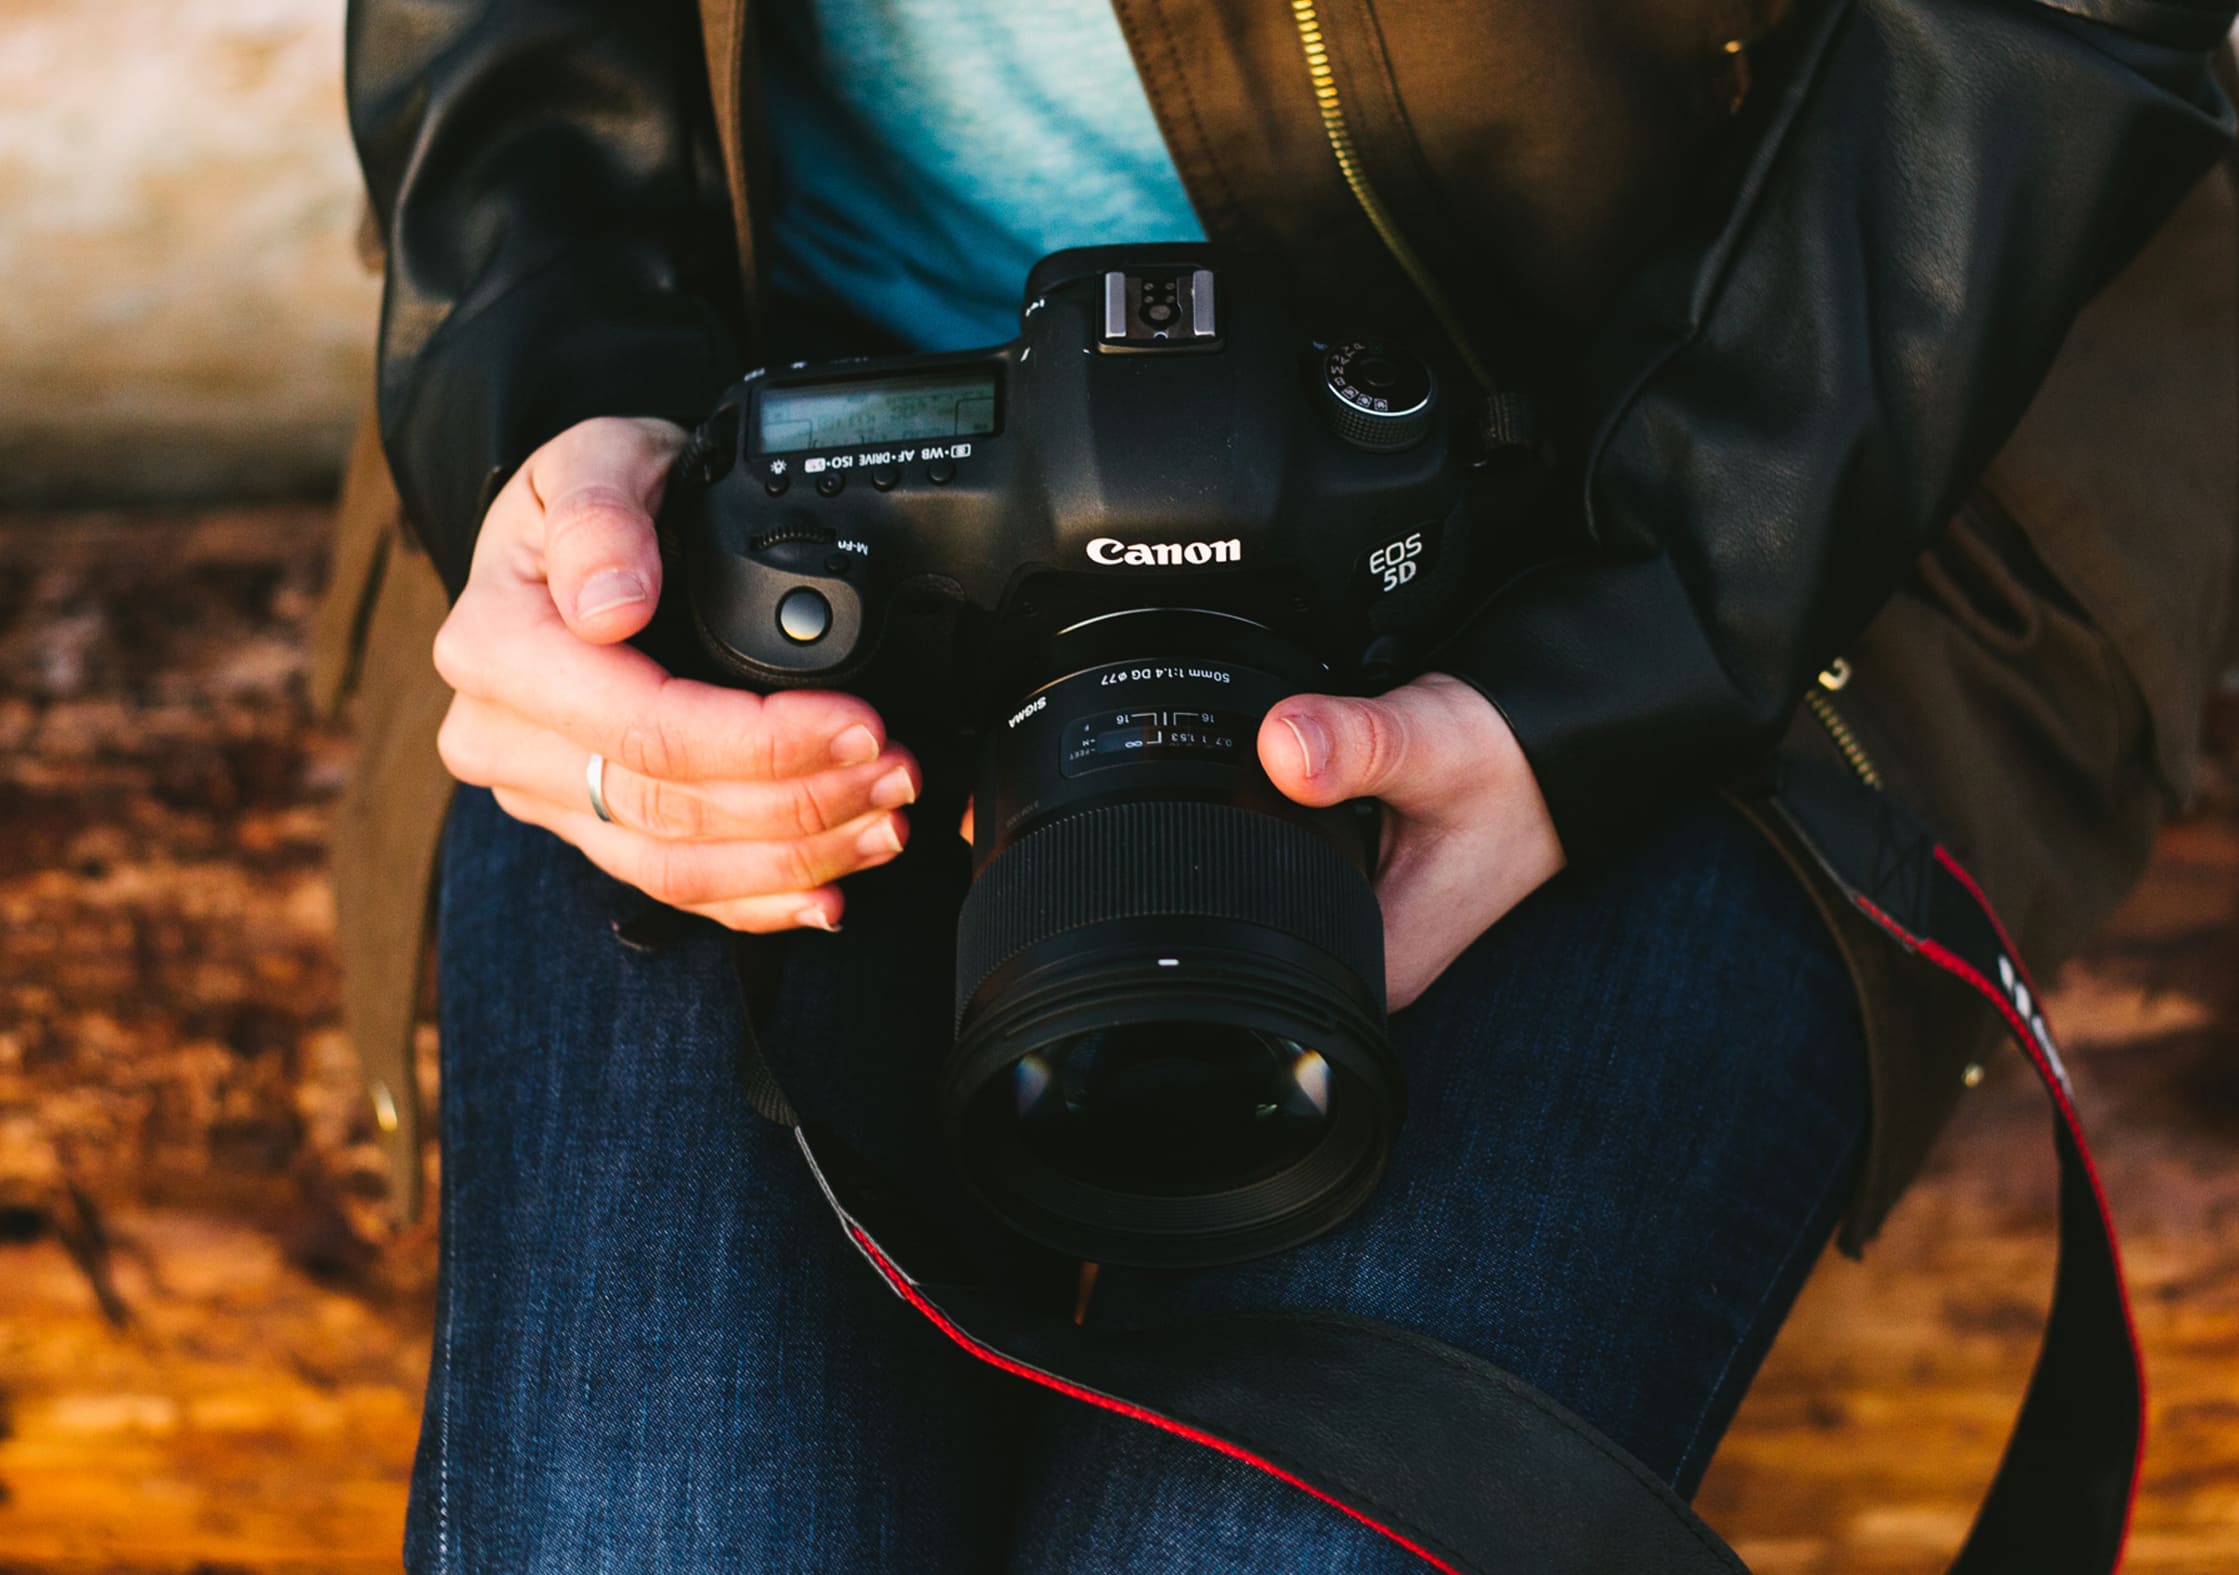
DSLR Accessories: Down the Rabbit Hole
In addition to lenses, the DSLR system can be customized to best suit your needs with a handful of accessories, such as a flash or battery grip. It’s also designed to work equally as well with both studio lighting setups and natural light settings. On top of that, if you decide you want to switch gears from photography to videography, there are countless accessories to add to your DSLR to turn it into a little video-making-machine.
To give you an idea of the possibilities, below is a list of some of the accessories you can attach to your DSLR, in addition to the lens:
- Battery grips
- Remote shutter releases
- Camera straps
- Microphones
- Video lighting
- External flashes
- A multitude of flash Accessories: bounce cards, filters, diffusers, softbox, tripods, triggers, grids, umbrellas…
“In my category of photography, I use flash—I have to have my 600EX flash with me at all times. And since I use flash throughout an entire day, I carry around an external battery pack. I also use a folding flash bracket because I need the flash to be above the lens at all times and I’m frequently switching between landscape and portrait orientation. The only other accessory that I sometimes use is a Gary Fong collapsible flash diffuser to soften my flash a bit.” —Corey Tenold, Professional Fashion Photographer
The Canon vs. Nikon Debate
As we mentioned in the beginning, quality is the main benefit of a DSLR. There are, of course, different options for quality at different price points—you get what you pay for, after all. DSLR camera bodies range from entry-level camera bodies to professional level. The Canon 5D Mark IV is a great example of a professional-grade DSLR that’ll cost a pretty penny, but with its 30.4 MP full frame sensor and 4K video, you should be able to take some unbelievable photos that you can enlarge to 20×30” without any issues. A similar camera—and another favorite of ours—is the Nikon D850.
Which brings up the Nikon and Camera debate. Before we get into trouble, we’d like to take a second to address this never-ending feud. For the uninitiated, Canon and Nikon are by far the two biggest DSLR brands out there. They are extremely close in quality—so close that it is virtually impossible to say that one is objectively better than the other—yet there is a strong divide in the photography community between Nikon users and Canon users.
Due to compatibility issues and brand loyalty, Nikon users tend to stay Nikon users and Canon users tend to stay Canon users. This is largely because it is difficult to mix accessories between the two brands and the expenses associated with switching teams. Once you pick one, you’re kind of stuck with it.
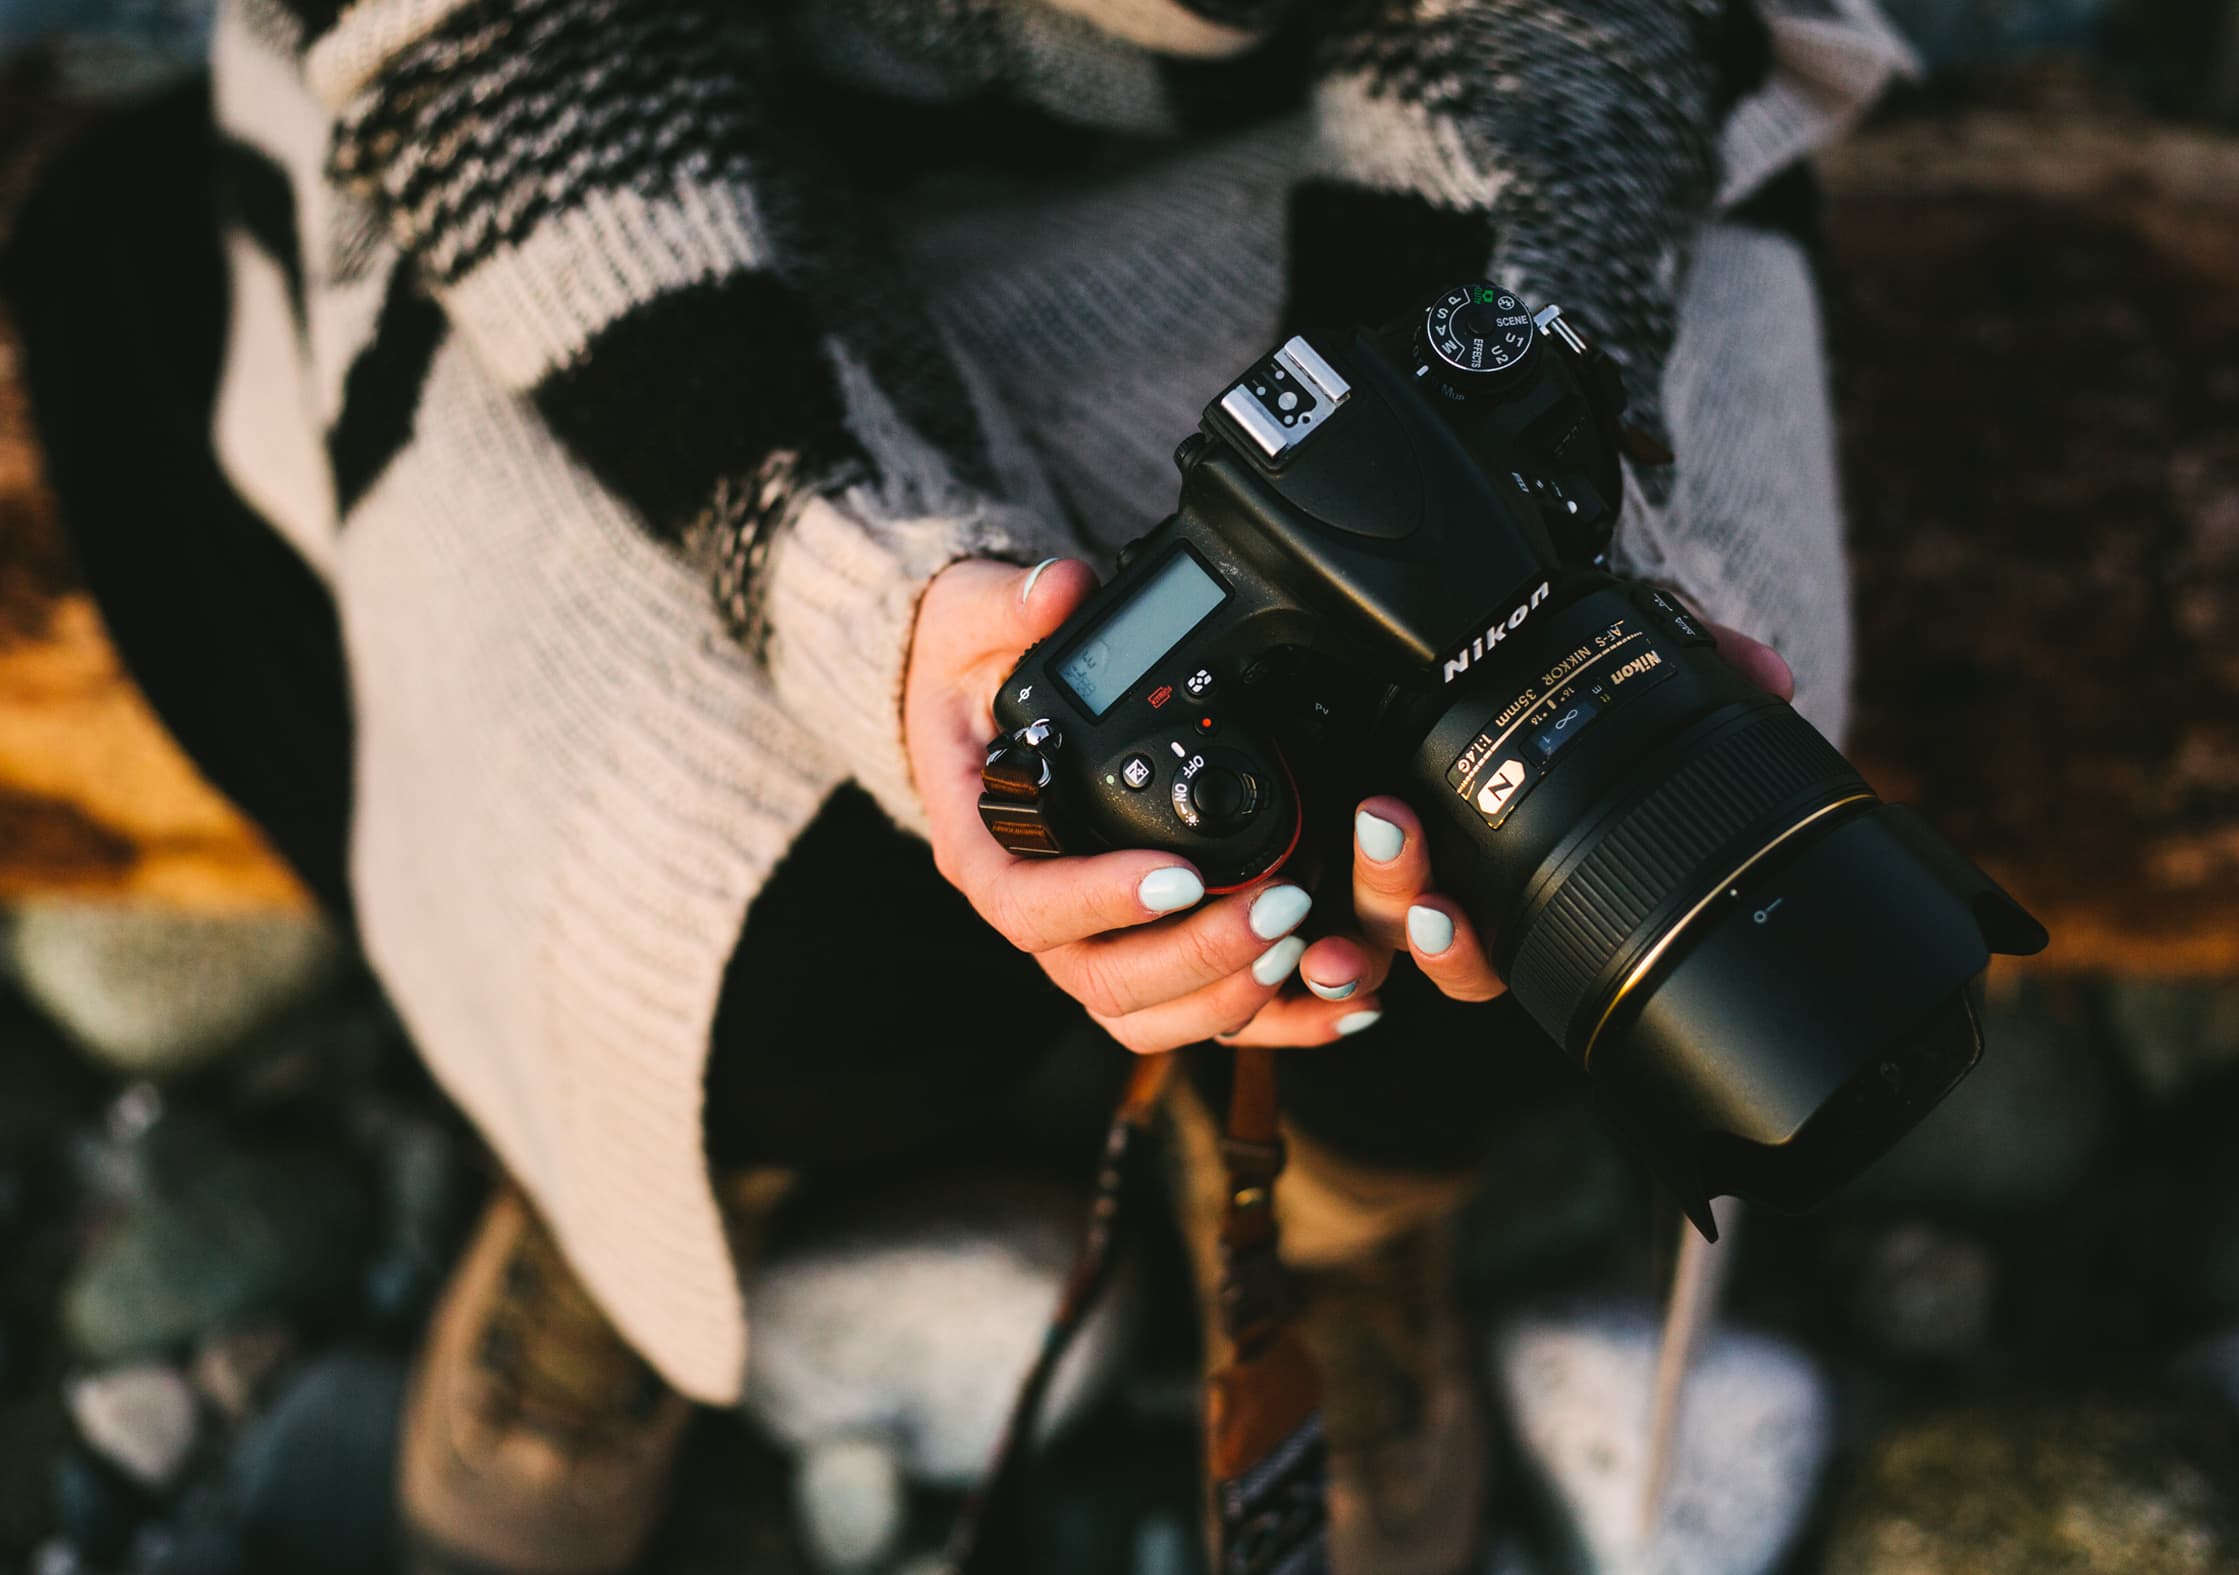
The unfortunate result is endless arguments between Canon and Nikon users over which brand is “the best.” Hop on to any photography forum and you’re bound to encounter some sort of Canon or Nikon bashing. It’s a topic that gets never-ending attention from photographers and may have even resulted in a black eye or two over the years.
There will always be the Canon vs. Nikon debate, but we don’t buy into that at Pack Hacker. The truth is they’re both great brands and build cameras that take great quality images. Ultimately, it comes down to personal preference. Both Canon and Nikon handle files differently. Nikon retains more details (or information) in the shadows of your images, whereas Canon will retain more information in your highlights. Neither one is right or wrong, but you will find you have a preference based on how you want your final images to appear. If you’re unsure of which brand suits you best, we’d recommend going into your local camera shop and trying them both out. One will most likely feel more comfortable in your hands.
“A large reason I use the Canon system is because a lot of other colleagues and studios I work with also use Canon, so borrowing gear is easy. Need a battery? No problem. Want to borrow a lens? No problem.” —Corey Tenold, Professional Fashion Photographer
Automatic and Manual: The Best of Both Worlds
One final benefit of a DSLR is that it has both automatic and manual settings. Like most cameras, the automatic settings are great for certain things, but they don’t allow you to have creative control over what kind of image you’re taking.
Just like mirrorless cameras, DSLRs are designed to give as much freedom as possible by giving you the ability to choose manual modes, auto modes or a cross between the two with modes like aperture or shutter priority. Auto modes are convenient, but they don’t allow you to have creative control over what kind of image you’re taking—which many consider a must.
DSLRs also allow you to shoot in Raw or JPEG, which makes a big difference depending on how you will ultimately be using the image. A raw image will capture far more information and give you more room to edit afterward, whereas JPEG compresses your image right away—meaning you’ll lose some of that editing capability.
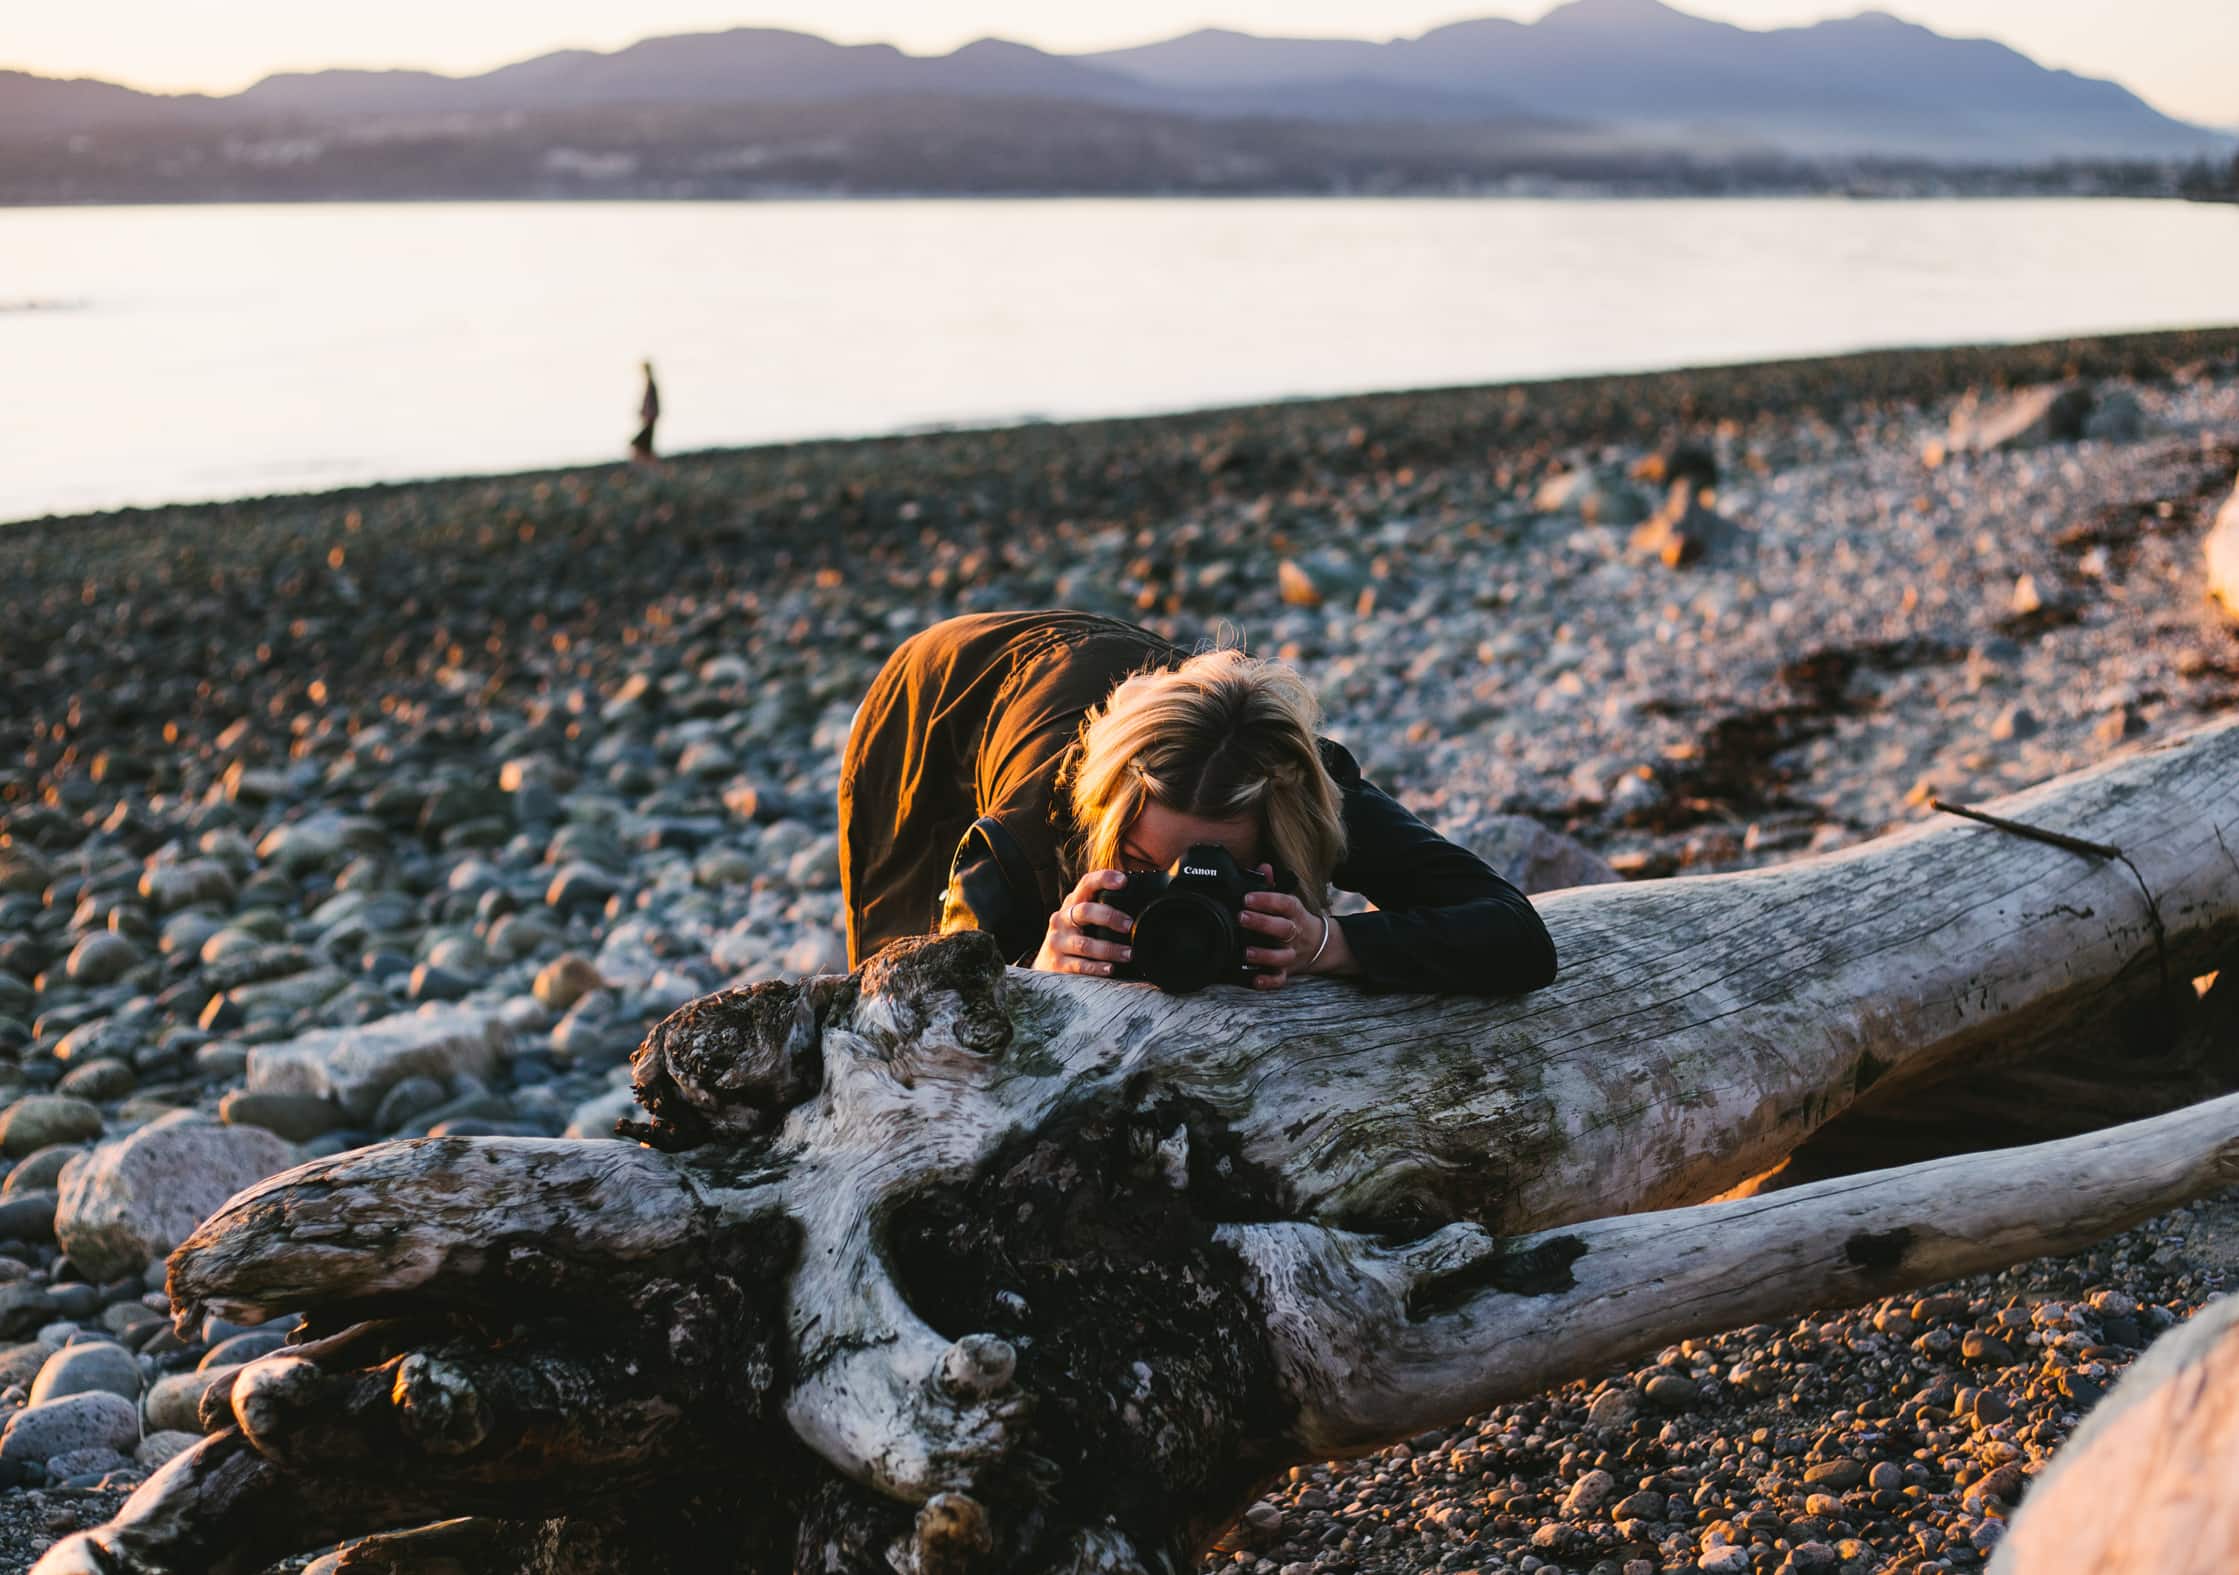
With most DSLR’s you can also shoot both RAW and JPEG simultaneously—the best of both worlds. This will eat up some of your memory, but then you have both to play with. If you’re new to photography and haven’t taken on the task of editing your RAW images yet, you might just want to stick with JPEG in the beginning for the sake of convenience. That being said, if you plan on trying out editing at some point the benefit of shooting RAW+JPEG is that you can always go back and edit old images once you’ve mastered your editing tools. You’ll have easy and quick access to the images you have just taken, but also be able to edit them to perfection later on. Bingo!
For most pros, the ability to shoot on dual cards is the real winner. This adds an immediate backup for all of the images they are taking for clients. For this case shooting RAW to both cards is probably the answer, that way if something becomes corrupt or lost, you still have a copy of all of the images to give to clients. You also have the option to shoot RAW on one card and JPEG on the other, or RAW+JPEG to both! It’s up to you to decide what works best for your workflow and how much space you’re willing to take up on your SD card(s).
Traveling With a DSLR
While DSLRs range in size & weight depending on which body or lens you have attached, they are generally the largest and heaviest of all the cameras in this guide. They pack the biggest punch in terms of image quality, but they can be cumbersome when traveling for long periods of time.
If you’re a big fan of traveling light, a DSLR may not be the beast for you. But as we mentioned before, many people find the superior quality outweighs just about everything else.
When considering a DSLR for travel, one thing to note is that body and lens sizes can vary quite a bit. This also means that the weight of your camera will differ greatly depending on what you choose.
When it comes to camera body sizes, there’s a huge variance in size & weight:
- Canon Rebel t7i: 5.16” x 3.93” // 532g
- Nikon D3400: 4.88” x 3.86” // 460g
- Canon 5D Mark IV: 5.93” x 4.58” // 800g
- Nikon D850: 5.75” x 4.88” // 1000g
- Canon 1D Mark IV: 6.14” x 6.17” // 1230g
Keep in mind, that’s just for the body sizes. When you take different lenses into account there’s a ton of variability in kit size. Generally speaking, the biggest lens you’ll see will be telephoto lenses, which are mainly used by either sports or wildlife photographers. A Nikon AF-S 600mm 4.0, for example, comes in at a whopping 6.54” x 17” and 3810g—also known as “ginormous” in layman’s terms. On the flipside, smaller lenses, while lacking the ability to pick out rocks on the surface of the moon, can be drastically smaller. Take the Canon EF 50mm 1.8 as an example—it’s only 2.7” x 1.6” and 162g. A lens like that is certainly used for different types of photography, but if you don’t plan on doing a lot of birding on your trip to Iceland you might want to leave the telephoto at home.
If you’re curious about sizes or looking to make use of every inch in your one bag travel pack, you can compare different body sizes and weights at Camera Compare. A website that we find ourselves getting lost on with some regularity.
“Think about matching your setup with your needs and travel style. A DSLR and a quiver of lenses is awesome, but not if it doesn’t make it out of your backpack.” —Adrienne Tam, Architect and Photo Enthusiast
You’ll really have to think about what you’re planning on shooting and how you’d like to do so before you choose the lens you’re going to take with you. If you like versatility but don’t want to take more than one lens, you should definitely look into some zoom lenses.
Something like the Canon 24-105mm is a great option and will give you a good range of wide to telephoto. If you prefer the challenge of moving your body to get the right composition—rather than just zooming in—we’re massive fans of the Nifty Fifty by Canon . It’s a 50mm 1.8 lens that’s small, light and super purse happy. For a mere $150, you’ve got yourself a great little lens. It’s a classic for most beginners because of the price point, the shallow depth of field and the perspective, but it’s not just for newbies. This thing can pack a punch.
“I often travel with my nifty fifty as my only lens. It’s so light and I grew up shooting with a 50mm 1.8 so it feels like going home. The images are sharp and I love the perspective.” —Frances Beatty, Professional Wedding Photographer
If you’re sporting a Nikon camera, consider the D lenses . They’re more compact than the professional range of lenses and they’re light as a feather. They may not be as tack sharp as some of the heavier and more expensive lenses, but they’ll get the job done. They’re a staple for many professional photographers as well as hobbyists.
DSLR Gear We Can’t Live Without
Holdfast money maker.
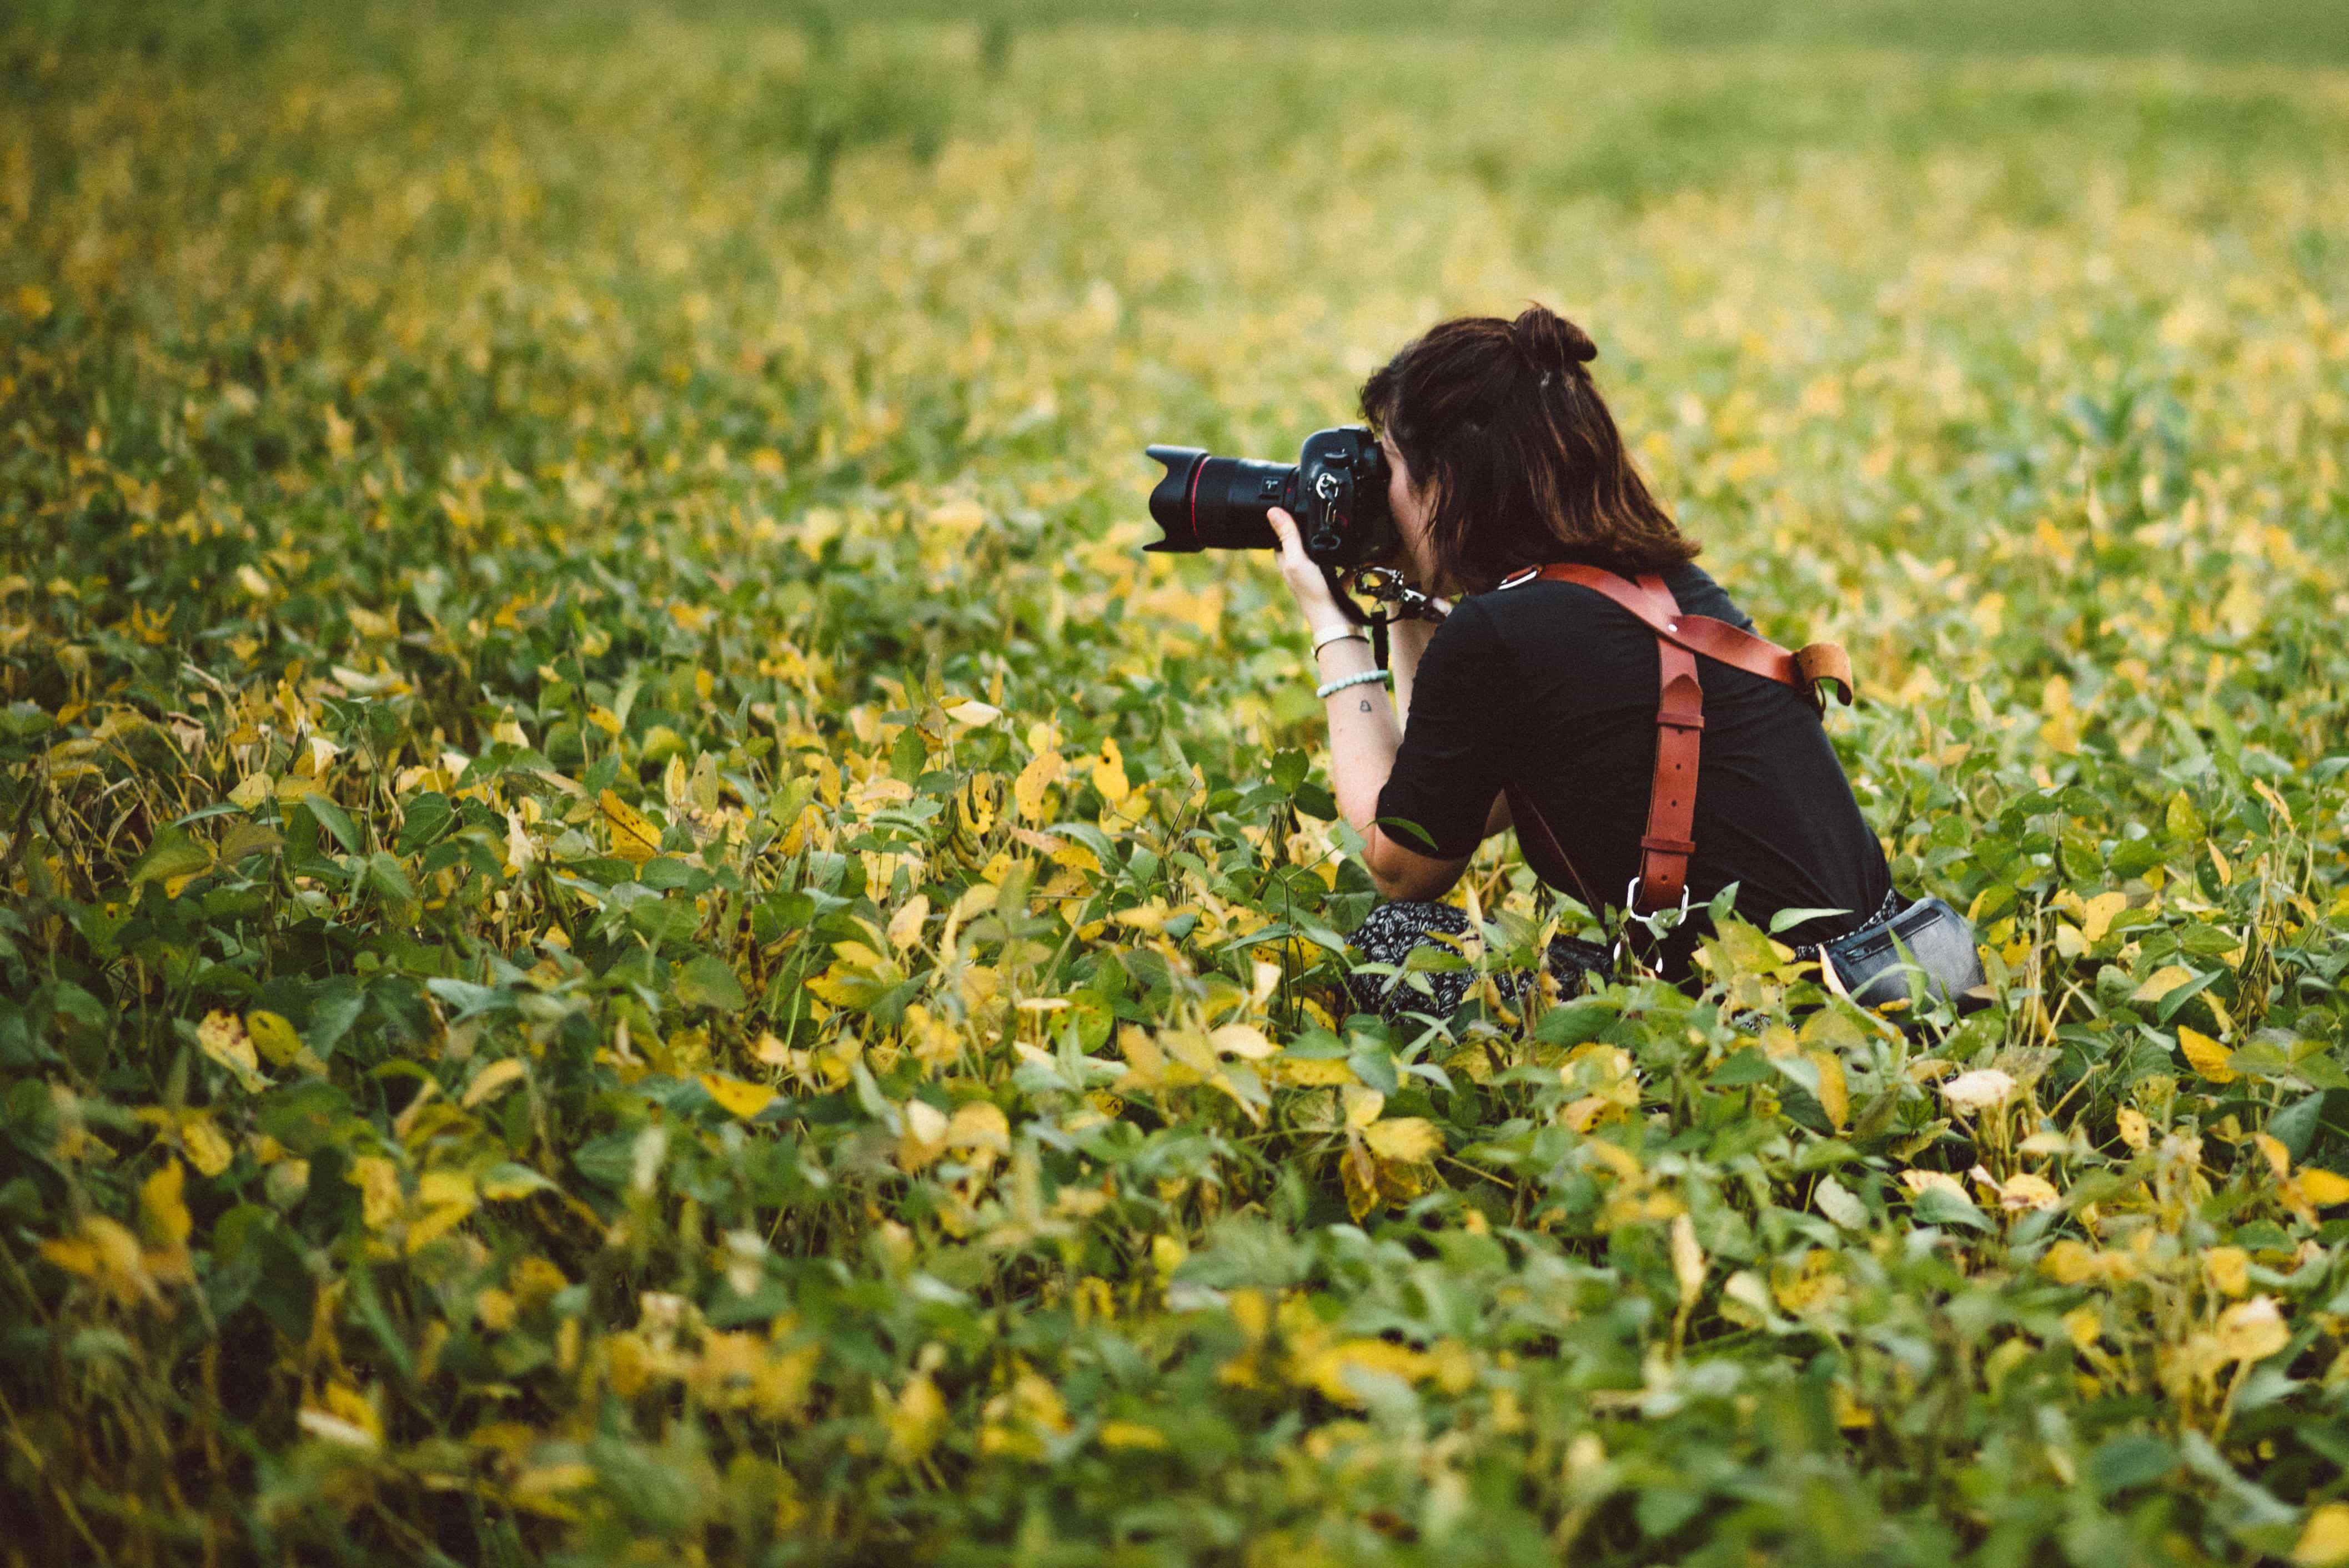
A leather holster type camera strap, this allows you to carry two cameras at once—a favorite for wedding photographers. The even distribution of weight takes some of the pressure off of your neck and back, which is helpful on a 12 or 14 hour shoot. The hardware is tough and intended to take a DSLR with a professional lens, plus there is a redundancy tether that will be sure to keep your gear safe.
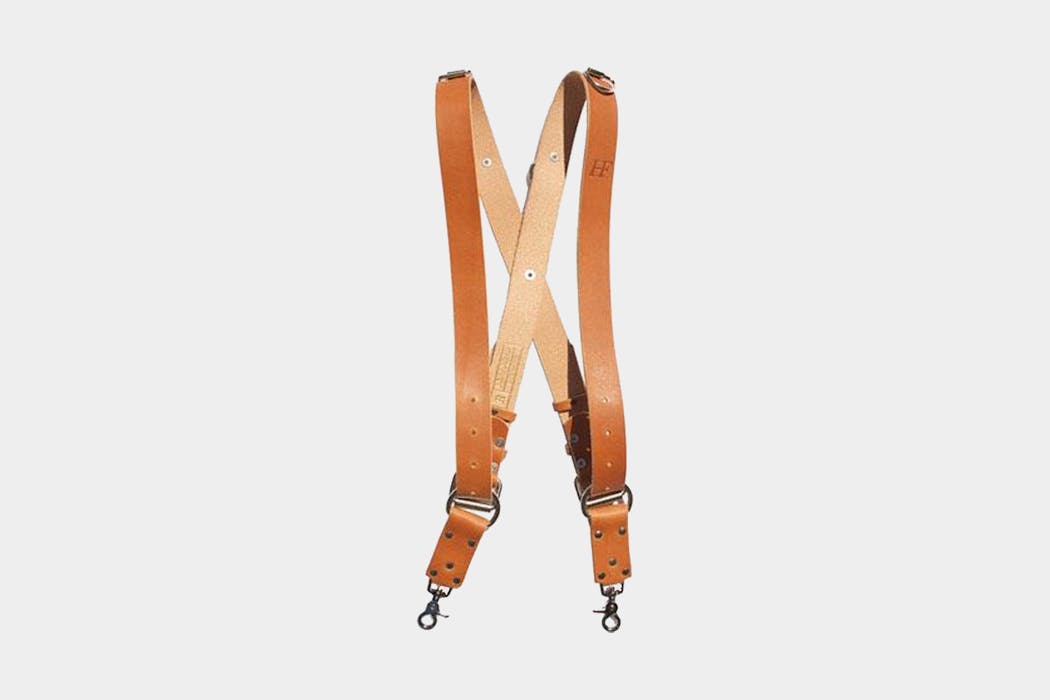
The leather looks sharp whether you’re dressed down for a less formal shoot or wearing a suit/dress at a wedding, looking like a total badass. There are also a number of options for colors, and they even make a vegan option!
“I get a lot of compliments while working. Lots of people liken me to Lara Croft, which I won’t complain about.” —Frances Beatty, Professional Wedding Photographer
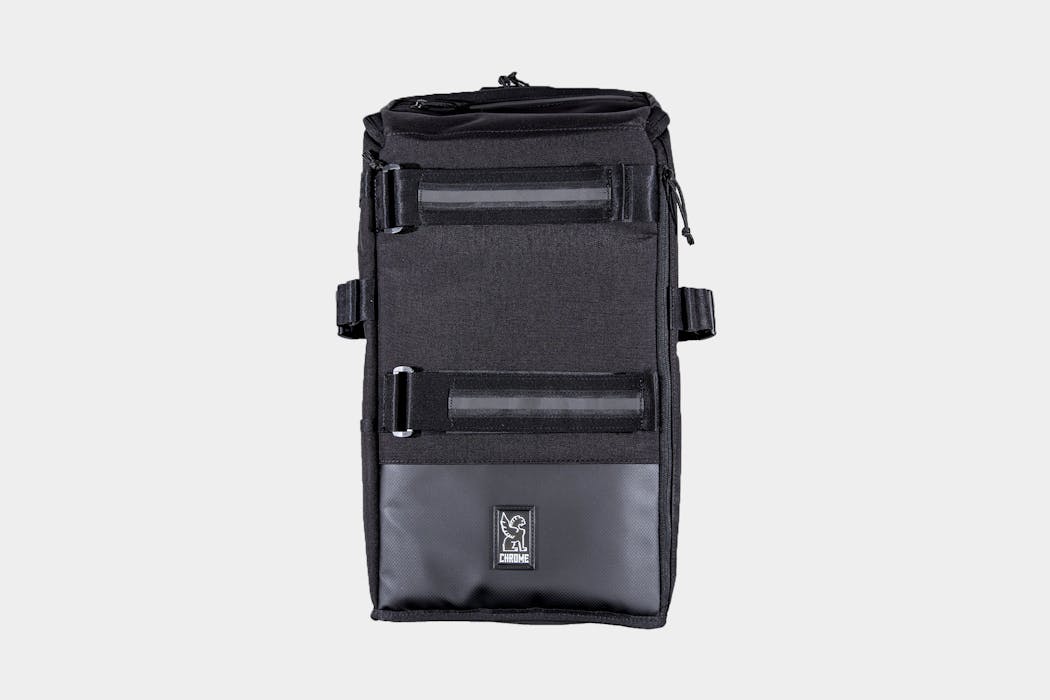
This medium-sized backpack is a great option for anyone carrying around a good deal of lenses and gear with them. It’s got some great features for any urbanite photographer on the go, and we think it has a nice overall construction with some solid craftsmanship.
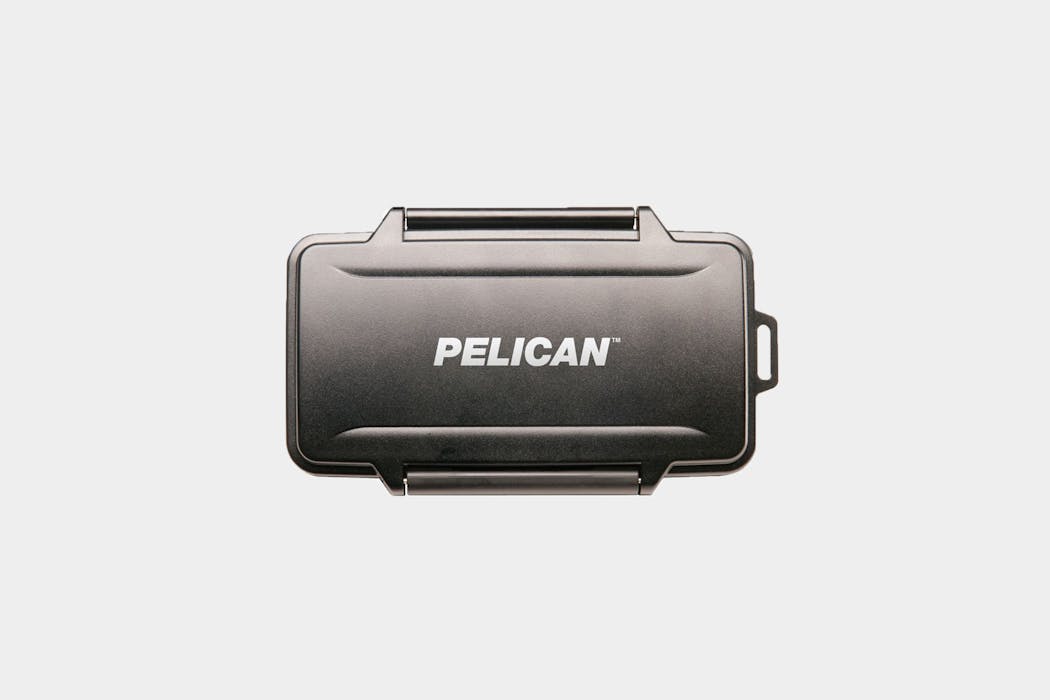
A hard case is useful for keeping your memory cards safe from the elements and organized in one place. We like the Pelican because it’s waterproof and holds quite a number of cards. There are two different types of cases depending on which type of memory card you use, so make sure to get the right one.
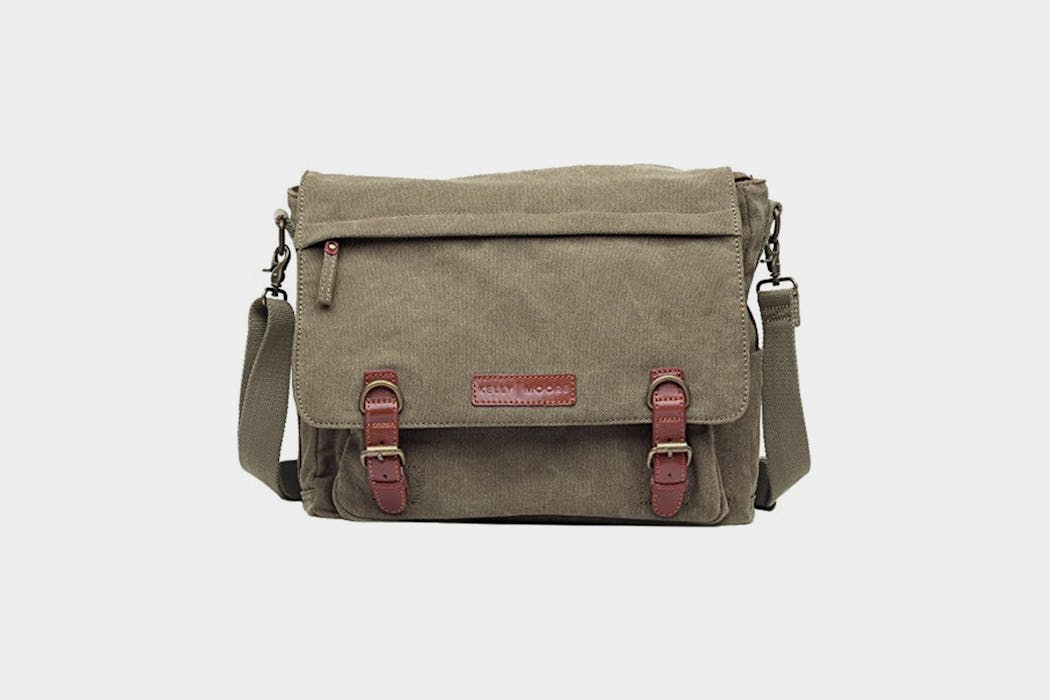
Kelly Moore makes camera purses and bags that don’t look like your average camera bag. That makes this a favorite for traveling, as you’re a little less conspicuous. The Kate canvas bag comes with a removable camera cube, which makes things easy to organize. Depending on how you configure the cube, you can fit a number of items in there—we’ve been using this with a DSLR Pro body/lens and two additional lenses. The tough canvas doesn’t show signs of wear and tear very easily, which is also a big plus.
External Flash
If you’re a professional photographer or just interested in exploring what flash can do for your images, the Canon Speedlites or the Nikon Speedlites are great options. It’s easy to use but packs a punch.
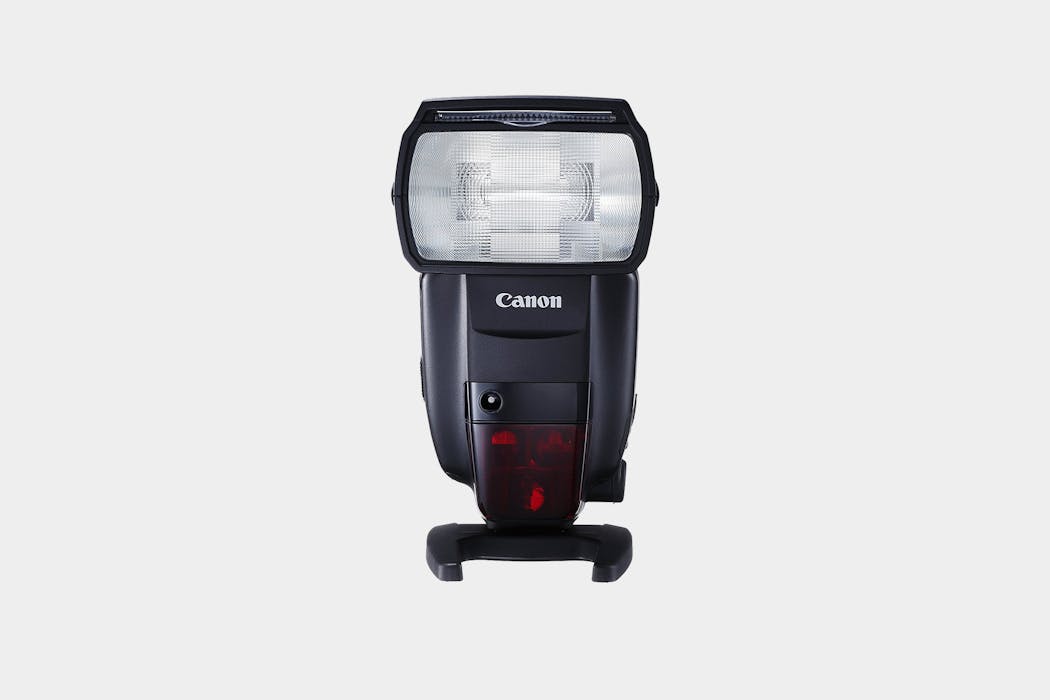
You can use this flash in ETTL mode, which is a little like automatic mode—it will take your settings into account and fill in the light that you need. Or you can go old school with full manual mode! It has a swivel head to allow you to manipulate where the flash bounces, and there are a few options to power this bad boy. It also takes AA batteries, which is very convenient if you need to replace them while traveling.
“I have to have my Speedlites flash with me at all times.” —Corey Tenold Professional Fashion Photographer
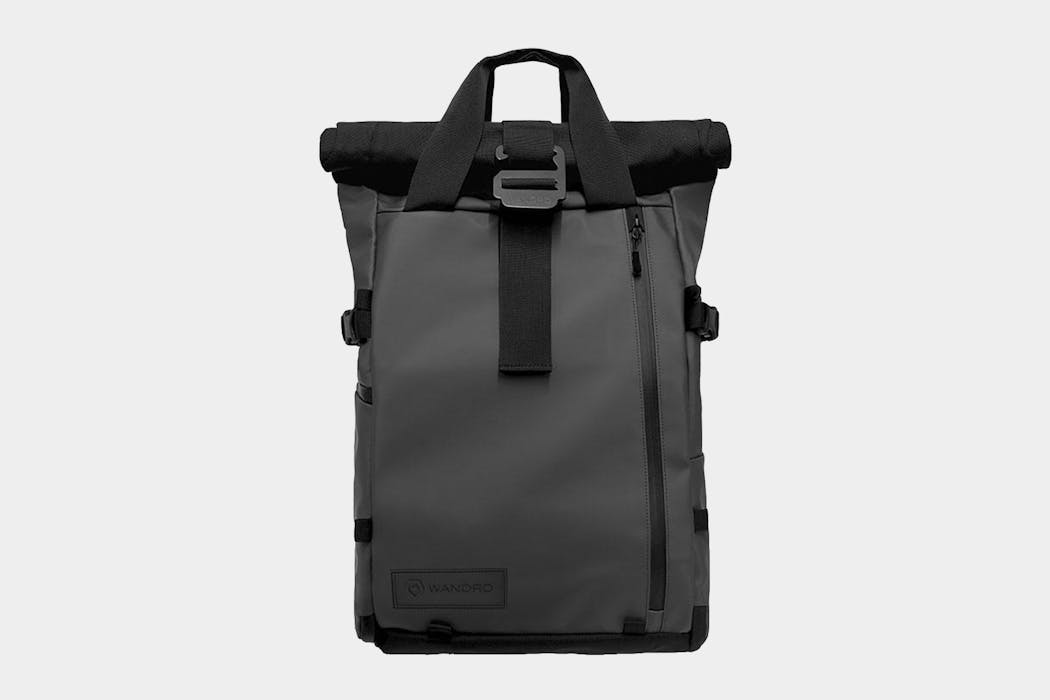
A camera backpack made by photographers for photographers. This backpack can be your one-stop shop bag for long trips. The camera cube keeps your gear safe, and the rolltop leaves enough room for your personal belongings. There are multiple access points for easy access to your gear or laptop.
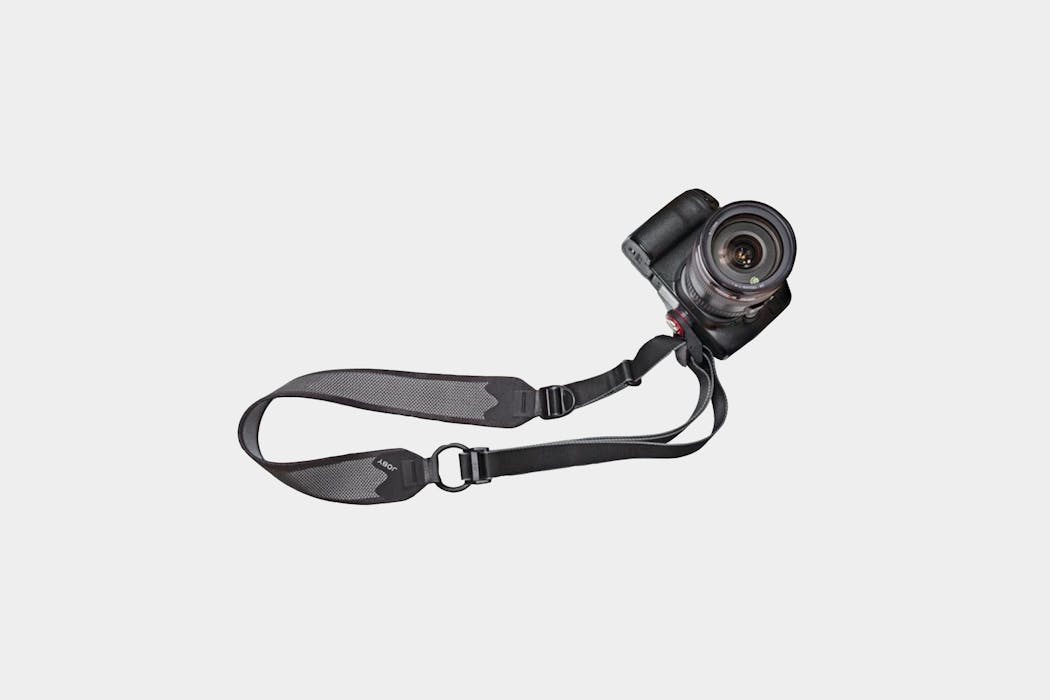
A crossbody strap for your camera. This strap is lightweight, designed with comfort in mind and will sit tightly against your hips when you’re moving around. It’s a great option for travelers.
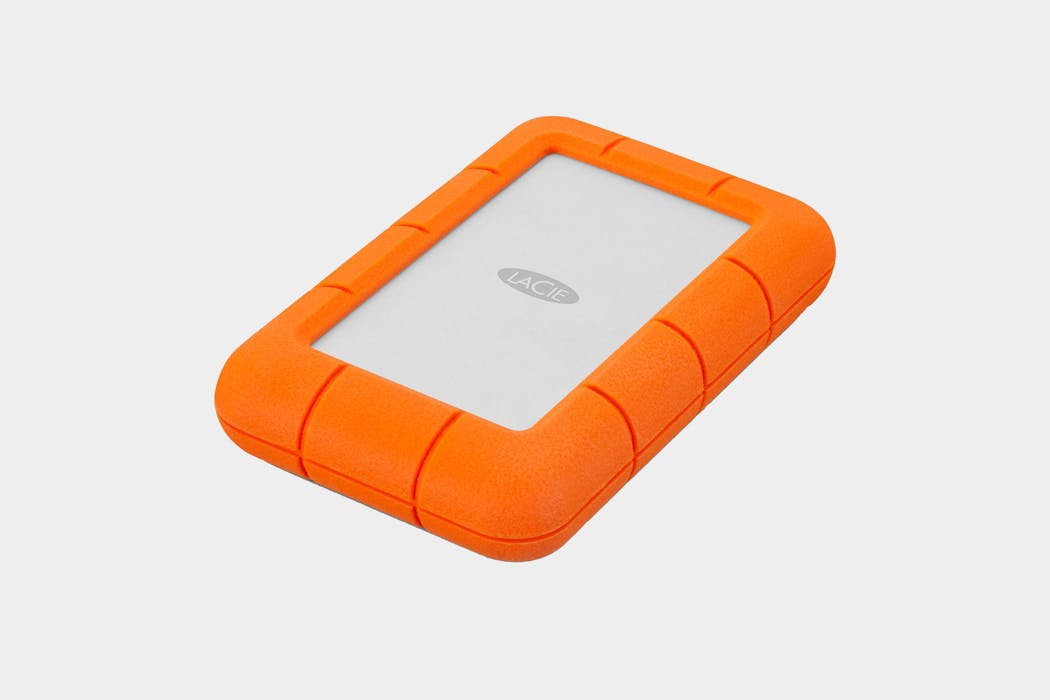
The LaCie rugged hard drive is compact, fast, and designed to take a few hard hits. It’s crush, drop and rain resistant, which we hope won’t come in handy. The last thing you want while you’re traveling is to drop and destroy your backup—and this is why some professionals will even keep 2 hard drives on them while they’re on the go.
“I typically carry 2 hard drives with me. I have a portable that I typically leave at the hotel/apartment. And then I carry around a 1TB Samsung SSD portable for transferring/editing while I’m out and about. At the end of the day, I move my files from my SSD to my HD, and then clear the SSD for the next day.” —Corey Tenold, Professional Fashion Photographer
DSLR Apps We Love
Within the photography community, VSCO is best known for their lightroom presets that mimic old film stocks, but they also have an app. You can shoot directly in the app or add photos to it and edit them using presets created by VSCO. There are plenty to choose from, including some that match their lightroom presets and old film stocks like Kodak Portra or Fuji Pro. You can also manipulate other settings within the app and share it with the VSCO community. The VSCO app will give your photos that little extra spit and polish that can help them stand out against the masses.
“During dinner at weddings, I will use my camera’s wifi and send images directly to my phone to edit using either VSCO or the lightroom app. Then I’ll print it directly from my instax printer and have a print to give my clients in real-time. I love that I can leave my clients a couple of small prints in a thank you card on the day of their wedding.” —Frances Beatty, Professional Wedding Photographer
JPEGmini App
One thing you start to notice when you start getting into photography, whether as a hobby or as a career, is that there is never enough space. What seemed like an absurd amount of space at one point, quickly fills up with all of the amazing photos you’re taking. Memory isn’t super expensive, but it isn’t cheap either and it can add up quickly. No one loves being in that position where you have to decide if you’re going to keep those images of your nephew’s birthday, or delete them to make more room for your pictures from your latest trip to the Hamptons. Well! Luckily there’s an app for that (sorta). JPEG Mini is an app that compresses your Jpeg files without any loss. Tried, tested and true – you can compress a 32mb file down to under 10mb and still print it as a 30×40” print. You won’t even notice the difference. Better yet, it’s a drag and drop program, so it requires very little from you or you can install the plugin for lightroom and use it when you export your images. At this point it’s an industry standard, but it also comes in handy for personal use especially while traveling.
The DSLR world can be intimidating to newcomers, but the benefits largely outweigh the learning curve—which is not quite as steep as some may assume. Anyone interested in creating ultra high-quality pictures simply must consider a DSLR when looking to make their big camera purchase. It’s a no-brainer.
For both professionals and amateurs alike, the DSLR can cover a wide range of use-cases. Family vacation pics, full-fledged studio portraits, macro close-ups, jaw-dropping landscapes, and stunning city vistas…the DSLR can do it all. The possibilities—and the amount of gear/accessory combinations—are virtually endless.
When it comes to travel, the DSLR is a tricky item. Many minimalist travelers will still put up with the weight and size of a DSLR setup because they simply can’t give up the image quality. With the variety of lens and body sizes—plus a little research—you can almost certainly create a setup that accomplishes all of your photography needs while keeping in line with your weight and size budget.
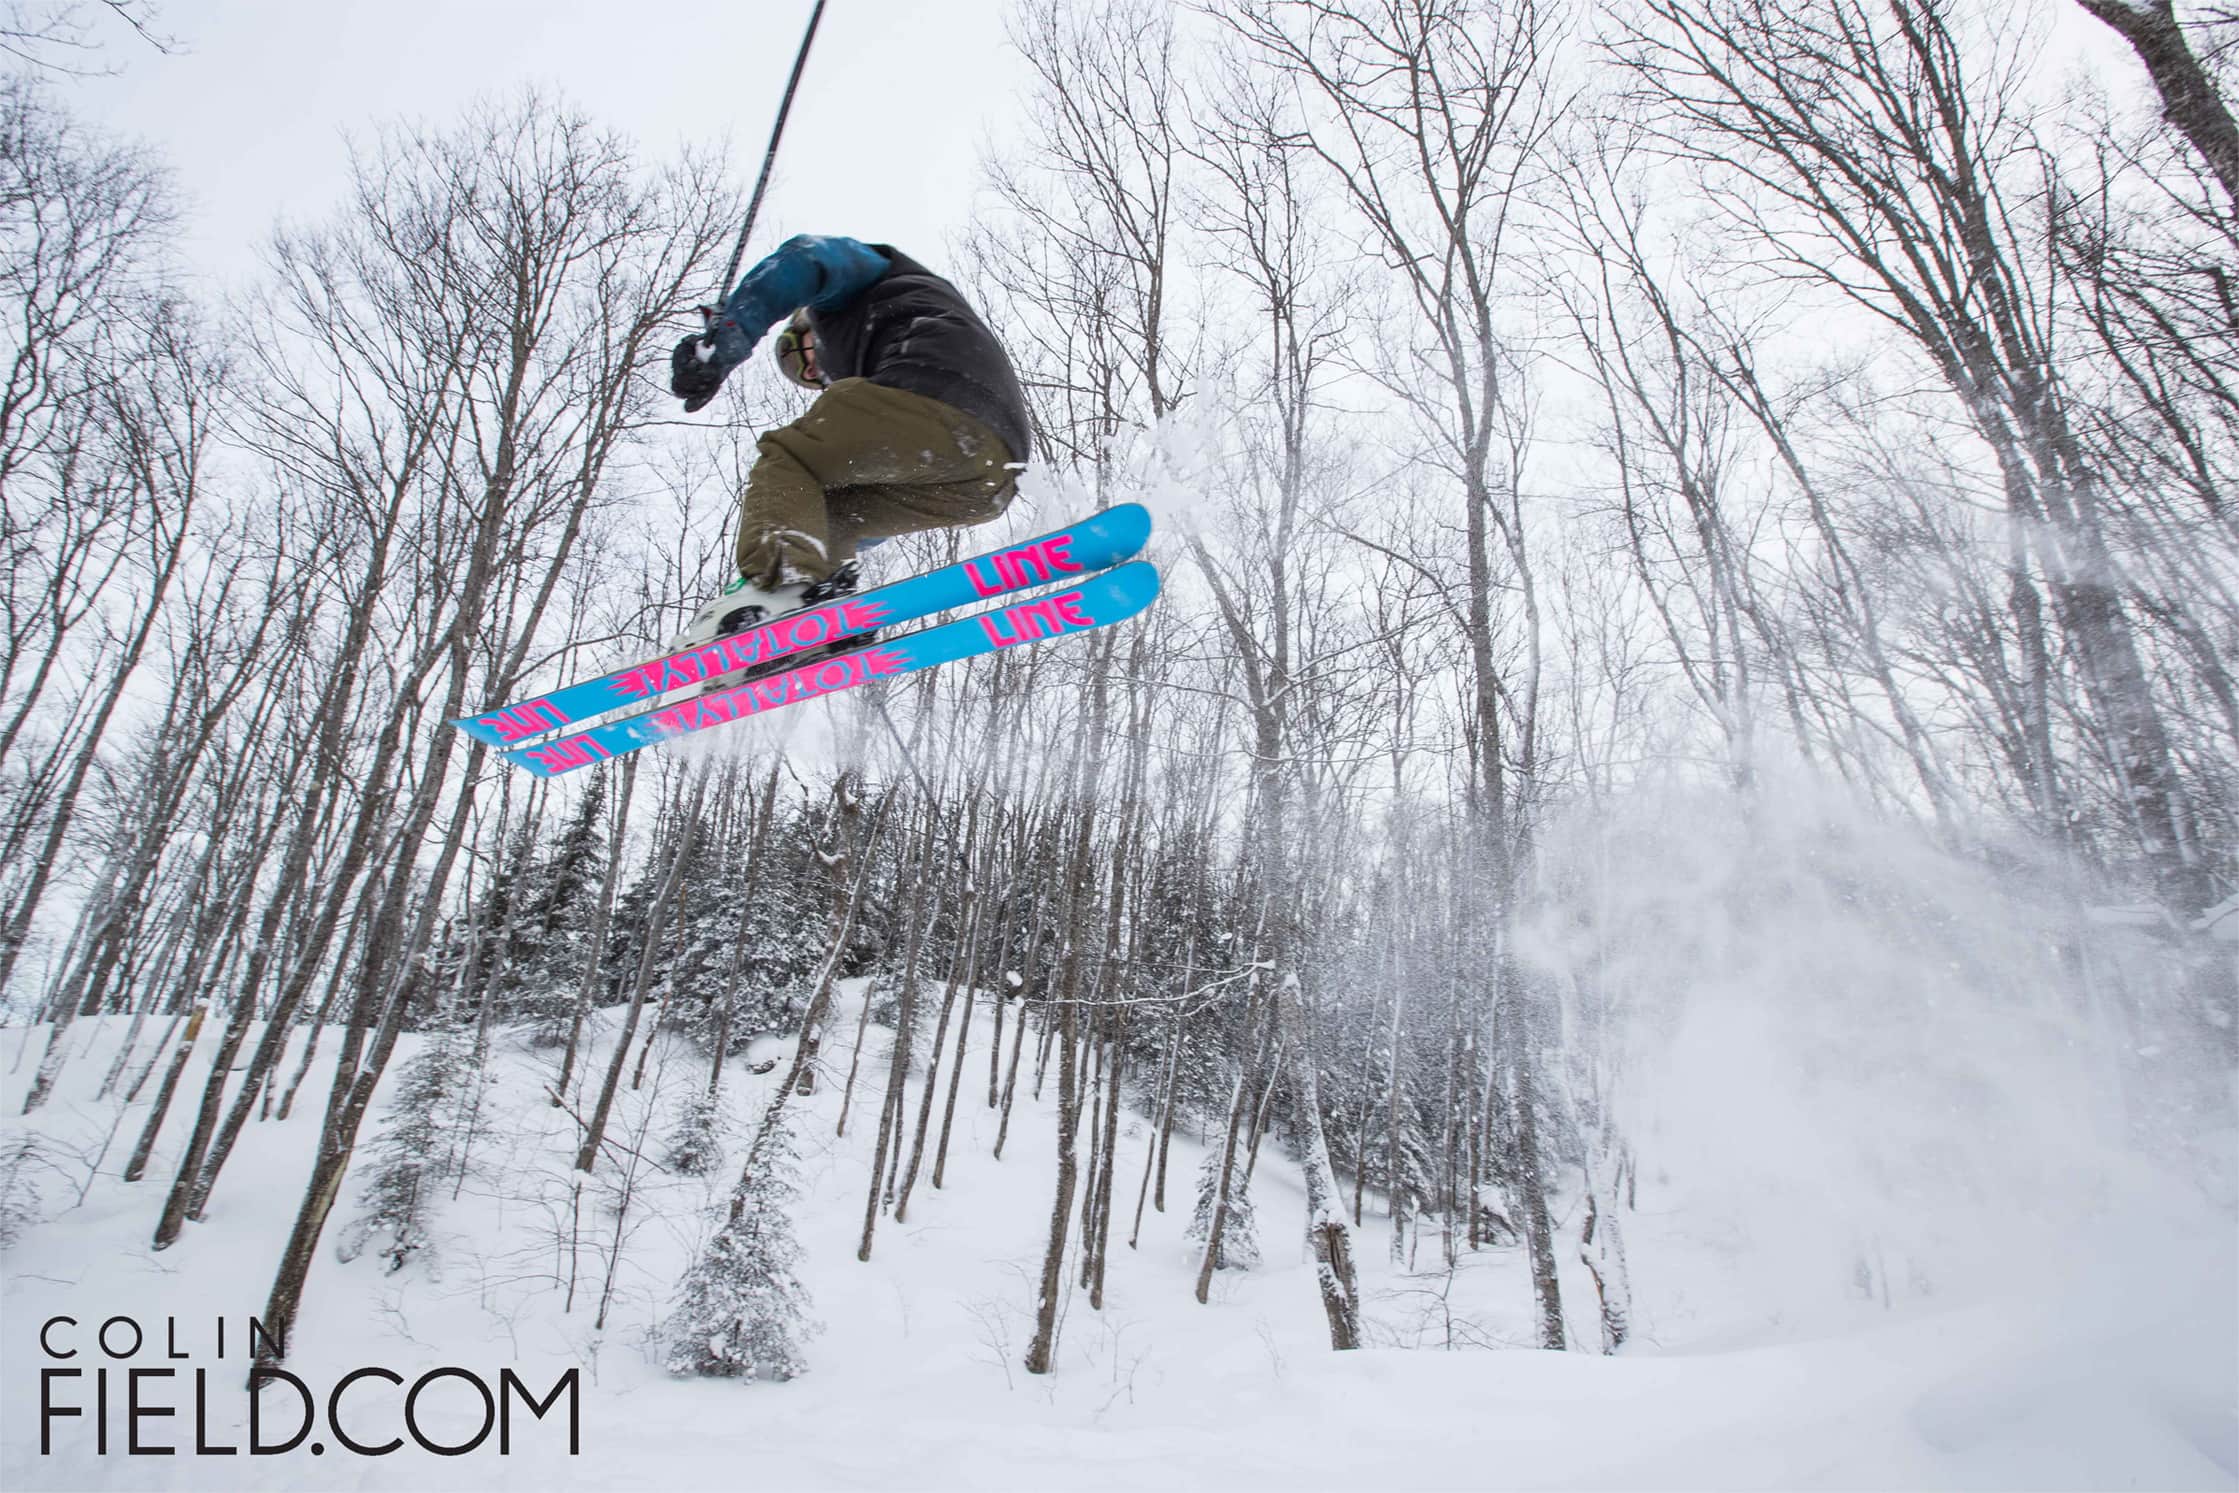
That being said, many travelers—especially those in the ultra-light realm—either can’t stomach the additional weight, size, and price of a DSLR or they simply don’t need it. If high-quality images aren’t a priority, there are plenty of other low-weight options out there that will still give you great results.
Ultimately, it comes down to personal preference and a question of what your needs are. Do you travel with the goal of taking amazing pictures? Then you need to consider a DSLR. Do you travel to have amazing experiences and you’d like to document them every now and then? Other options will suffice, but a DSLR will give you some awesome photos—if you’re willing to sacrifice the space you will be pleasantly surprised with the quality you receive.
Are you only interested in taking food shots for Instagram? Well, you may not need a DSLR—although if you want to take the best food shots around… you guessed it, check out a DSLR.
Our Favorite DSLRs
- Canon Rebel t7i
- Canon 5D Mark IV
Whether you want to hit the skies or see your physical photos in real time, our list of supplemental cameras will add some spice to your life.
What About the Other Travel Cameras Out There?
While we have covered some of the most popular camera kits out there, we’re still just scratching the surface of what is ultimately available. Cameras have been around for a long time and there are many varieties available that are outside of the realm of what you might find in the average camera bag.
That being said, a truly comprehensive camera guide that includes every camera from throughout history would take years and years to develop. That sounds like way too much work for us, so we’ve decided to give you a quick overview of the more applicable “supplemental” cameras you might find out there.
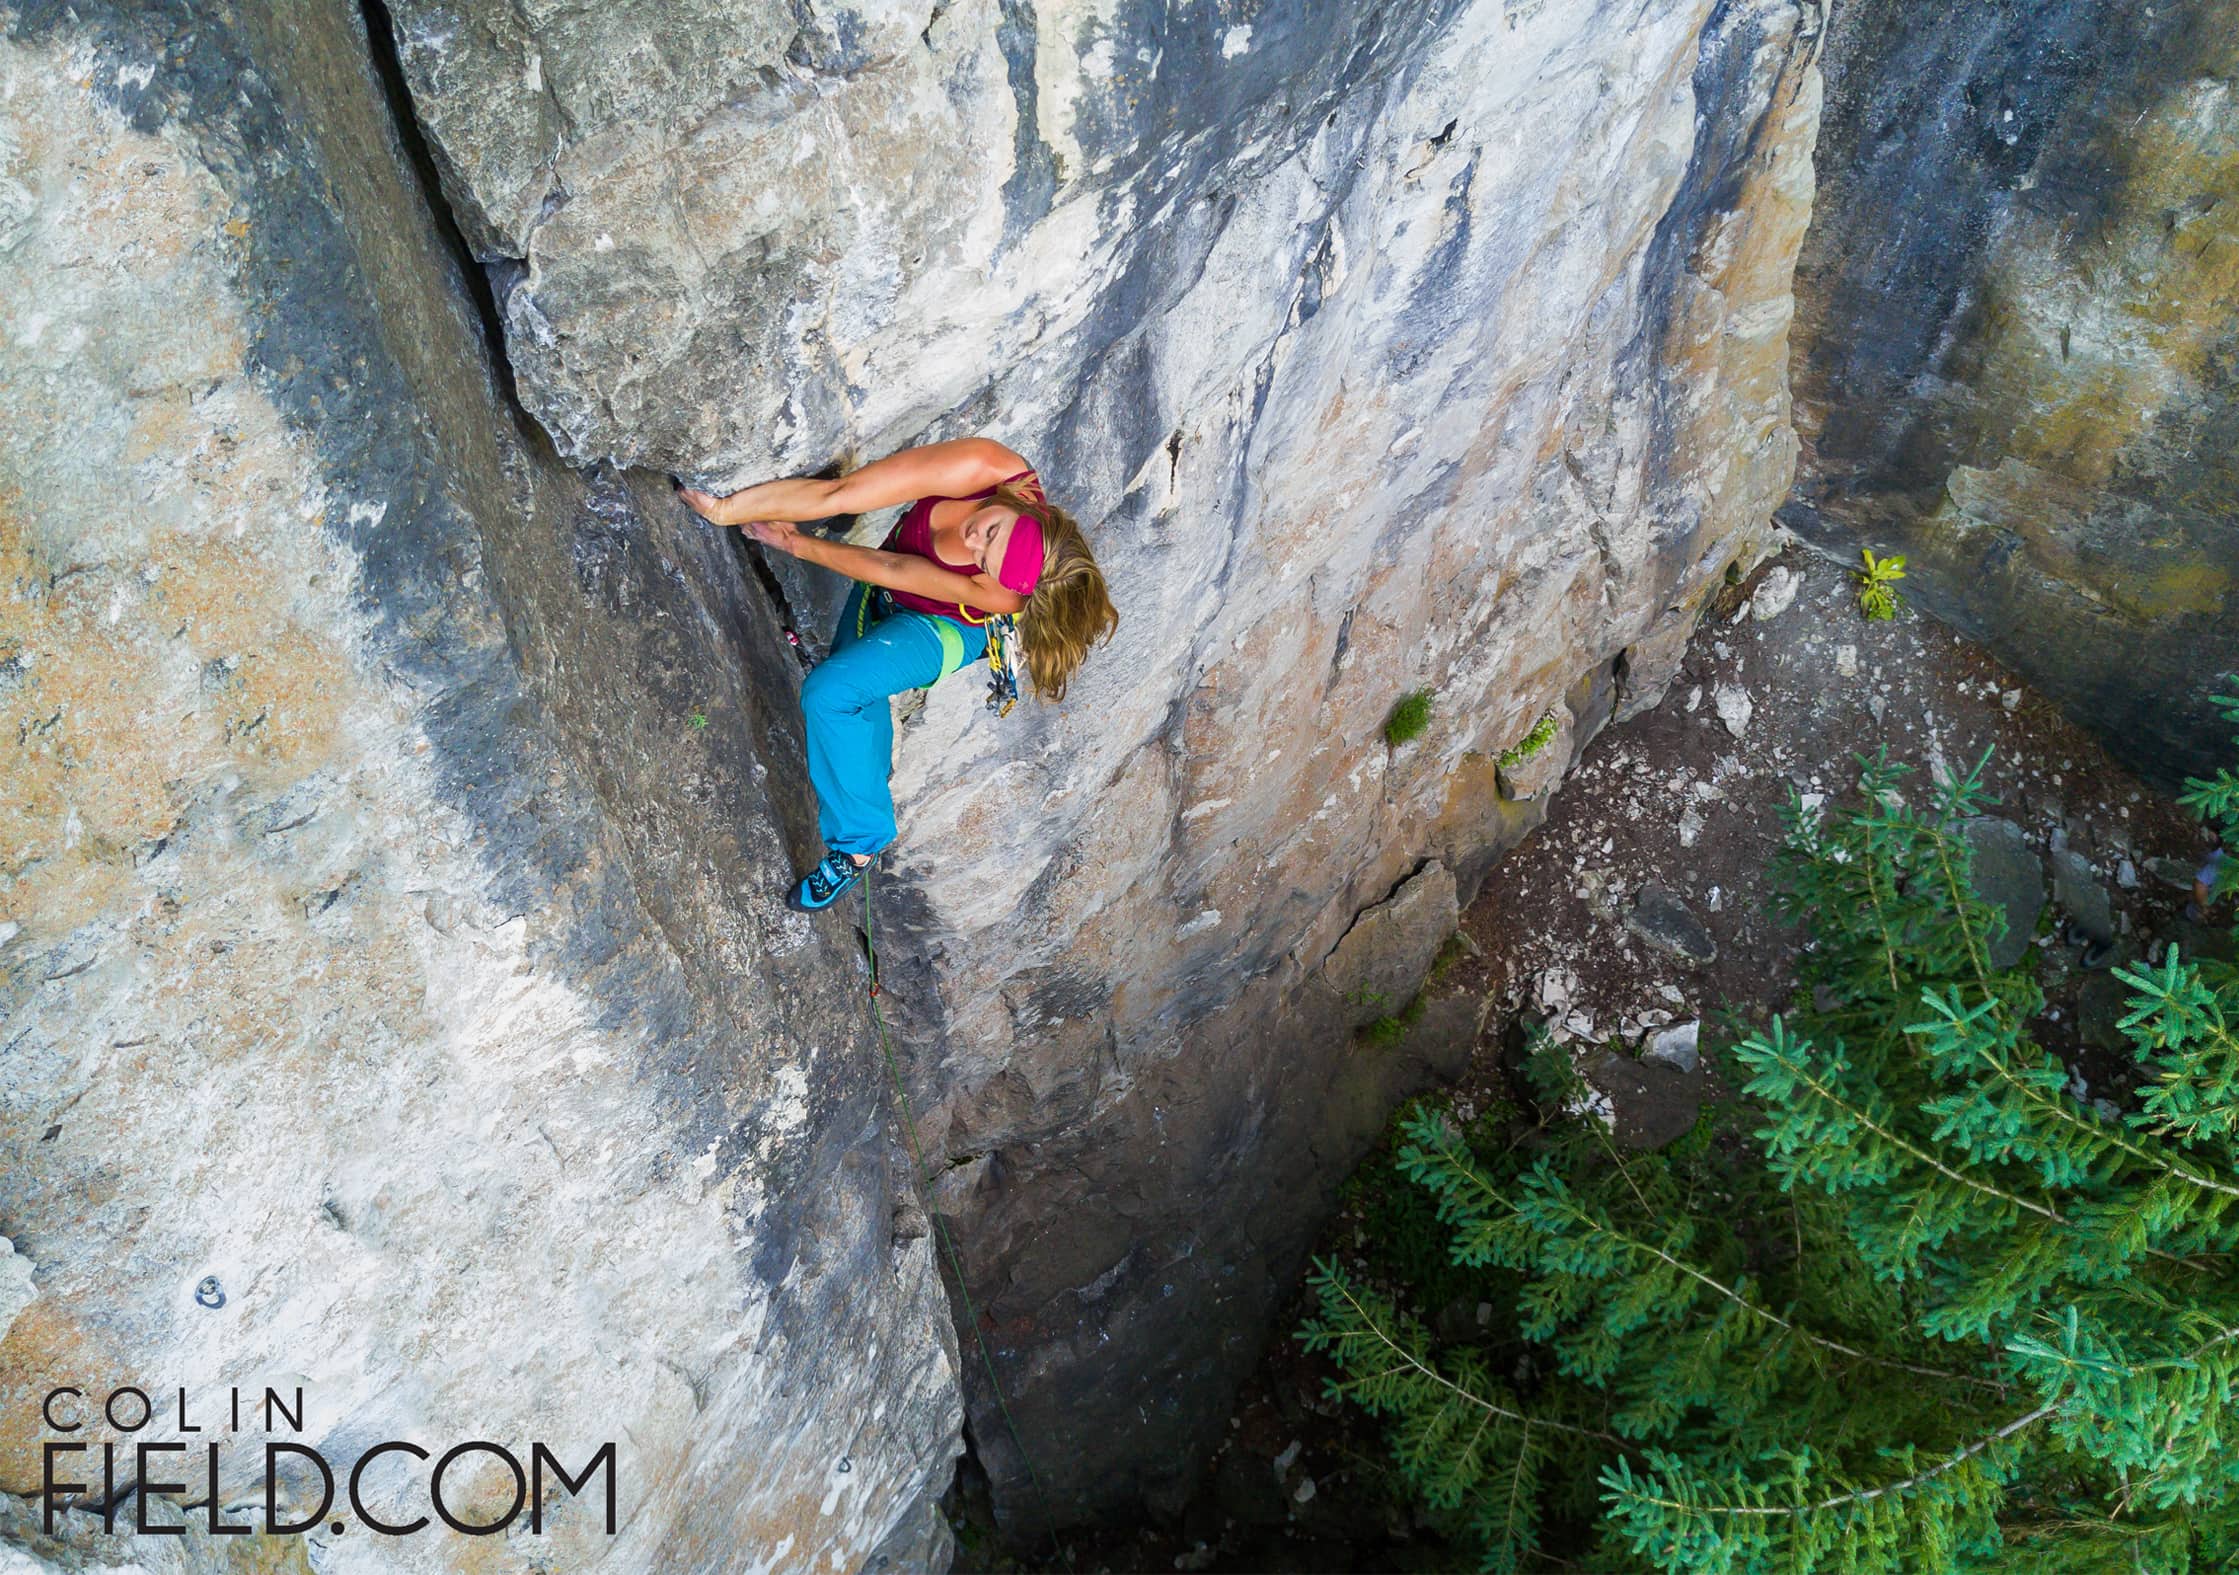
When it comes to traveling and taking photos for professional or personal use, we’d recommend sticking to what’s listed in the overview guide above. But for those that are looking for something a little extra—either for their own pleasure or to capture photos in a truly unique way—check out our supplemental cameras below.
Film and Video
Film cameras have been around since the 1800’s. There’s still no digital camera out there that can compete with the quality of image you can get with a film camera. Accessibility is usually the biggest deterrent for people when it comes to picking up a film camera. Because you can’t preview the exposure or the image, you really need to know what you’re doing in order to avoid throwing away a whole roll of images. Film cameras are usually fairly cheap to pick up, but paying for the film and then developing it can sometimes turn people off. Most pharmacies still develop film, but for the serious photographer this won’t quite cut it—they’ll want access to a dark room to do it themselves.
While film cameras can be intimidating to newcomers, there is a certain appeal and nostalgia to film that many photographers like to indulge in from time to time. There’s a bit of risk involved, compared to digital cameras—you know that you’ve only got a few chances to get the shot. And at the same time, there’s some mystery as well—you don’t know what you’re actually going to get until you get into the darkroom.
While developing film on your own can be a process, it is also an experience that every true photographer should have at some point in their lives. The process is still the same as it was back then, and looking back, most of the iconic photos we know and love were discovered in the darkroom—not after the shutter clicked. Someone, at some point, had that image revealed to them in a tiny room under a red lamp, just like the one you’re developing your photos in now. That is pretty cool, if you ask us.
There are so many different types of film cameras out there. If you’re interested in dipping your toes into the film world, try a Fuji Instax camera. Everything is automatic in the camera and you get your images instantaneously.
Let’s be real, the whole world is going to be run by drones at some point. You’ll be receiving your groceries by drone in addition to using one like a carrier pigeon. Until that day comes, you should probably stick to exploring aerial photography and videography with a drone.
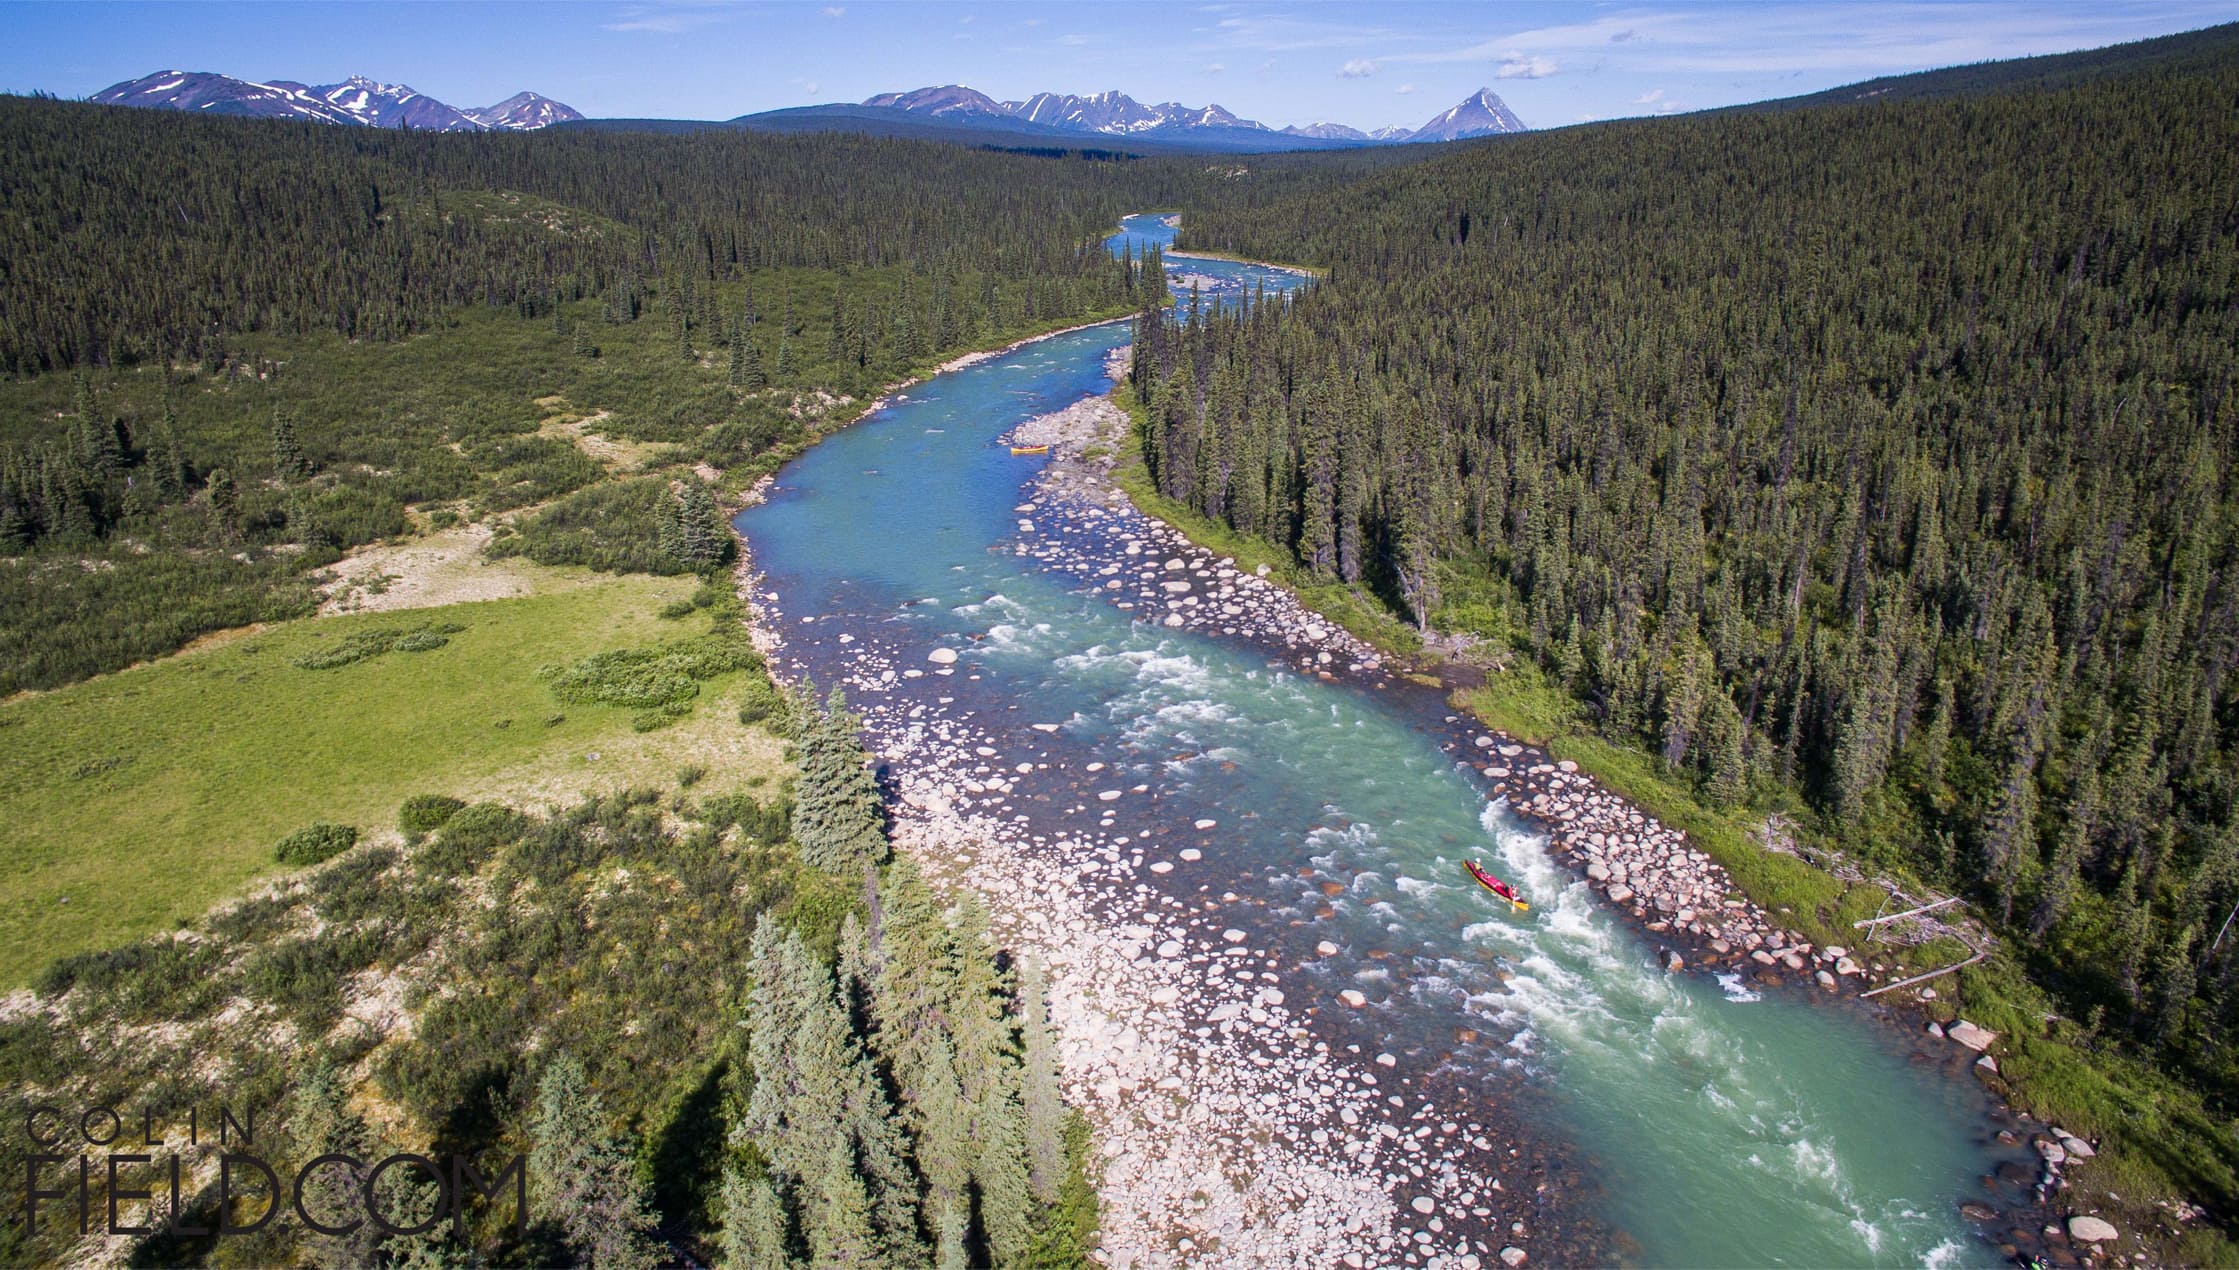
As they become more commonplace, the price tag of drones keeps coming down, along with the size. There is a bit of a learning curve with flying—and a mistake could mean losing your drone in the ocean—but once you get the hang of it, it’s pretty simple to use. Once you’ve got the flying down, you’re taking pictures from the SKY!
Drones are often used for sweeping landscape shots like you’d find in a Lord of the Rings movie, viewing “forbidden” areas from above, action sports sequences, or just providing a unique perspective. Mainly used for filming—but still equally good for stills—these cameras can assist in creating cool transitions and awesome overview shots. Do it right and you’ll have people thinking you rented a helicopter to get the shots you’ve created.
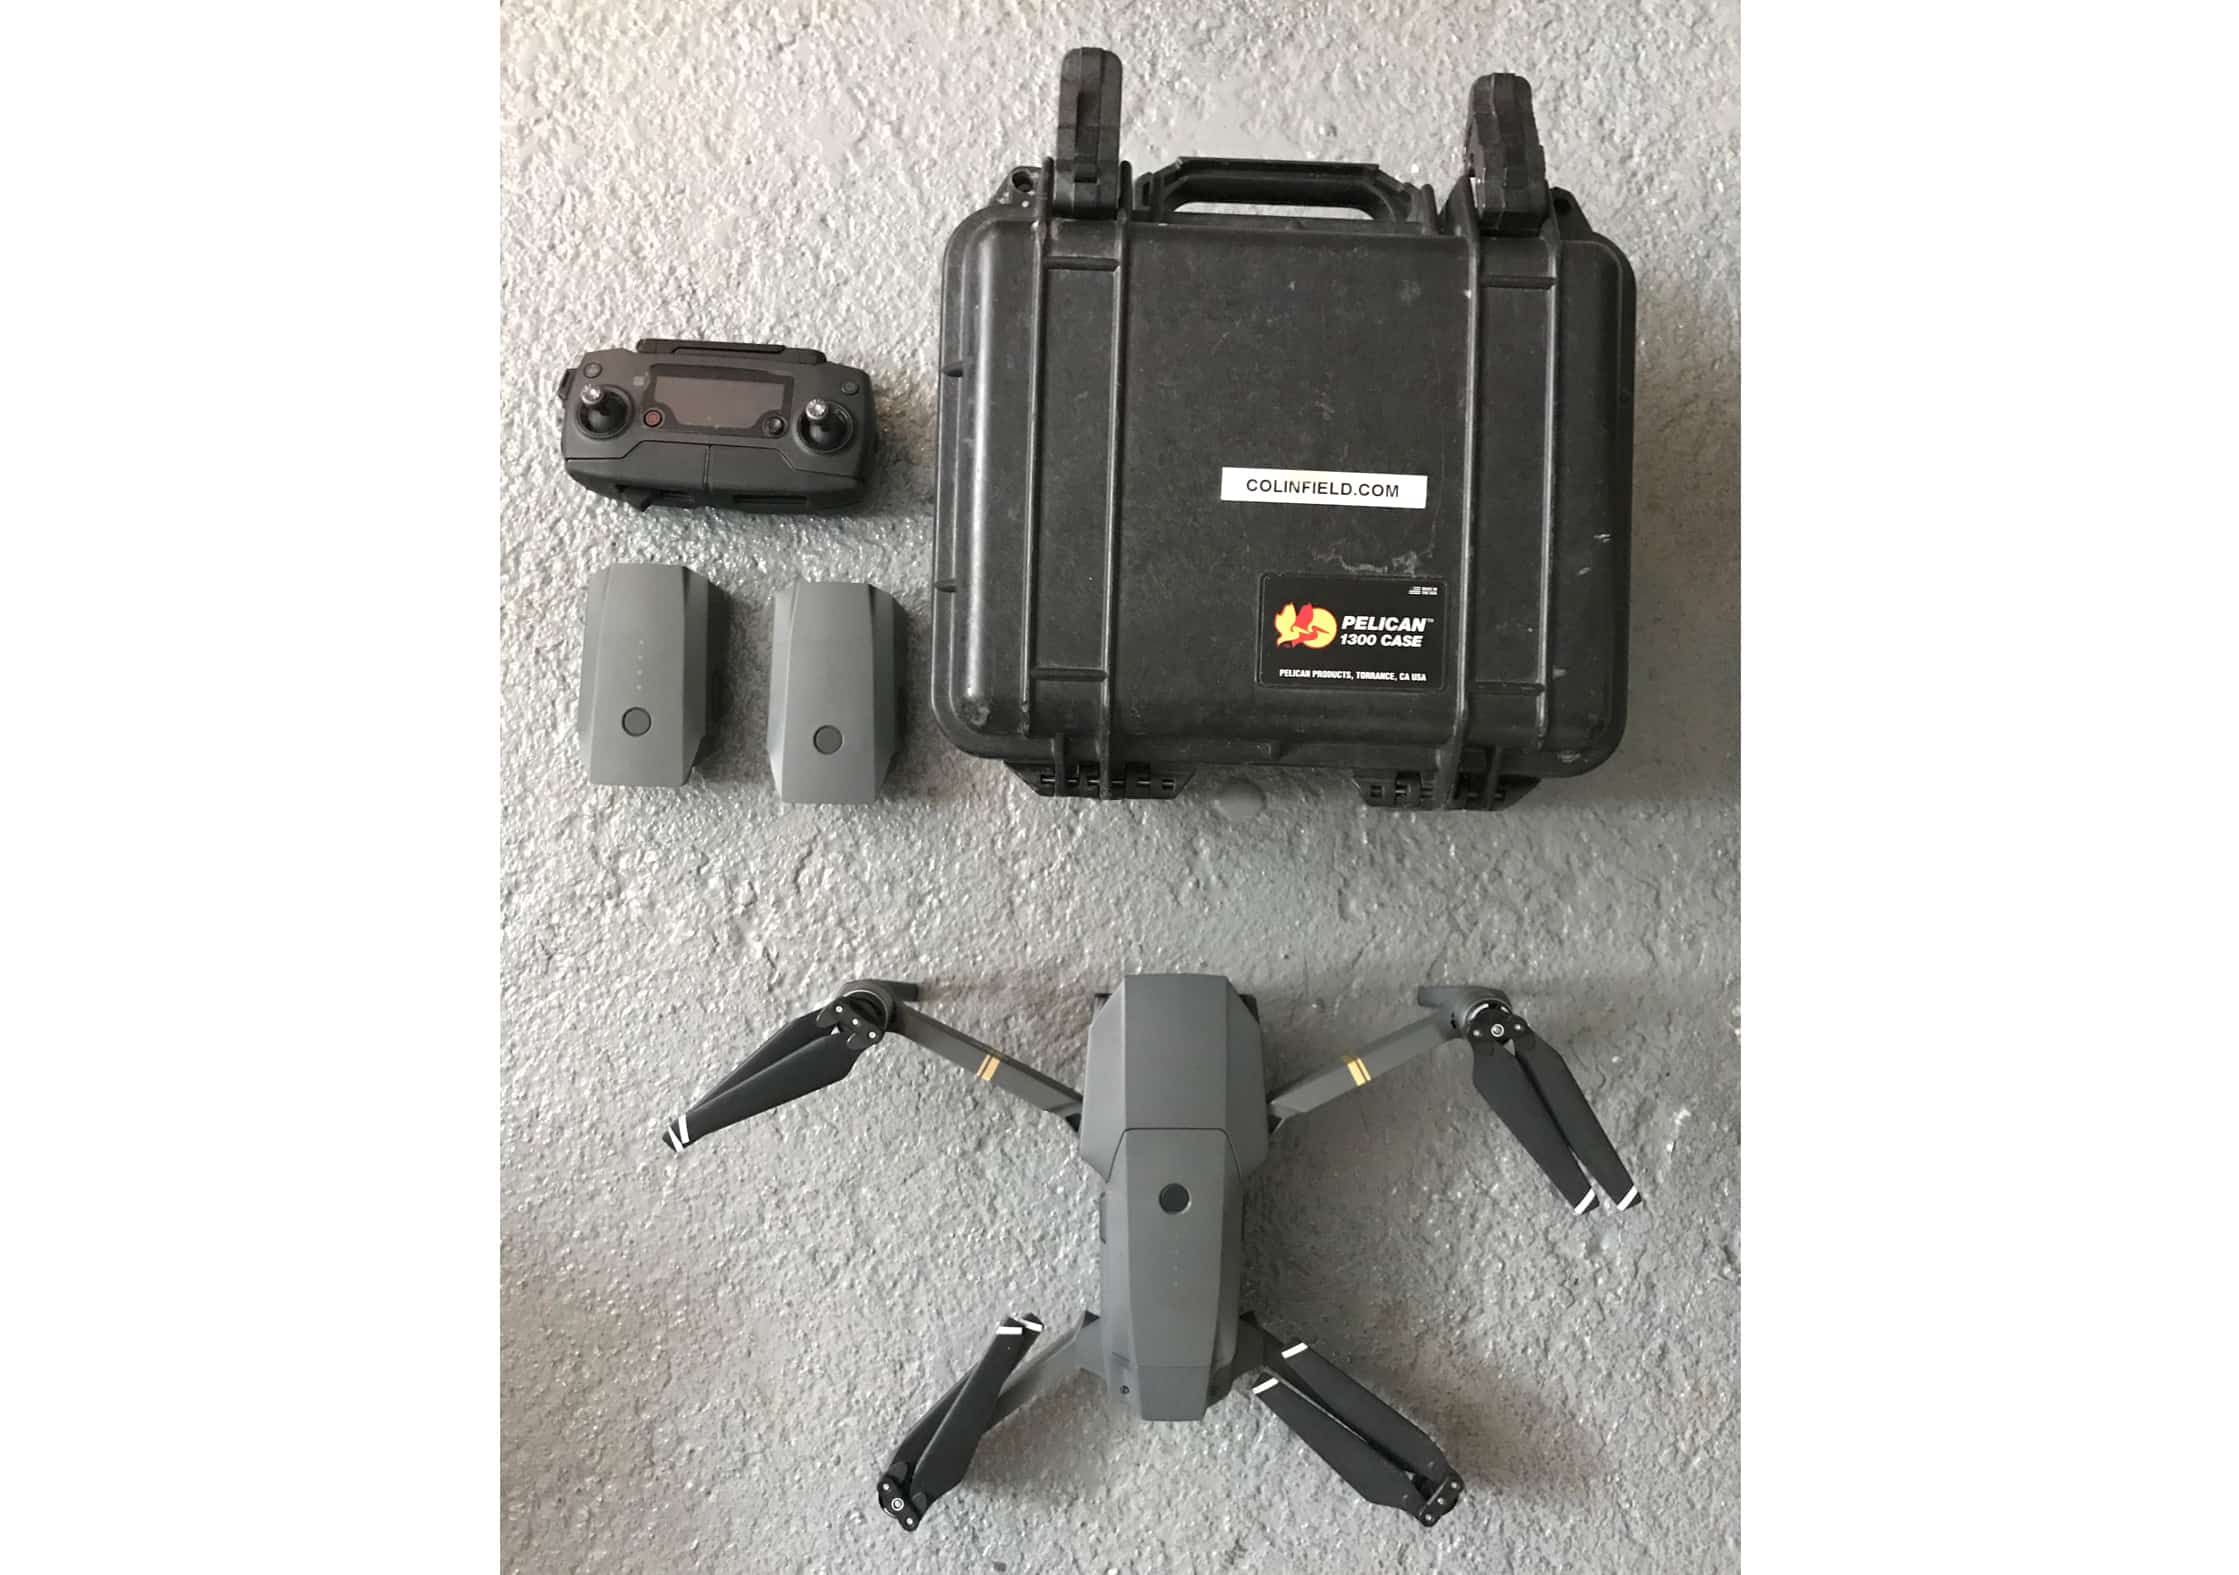
The DJI Mavic Air is a solid option for travel. Compact & powerful. There’s also the classic DJI Mavic Pro —another solid option.
“Do keep in mind that some countries require you to submit flight routes and there are many national parks that do not allow you to fly a drone (Banff, I’m looking at you).” —Frances Beatty, Professional Wedding Photographer
Action Cameras
Action cameras are designed to be right in the action—hence the name. These tiny cameras generally provide point of view (POV) video footage and still images by attaching themselves to something or someone. They are incredibly durable and oftentimes have completely waterproof cases that will allow the user to take them swimming, skiing, or on a boat. These cameras are incredibly popular with action sport aficionados as they can be attached to bikes, cars, helmets, or chests to give exhilarating footage that makes the viewer feel like they are in the shot themselves.
Most of these cameras do not have viewfinders or LCD’s, so you are often left guessing when taking a still image or quick video in your hands. Some models have smartphone apps that will provide a quick glimpse at what you’re shooting and can even upload images or videos directly to your phone. Image quality is surprisingly high, although these cameras tend to lack zoom or many settings at all, really.
The GoPro Hero7 is by far the most popular and well-known action camera, but there are a handful of others that are just as capable including the YI 4K+ Sports and Action Camera , YI Lite Action Camera (a little less robust) and the Sony FDRX3000 .
Disposable Cameras
A cardboard camera with film inside. It’s a super uncomplicated camera that you don’t really need to worry about damaging or insuring. These can be fun for taking snapshots during social events. Pass it around during a party or hand it to your kids to see what they see. They can also be a great way to remember a quick trip, as you’re guaranteed to have the physical prints in your hands at some point—as opposed to having them buried deep in your phone’s photo library. These prints may easily find their way into a picture frame or scrapbook, unlike your digital photos.
Instant Cameras
Shake it like a polaroid picture. Polaroid may not be around the way it used to be, but instant photography is making a comeback. It makes sense. Just like with vinyl, there’s been a real push back to analog after a point where it seemed like digital might make film obsolete. Instant cameras are really easy to use, with fully automatic cameras, but they provide you with an instant physical picture.
The downside? No duplicates. But that’s also kind of nice. Something to cherish.
The Fujifilm Instax Mini 9 is a good instant camera to have on the road. There’s nothing like meeting a new friend & creating a permanent memory with them within seconds.
That's a wrap!
The Final Decision: Choosing The Best Camera For Travel Photography
Whether you’re gearing up to snap a few pics with your smartphone or ready to buy a new lens for your DSLR, we hope this guide has helped steer you in the right direction towards finding the best travel camera kit for you. Traveling and photography go hand in hand, and quite frankly, if you’re not taking a few pics here and there during your world travels… You’re doing it wrong.
As you’ve probably noticed by this point, there is no one camera setup that works for everyone—just like there is no single “best” backpack. We encourage everyone to look at what they ultimately want from their photos, work backward, and try to decide what setup would suit them best. By no means do we expect you to have a clear solution just from reading this one guide, but we do hope that you have the knowledge to now help yourself figure out what the best travel camera is for you.
For the newer photographers out there, you may want to get yourself out to a store and hold some cameras in your hand. We love smaller, dedicated photography shops as opposed to the big tech retailers, because the folks there will have the expertise to give you quality advice depending on your situation.
And for the professionals out there, hopefully you’ve been able to get some insight into how you can travel around the world with your kit and augment it to suit your needs. If you have any good tips that you’d like to share, we are all ears. Feel free to drop us a line .
This Guide Was Brought to You By…
Frances beatty.
Frances is a thirty something wedding photographer living in small town Ontario with her husband. She’s a wedding photographer with some serious travel perks, and also the main creator of this guide! You can check out her website here .
Corey Tenold
Corey was born and raised in a small town outside of Chattanooga, Tennessee. Now, he’s based in New York City shooting for clients such as Vogue and Marc Jacobs. He looks at everyday things from a different perspective and believes that change inspires creativity. Check out his latest work here .
Jared Martin
Jared is a Professional, Real Estate, Architecture, and Interior Design Photographer. You can find him shooting anything from the intricate architecture in his home state of Minnesota to the mountain tops of Peru. Take a look at some of his work here .
Colin Field
Colin Field primarily shoots with a drone throughout his photography work and travels. He has bicycle toured through North and West Africa, taught English in Korea, worked as a bicycle courier in London, and hitchhiked throughout Australia and North America and more. Follow his latest adventures here .
Adrienne Tam
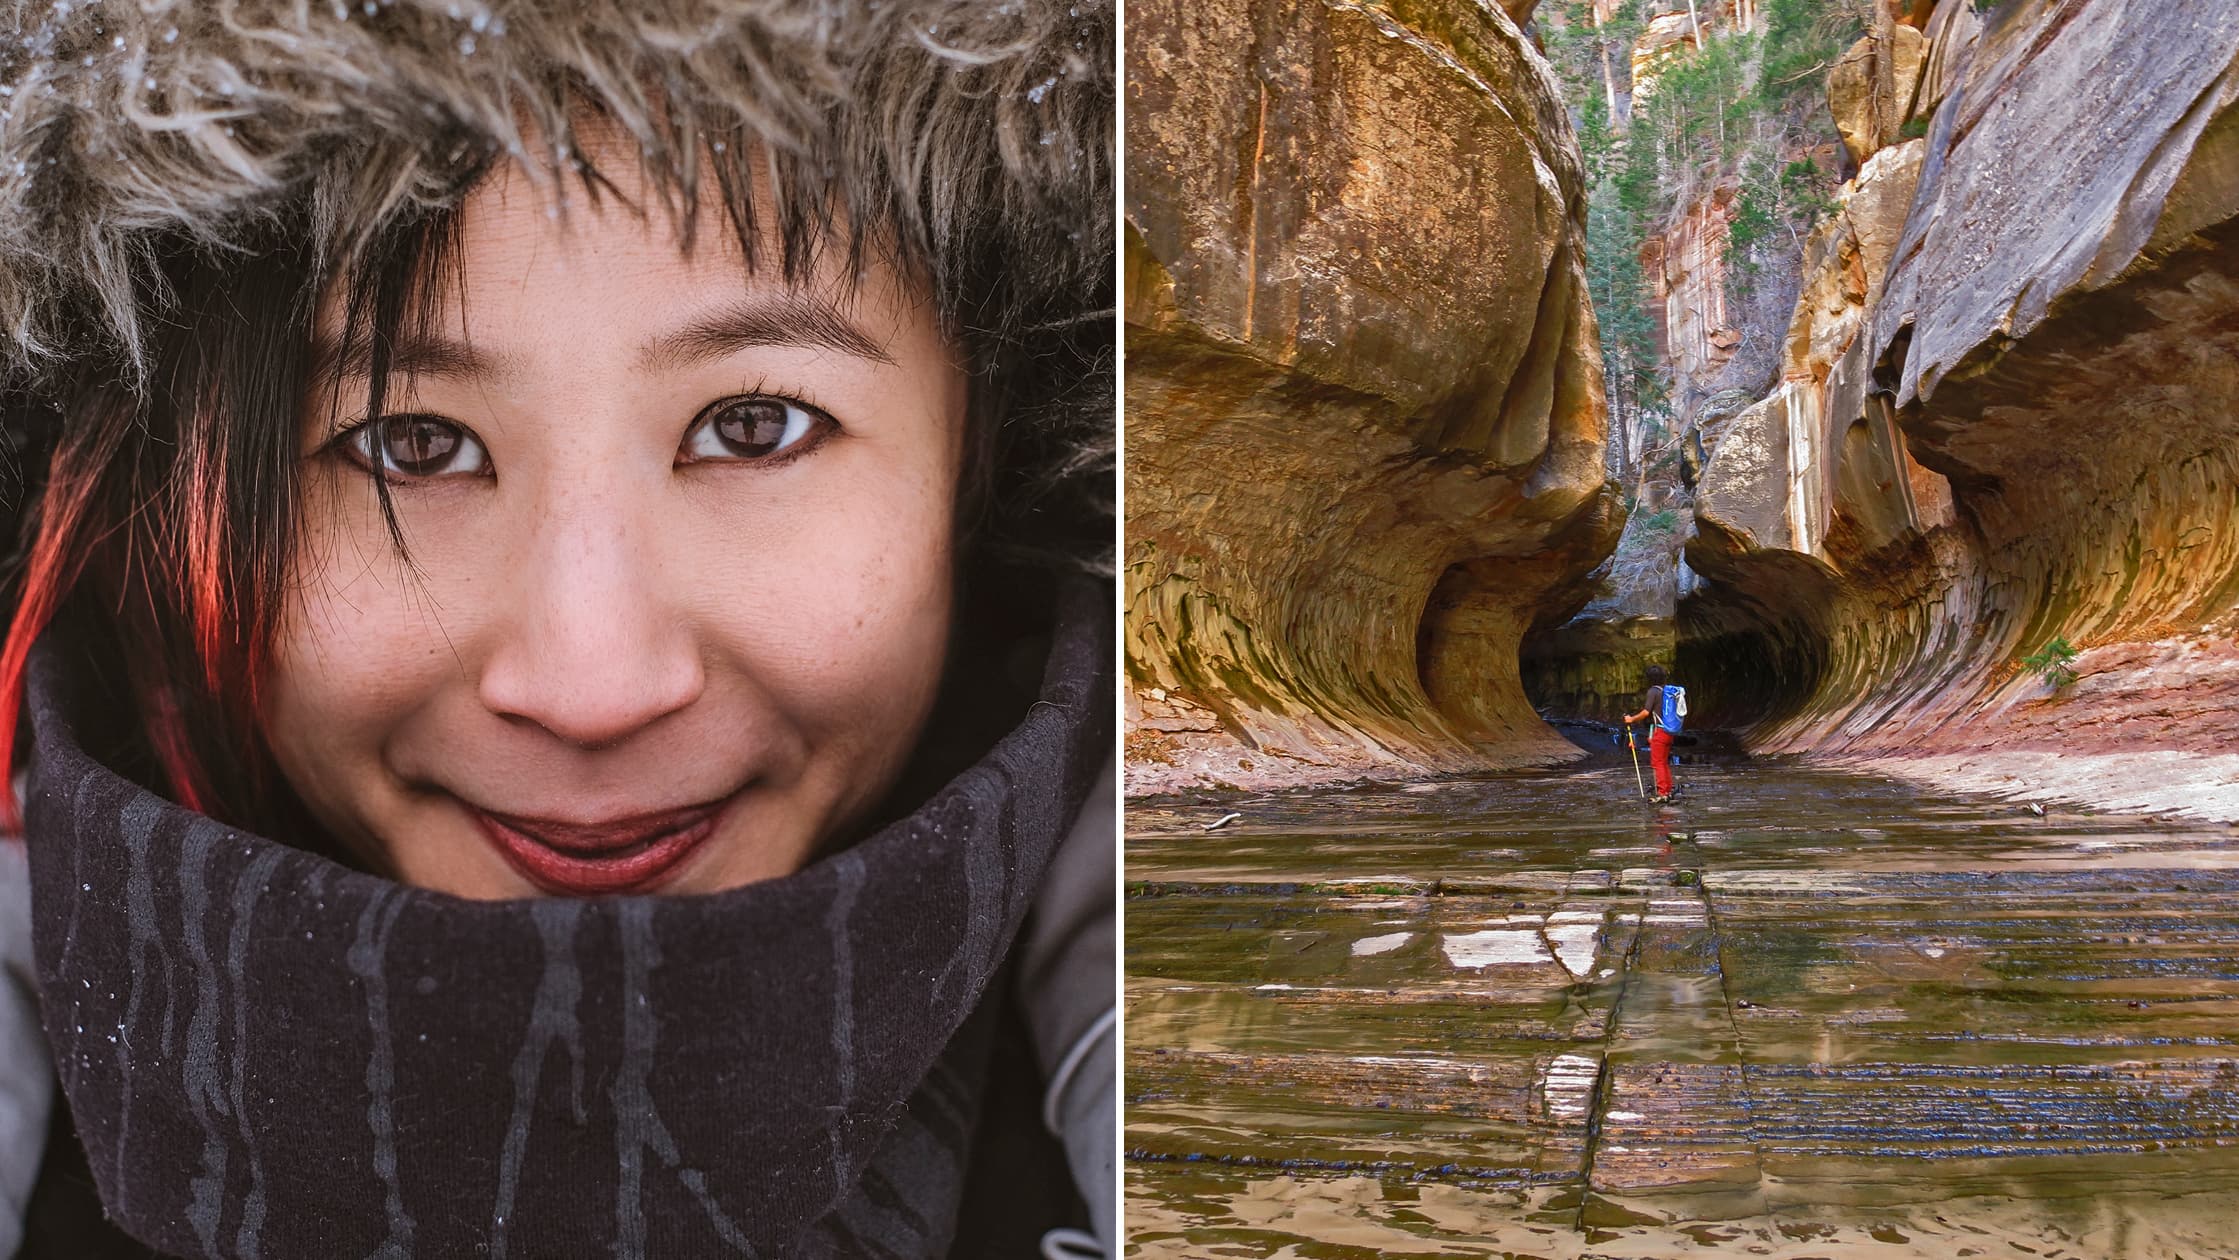
Adrienne is an Architect based out of Toronto. Whenever she gets the chance to hit the road, trips are focused around food, design, nature, and rock climbing. She’s learned the hard way that the climbing portion of traveling should probably occur before the eating, as gravity will get you every time. You can find some of her work here .

Tam is a self-taught mobile photographer and blogger. She captures small things, big things, and everything in-between. You can find her in Vietnam snapping photos of food and sharing her tips through Airbnb experiences .
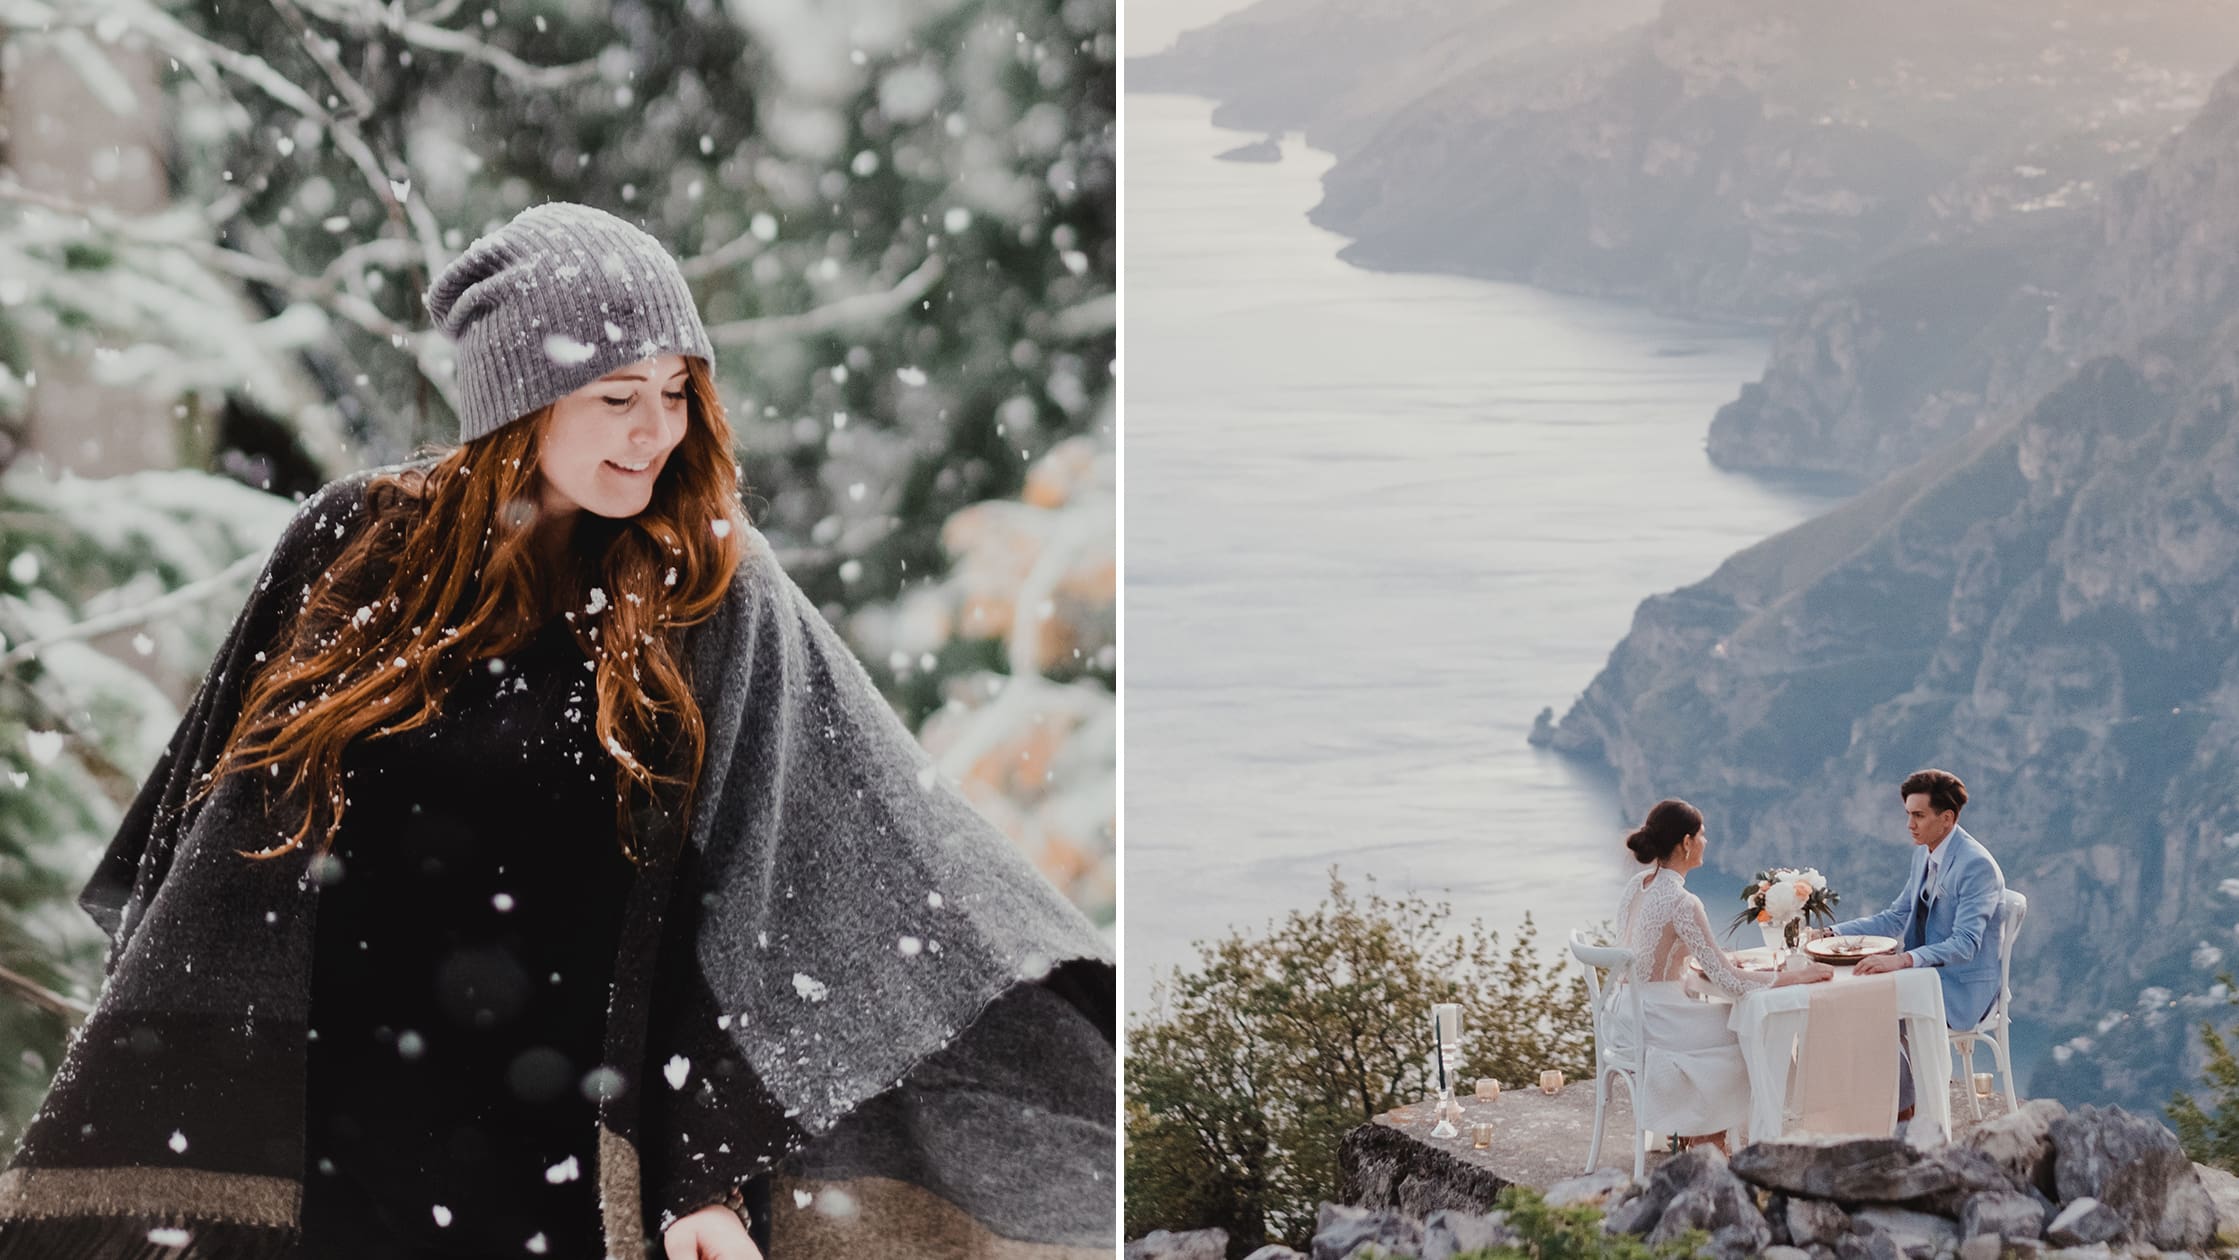
Tara is a Whistler based wedding photographer that loves to travel and live in a van every chance she gets. She can get completely lost in the projects she is passionate about when she’s doing something she loves and can fall asleep faster than anyone on an airplane. Take a look at her work here .
Author: Pack Hacker Team
We find and test the best gear for travel based on form, function and aesthetic. We believe the best trips start with quality gear, regardless if you’re traveling for business or pleasure.

- Meet the Team
- Work with Us
- Czech Republic
- Netherlands
- Switzerland
- Scandinavia
- Philippines
- South Korea
- New Zealand
- South Africa
- Budget Travel
- Work & Travel
- The Broke Backpacker Manifesto
- Travel Resources
- How to Travel on $10/day
Home » Gear » best camera accessories
The Best Camera Accessories of 2024: What and WHY You Need Them
If you’re planning on being the next great freelance photographer , then you’re going to need a great kit. No kit is complete without all of the essential camera accessories either!
Like Batman himself, you’ll need a utility belt stocked with all manner of gadgets and gizmos to get shit done. A shutter release for those long exposures, spare batteries for those long shoots, cleaning supplies, and much, much more will all be crucial to your success in the field.
Whether you are a professional or a beginner, there are a lot of different products out there, so you may need guidance when looking for the best camera accessories for your awesome travel camera .
Trust us when we say that having the right camera accessories is just as important as having the right camera or the right tripod . Many of these professional camera accessories are extremely useful if not necessary for any kit. So take a look at our list for the best camera accessories of 2024 and see which ones are best for you.
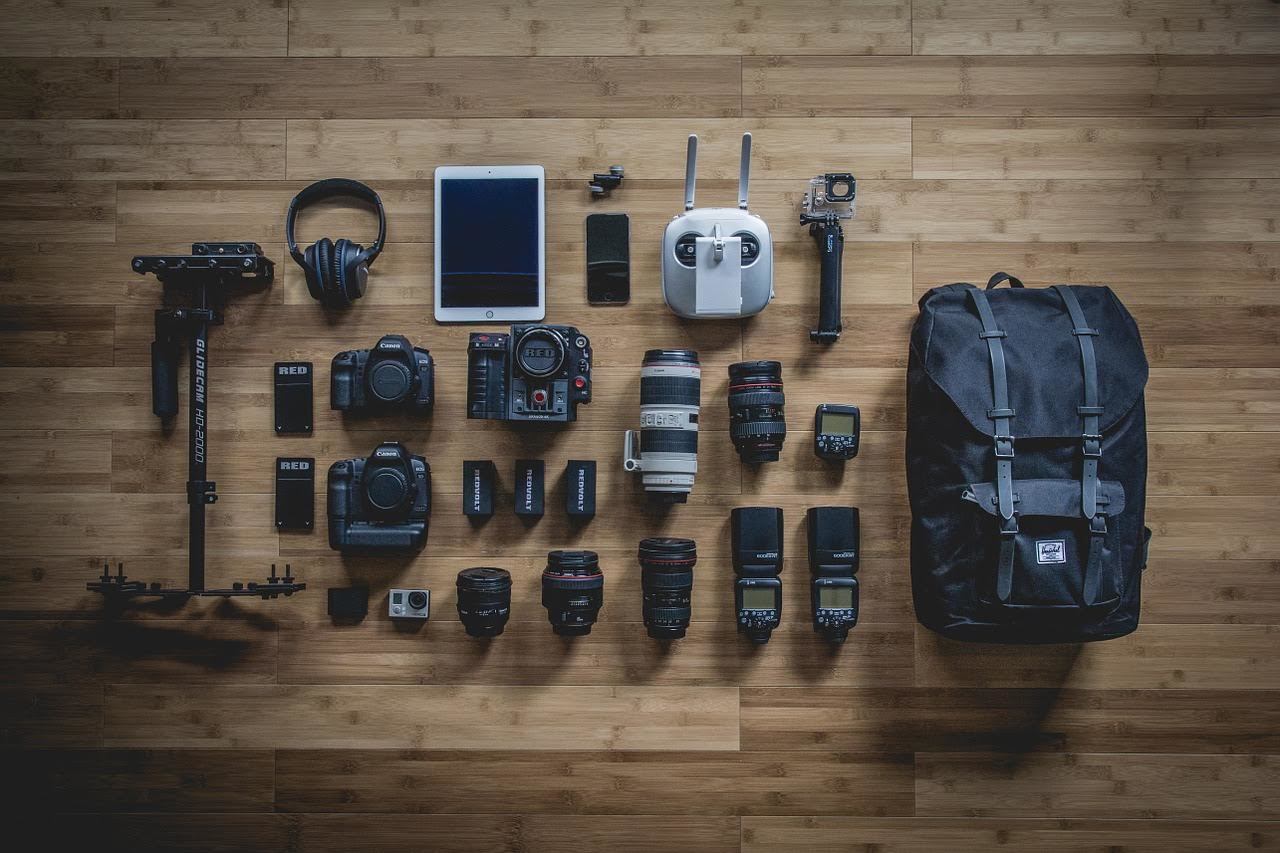
The Best Camera Accessories of 2024
Best camera accessories: filters, best camera accessories: storage, best camera accessories: cleaning and maintenance, best camera accessories: lighting, how we tested to find the best camera accessories, faq about the best camera accessories, final thoughts, travel camera backpack.
Proper camera kits are going to have a lot of accessories and you’re going to need a good bag to put all of them in! Whether or not you invest in a little messenger bag or a full-on backpack, you’re going to need plenty of space for your accessories.
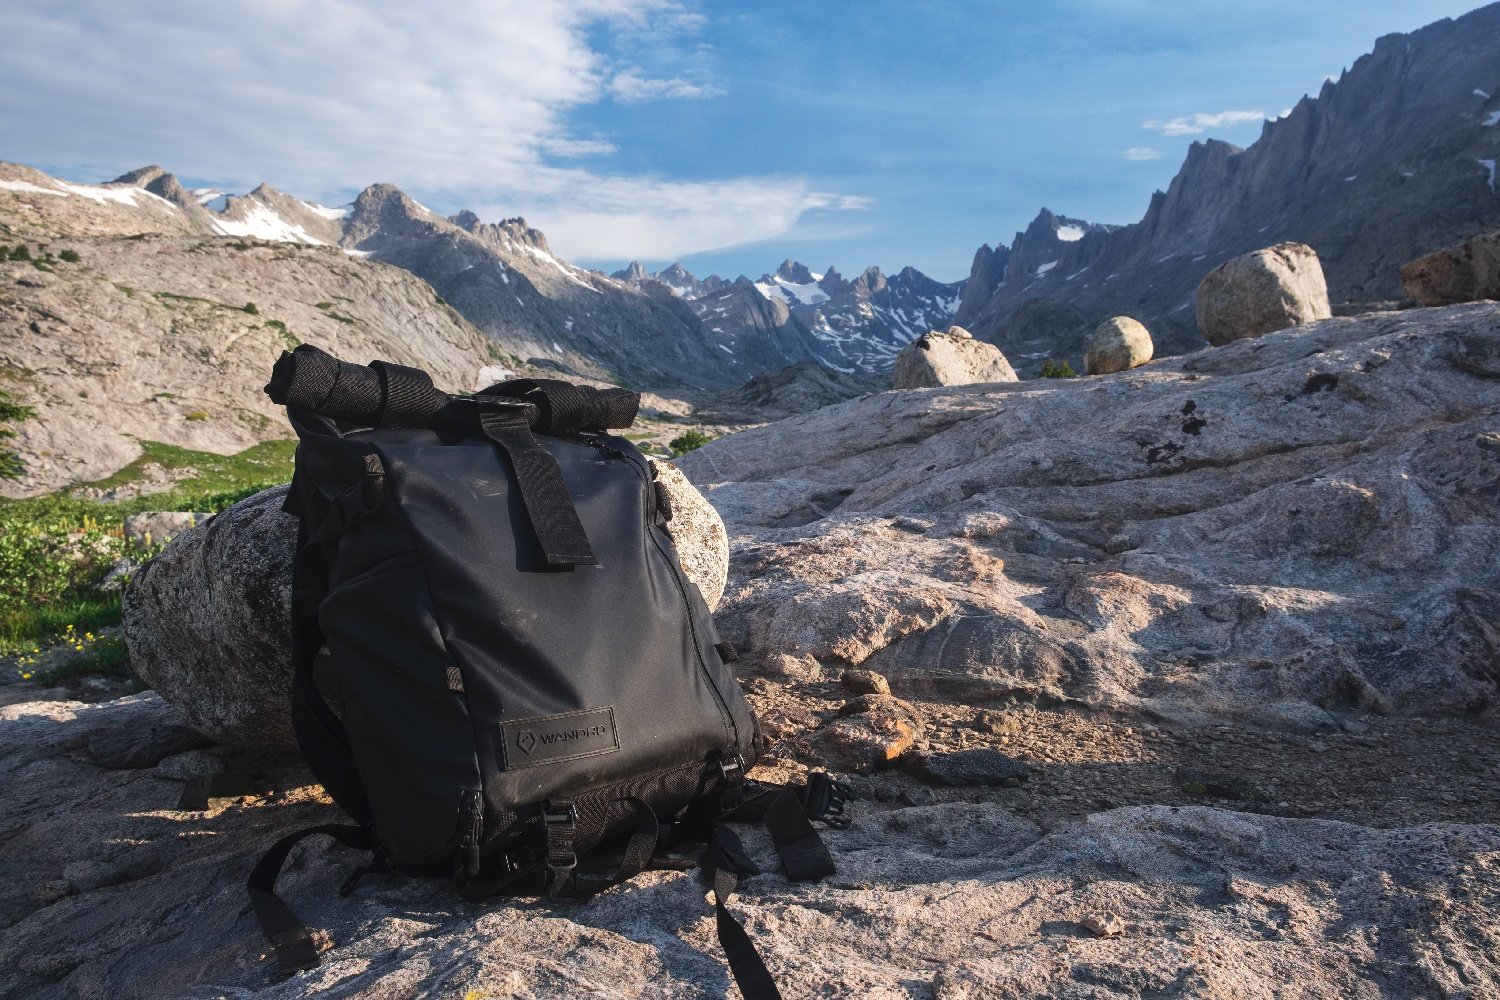
Most camera bags have enough space to accommodate your camera body plus the essential accessories. Some bags may be better at compartmentalizing accessories than others. If a bag doesn’t have much dedicated space for accessories, then you may think about investing in a separate pouch like the PEAK Design Field Pouch or the ProCase Accessory Bag . Whether or not you think you need one of these pouches is up to you.
Choosing the right bag is a big decision as it’s going to be responsible for holding and protecting all of your expensive equipment. For your’s and your gear’s sake, don’t skimp on this purchase – find the best camera bag possible!
Finding a pack that combines packability with comfort can be difficult, but we thing WNDRD found the perfect balance. Small and comfortable enough to be used as your everyday camera bag, but with 31 liters of space to easily fit all the gear you want to bring along.
Our Favorite Travel Backpack
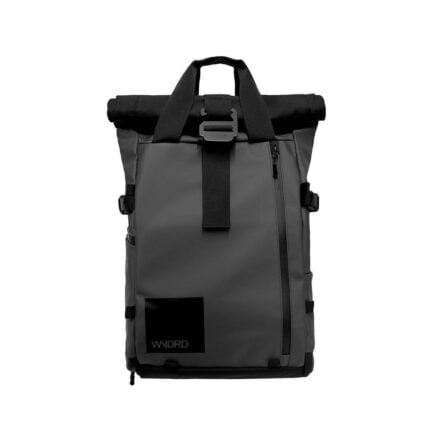
WNDRD PRVKE 31 Liter Backpack
- > Large capacity
- > Customizable
REI is one of America’s biggest and most-loved outdoor gear retailers.
Now, for just $30, get a lifetime membership that entitles you to 10% OFF on most items, access to their trade-in scheme and discount rentals .
Travel Tripod
Of all the photography accessories, a tripod may be the most quintessential camera accessory you can own. So important is a tripod, that, frankly, it should be the very first thing that you buy after a camera.
A tripod is a must-have camera accessory because it allows for maximum image sharpness in addition to creative techniques that would be otherwise impossible. Long exposures, astrophotography, image stacking, videography; most of these would be extremely difficult without a tripod.
Due to the tripod’s importance in any camera bag, we’ve already dedicated a full article just to finding the right one. Check out the article here , study up, and think about which tripod is best for you.
Our Favorite Travel Tripod
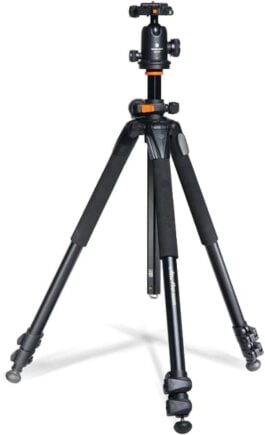
Vanguard Alta Pro Tripod
- > Innovative
- > Good Price
Shutter Release
Shutter releases are handy little devices that help to limit camera shake which is caused when you press down the shutter button. For portrait and long exposure photographers, who require absolute sharpness and deal with longer shutter speeds, a shutter release is a crucial item. They are certainly some of the most useful professional camera accessories out there and a must-have for all photographers.
Shutter releases range from pretty basic to exceptional in quality. The more advanced shutter releases are often wireless and have a radio antenna. Often times, the more expensive remotes will possess many more effective shooting modes as well. The more premium shutter releases are also nice because they tend to last longer as well.
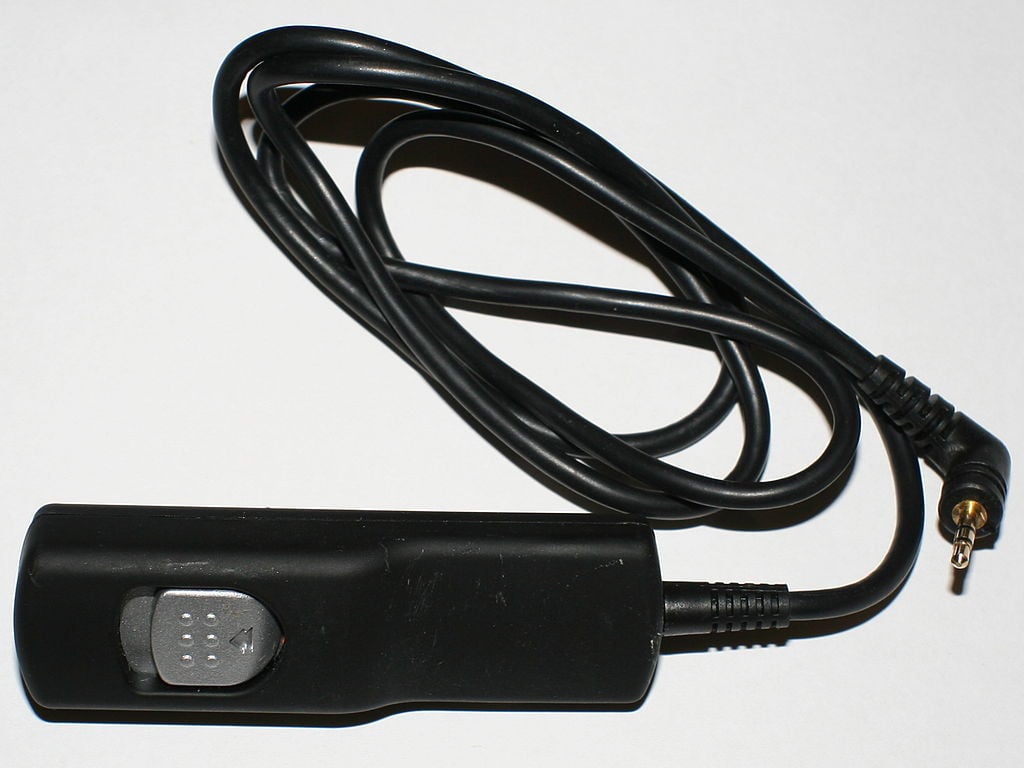
More basic shutter releases will be able to do much the same as the more expensive ones do but will almost always need to be plugged into your camera. There are cheap radio shutter releases out there but often they fail easily and you shouldn’t really trust them much. If you’re going to invest in a corded shutter release, be sure to take note of your camera’s specific port – many use different types.
Whether or not you need a corded or wireless shutter release is really a matter of preference. If you’re the type that likes selfies or needs to be away from the camera (wildlife photographers often set up multiple cameras that need to be controlled simultaneously) then a wireless shutter release may be best. If you tend to shoot with a tripod and/or don’t mind the chord, maybe pay less for a corded shutter release; they work almost as well as the wireless kind.
Our Favorite Shutter Releases
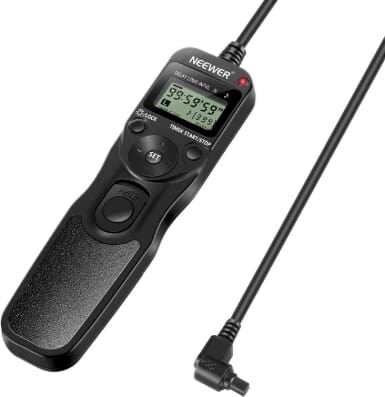
Neewar Shutter Remote for Canon
- > Affordable
- > Works well
- > Good Features
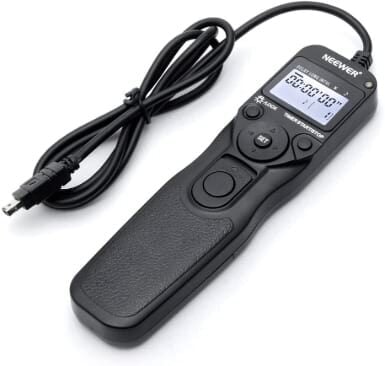
Neewar Shutter Remote for Nikon
- > Same as above
Spare Batteries + Battery Case
There is nothing more frustrating than when your camera dies in the middle of shooting! They always seem to fail at the best times too like when the light is just right or when something spectacular is happening. To avoid a dead camera and the frustration that follows, spare batteries are among the best photography accessories. Mirrorless camera user especially will benefit from extra batteries.
It can be maddening never knowing when the next charge may come. Those who plan on shooting intensively or don’t have the luxury of having a power outlet consistently nearby will benefit the most from spare batteries.
Spare batteries primarily come in two varieties: 1) official batteries and 2) 3rd party batteries.
Official batteries, those that are made by the company that produces your camera, are usually more expensive but last longer and hold a better charge. 3rd party batteries are usually of lesser quality and tend to perform less effectively; these may even swell over time and will no longer be useful. I find a mix of both official and 3rd party batteries to be the most effective setup.
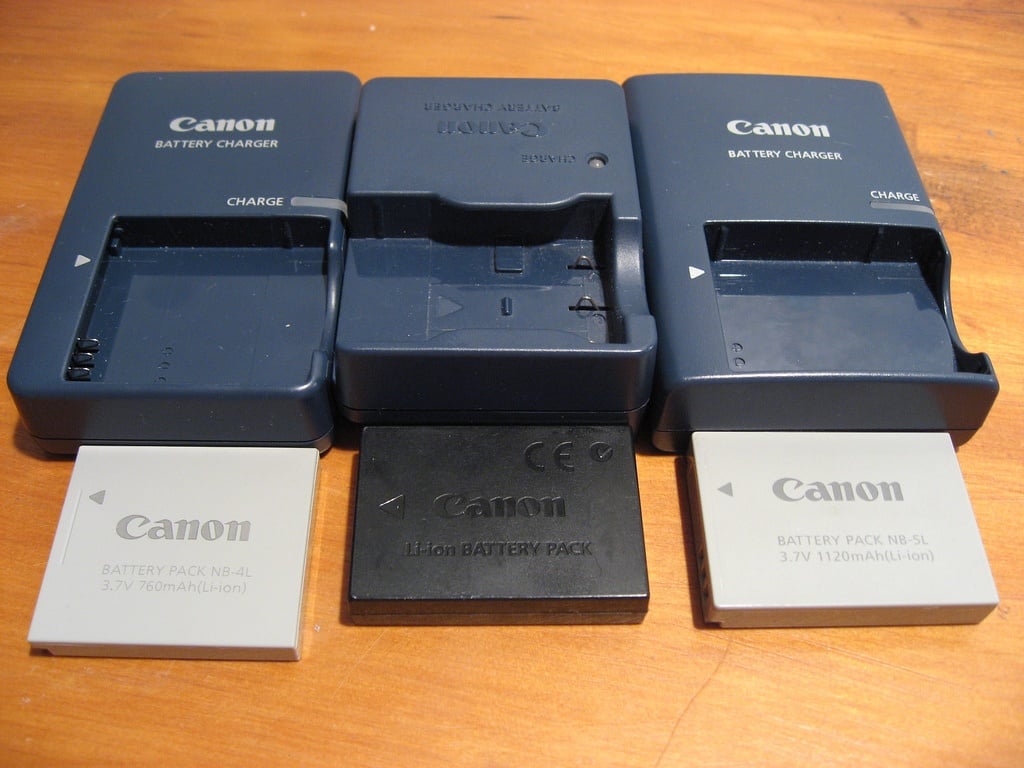
If you’re going to have a lot of spare batteries (mirrorless users will probably fall under this category) you’re going to need a case or wallet to hold them as well. Organization will be key when it comes to using your essential camera accessories and so you don’t want them floating around everywhere.
Most battery cases are universally sized and should be able to accommodate most batteries. Just to be on the safe side though, make sure that the case can hold your specific batteries before buying.
Our Favorite Batteries
LP LP-E17 Battery Charger
- > Standard Compatibility
- > Worldwide use
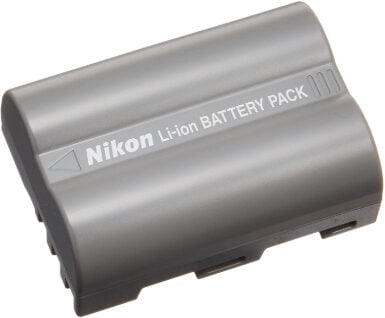
Nikon Rechargeable Battery
- > Original manufacturer
- > Lasts long
- > Sightly more expensive
Camera Strap
Camera straps are a must-have camera accessory, and most camera straps that come prepackaged with camera bodies are pretty uninspiring. Usually, these straps are either physically uncomfortable or ineffective to use. For these reasons, it would behoove most photographers to invest in a separate camera strap for their camera. The right strap can be a great camera accessory and really improve your shooting experience.
Camera straps come in several varieties from neck straps to hand grips to wrist straps.
The most common camera strap is a neck strap , which, as the name implies, allows the camera to be draped conveniently around the neck. A good neck strap will have the proper amount of padding and be fully adjustable to suit your body. Neck straps will allow very easy access to your camera but will be quite vulnerable to both thieves and foreign objects as they sometimes hang precariously.
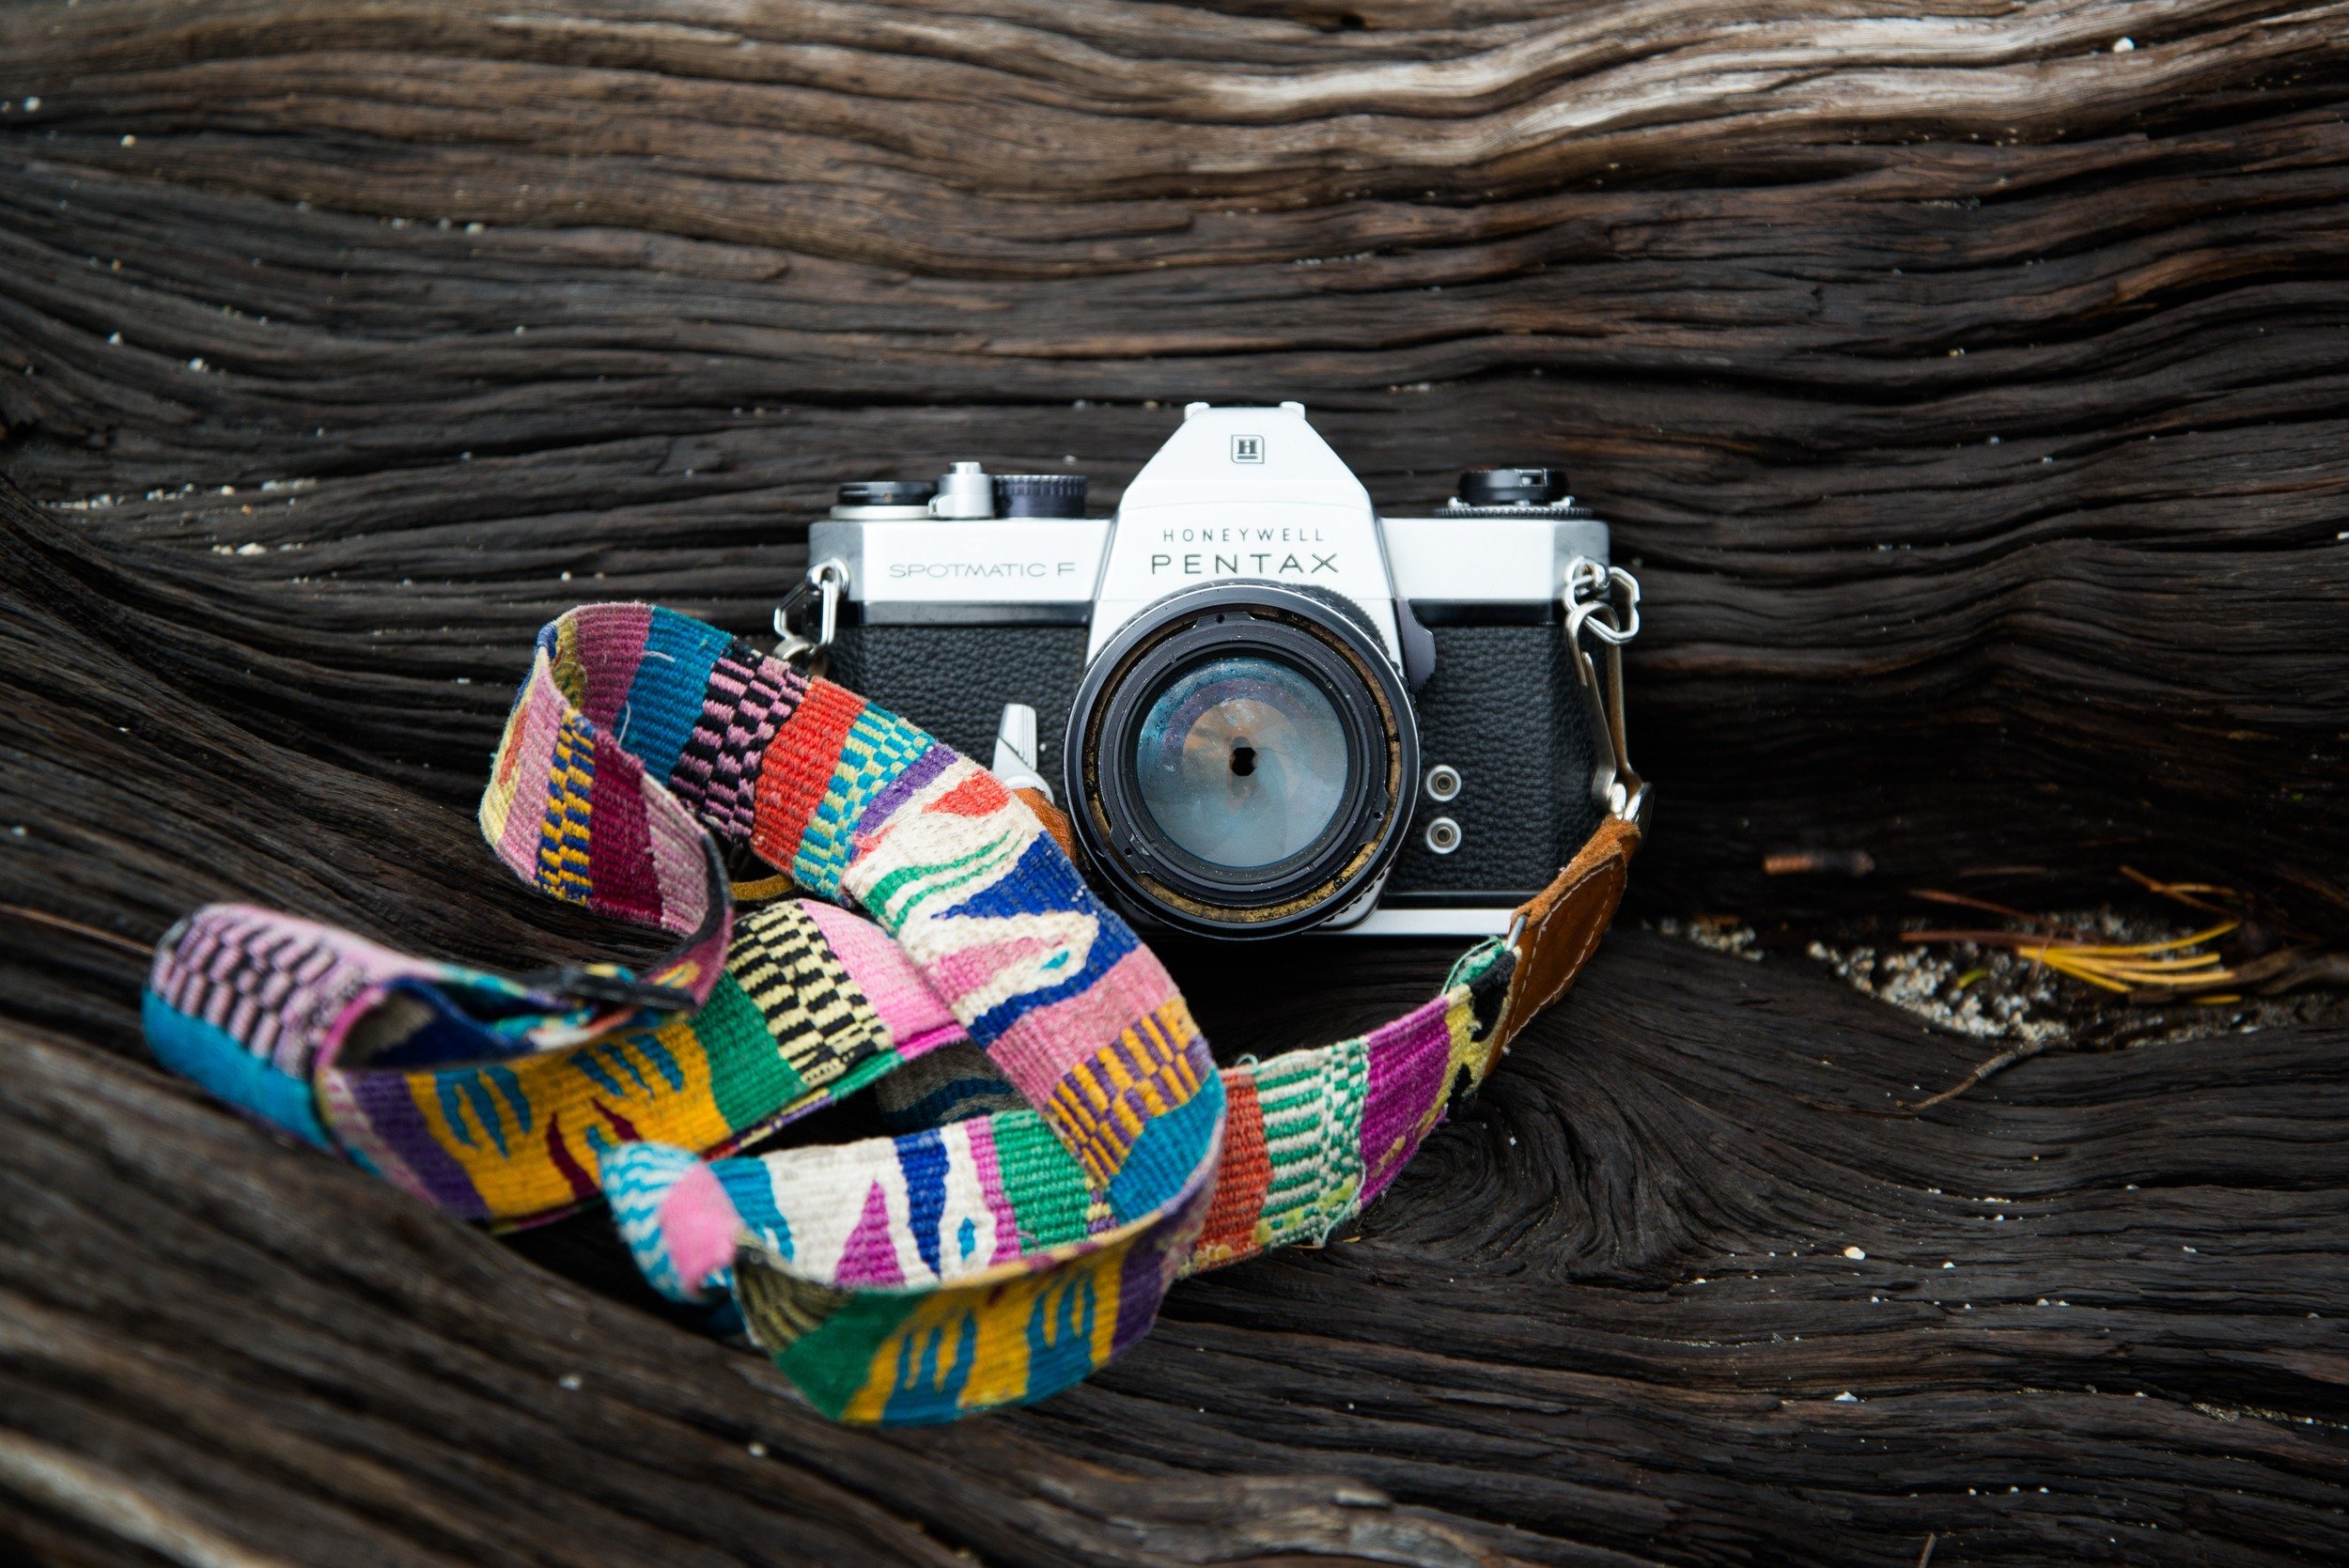
Wrist straps are another popular option. These are convenient because they are very strong, small, and allow for quick shooting. Unfortunately with a wrist strap, you cannot hang your camera as you would with a neck strap. You can dangle the camera from your wrist but you will probably end up just holding it for most of the time. For those who shoot frequently and have the camera in their hands often though, this isn’t much of a problem.
Finally, hand straps behave much in the same as wrist straps do but are even more hands-on. These cannot hang at all and are pretty much in your hands 100% of the time. Hand straps can be quite comfortable and provide a great deal of security but you’ll have to find the perfect one; like a glove, these need to fit perfectly to be effective.
Our Favorite Camera Strap
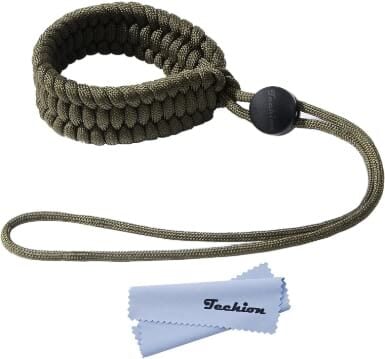
Techion Braided Camera Wrist Strap
- > Inconspicuous
- > Effective
If you’re a landscape or urban photographer who needs a perfectly level horizon and/or don’t like to rely upon an in-camera gyroscope, a leveler could be a great addition to your bag. Levelers also take up next to zero room in your camera bag and cost practically nothing as well! Considering their usefulness, price, and portability, levelers are one of the best camera accessories that photographers can buy.
Cameras levelers are much like the levelers in your dad’s toolkit – they use a simple bubble system that lines up with a series of markers, which in turn indicate levelness; simple as that. When the bubble within the leveler is properly oriented, boom, you have a level camera. A camera leveler fits neatly onto the hot shoe and is very inconspicuous as well.
That’s really all that there is to it; a leveler isn’t an extremely complex piece of equipment but it’s quite effective and very inexpensive. For landscape and architectural photographers who like their perfect horizons, a leveler is an easy buy and a great cheap camera accessory. Some tripods have also started including a built-in leveler, so keep an eye out when shopping around for your next tripod!
Our Favorite Leveler
Hot Shoe Level Camera Bubble
No kit is complete without filters for your camera lenses and UV Filters should be the very thing that you buy after purchasing a new lens. Aside from cutting haze in your photos, UV filters provide crucial protection against foreign objects. They are very useful items for protecting your lenses and must-have camera accessories.
A UV filter is, essentially, a clear piece of glass that screws in over the front of your lens. As mentioned before, this extra layer of glass adds vital protection and could mean the difference between a cracked $800 lens and a cracked $25 filter. Better the latter than the former I say.
A UV filter’s second function is to increase photo quality by limiting haze and adding crispness. Honestly, I’ve never really noticed a huge amount of added clarity with UV filters. Besides, haze can be an attractive element in photos anyways.
The difference between a good and bad UV filter is the degree of scratch resistant coating present. Higher quality filters will have better coatings and be more resistant to scratching while shittier ones will quickly become covered with scrapes and in turn inhibit photo quality.
I suggest going with a middle of the pack manufacturer like Hoya when it comes to buying a UV filter. Build quality is good and the price is usually right.
Our Favorite UV Filters
Hoya 58mm UV Filter
- > Good quality for price
- > Scratch Resistant
Hoya 67mm UV Filter
Hoya 77mm uv filter, hoya 82mm uv filter, polarizer filter.
A polarizer filter can mean the difference between a good photo and a great photo! By blocking certain wavelengths of light, those which are responsible for glare, polarizer filters add saturation and deeper shades of color to photos. Polarizer filters are one of the coolest camera accessories and essential to any professional photography kit.
Polarizer filters are like UV filters in that they’re circular and attach to the front of the lens. There are a number of key differences between UV and polarizer filters though. Polarizer filters, specifically circular polarizers, actually rotate , which is one of the ways that they are able to block those specific bands of light. The glass used in polarizers is also darker, as opposed to being clear, so you’ll lose 2 stops of light when using one.
When used properly , polarizer filters essentially limit glare, which then leads to deeper colors. Landscape photographers love polarizer filters because they can make skies super blue and create greater drama. Other photographers may appreciate a polarizer ability to cut reflections in glass and water.
When purchasing a polarizer filter, I suggest going more upper tier. You’ll gain higher quality photos and the filter will be more resistant to scratching, which polarizers are already more prone to. You can go middle-level with something like Hoya but you can’t go wrong with a more premium model from a company like B&W.
Our Favorite Polarizer Filters

B + W 58mm Circular Polarizer Filter
- > Great colors
- > Top Quality
- > More expensive
B + W 67mm Circular Polarizer Filter
B + w 77mm circular polarizer filter.
Hoya 82mm Circular Polarizer Filter
- > Good bang for buck
- > Good quality
Filter Case
There are all kinds of filters for camera lenses out there besides UVs and polarizers like ND filters and color filters. Once you start collecting these filters, you’ll find that your bag can be a cluttered mess so you’re going to need something to hold all of them. A filter wallet does a very good job of keeping your filters organized. I have several and you should have one of these essential camera accessories as well.
Filter wallets can hold any number of filters depending on the wallet’s size. I’ve seen filters wallets accommodate up to 9 filters though there may be even larger out there! Most filter wallets are pretty equal in terms of build quality. In the end, it really comes down how many filters you need to store when buying a wallet. Invest in one wallet or invest in many; whatever floats your boat.
Our Favorite Filter Case
K&F Concept Filter Case
- > Lightweight
Filter Wrenches
Ever had a screw-in filter that was twisted too tight or stuck onto another? Ever felt the pain and madness of trying to untwist them and you just can’t get a good grip? If you’ve ever thought about throwing your filters against a brick wall because they wouldn’t come unfastened, then filters wrenches are one of the must-have camera accessories for you!
Filter wrenches are one of those accessories that few photographers actually know about but make life 10 times easier if they had them. Thanks to special teeth these wrenches provide additional grip and give you that extra torque to pry off difficult filters. They are one of the coolest camera accessories that I ever invested in a real lifesaver sometimes.
A typical set of filter wrenches will come with two different sized wrenches – a large and small one – and each is used respectively for different filter sizes. When combined both should cover the vast majority of filter threads. Since these wrenches are relatively thin and made from plastic, they won’t weigh anything either. Overall, these are very portable and effective tools to have in your bag.

Do You Want to Travel FOREVER??
Pop your email in below to get a FREE copy of ‘How to Travel the World on $10 a Day!’.
Our Favorite Filter Wrenches
Neewar Rubber Coated Lens Filter Remover
- > Works great
SD Cards + Wallet
Like running out of batteries, running out of memory can be infuriating. The last thing that you’d want is to be in the middle of a shoot and have your camera lock up because you filled up your memory card. You never know when you’ll be able to back up your files onto a new computer either so having additional SD cards are imperative when considering the best camera accessories for your kit.
Digital memory has come a long way and these days SD cards are quite affordable. 32 GB cards should cost no more than $15 while 64GB cards cost only $20-$25. These capacities, compared to what they were 5 years ago, are great deals.
I really don’t suggest that you buy anything less than 32GB for your camera. With modern sensors using more and more megapixels these days, which directly affect file size, and the growing popularity of 4k video, anything less than 32GB will not be enough. You’ll especially want higher memory when looking for travel camera accessories – you’ll need all the space you can get as it might be longer between downloads.
I also suggest buying an SD card with a fast transfer speed; doing so will allow for optimal speed and processing times. Remember that, at the end of the day, cameras are essentially computers – watching the camera slowly buffer its memory because the transfer speed is subpar can be just as frustrating as running out of memory altogether.
Our Favorite SD Card and Wallet
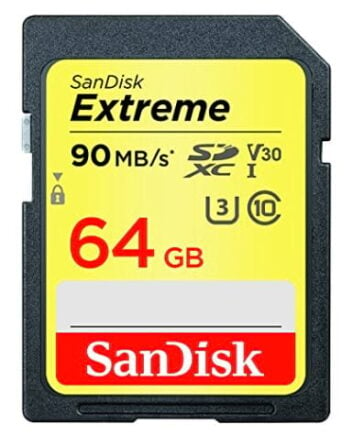
SanDisk Extreme 64GB SD Card
- > Fast processing
- > Good price
Think Tank Photo SD Pixel Pocket Rocket Memory Card Case
- > Fits 9 SD memory cards
- > Built in business card holder
SD cards will be your primary means of storage while in the field but what do you do when you want to empty them of all of their files? In this case, you need an external hard drive for backing up your images! An external hard drive is a great place to store those image files that you just can’t let go of or want to edit later. For every photographer, this one of the best camera accessories that one could have.
Depending on what kind of photographer you are, you will require a certain amount of space on your hard drive.
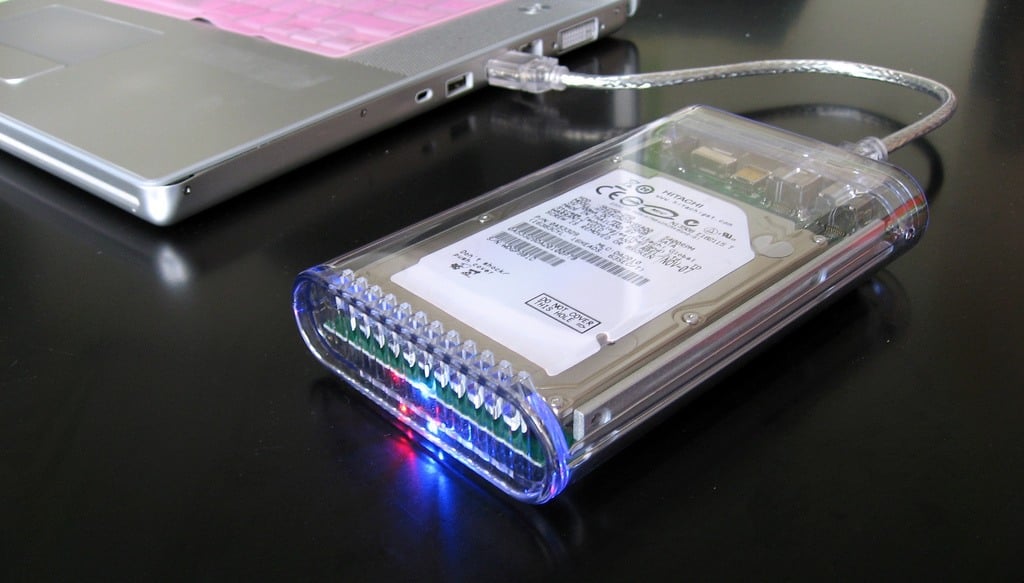
If your camera creates larger file sizes and/or you have a lot of images that you need to store, then you’ll need a hard drive with a larger capacity. You will need at least 500 GB of storage in this case though 1TB or more may even be more appropriate as you’ll be surprised at how fast those can fill up.
If you’re the more casual type of photographer who takes fewer photos, shoots JPEGs more often, and/or likes to clean house regularly, you could probably get away with less than 500GB, say around 250GB or 125GB. If you find that these storage sizes are still too large, well that hard drive is great for other stuff like videos, music, and old documents too.
Our Favorite Hard Drive
Seagate 1TB External Hard Drive
- > Easy to set up
- > Works very well
Memory Card Reader
These days, built-in SD card readers are becoming less common in computers, especially so with laptops. To avoid the sticky situation of not being able to offload your photos from an SD card, you should think about investing in an SD card reader. Though maybe not one of the great necessities of camera kits, having one may still save your ass in certain situations.
SD card readers are fairly standard tech. By using a standard USB plug, SD card readers serve as adapters for nearly any device. Simply insert your SD card into the reader and then plug the latter into a USB port and, boom, you can now transfer your files.
An SD card reader is a simple device, one that doesn’t offer too much variation throughout the market. You can choose between different designs i.e. a stick or maybe a chorded version but that’s about as complicated as it gets. If you’re in need of an SD card reader, there are few bad choices out there.
Our Favorite Memory Card Reader
UGREEN SD Card Reader
Microfiber cloth.
Lenses get smudged; viewfinders become fogged up on cold days; these, among other minor dirty little things, happen all the time in the field. One of the quickest and most convenient ways of cleaning your gear on the go is a good microfibre cloth. So handy are these wipes that they’re practically ubiquitous in camera bags and time after time they’ve proven to be one of the best camera accessories that you can have.
Using a microfiber cloth is pretty straightforward: you store it, keep it clean and dry, and then use it to clean your gear; simple as that.
Not every microfibre cloth is created equal though. There are definitely some shabby ones out there that kinda suck after limited use and these end making your lenses even dirtier in the long run.
Do yourself a favor and invest in a good microfibre cloth. A little extra cash will ensure that it’ll last much longer and be much more reliable.
On a side note, NEVER use a microfiber cloth to clean a camera sensor. Doing so will introduce abrasive particles, which is a sure way to scratch the sensitive sensor.
Our Favorite Microfiber Cloth
MagicFiber Microfiber Cleaning Cloth
- > Higher quality
- > Pack of 6
- > Larger size
Giottos Rocket Blaster
Keeping your camera clean is just as important as keeping it safe, and having a clear sensor is just as crucial to good photos as clear glass. This is another one of those must have camera accessories, as your camera’s sensors are very sensitive and require special treatment. You can’t just clean them casually with a rag or with soap and water; you’ll need a special tool to keep your sensor from being damaged while cleaning.
For those pesky dust and dirt particles that can coat your camera sensor, the Giottos Rocket Blaster is a godsend. Using powerful puffs of air, this simple device is great for cleaning off specks of grit that may be clinging to your camera sensor.
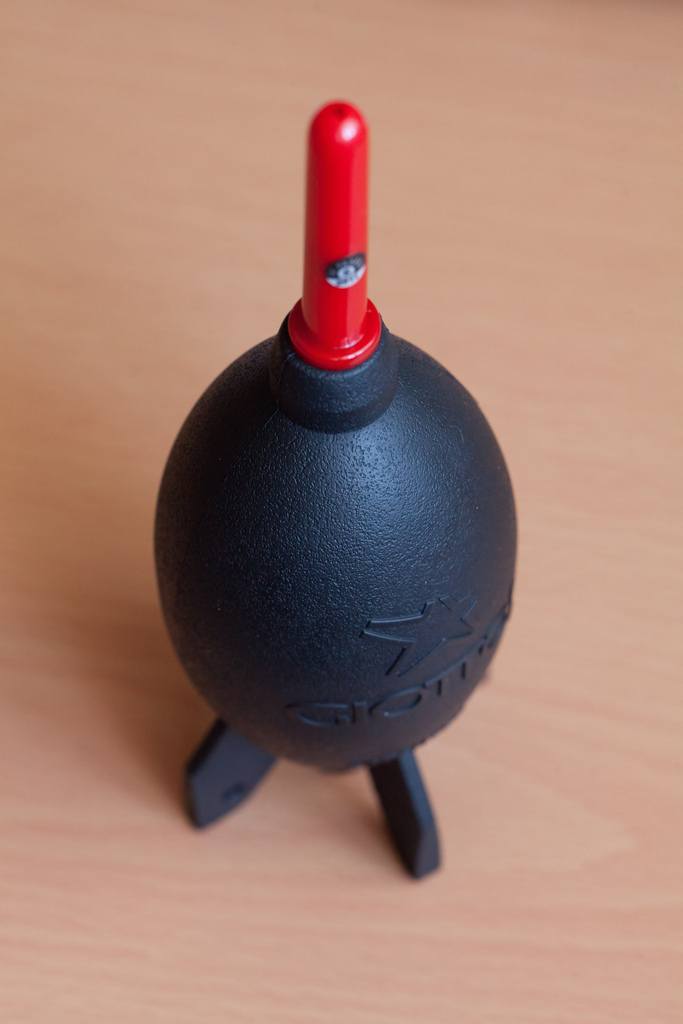
Behaving much in the same way as a bellows, the Rocket Blaster works by squeezing it firmly resulting in a strong blast of air that should clear out most particles. The sensor is, in the process, not actually touched by any foreign object in the process and so very unlikely to be damaged.
The Giottos Rocket Blaster comes in several sizes: small, medium, and large. I definitely suggest that you buy the larger one. Although the others may appear to be more compact and thus easier to pack into your camera bag, they don’t produce enough force to dislodge a lot of the grit. The larger blasters are really the most effective and, in my opinion, the only real choice.
Our Favorite Giottos

Giottos Rocket Air Blaster – Large
- > More effective than smaller versions
- > Easy to use
Sensor Swabs
For those really stubborn pieces of dirt that just won’t come dislodged, Sensor Swabs are your next best bet. These specialized cleaning clothes are designed specifically for certain sensors and are the ultimate form of cleaning. For those who like to keep their sensor squeaky-clean (and don’t like paying someone to do it for them) sensor swabs are a must-have camera accessory.
Sensor swabs are fairly easy to use, requiring you to only wet the tip and firmly brush the sensor, but they do require a few considerations. Firstly, you will need the proper solution i.e. some Photographic Solutions Optic Cleaner, to clean the sensor. Secondly, there are three different sensor swab styles for the three major sensor sizes and you must use the correct one. Take note of your camera’s sensor size and be sure to purchase the right swab size for your sensor.
You must very careful when using a Sensor Swab. Because you are literally touching the camera sensor and thus inviting the opportunity to scratch it, you have to use the swab correctly. Use only a little liquid on the swab and use each side of the swab only once. Passing over the sensor with a swab that has grit on it may cause scratching.
Our Favorite Sensor Swabs and Solution
Photographic Solutions Sensor Swabs Type 1
- > Properly sized
- > Excellent Quality
- > Pack of 10
Photographic Solutions Sensor Swabs Type 2
Photographic Solutions Sensor Swabs Type 3

Photographic Solutions Eclipse Cleaning Solution
- > Industry standard
- > Non-abrasive
- > Works on other glass surfaces

Now, you could spend a fat chunk of $$$ on the WRONG present for someone. Wrong size hiking boots, wrong fit backpack, wrong shape sleeping bag… As any adventurer will tell you, gear is a personal choice.
So give the adventurer in your life the gift of convenience: buy them an REI Co-op gift card! REI is The Broke Backpacker’s retailer of choice for ALL things outdoors, and an REI gift card is the perfect present you can buy from them. And then you won’t have to keep the receipt. 😉
External Flash
Flash photography can be a pretty advanced form of photography. Having a working understanding of it can take some time but doing so will open up a whole new world of photographic opportunities. By creating your own light you’ll have greater control over your subjects and the scene itself. For those who want more powerful accessories for portrait photography in addition to just being a better photographer, an external flash is an indispensable tool and one of the best DSLR tools that you can own.
Flash devices (internal and external) serve the purpose of adding extra light to a scene and change the overall exposure. By filling a room or immediate foreground with light, you’ll gain a huge advantage in adverse conditions. Some examples include shooting into a front-lit scene, compensating for extreme contrast, and adding depth to portraits.
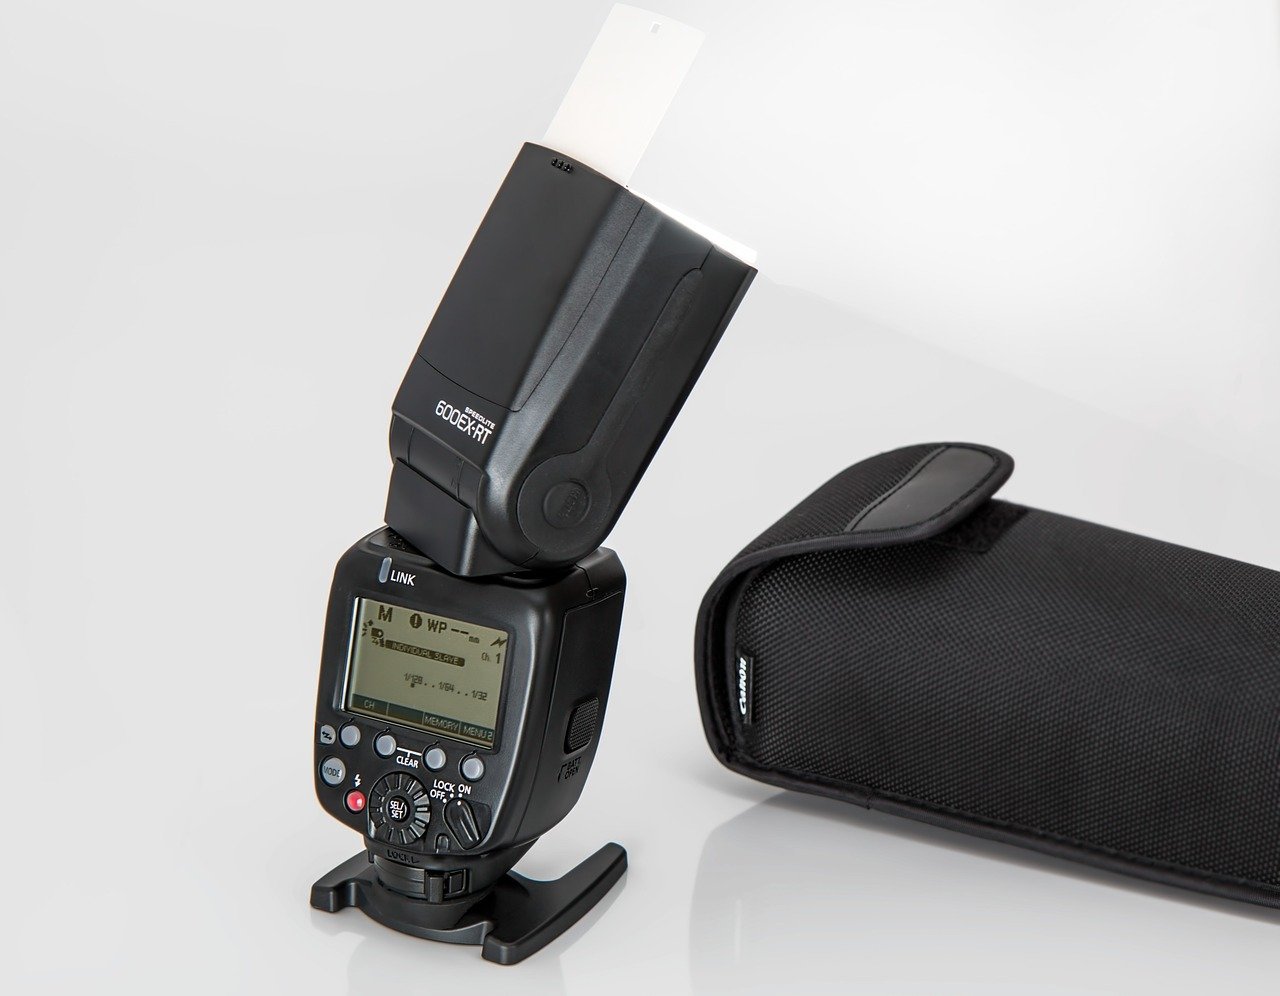
Most cameras come with a built-in flash but the majority of these underperform greatly. An external flash does a much better job of lighting up a scene. External flashes are more powerful because they use their own batteries and offer greater control thanks to their plentiful settings. Many external flashes also have the ability to swivel whilst mounted or can be used remotely, thus creating additional angles for more varied lighting.
Flash photography can be difficult to understand. For more on the subject, you can read up on the technique at CreativeLive and Photography Life .
Flashes range in build-quality from basic units with fewer controls to ultra high-tech with built-in computers practically. How much you intend on using a flash will dictate how nice of a flash you need. Like most of the camera necessities on this list, I suggest going mid-range in the beginning – the cheap camera accessories break too easily and the expensive ones may be too large of a commitment.
Our Favorite External Flash
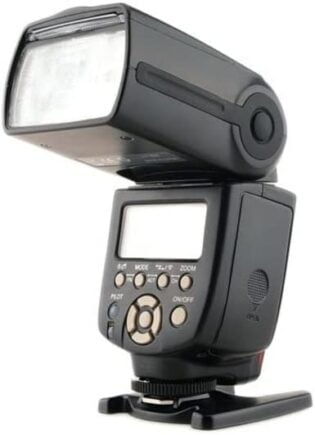
YongNuo YN-560IV Speedlite
- > Compatible with most major brands
- > Great bang for buck
If you’ve already purchased a flash and are looking for ways to manipulate the light even further, reflectors are one of the best camera accessories for doing so. These tools are very packable, effective, and, best of all, inexpensive. Reflectors are one of the best camera accessories for portrait photography and are very useful in other studio and outdoor work as well.
Reflectors are simple devices that essentially serve to redirect light. They come in many forms e.g. as a metal hood for your camera but the most common form is simply a sheet of material stretched over a ring-shaped frame. These circular reflectors are made from durable and flexible materials and so can be warped for packing.
Reflectors also come in different colors, which in turn affect the nature of the reflected light. You can read up here on reflector colors and, for that matter, using reflectors in general.
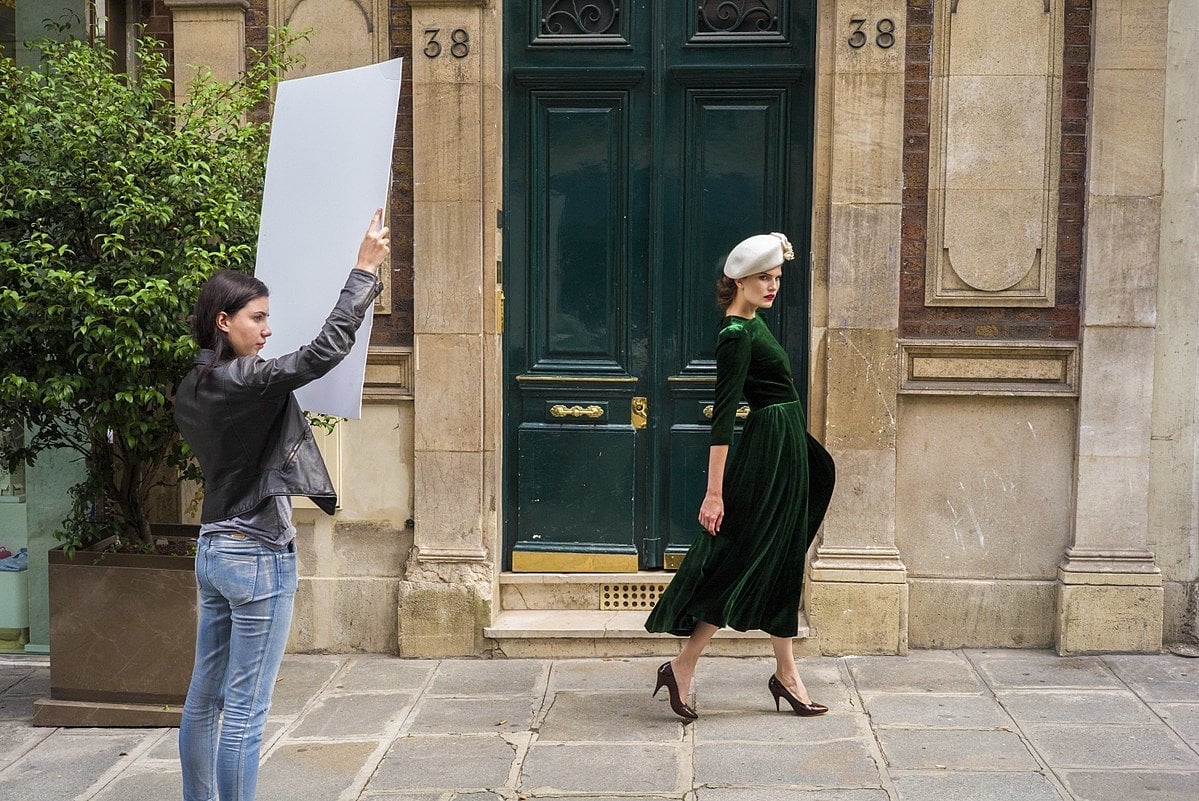
Reflectors are great for brightening up shadows and creating a more even exposure. Studio photographers often use reflectors as fill lighting while outdoor photographers may use them to combat harsh midday light or overly contrasty scene. The light cast by reflectors is also very soft and gives off a very natural look.
Reflectors are a great investment for portrait photographers who aren’t looking to spend too much. For less than $20, you can own a set of reflectors and immediately up your photography game. Reflectors should be on the photography equipment list for both beginner and professional alike.
Our Favorite Reflectors
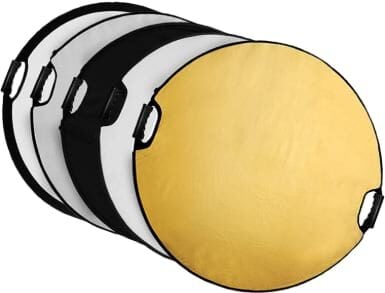
Selens 5-in-1 43″ Reflectors
- > 5 different colors
- > Folds neatly
Over a period of time and between all of the members of our team, we have tried each and every one of these camera accessories out for ourselves. In order to fairly assess these accessories, we looked at the following criteria;
User Friendliness
Very few of the team members are serious photographers. As such, we love gear that regular travelers can get to grips with relatively quickly and improve their photography game.
This one is presumably a bit of a no-brainer right? If it’s not helping you out in some way, why lug it around in your pack? We made sure to select essential camera accessories you’ll want to have when the time comes.
Portability
Luckily most camera accessories are easily packed away and take up little space, nonetheless, we took how well it packed into account when picking these accessories.
Packed Weight
Packing your backpack/camera bag is more times than not a game of ounces, and the last thing you want is to be dragging a bunch of useless gear around just in case you need it . We made sure to only recommend gear we believe to be worth the extra ounces.
Still have some questions? No problem! We’ve listed and answered the most commonly asked questions below. Here’s what people usually want to know:
What is the one accessory that every photographer needs?
Having a good camera bag to keep your equipment safe is an absolute no-brainer. We highly recommend the WNDRD PRVKE 31 Liter Backpack .
Should you buy an UV Filter?
Aside from cutting haze in your photos, UV filters provide crucial protection against foreign objects. It’s an essential accessory of you want to save your camera lense.
What is a camera accessory that is often forgotten?
Microfiber cleaning cloths and sensor cleaners are one of the most underrated camera accessories.
How much do camera accessories cost?
As always, this depends on the accessory. They can range from $5 to a blasting $150. You should set aside a total of at least $350 for your camera accessories.

Our GREATEST Travel Secrets…
Pop your email here & get the original Broke Backpacker Bible for FREE.
There you have them: the 17 best photography accessories of 2024! With these useful mirrorless and DSLR tools, you’ll be prepared for any situation there is. You’ll have filters for creating cool effects (not to mention protection), the perfect camera strap for your body, and plenty of memory between those many SD cards and hard drives. What more could you want?
We used a cheesy Batman metaphor earlier because we think that having so many accessories is both useful and, in some ways, kind of a cool feeling. You’ll never know when you need one of these essential camera accessories anyways. As the saying goes: “better to have them and not need them than to need them and not have them.”
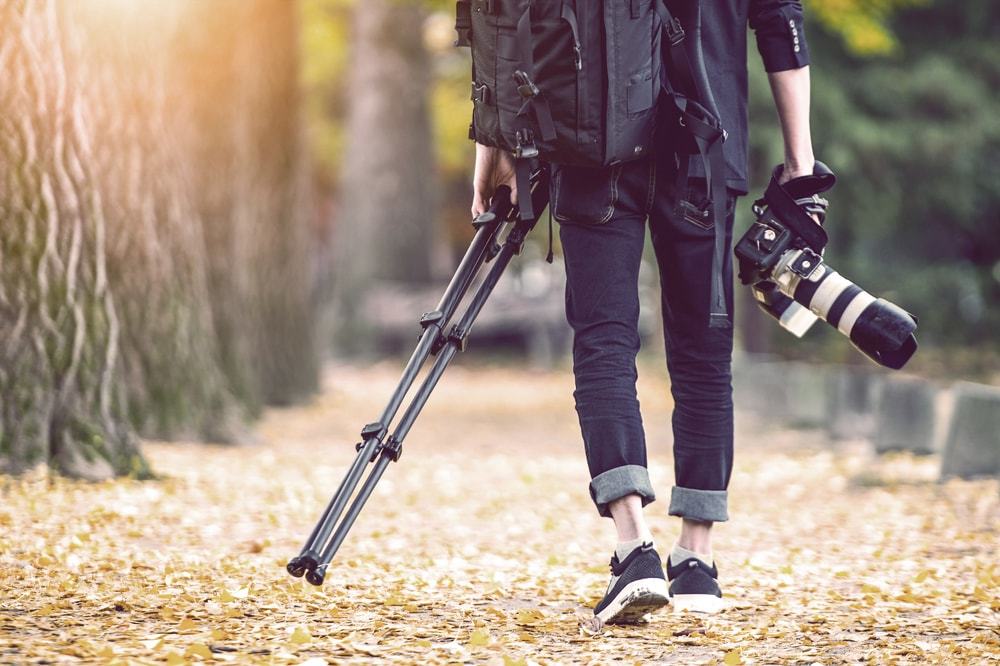
Share or save this post

Great right up. My son is just starting using a DSLR and I gave him the same story about UV filters. I first heard that story in 1977.
I did not know that they made filter wrenches! I usually add the polarizing over the UV and many times the two get stuck together, especially with a circular filter. I would need two of the same size.
I’d like to know more about how to properly use reflectors in given situations…it’d be cool so I know that the people who use them aren’t just holding a white thing to look professional!
Well written and informative post! Thanks for the value offered here.
Leave a Reply Cancel reply
Your email address will not be published. Required fields are marked *
Save my name, email, and website in this browser for the next time I comment.
Notify me of followup comments via e-mail.

The Best Travel Camera Gear – What’s In My Kit Bag? (2020 Update)
Hunting for the best travel camera gear for your next adventure? From action cameras to drones and editing – here’s what’s in my kit bag for photos & video
Trying to figure out the best travel camera for your next adventure? Or looking to piece together an epic travel camera kit bag to capture all the fun?
After 10 years on the road, using and testing numerous cameras, gadgets and accessories this is what travel camera gear has made the cut for my personal kit bag…
The Best Travel Camera Gear – What’s In My Kit Bag? (2021 Update)
What makes the best travel camera gear.
So what makes the best travel camera gear? Well picking the best setup for you will come down to 4 key things – size, weight, price and your personal adventures/subject matters/
Unless you’re only heading off on short trips and can afford to lug around other items, size is going to be a huge deciding factor. Sure things like a full Digital SLR setup will capture epic footage, but they’re also pretty bulky and will limit the other gear you can squeeze in! In fact this has been one of the biggest factors in streamline my kit bag.
It does come with some compromises, but compact gear usually means your more inclined to actually take it with you and use it!
Along with size is weight! If you’re travelling around a heap you wont want a huge and more importantly heavy kit bag.
It’ll make everything a huge pain in the ass and you’ll find you leave gear behind simply because its too heavy to lug up to the top of that mountain or take on that day trip – meaning you miss the shots!
Travelling is expensive, so you don’t want your gear to eat into your travel funds too much! Now good gear is going to be an investment and creating a well rounded travel kit isn’t going to be a cheap investment – but your personal budget is going to be a large factor in what you end up buying.
Your Adventures
Finally you need to be thinking about what you’re going to be doing and therefore capturing. You can have the best travel camera money can buy, but if it not waterproof then you sure as hell aren’t going to take it into the ocean to shoot surf photos or take it diving are you?
Balance all the above with what you’re doing along the way – you’ll find you might need a few pieces of gear to get the job done, but it’ll mean no adventure goes undocumented!
Nomatic Camera Bag
Now when it comes to carrying your travel camera gear around a solid bag is a must. Personally I’m now using the 30L Nomatic Backpack .
Now this isn’t primarily designed as a camera bag (although they’ve now launched an epic collaboration pack with Peter McKinnon which is a great one to look into) and because of this the bag itself doesn’t look like a camera bag.
Now not only does this make it less attractive to thieves, but it also draws less attention to itself in airports too – so you’re more likely to get away with it as a carry on bag without getting weighed! In fact fully packed my bag comes in at around 12kg, WAY above the 7kg carry on limit…so not getting clocked at check in has saved me heaps!
The bag itself is built really well and most importantly there are plenty of pockets to store lenses, chargers etc etc. I’ve also invested in the Nomatic packing cubes too, which instead of holding clothes are now divided up to hold all my accessories.
Click for more info and to buy
Sony a6300, 75-210mm lens and 16-55mm lens.
Having ditched my Canon 7D a few years back due to the size and weight I’ve finally reinvested in a “proper camera” once again – in the form of the mirrorless Sony A6300.
The reasons were simple – I needed a camera which would shoot high frame rates (for surf and action photography), be compact and relatively light weight, shoot 4K video and that I could buy a decent zoom lens (min 200mm).
Oh and that I could get for under £1,000.
After a whole heap of research I ended up buying the Sony A6300, 16-55m kit lens and 75-210mm lens.
Total cost = £1,013
However Sony were also running a cash back offer and I got £250 back – so in the end I got the whole setup for £763!
Why didn’t I go for the newer models in the A6000 series? Well it was a combination of cost (the latest model is nearly double the price) and in terms of features they really didn’t add enough to justify the jump in the price.
Sure the Sony A6400 has the flip up screen (great for vlogging) but given the other kit in my bag for vlogging it wasn’t worth the price jump (RRP is currently £949), especially when you consider the fact that my whole setup still cost less than that camera body alone!
I’m stoked to have the A6300 in my kit bag and it’s now my go to for shooting in water pictures too (more on that in a bit). Oh and you can also charge it using a USB cable and a portable power pack too, which is an epic bonus!
My Sony Mirrorless Setup (Click for more info and to buy)
- Sony A6300 + kit lens
- Sony 75-210mm lens
- Polarising filter (zoom lens)
- UV filter (main lens)
- 2 spare batteries + charger
LiquidEye Surf Housing
I got back into surf photography last year by complete accident!

They usually retail at around £700, but I picked mine up for just under £400 with a spare port.
I know for most people this piece of kit wont be of interest, but for those looking for the best travel camera gear this is certainly something I’d recommend if you’re looking to do any in water shooting with a mirrorless camera.
The surf housing itself is pretty lightweight too – weighing in at only 685g – which is pretty impressive when you look into alternative options.
My Surf Housing Setup (Click for more info and to buy)
- Liquideye Surf Housing
- Standard Port
- Pistol grip trigger
- Full control backplate
Mavic Air 2 Drone
When it comes to the best travel camera gear having a drone is a must these days. The epic aerial photos and videos really boost what you can create and add a whole new dimension to your travel filming and photography – especially if you’re looking to monetise or work with brands.
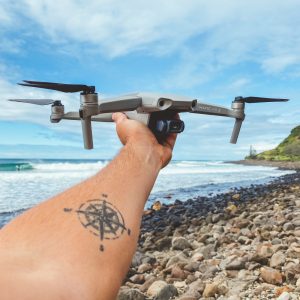
I did have the Mavic Pro, but swapped over to the original Mavic Air as it was simply much more suited for travel and a condensed kit bag.
The Mavic Air 2 builds on this and adds in heaps of amazing features and upgrades – including 4K @ 60FPS (for those lovely slow mo clips), OcuSync 2.0 (for better signal strength) and nearly doubled the battery life to a 34 min flight time!
I also opted for the “Fly More Combo” too – which meant the Mavic Air 2 came with 3 batteries, charger and a nifty little carry case.
There are heaps of drone options out there but honestly I wouldn’t hesitate to recommend the Mavic Air – it’s a small package with a big punch and has allowed me to create some epic content all over the world.
Click here for more info and to buy
GoPro Hero 10 Vlog Setup
My GoPro vlog setup is at the core of my kit bag and for me it’s arguable the single best travel camera I have with me.

Lightweight, compact, easy to use and super robust – I’ve put GoPros through their paces doing everything from surfing to skydiving and I’m always stoked with the epic footage they can capture!
To create the ultimate GoPro travel vlog setup I teamed it up with the Media Mod (which includes a shotgun mic, 2 cold shoe adapters and most importantly a 3.5mm jack for external mic), the Shorty Mount (which doubles up as a mini tripod) and rounded it off with the Rode Wireless Go and Rode Lavalier Go for my audio.
This full setup costs around £780 – but the Rode Wireless Go and Lavalier Go are a big chunk of that and you can make do with just the Media Mod or a cheaper shotgun mic.
As you might have guessed I now use it more for video work than still images – but it does have the capability to create some pretty awesome pics too.
Sept 2021 Update – I’ve now upgraded to the new GoPro Hero 10, which build on all the awesome parts of the Hero 8 and 9 but with the added front facing selfie screen and new GP2 chip, making it even better for vlogging and framing! You’ll need the new Hero 8 Media Mod to get the full use of external audio.
The Setup I Use – (Click for more info and to buy)
- GoPro Hero 10
- GoPro Media Mod
- Shorty Mount
- Rode Wireless Go
- Rode Lavalier Go
Alongside my Hero 8 I also ended up buying the GoPro MAX as well – although I still have some mixed feelings about it.
At £479 it’s not a small investment but the 360 video does have some great creative uses, so I guess it comes down more to your budget and needs than anything else.
That being said the SuperView mode and forward facing camera are pretty good for vlogging (even if the inbuilt audio isn’t as crisp as I’d want it) and it has allowed me to add in some more unusual clips to my travel videos.
Again for travel photography the 360 options are really handy for creative angles and being able to capture some epic scenes – just be careful not to overdo it with the zoom out function and tiny planets!
Assorted GoPro Mounts & Accessories
One of the best things about shooting with a GoPro is the huge range of accessories available – both by GoPro and this party options – that open up a whole heap of creative shooting options.
I’ve already smashed together a full post on the best GoPro travel accessories but for me the main mounts I use are the Shorty (mini selfie stick and tripod combo), Floaty Mount (for snorkelling and in water shooting), SP Gadgets POV Pole (for diving and selfies) and also a Mouth Mount for some awesome first person angles, especially when surfing!
My Main Mounts (Click for more info and to buy)
- Floaty Grip
- Mouth Mount
- Ho! Stevie Armband
- SP Gadgets POV Pole (aka selfie stick!)
Osmo Pocket
UPDATE: I’ve now upgraded to the DJI Pocket 2. Click here for the full review
When it comes to shooting travel videos I have to admit the Osmo Pocket is my go to for videography.
Why the Osmo Pocket as well as the GoPro? Well as much as I love shooting with the GoPro, I find the Osmo Pocket a lot easier to work with for anything outside of action videography.
The inbuilt gimbal of the Osmo Pocket makes for incredible footage and connecting it to your smartphone gives you heaps of control over all the modes and settings – allowing you to get the perfect shot.
It’s small, compact, super simply to use and also surprisingly affordable too – so it really does tick all the boxes!
For those looking at getting into vlogging it’s also. solid option as well – with forward facing LCD scree, gimbal smoothness and even facial tracking so you’re always the focus of your shot.
Personally I think the Osmo Pocket is massively under rated in terms of travel videography so go check it out.
iPhone 13 Pro
They say the best camera is the one you have with you – and I never go too far without my iPhone!
As well as being super useful for life on the road in general (I don’t know what I’d do without Google Maps!) the camera on the iPhone 13 is insanely good!
With 3 lenses to choose from – standard, 3 x zoom and wide angle – it’s really versatile and the fact you can shoot 4K video with it makes it ideal for B roll footage and also capturing those spontaneous travel photos too.
And the new iPhone 13 Pro and Pro Max both have the insanely good Cinematic modes too – which allows you to seamlessly change between focal point for that truly professional feel.
Bottom line is don’t underestimate your smartphone and how much it bring to the table as an essential part of your travel camera gear.
Macbook Pro, Lightroom, Photoshop + Final Cut Pro
When it comes to editing I’ve kept things pretty simple – MacBook Pro 13” with subscription to Adobes Creative Cloud (Lightroom and Photoshop option) with Final Cut Pro installed for video editing.
The MacBook Pro is a great work horse for editing both videos and photos, so that’s a no brainer. I also bumped up the specs to 16GB memory and the quad core processors (2020 model) which really speeds things up, especially for video.
Lightroom is my primary photo editing software, with Photoshop being used a few extra edits, exporting in different formats and creating things like YouTube thumbnails etc. It costs £9.98 per month but that gives you all the latest updates and is well worth it in my opinion.
Then on top of that I splashed out the £300 on Final Cut Pro for video editing. I had originally been using the free iMovie install that comes with every MacBook, but progressed to Final Cut as things got more serious.
My Laptop Setup (Click for more info and to buy)
- Macbook Pro
- Adobe CC Lightroom and Photoshop Package
- Final Cut Pro
Sandisk SSD – 1TB + 500GB
When it comes to underrated but essential things on this best travel camera gear list external storage is the unsung hero!

After a lot of deliberation I FINALLY made the move over to using SSD hard drives and I haven’t looked back.
Incase you didn’t know SSD stands for “solid state drive” and essentially it means that unlike traditional hard drives they have no moving parts.
Not only does this make them heaps more robust (a must for travelling remember), it also makes them REALLY small and really fast too.
Like insanely small! In fact I could probably fit 4 SSD drives into the same space as a single standard hard drive like the WD Passport!
These advantages do come at a price though and the 500GB option from Sandisk will set you back around £70
My SSD Drives (Click for more info and to buy)
- Sandisk SSD 500GB
- Sandisk SSD 1TB
Are you piecing together your perfect travel camera gear setup?
Anything else you’d add to the list, related posts.
The Apple Watch Surf Guide: Apple Watch Series 9 & Dawn Patrol App

Surfing In The Maldives At Niyama Private Islands – 10 Pics To Inspire Your Next Trip!

8 Things To Know About Surfing In Sri Lanka – BEFORE YOU GO!
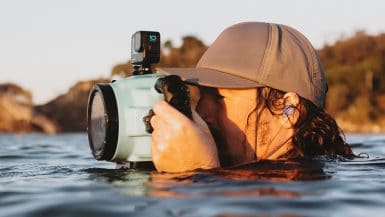
Liquid Eye Surf Housing Review – My Go To Waterproof Camera Housing
Leave a reply cancel reply.
Your email address will not be published. Required fields are marked *
The Best Travel Camera Cases and Backpacks of 2024, Tested and Reviewed
Keep your cameras and lenses organized and protected while on the go
:max_bytes(150000):strip_icc():format(webp)/justin-park-5cb1f6e666f946c8ae3cb6e48a3ee878.jpg)
We independently evaluate all recommended products and services. If you click on links we provide, we may receive compensation. Learn more .
TripSavvy / Debbie Wolfe
Cameras are still essential travel gear, but unlike flip-flops and toiletries, cameras require special handling and, ideally, a dedicated camera case. If you’re hitting the road (or tarmac) with expensive camera gear, it’s worth investing in a camera-specific travel bag or case that not only protects your investment but has a home for each camera, lens, and accessory you might bring along.
To help you find the perfect travel camera case, we had more than a dozen testers get hands-on with 21 of the most popular camera-specific travel cases and narrowed it down to our nine favorites. We reviewed bags on their design, layout, comfort when carrying, and even tested the waterproofing on bags that advertised it. These nine travel camera cases fit different niches within the category, giving you a wide range of options since not all photographers and videographers travel the same.
Our favorite camera bag overall was the Thule Aspect because of its smart design and layout and its minimalist, streamlined style in a size that should work for most photographers on the go. And because it doesn’t scream “photo case,” it can be used as an everyday pack even when leaving the camera gear at home. Read on for more about the Aspect and the eight other camera cases our testers found were worthy of your consideration.
- TripSavvy's Picks
Other Camera Cases We Tested
How we tested.
- What to Look For
Why Trust TripSavvy
Best overall, thule camera bag backpack.
Camera accessible while wearing
The understated design doesn't scream "camera bag"
Fits under airline seats
No cover, not fully waterproof
While they’re not an endemic camera brand and are probably best known for their ubiquitous roof racks and bike carriers, Sweden’s Thule makes exceptional camera luggage. Their XX-liter Aspect strikes an outstanding balance of simplicity and functionality and is unassuming enough to work great as an everyday carry pack even if your camera stays at home. The primary camera and lens storage area has a convenient side entry zip and enough space for a DSLR body with a lens attached and two to three additional lenses and accessories. Our testers loved the placement of this side access compartment because it’s accessible without removing the pack to unzip and pull the camera out quickly if needed.
You can easily rearrange the padded internal dividers to fit your specific gear needs, and there’s a mesh zippered pocket on the inside of the opening flap to hold loose items such as extra batteries and cables close at hand. The top-access compartment provides a separate area to carry extra equipment if you’re gear-heavy or miscellaneous non-camera gear, such as layers, snacks, and water. The laptop sleeve holds up to 15-inch laptops or tablets and is roomy enough that you don’t have to fight to get your device in properly, like some similar sleeves. Like most camera bags, your tripod storage is along the side and uses a mesh pocket and strap to secure it.
The Aspect is water-resistant, not waterproof, but stood up to direct water exposure in our testing. It also wears like a standard daypack and has a sternum strap and substantial hip belt if you fully load the pack. The hip belt also has mesh quick-storage built-in, so you don’t have to overload pockets with things like lens caps and batteries when you’re in the thick of shooting. There’s plenty of room for gear for your average photographer, but the size and shape are small enough to fit under most airplane seat storage areas, so you don’t have to worry about contents shifting during flight.
Capacity: XX liters | Weight: 3.2 pounds | Maximum Laptop Carry Capacity: 15.6-inch | Materials: 100 percent nylon
Best Overall, Runner-Up
Peak design everyday backpack 20l.
Peak Design
Innovative design touches
On-body access
Pricier than similarly sized bags
Peak Design started as a Kickstarter launch, and their camera bags and accessories are now some of the most sought-after camera equipment. Their Everyday Backpack (now in its second iteration) isn’t just another camera backpack and has loads of intelligent design features you’d expect from Peak Design. Our tester appreciated the ambidextrous side access that lets you into the main compartment from either side by removing one arm from the shoulder strap and slinging the bag around to your front. Inside, Peak’s innovative, origami-like FlexFold dividers keep your camera items from bumping into each other.
The side-access panels have zippers, but the top flap closes with a dead-quiet MagLatch closure that can clamp down less or more depending on how full that compartment is. The laptop sleeve holds up to a 16-inch size but can be adjusted for smaller computers so they don’t fall down, making them harder to dig for. We tested the 20-liter model, but for a modest additional $20, you can get the same pack in a 30-liter version if you carry more gear than average. If you occasionally need even more capacity, stowaway external carry straps permit multiple configurations for lashing things like jackets, tents, or whatever your adventures call for. There are smart travel features as well. The pack’s back has a sleeve that slides over a roller bag’s handle, and there’s a quick stash top pocket for miscellanies such as phones, chargers, and passports.
Capacity: 20 liters | Weight: 4.43 pounds | Maximum Laptop Carry Capacity: 16-inch | Materials: 400D recycled plastic
Tripsavvy / Robert Caponetto
Best Budget
Bagsmart photo camera backpack.
Stylish non-techy look
Built-in rain cover
The top compartment lacks padding
Despite being one of the few bags we tested that retails for less than $100, this is a stylish backpack you could use for everyday carry without anyone knowing you're wearing a camera pack. Our tester said, "It looks like a nice, modern backpack that doesn't scream, 'I have expensive equipment in here!'" Inside the water-resistant canvas, however, is a large lower compartment with padded dividers that holds a camera with a lens attached and three to four additional lenses or other gear items. And like more expensive camera bags, there's a side access pocket that lets you quickly grab your camera while keeping the bag slung on one shoulder.
The expandable top compartment captures the rest of your stuff with a water-resistant cinch top beneath the canvas flap that closes securely with belt-like leather straps. Side pouches with elastic hold water bottles or tripods, and the laptop sleeve keeps your computer up to 15 inches secure against your back. The canvas is water-resistant but also has a pull-out cover in case the weather takes a serious turn.
Capacity: Not listed | Weight: Not listed | Maximum Laptop Carry Capacity: 15-inch | Materials: Canvas
TripSavvy / Abby Mercer
Peak Design Everyday Sling
Easy on-body access
High durable exterior
Collapsible for travel
Not fully waterproof
If you want to travel light with a stripped-down camera gear kit, a bag or pack can be overkill, making it harder to access what you need. For situations like this, I’ve used an earlier version of Peak Design’s 6-liter Everyday Sling for years, and it’s durable enough that it still looks like new. The updated version remains largely unchanged but comes in additional sizes (you can get it in 3-, 6-, or 10-liter versions) and new color options. The latest version also adds more durable zippers and uses recycled materials. The 6-liter is only big enough to hold a tablet, but you can use the external carry straps to bring a tripod when necessary.
The collapsible sling is thick, padded, and fairly stiff and can flatten enough to store inside a larger suitcase. Alternatively, you could pack the smaller sling sizes with your gear and place it inside other luggage to keep your equipment protected in transit and ready to be deployed for lighter trips at your destination. Our tester loved carrying the smaller pack when traveling, taking just enough equipment, and quickly swinging it around to access gear.
Capacity: 3-liter, 6-liter (tested), 10-liter | Weight: 1.72 pounds | Maximum Laptop Carry Capacity: 11-inch tablet | Materials: 400D recycled plastic canvas
TripSavvy / Mariah Tyler
Most Durable
Neewer rolling camera backpack.
Three carry options
Large capacity
Attached rain cover
Shoulder straps aren't removable
If you carry a lot of gear, many travel camera packs can make you feel cramped trying to fit Speedlites, large telephotos, and extra camera bodies. Not an issue with Neewer’s luggage-style roller bag that converts to a backpack and also has a regular suitcase carry handle and plenty of interior room and is rated to handle over 120 pounds of gear. The non-removable wheels and telescoping handle give your back a break when navigating airports and city streets, but the backpack straps (including a waist belt) let you go off-road when needed.
Our tester loved the solid structure and substantial padding to protect their gear and felt the bag could withstand drops and other abuse in transit. The exterior is made from waterproof nylon but has an attached rain cover, just in case. This extra-large backpack is just small enough to fit in overhead storage on a plane, but our tester found a few downsides. Because of the size and weight, it’s not the most comfortable for long-term wear as a backpack, and the backpack straps aren’t removable to prevent snagging when used as a roller bag.
Capacity: 60-kilogram weight-rated | Weight: 9.43 pounds | Maximum Laptop Carry Capacity: 15-inch | Materials: Nylon
TripSavvy / Jacob Fox
Best Organization
Think tank photo airport security.
Extra-durable exterior
Lots of interior space
Meets carry-on size requirement
You expect durability with “tank” in the brand name, but this airline-ready roller carry-on bag should withstand nearly anything with ballistic-grade waterproof nylon outside and heavy padding. Think Tank designed this bag to meet US and international carry-on requirements, but there’s still tons of room inside, and our tester loaded it up with two bodies and large lenses and still had about 20 percent of the volume left unused. Think Tank’s highest-capacity roller bag accommodates up to 600 millimeters of telephoto lenses.
There’s a laptop compartment that will hold up to a 17-inch device, but otherwise, the bag is essentially one giant equipment compartment with tons of dividers, giving you maximum flexibility to arrange the bag to hold your specific gear configuration. While you could fit smaller tripods inside, the bag has tripod-specific straps for exterior carry and a TSA-approved padlock and cable lock for theft prevention. Our tester loved the build and durability, but the downside is that the pack is heavy, which gets magnified when fully loaded, so you’ll want to use the rolling wheels whenever possible to avoid carrying the total weight.
Capacity: Not listed | Weight: 12.76 pounds | Maximum Laptop Carry Capacity: 17-inch | Materials: 1680D ballistic nylon
TripSavvy / Victor Protasio
Most Comfortable
Lowepro protactic 450 aw.
Armored build
Lots of available accessories to attach
Ergonomic build for all-day comfort
For long days shooting in the field, you want a comfortable, ergonomic backpack, and it’s no surprise that a brand with backpacking roots makes our Most Comfortable pick. Colorado-born Lowe Alpine made the first internal frame backpacking pack, and they’ve been making camera-specific years for over 50 years. The ProTactic 450 AW is for adventurous photographers who need to keep their pack on over countless miles and long days with ActiveZone support that uses firm but supportive padding that leaves room for airflow against your back. Our tester specifically called out the extra-wide waist strap for putting the weight on their hips where it belongs instead of the shoulders. Beyond simple padding, the ProTactic 450 employs FormShell construction lands it somewhere between a backpack and hard-sided luggage.
Everything about the ProTactic 450 AW says “tactical,” and its webbing-wrapped exterior permits attachment of LowePro’s many sold-separately SlipLock accessories, such as pouches for water bottles, phone, and other accessories. Included straps and a tripod cup securely attach to the outside. Despite being stiff and armored, there are four ways into the main compartment for easy access to your gear, no matter where the pack is.
Capacity: 25 liters | Weight: 6.26 pounds | Maximum Laptop Carry Capacity: 15-inch | Materials: Not listed
TripSavvy / Gregory Dupree

Best Storage
Nomatic mckinnon camera pack.
High volume
Very expensive
Helpful accessory pouches not included
Salt Lake City-based luggage company Nomatic likely paired with popular YouTube photographer/videographer Peter McKinnon partly because of his massive following, but the 35-liter McKinnon Camera Pack has developed a loyal following of its own. The pack stands out for its ruggedly urban looks and enormous storage capacity, expandable up to 42 liters to accommodate lots of content creation gear but a few days' worth of clothes and basics. The TPU-coated 900D nylon is rugged and waterproof, forming a durable armor that's still flexible enough to feel like a backpack and retain some flexibility despite ample padding everywhere.
We tested the Nomatic pack in the field, and both testers appreciated how the pack forms to your back and the extra padding in the shoulder straps to ease the weight when fully loaded. Like an excellent backpacking pack, the shoulder straps also have load-lifter straps to help position the weight on your shoulders, and sternum and waist straps help distribute the weight more evenly. The pack is heavy compared to backpacking packs, and it needs to be to pad and protect your equipment, but it's light for its capacity compared to other high-volume camera bags we tested. Even for such a nice pack, the price is high, so we wished Nomatic threw in a few helpful accessory pouches and packing cubes that are part of the McKinnon camera gear line.
Capacity: 35 liters (expands to 42L) | Weight: 5.75 pounds | Maximum Laptop Carry Capacity: 16-inch | Materials: EVA back panels, 900D TPU-coated nylon exterior, Hypalon lashing points
TripSavvy / Henry Wortock
TripSavvy's Picks
Our testers loved the Thule Aspect and the Peak Design Everyday 20L packs for their streamlined profiles and photography-specific builds packed with many innovative features. While the Peak Design bag has tons of unique features we loved, the Thule Aspect edged it out just barely by having a more accessible price point, making it an excellent option for pros and casual photographers alike. We also got most of the same features out of the surprisingly capable Bagsmart Photo Camera Backpack, which has most of the features we loved in pricier packs but was the only one of our picks that retails for less than $100.
Thule Covert 32L Camera Pack : This well-designed, high-capacity pack is an excellent option for balancing personal and camera gear storage via a removable camera pod that works as a sling. However, we felt Thule Aspect was a better option for most travelers, thanks to a much lower price point. Pros who want more storage and versatility should consider the Covert if they find the Aspect too small or simplistic.
Manfrotto Advanced III Rolling Camera Bag : This basic camera roller bag ticks most of the boxes on paper, but our tester found the padding lacking and expected more storage from a carry-on-sized piece of luggage.
Think Tank Photo Airport Accelerator Backpack : Our tester loved this bag's size and build quality, but other options in this category edged it out by having more carry options to ease the burden of carrying a higher volume of gear.
Boundary Prima System : We loved the design and modularity of this pack and its components but wished there wasn't an extra charge to make it waterproof and that they included more parts of their system.
Manfrotto MB MA2-BP-GM Advanced² Gear M Camera and Laptop Backpack : We appreciated the comfort and design of this pack despite lacking a hip belt, but felt it was a bit small for travel since there isn't much space dedicated to clothes and personal items.
Wandrd PRVKE : We tested the 21-liter size, and our professional photographer tester felt there wasn't enough gear storage for most pros. We also felt the price was high, especially considering the additional cost of including the "essential" photography bundle.
Brevite The Jumper Camera Backpack : This stylish, small backpack scored high marks from our tester for being lightweight and easy to carry. It comes in many bright solid colors and could be an excellent choice for someone with a streamlined kit.
Hex Ranger DSLR Sling V2 : This is a more modestly priced sling than our Best Sling pick from Peak Design that could be an excellent option for photographers that don't want to spend over $100 on a camera sling. Compared to the Peak Design sling, it lacks some structure and durability but is about half the cost.
Bellroy Venture Sling 10L: This oversized sling got high marks from our NY-based tester, who loved the quality, design, and ease of use while walking around for street photography.
Tenba DNA 16 Pro Messenger Ba g: If you prefer the ease of access of a shoulder-slung bag like this, the Tenba may be a great fit as a day trip bag, though our tester wished it was a tad smaller.
Lo & Sons Claremont : While it's not for everyone, this shoulder bag looks like an oversized purse and has some basic camera-specific design touches—an excellent choice for someone who wants a camera bag that's a bit chic.
ONA The Bowery Messenger Bag : Another stylish, purse-like shoulder camera bag. Our tester loved the style and could fit her entire kit inside but felt the price was too high.
Gatta Rae Noir : Another leather purse/shoulder bag option. Stylish and reasonably priced but bulky for travel and better-suited for day shoots closer to home for photographers that want a stylish bag.
Poler Elevated Camera Cooler: A fun, lunch tote-style camera bag that converts to a light-duty lunch cooler after removing the padded dividers. A more unisex option for folks that want a shoulder carry day bag for a small camera kit.
More than a dozen recreational and professional testers took 21 camera bags out around their home bases and on road and air travel trips. Testers spent time customizing the travel bag’s organization and trying different configurations. They then took the bags into the field, testing for ease of use and accessibility of gear while worn and comfort in transit.
We also tested the weatherproofing of the bags when present by taking them out in bad weather when possible and spraying them down at home to gauge how well they keep gear dry. Testers examined zippers, fasteners, pockets, storage compartments, and special features for durability and ease of use.
What to Look for When Buying a Travel Case for Camera
Camera bag makers use various materials to achieve their design goals, and there’s no “best” material to watch when evaluating your camera bag options. Some bags use fabrics such as nylon, and many employ coatings such as DWR or rubbery TPU to give them weather resistance. Many manufacturers will list the Denier rating of fabric, and if durability is important to you, look for exterior materials with higher Denier numbers. However, remember that higher Deniers are usually heavier, bulkier, and less flexible.
Most backpacks and camera bags measure storage volume in liters, which can be a useful way to compare the size of different bags when shopping online. We tested some slings 10 liters or less in volume, and most packs fell between 20 and 40 liters. While you can undoubtedly buy camera bags and cases larger than this, they become too big to carry on and fall more into the luggage category than travel bags. When choosing a bag size for your travels with camera gear, consider not only the amount of camera gear you need to transport but any personal items, such as clothing, computers, hard drives, water, snacks, etcetera, that you’ll want to include to estimate the volume that’s right for you.
Additional Features
With most photographers operating in the digital world, most camera bags have a slot for a laptop, and we’ve included the maximum laptop size for any bags with that feature. If you usually employ a tripod, look for bags with a dedicated tripod storage solution. More advanced bags will often have special, smaller compartments for odds and ends that photographers carry, such as memory cards, hard drives, batters, filters, and more.
All but one of our picks above cost over $100, and camera bags are generally more expensive than comparably sized backpacks and bags because they include extra features and materials used to organize and protect your gear. You can expect to pay $150 up to $400 for a high-quality, higher-volume camera-specific pack though smaller bags and slings will generally cost less.
Cleaning and care for camera bags will vary from model to model and brand to brand, but your best bet is to spot clean whenever possible. Waterproof bags can be easier to clean as they repel water, resist stains more readily, and can also be sprayed down if they get dirty. A few bags are machine-washable, but always consult manufacturer recommendations on how to clean individual bags.
Smaller bags can qualify as personal items, and several of our picks will meet size requirements for carry-ons for domestic flights. Because these requirements can vary depending on your location, destination, and airline carrier, it always makes sense to consult your airline’s specific requirements and fees before you fly.
When traveling with camera gear, bringing any equipment you might need for a particular trip or a photo shoot is a good idea. While no one wants to lug around more gear than they expect to use, it can be expensive, difficult, or even impossible to replace items you didn’t bring when you’re far from home. If you’re like me and prefer to overpack camera gear, get a bigger pack than you think you need.
Also, anticipate your non-camera needs, such as extra clothes, personal electronics, and food/beverage considerations. If you want one pack to hold everything, choose a camera bag that holds more than just camera gear. Especially when dealing with food and liquids, it’s a good idea to have separate compartments for personal and camera items.
Over 15 years as a professional photographer and videographer, Justin Park has tested and owned dozens of camera bags and cases for both work and play. He has employed and destroyed slings, backpacks, and hard cases filming Olympic games and backcountry sporting events such as mountain bike races and ultramarathons, including Colorado’s Leadville 100.
The 11 Best Carry-on Backpacks of 2024, Tested and Reviewed
The 11 Best Hardside Luggage Bags of 2024, Tested and Reviewed
The 9 Best Travel Toiletry Bags of 2024, Tested and Reviewed
The 12 Best Carry-On Luggage of 2024, Tested and Reviewed
The 14 Best Backpack Brands of 2024
The 9 Best Camping Cots of 2024, Tested and Reviewed
The 9 Best Travel Strollers of 2024, Tested and Reviewed
The 6 Best Small Coolers of 2024, Tested and Reviewed
The 8 Best Luggage Sets of 2024, Tested and Reviewed
The 5 Best Waterproof Phone Pouches of 2024, Tested and Reviewed
The 9 Best Beach Chairs of 2024, Tested and Reviewed
The 10 Best Anti-Theft Backpacks of 2024, Tested and Reviewed
The 7 Best Travel Toiletry Bottles of 2024, Tested and Reviewed
The 9 Best Car Phone Mounts of 2024, Tested and Reviewed
The 8 Best Duffel Bags of 2024, Tested and Reviewed
The 8 Best Backpack Coolers of 2024, Tested and Reviewed
- Search Please fill out this field.
- Manage Your Subscription
- Give a Gift Subscription
- Newsletters
- Sweepstakes
We independently evaluate all recommended products and services. If you click on links we provide, we may receive compensation. Learn more .
- Travel Products
- Tech Essentials
The 13 Best Travel Camera Cases of 2024, Tested and Reviewed
We love a protective camera case for travel, especially when it includes functional compartments and a stylish design.
:max_bytes(150000):strip_icc():format(webp)/Lauren-Breedlove-2000-8fc62921334e4fe5a26bc333e9ea4b1b.jpg)
In This Article
- Our Top Picks
Our Testing Process
- Others We Liked
- Tips for Buying
- Why Trust T+L
Travel + Leisure / Grant Webster
A great camera bag doesn’t just keep gear protected during your travels. It also enhances your overall experience by adding comfort, ease, and storage solutions on the go. You don’t want to risk liquid damage or have expensive cameras and lenses get banged up during transit in a bag that doesn’t have water-resistant materials or shock-absorbing dividers. It’s also important to factor in whether you need a backpack style that can hack it in the outdoors, or if you want a heavy-duty case that you can roll to your gate and store in the overhead bin.
Because narrowing down a search can be tricky, we evaluated 21 camera bags on design, durability, capacity, portability, and value to see which ones go the distance. While some are better than others for specific types of photography, all 13 that made our list are perfect for anyone looking to up their game. And, as a travel photographer and writer myself, I’ve included my expertise and personal experience traveling around the world with various gear, plus spoke with professional photographer and blogger Renee Hahnel for expert insights about what to look for when shopping for a camera case, too.
Best Overall
Peak design everyday backpack 20l.
Peak Design
- Design 5 /5
- Capacity 5 /5
- Portability 5 /5
- Durability 5 /5
It has an impressive capacity and fits under the seat when flying.
It doesn’t stand up on its own when placed on the ground.
We love the sleek design of the Peak Design Everyday Backpack 20L, as well as its all-around functionality and portability. It’s versatile enough to use as an overnight pack or strictly a camera bag on a longer trip, with both padded laptop and tablet slots; a separate camera compartment with dividers; and top space for accessories like chargers, snacks, keys, an ID, or even a small clothing item. Three foldable dividers allow you to configure them how you prefer, fitting one or two camera bodies (DSLR or mirrorless), depending upon the lenses you’d like to include inside as well. One mirrorless camera body with three lenses can fit nicely, with room for chargers and accessories, and add another body or small point-and-shoot in the upper area with its magnetic flap-and-hook closure.
The Everyday Backpack is smartly designed with features that work well in the field. It's durability has exceeded all expectations and after six months of use, it shows no signs of wear. We love the deep side pockets, which fit a tripod or water bottle nicely, keeping it tight to the pack with added straps, and the dual side zippers for on-body access so you don’t miss getting the shot while wrangling your camera out of a bag. The bag’s weather resistance works effectively, and the bottom panel is waterproof, so you can rest it on a wet surface without worrying either. The side flaps double as interior zippered storage as well, where batteries, lens cloths, and backup SD cards have individual pockets for keeping them secure.
"The Peak Design Everyday Backpack 20L is not only sleek in its aesthetic, but it's super practical for traveling with a small to mid-size camera set up and other tech gear, like a laptop and headphones,” Hahnel says. “Then the 30L version is a great option for those with additional gear to carry. I personally really love Peak Design's MagLatch hardware and UltraZips.”
The Details : 22.24 x 11.81 x 8.27 inches (exterior), 21.65 x 11.22 x 6.3 inches (interior) | 20 liters (also sold in 30 liters) | 3.75 pounds | 400D double poly-coated nylon canvas shell; 900D waterproof bottom liner; nylon interior; leather accents | 3 dividers
Travel + Leisure / Robert Caponetto
Best for the Outdoors
Shimoda adventure backpack.
This water-resistant case holds up to the elements and even comes with a rain cover if you're using it outdoors.
If you’re using the removable main compartment, you’ll actually have less space.
The carry-on-friendly Shimoda Explore V2 30 Liter Adventure Backpack is our top pick for photographers who spend a lot of time outdoors when traveling. Ideal for landscape photographers who hike or enjoy other wilderness-based endeavors, this pack has padded shoulder and hip straps for enhanced carrying comfort. The interior is very secure with plenty of options to customize padded Velcro walls for your desired configuration of your individual camera, lens, and more. The small core unit holds a mirrorless camera and a lens but you can store additional lenses and accessories in the other main compartment, which can hold up to approximately three lenses.
A padded sleeve on the backside holds a 13-inch laptop and a three-liter bladder sleeve on the front will keep you hydrated during your outing. Water-resistant with a lightweight rain cover included, you’ll be fairly protected should you get caught in the rain or snow as well. The bag itself also holds up to the elements and, after six months of use, still looks brand new, Side and rear camera access are major highlights of this pack, so you can access your gear quickly in the event of a surprise rainbow or wildlife sighting. It also features lockable, water-resistant YKK zippers to protect your gear.
The Details : 11.6 x 20.3 x 6.6 inches (exterior), 11.2 x 19.8 x 6.2 inches (interior) | 30 liters (also sold in 25 and 35 liters) | 4.8 pounds | Ripstop nylon shell with Carbonate Ether polyurethane coating | Various customizable Velcro dividers, small and large
Travel + Leisure / Grant Webster
Best Organization
Nomatic mckinnon camera pack.
Rigid dividers keep camera equipment secure while on the go.
It’s a little heavier than other camera backpacks on the market.
Organization is key when shooting on the move and we think the Nomatic McKinnon Camera Pack 35L is at the top of its game in that department. A plethora of storage for camera bodies, lenses, SD cards, and hard drives, as well as an external slot for a laptop up to 16 inches makes this a great travel companion. Between the zippered pockets, dividers, and a designated clothing area, you’ll have no problem staying organized.
With 35 liters to work with, you can easily fit more than one camera body and multiple lenses, and, from our tests, we determined that it's possible to accommodate a camera body with a lens attached to it, if needed. The clothing/gear compartment expands by an extra seven liters, topping the capacity out at 42 liters for trips where you need an extra T-shirt or pair of socks. Even when packed full, it's comfortable to carry thanks to added straps we loved more and more after regularly using them for six months. The bag is water-resistant, has waterproof zippers, and keeps gear dry in moderate rain. Several pockets for everything from your passport to charging cables and filters means everything will have its own place and exterior pockets are perfect for a tripod and water bottle. Side access makes grabbing your camera on the go an easy feat as well. For multi-day trips, this pack is a solid choice.
The Details : 22 x 13.5 x 9 inches (exterior), 21 x 12.5 x 5.25 inches (interior) | 42 liters | 5.75 pounds | N900D square ripstop with 0.20mm film-laminated TPU65 coating; N420D square ripstop with with 5PM coating; compression-molded EVA back panel; interior Velux hook-and-loop compatible fabric; nylon 210D liner fabric and mesh | 4 long, 5 short dividers
Travel + Leisure / Henry Wortock
Best Rolling
Think tank photo airport security.
- Portability 4 /5
The rugged design and ample padding keeps gear extremely safe for travel.
It lacks a quick access point; the whole bag has to be unzipped to access camera gear.
Give your back a break and enjoy the benefits of a rolling camera case. We love the Think Tank Photo Airport Security V3.0 for its tough, high-quality design and protective padding. The materials both looked and felt secure, promoting confidence when transporting their gear. It even protected all of the items from water during our six-month testing period. Customizable compartments came in handy to tailor-fit a wide array of camera bodies, lenses, hard drives, batteries, and more within the roomy interior. Pack up to two DSLRs or mirrorless model cameras, as well as 4-6 additional lenses and accessories, including a large 600mm lens (detached from camera body). There’s also a slot for a 10-inch tablet and up to 15-inch laptop, and a spot for your tripod and a water bottle, if needed.
Although it doesn’t have spinner wheels, it’s still a relief to roll through the airport when packed with heavy equipment versus carrying a pack. The Think Tank meets most carry-on requirements for both domestic and international flights and we noticed that it fit nicely almost anywhere, from airplane or car to the photo studio. The water-repellent treatment worked well, even in heavy rain.
The Details : 14 x 22 x 9 inches (exterior), 13 x 21 x 7-8 inches (interior) | 11.1 pounds | Exterior: 1680D ballistic nylon, water-repellent (DWR) coating, polyurethane coating, nylon webbing; interior: 210D silver-toned nylon, polyurethane backed velex liner and dividers, 2x polyurethane coated nylon 210T seam-sealed rain cover, closed cell foam and PE board reinforced dividers, clear mesh pockets | 10-12 dividers
Travel + Leisure / Victor Protasio
Best Messenger
Tenba dna messenger bag.
- Design 4.8 /5
- Capacity 4.5 /5
It fits more than your typical messenger bag.
It’s a bit bulkier than most bags of this style.
We love the ease of carrying that messenger bags offer, and the comfy Tenba DNA 16 Pro features a spacious interior with easily customizable compartments, too. It’s ideal for photographers looking to only carry a limited set-up as well as a laptop and some accessories. Although it can fit a full-frame DSLR or mirrorless camera and up to six lenses, we noticed that it gets to be a bit bulky to carry when stuffed.
A separate padded sleeve on the backside of the interior holds a laptop up to 16 inches or an 11-inch tablet. Zippered pockets and other mesh storage spots offer plenty of additional areas to keep items like passports, keys, SD cards, cords, and more secure. The weather-resistant material with additional boot protection on the bottom is fantastic for when you need to rest it on the ground. Quick access to your gear is through the top zipper, though it felt like the slide clips made it trickier for one-handed access.
The Details : 15.75 x 12 x 7.5 inches (exterior), 14.75 x 11.5 x 6 inches (interior) | 2.9 pounds | 70D shadow ripstop nylon interior with two layers of polyurethane coatings and soft brushed-tricot lining, Helix all-weather polyurethane-coated nylon exterior, TPU-coated and seam-sealed base | 3 medium dividers
Travel + Leisure / Gregory Dupree
Peak Design Everyday Sling
- Durability 4.5 /5
It’s durable and sturdy, made with high-quality materials.
The bag remained a bit stiff, even after six months of regular use.
If you’re in search of a minimalist-style camera bag, the Peak Design Everyday Sling 6L is a top-notch choice. It can be worn as a crossbody bag or waist bag and features a reversible strap and quick-access zipper for grabbing your gear. Despite being small, there are numerous areas for storage, and it can fit a mirrorless camera or a small DSLR with 2-3 lenses, depending on their size. The removable main compartment has customizable dividers that can fold down, ideal for stacking lenses.
A tablet up to 11 inches in size can fit in the included sleeve, and there are various pockets and zippered areas for other accessories like batteries, SD cards, and lens wipes. Every part of the bag seemed well-made, and it repelled water when sprayed. It was comfortable and lightweight to wear, easy to adjust, and can pack down to easily fit inside a larger suitcase for travel. Additional external straps on the bottom can hold a jacket, clothing, or a tripod, though it’s not the best bag for heavier items like the latter.
The Details : 13.8 x 9.3 x 4.7 inches | 6 liters (also sold in 3 and 10 liters) | 1.7 pounds | 400D double poly-coated DWR-impregnated nylon canvas shell, nylon interior, leather accents | 2 medium dividers
Travel + Leisure / Mariah Tyler
Best for Multiple Lenses
Lowepro protactic 450 aw.
It’s very spacious and has four access points.
It’s a bit heavier than other camera backpacks.
The Lowepro ProTactic 450 AW is our top pick for photographers looking to carry multiple lenses and/or bodies. Its hiking-pack design adds padded shoulder and waist straps, while your gear will stay secure in the sturdy customizable internal compartments. While we noticed that the harder shell of the bag made it a bit bulky and difficult to store, they also noted that it’s extremely spacious and holds most of the camera gear you’ll need including a laptop up to 15 inches and a tripod attached using the exterior tripod cup or straps.
The 25-liter capacity is designed to hold two full-frame cameras, and up to eight lenses. The included all-weather cover will keep your bag and the gear inside protected from the elements as well. With multiple quick-access points, your photo missions will run a little smoother without having to stop and open the whole bag. We think this bag is worth the price for its durability, functionality, and abundant features.
The Details : 14.1 x 8.6, x 20.5 inches (exterior), 11.8 x 6.3 x 17.3 inches (interior) | 25 liters | 6.25 pounds | Exterior: 1680D ballistic polyester, 900D polyester, 420D nylon recycled; interior: velex nylon | 10+ dividers, all sizes
Most Durable
Thule camera bag backpack.
It performs like a hiking backpack that’s comfortable to wear.
It doesn’t store very easily due to its bulkiness.
The Thule Aspect DSLR Camera Bag Backpack is our most durable pick, with thick interior padding that remained stiff and supportive even after six months of regular use. The bag’s weather-resistant exterior can hold up in drizzling rain, too. It also functions well as a hiking backpack with padded shoulder straps, removable hip belt, and an air mesh back panel for ventilation. Customize your gear configuration with the Velcro dividers and store your 15-inch laptop and a tablet in the back padded compartments.
The main camera section can fit a full-frame camera and two lenses and the top pack compartment is great for another compact camera, accessories, or personal gear. A tripod can be stashed in the exterior side pocket with a strap to hold it tight and a small front pocket is great for snacks or keys. Since this bag prioritizes durability, we noticed that it doesn’t compress easily like a regular backpack, making it a little more difficult to store.
The Details : 20.5 x 11.8 x 8.7 inches | 3.2 pounds | 3 dividers
Travel + Leisure / Debbie Wolfe
Best Modular
Boundary prima system.
- Capacity 3.8 /5
The modular design allows for extra tailoring to your preference and gear set-up.
Quick access is for just one camera and lens, everything else has to be accessed by taking it off and unzipping the whole bag.
We love the customizable modular design of the Boundary Prima System pack, suitable for everyday use or two- or three-day trips. There is a large packing cube that you can expand with a zipper, designed for storing your camera gear, and it can fit through the top or side compartments. (One body and one lens fits in this particular cube.) Those with more camera equipment would need to store it in other spots within the bag, making it more difficult to access on the go.
You can transform this main module into a separate shoulder sling bag with an included strap for when you want to explore without your entire backpack. A padded slot in the main bag fits up to a 17-inch laptop and a separate folder section can store a tablet, notebook, or other flat items. Additional storage pockets can fit chargers, batteries, cords, and SD cards. The bag kept everything inside dry even after getting caught in the rain. After six months of regular use, this bag has held up to all the elements and protected gear time after time.
The Details : 53 x 31 x 17 inches | 30 liters | 4.9 pounds | 3 modular components, 2 dividers in the camera packing cube
Travel + Leisure / Jason Donnelly
Lo & Sons Claremont
Lo & Sons
- Capacity 3.5 /5
It could easily pass for a stylish purse, yet inconspicuously holds a camera and lens.
It doesn’t fit a ton of gear and the divider pops out easily due to lack of Velcro to hold it down inside.
If you’re looking for a camera bag that doesn’t scream “camera bag” then the Lo & Sons Claremont might be for you. Made from high-quality leather, we noticed that it felt thick and durable while also looking very stylish. You can wear this bag as a crossbody or on your shoulder by adjusting the length of the strap, making it comfortable to wear. A DSLR or mirrorless camera with a smaller lens (like a fixed 35mm or 50mm), plus an additional lens can fit nicely inside, separated by a movable divider. Two small front pockets are designed to hold SD cards and other storage spots like the discreet back zippered pocket can easily fit a wallet, passport, snacks, keys, and more. If you’re looking to travel with a lightweight personal item that also stores your camera — and you don’t need to bring a laptop or tablet — this bag is a win.
It doesn’t seem to have shock-absorbent capabilities, making it better suited to hold your camera while exploring instead of using it as a carrying case for travel. The bag lacks a zip enclosure, so if water were to get under the flap with twist latch closure, it’s possible your gear could get wet as well. This camera bag is perfect for city explorations, and bringing your camera out to lunch or dinner when you want to look chic without a big backpack in tow.
The Details : 10.5 x 5.5 x 8.5 inches | 1 camera body, small lens, and additional small lens or flash | 1.5 pounds | Full-grain leather exterior, polyester interior | 1 small divider
Travel + Leisure / Alessandra Amodio
Best Colors
Brevite the jumper camera backpack.
- Durability 4 /5
It’s a multi-purpose bag in a wide array of great colors.
The dividers aren’t as sturdy as those in other bags.
The Brevite Jumper Camera Backpack is our top pick for best colors, and with 10 hues to choose from, it's easy to see why. Although hip and stylish, this pack offers more than just its looks; with a lightweight profile and ample compartments, this is a great personal carry-on item or everyday bag. After six months of regular use, it remains incredibly durable with very secure zippers that are easy to use. The main camera compartment can fit a full-frame camera with a lens up to 200mm, as well as smaller accessories like chargers, batteries, or small fixed lens. The top storage area is great for snacks, small clothing pieces, or other personal items, and a rear, padded sleeve fits a laptop up to 16 inches in size. You can carry a tripod either in the side pocket or on the bottom using the external straps, and access to your gear is quick through the side zipper.
While the material repels water at first, there was some residual wetness afterwards, so a rain cover might be a good idea. They also determined that it’s a great quality bag that works for work or pleasure travel. As a major bonus, it’s machine washable.
The Details : 16.25 x 10.5 x 5.5 inches | 18 liters | 1.9 pounds | 5 dividers
Best Leather
Ona messenger bag.
- Capacity 4 /5
It’s very stylish and doesn’t look like a regular camera bag.
It’s more suitable for carrying a smaller camera kit.
A classic style that’s as beautiful as it is functional, ONA’s The Bowery Messenger Bag is our top choice for a buttery soft leather camera bag. Crafted from Italian-tanned leather, this high-quality bag is perfect for toting a DSLR or mirrorless camera and additional lens, slung over your shoulder or worn cross-body. After six months of use, we love how much the bag is able to store, making it the perfect option for daily use. The padded strap makes it comfortable to wear while shooting, exploring, or commuting. The main compartment can be tailored to your camera size and preference with the movable Velcro divider, fitting a full-frame camera with a fixed 35mm or 50mm lens attached, as well as another smaller lens, or a camera body and detached additional lens, likely up to 100mm.
Another slot compartment on the backside and two smaller front storage spaces can hold smaller accessories like cords, SD cards, and lens cloths as well as a wallet or passport. Alternatively, a small tablet could fit in that back slot but would take up the entire space. The gear fit snugly; it was not too tight to pull out, but secure and safe inside. For days where you just want one camera body and a lens or two, this fashionable bag is the answer to that call, though at a heftier price tag.
The Details : 11.8 x 8.9 x 5.4 inches | 1 camera body and up to 2 small lenses | 2 pounds | Available in leather or canvas | 1 small divider
Travel + Leisure / Dera Burreson
Best Budget
Bagsmart photo camera backpack.
- Durability 3.5 /5
It’s a great value for its features and space.
It’s more of a starter bag as the durability may not last for the long-haul.
The Bagsmart Photo Camera Backpack is a top pick for both beginners and those looking for a budget-friendly camera bag. Crafted from canvas, this pack has ample storage space, fitting a full-frame camera body, two lenses, external flash and a laptop up to 15 inches in size within the padded back slot. The interior compartment is customizable to your kit, with movable dividers, and the top compartment is spacious for personal items, though it might be beneficial for some of the top compartment space to be used in the camera gear section instead. We also determined that with two camera bodies or more than 2-3 lenses, it would be fairly tight.
The side pockets accommodate both a tripod and a water bottle, and the included rain cover does a solid job at keeping things dry. Quick side access allows you to grab your camera easily, and it was very comfortable to wear as a casual backpack. This bag offers solid value for the features, and is best suited for an amateur photographer looking to get started.
The Details : 17.3 x 11.5 x 7 inches | 25 liters | 3 pounds | Water-resistant canvas | 2 small, 2 medium dividers
Travel + Leisure / Abby Mercer
Our team of photographers tested 21 camera bags and cases for travel. A range of tests were performed in everyday shooting situations for a wide array of photography types, from landscape to portrait and everything in between. All of the bags were packed with typical photography gear, including different types of camera bodies, various lenses, batteries, SD cards, laptops, and personal items to see how they’d perform in real-world travel situations.
We assessed how easy it was to access the camera gear on-the-move, how comfortable it was to wear or roll the case, how much can actually fit inside, and how weather-resistant the material was as well. We also took note if a laptop and tripod could fit. Additionally, all zippers, fasteners, pockets, storage compartments, and customizable divider configurations were tested.
Other Travel Camera Cases We Liked
Some of the camera cases we tested didn’t quite make the cut on our list, but they did have some notable features that may be a fit for some photographers who travel.
Neewer 2-in-1 Rolling Camera Backpack: With spacious storage compartments that are adequately padded, and room for multiple camera bodies, lenses, a tripod, and a laptop, we loved how easy this pack was to pull when using the wheels. Unfortunately, it fell short in the storage department as it would be too large to fit in overhead bins of smaller airplanes and didn’t have removable shoulder straps to help with this issue.
Travel + Leisure / Jacob Fox
Think Tank Photo Airport Accelerator Backpack: We loved the impressive storage capacity of this backpack, and the high-quality features like a theft lock, durable padding and support, and an included rain cover. Although it fits a ton of gear, it’s likely too large for most photographers who don’t carry as much on a regular basis, and the rain cover only covers three out of the four sides of the pack, leaving one section exposed.
Travel + Leisure / Fred Hardy
Bellroy Venture Sling 10L: We love this sling’s sleek design, user-friendly features, sturdy hardware, folding padded dividers, and water resistance. It fits more than you’d think, with room for a camera and plenty of accessories, but the 10-liter size is a bit bulky to carry, and the internal dividers aren’t removable.
Travel + Leisure / Elise Wojczyk Wang
Tips for Buying Travel Camera Cases
Prioritize durable materials and padding.
The bottom line to consider when shopping for a travel case or bag for your camera is safety. Evaluate what features the bag has in place to keep your expensive gear protected from drops, moisture, and anything else travel might throw at you. A camera bag that’s durable and rugged enough to withstand some wetness — or at the very least includes a rain cover and padding in the main compartment — will make all the difference. You want to be able to put your bag in the overhead bin without worrying about your gear shifting too much as well.
"When buying a travel camera bag or case, you definitely want to prioritize durable materials and a high-quality build,” Hahnel says. “You will likely have this bag for a long time and it will house your expensive camera equipment, so it's worth investing in something with adequate padding, durability, and weather resistance. That includes weather-sealed zips and pockets."
Consider pockets, dividers, and other organizational features
Organization is paramount for photographers that have a lot of moving parts, so a bag that can help with this is already a winner. You don’t want to be pawing through charging cords, your passport, or snacks when attempting to quickly grab your camera for a once-in-a-lifetime shot.
“[Organizational features] include things like pockets, dividers, and drink bottle or tripod side holders,” Hahnel says. “Some bags even have hidden areas to safely store your passport away from opportunistic thieves. I personally find it much easier to access gear in my bag when it's stored in a practical way. Being able to get your camera gear out quickly could be the difference between getting and missing an incredible shot.”
Look for multiple access points and carrying options
A good camera bag allows easy and efficient access to your gear. Additionally, it’s difficult to carry a super heavy bag — and camera gear typically isn’t light. It’s important to consider how much gear you plan to carry, and how else you plan to use the bag: will you be hiking with it? Will you be storing it in an overhead compartment? In those cases, it’s nice to have a durable side handle to grab it.
"I cannot stress [enough] the importance of having a camera bag with hip and sternum straps,” Hahnel says. “Even if you don't think your bag is that heavy, it will be after you load it with gear and stand for hours on end with it on your back. Look for a bag with multiple carrying options, including an external strap to attach it to a wheeled luggage case. This will save your back on airport days! It's also important to consider how you would like to access your camera gear. Are you someone who likes to access gear from a side zip or from the top of your bag? This may depend on what type of photography you focus on, like street photography versus landscape.”
Frequently Asked Questions
It’s really up to your preference and camera kit. But whether you have a smaller gear setup with one camera and a few lenses or a more involved setup, you’ll want to prioritize space, customizable dividers, and accessories that make sense for your shoot. Additionally, a tripod is helpful in situations where you want to take low-light, long-exposure, nighttime, or self-timer images. If you find yourself in a situation where you have a great bag but just need a cube to keep your camera safe, you can buy just a removable cube as an insert into a backpack or tote bag that you already own.
"You should pack your camera body, lenses, lens wipes, SD cards, batteries, battery charger, and a tripod if you use one,” Hahnel says. “Some people also choose to carry additional accessories such as a camera strap, circular polarizer filters, ND filters, a Rocket Blower, and portable lights. You also might want to pack your passport, ID, phone, portable charging bank, sunglasses, reusable water bottle, a snack, and a pair of headphones.”
Yes, a camera case can be either depending on the dimensions and how heavy it is after you pack it full of gear. It’s important to check the requirements for each airline , but there are many camera bag and case options that fit within these specifications. “In most cases, a camera case will be over the weight limit for an airline's personal item allowance, but check the limitations before you fly," Hahnel says.
How you clean your camera case will depend on the materials it is made of, and you should always check the manufacturer's recommendation first. For leather bags, you should spot clean them by gently applying a small amount of water with a soft cloth (test it on a hidden portion of the bag first). You can try cleaning suede with a soft brush or a rubber eraser.
Lo & Sons cautions against using polishes, baby wipes, and other types of cleaners with chemicals in them as it could damage the leather. Shimoda suggests regularly reapplying water repellents and airing out your gear after use. The Brevite backpack on this list is machine washable. Always follow the manufacturer's suggestion because they can all vary.
Why Trust Travel + Leisure
T+L contributor Lauren Breedlove scoured our testing insights to find the best camera bags and cases for various gear set-ups. A travel photographer herself, she also used her personal experience finding the right products to suit shooting conditions around the world, including some of the recommendations on this list. Lastly, she interviewed professional photographer Renee Hahnel for more real world suggestions and tips.
Love a great deal? Sign up for our T+L Recommends newsletter and we’ll send you our favorite travel products each week.
:max_bytes(150000):strip_icc():format(webp)/JackieCuccoHeadshot-20cc479faeb842d0bf8e77406c9c1382.jpg)
Related Articles
10 travel photography essentials: key photography accessories for travel
We've put together a list of 10 items we think are essential for taking photos on the go, from flashguns to tripods
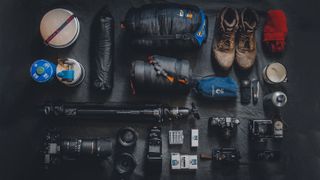
For any photographer who spends a lot of time traveling, minimizing kit and therefore weight is a must. There are so many bits of kit it would be great to carry around at all times, but realistically, it’s just not possible to take everything.
• Best cameras for travel • Best travel drones • Best superzoom lenses • Best action cameras • Best travel tripods
Whether traveling long term, going on holiday for a few weeks or having a weekend away, making sure your kit bag has the absolute essentials will ensure you can still take stunning pictures, without breaking your back.
It’s never easy trying to decide what lenses to pack or whether or not to take a tripod. Trying to pack for every eventuality is hard and it's easy to spend hours packing and repacking your kit bag with everything you'll need.
To help you along the way, we've put together a list of the bare minimum you should have in your kit bag as a traveling photographer. So whether you get booked for a portrait shoot or tasked to capture behind-the-scenes shots for a restaurant, you’ll have the kit you need with you.
We haven’t included a camera in this list as that’s pretty much a given and very much down to personal choice, these items are the things in addition to a camera body you should pack.
1. A zoom lens and a fast prime
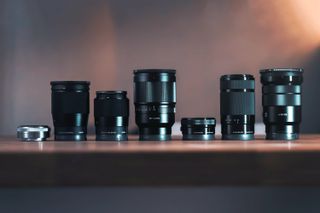
Choosing which lenses to pack is perhaps the most difficult part of packing for a trip. There are so many scenarios to think about and each lens has its own advantages. It’s a good idea to pack one zoom with a constant aperture such as the Sigma 28-70mm f/2.8 DG DN Contemporary and one prime lens with a wide aperture, for example, the Sony 50mm f/1.8 (these are the lens I use but you can switch them out for your brands equivalent.
The 50mm is great for taking detailed shots, portraits and achieving a really shallow depth of field while the 28-70mm is a good all-rounder perfect for landscapes, architecture, shooting from afar and getting more context into a background.
Get the Digital Camera World Newsletter
The best camera deals, reviews, product advice, and unmissable photography news, direct to your inbox!
2. A high-capacity power bank
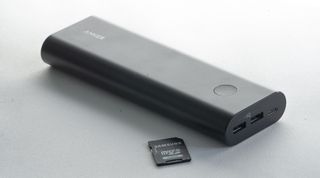
Most mirrorless cameras come with an in-camera charging feature that means you can use a power bank to charge it. Owning a high-capacity portable charger means that not only could you charge your camera, you can also charge your laptop and other gadgets. Check out the best laptop power banks , or the best iphone power banks , for options of different sizes.
3. Small speedlight with rechargeable li-on batteries
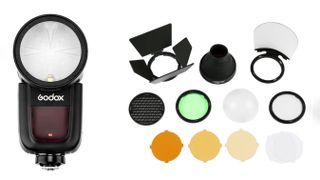
If you plan on shooting portraits, fashion or food photography, chances are you are going to need some sort of light source. It’s always a good idea to pack a flashgun – or an LED panel, if you’re not comfortable with flash photography. You never know what jobs you might get on the go or what might need extra lighting. Choosing a flashgun with rechargeable batteries often means you get more flashes out of one charge and you don't need to buy lots of AA batteries. My go-to flash for when I’m traveling is the Godox V1 or Godox AD200 with the Godox AK-R1 accessories pack so that I can bounce, diffuse and direct my light source.
Read more: Best flashguns
4. Reflector with reversible colors
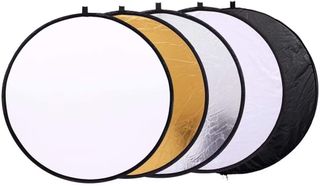
A collapsible reflector is a great item to keep in your backpack. They're a great way of mimicking two light sources without having to carry (or invest in) two lights. Reflectors generally come in four different colors, gold, gold/silver, silver, white and black. Each color has its own use so it’s a good idea to get a reflector that is reversible so you can unzip and flip the colors accordingly. Silver gives a cooler light, gold is much warmer, white is good for diffusing light and black is good for absorbing light.
Read more: Best reflectors
5. Spare batteries
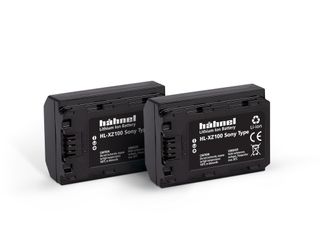
No matter where you’re going or what you’re shooting, spare batteries are essential for all your gadgets. Make sure they’re all charged up before you go so that you don't have to worry about charging them while you're out.
6. A laptop and charger

If you’re only going away for a leisurely weekend, you can probably get away with not taking a laptop with you. However, if you’re going away specifically for work or planning a trip that is more than a couple of weeks, it’s a good idea to take a laptop so that you can edit on the move and transfer images from your SD cards onto a hard drive.
7. A comfortable backpack
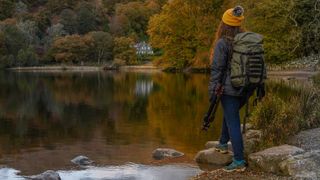
If you don’t have a comfortable backpack, regardless of what you pack or how much it weighs, you’re not going to have a very enjoyable time. When buying a backpack, try and go to a shop so you can actually try them on. Check to see how it adjusts, how padded the straps are, whether it has external pockets for a water bottle or tripod and if it's got an airflow system to keep your back cool (especially important if you're going somewhere hot). There are lots of options out there, you’ll just have to research the best camera backpack for you. The Lowepro ProTactic 350 AW II or the Gitzo Adventury 30L backpack are both great options.
8. Memory cards and carry pouch
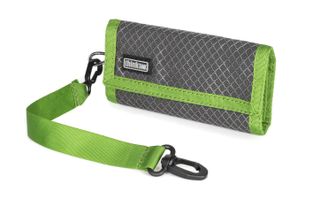
Live by this rule: pack more memory cards than you think you’ll need. This is for two reasons, you never know how much you’re going to shoot and if you have no way of transferring images, there’s nothing worse than missing shots because your cards are full. Secondly, they could get damaged, lost or corrupt and if you’re in the middle of nowhere you can’t exactly pop into a shop or order more from Amazon . There are lots of memory cards to choose from, the file output size of your camera and the speed of its continuous burst mode will determine which one you need. A Sandisk 64GB Extreme Pro will be fine in most cameras unless you're shooting in continuous burst mode using a high-resolution camera such as the Canon EOS R5 .
Read more: Best memory cards for your camera
9. Tripod or table top tripod
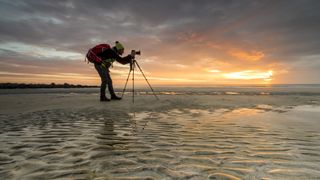
Just in case you ever get the urge to shoot some dreamy seascapes or you end up somewhere where the sky is particularly clear for astrophotography, it's a good idea to have some sort of tripod with you. It doesn't need to be anything fancy – sometimes a table top tripod is ideal as it takes up virtually no room and is really lightweight. A travel tripod might be worth packing if you know you’re going to be doing lots of wildlife photography or long exposures and can attach it to the outside of your bag.
10. An adjustable strap
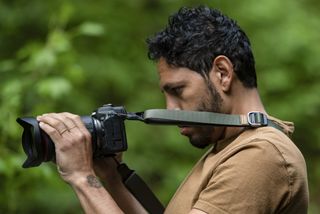
There's nothing more annoying than having to keep taking your camera out of your bag which is why having a strap is so handy. Whether you choose a sling style, a neck strap or a wrist strap, it'll transfer some of the camera's weight to your body and enables you to quickly shoot if you spot a photo opportunity. The type of strap you choose is completely up to you, some of the best camera straps include the Peak Design Slide Lite which looks stylish and is easily adjustable or the Black Rapid Sport Breathe strap for ultimate support and comfort.
Best standard zoom lenses Landscape photography tips Best mirrorless cameras 50 best camera accessories
Thank you for reading 5 articles this month* Join now for unlimited access
Enjoy your first month for just £1 / $1 / €1
*Read 5 free articles per month without a subscription
Join now for unlimited access
Try first month for just £1 / $1 / €1
Having studied Journalism and Public Relations at the University of the West of England Hannah developed a love for photography through a module on photojournalism. She specializes in Portrait, Fashion and lifestyle photography but has more recently branched out in the world of stylized product photography. For the last 3 years Hannah has worked at Wex Photo Video as a Senior Sales Assistant using her experience and knowledge of cameras to help people buy the equipment that is right for them. With 5 years experience working with studio lighting, Hannah has run many successful workshops teaching people how to use different lighting setups.
Related articles
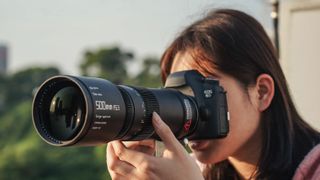
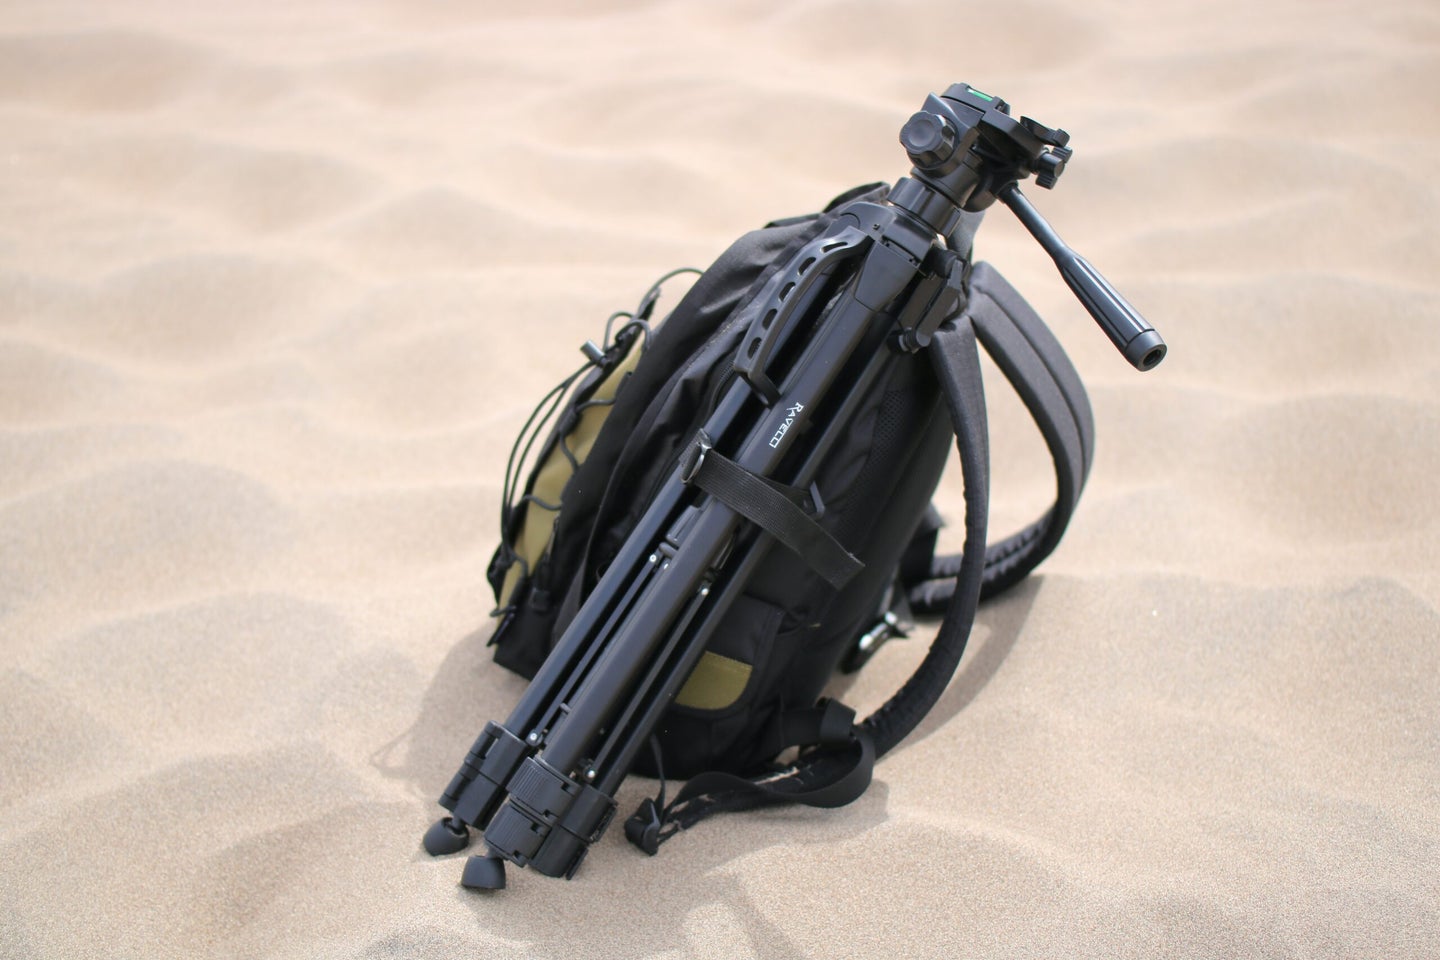
Best travel cases for camera gear in 2023
For camera-obsessed photographers safety is the primary concern, but there are other variables to consider.
We may earn revenue from the products available on this page and participate in affiliate programs. Learn more ›
Traveling is no fun without taking pictures. But, if you want to trot around the globe making images, you’ll have to choose the best travel cases for camera gear to protect your precious cargo. Not every photographer needs the same level of protection, however. That heavy Pelican case could make sense for an intense safari but would seem silly on the beach.
Best camera backpack: Lowepro m-Trekker
- Best waterproof hard case gear: Pelican 1510 Carry-On Camera Bag
Best for camera lenses: Ruggard Lens Case
- Best fashion travel camera case: ONA Camera Messenger Bag
Best GoPro case: Lowepro Hardside CS 80
Why do you need a sturdy travel case.
Gear is expensive, and even when it promises durability and solid weather sealing, it cant match the protective prowess of the best travel case. For camera gear to survive years of overhead bins and trips to far-flung locations, it needs extra padding and protective layers that won’t break down when things get intense. Check the gear of any hardcore travel or adventure photographer and you’ll likely find it nestled comfortably inside sturdy travel camera backpack or even hard cases. Here’s how to pick your own camera bags for protecting your rig.
Best travel cases for camera gear: Reviews & Recommendations
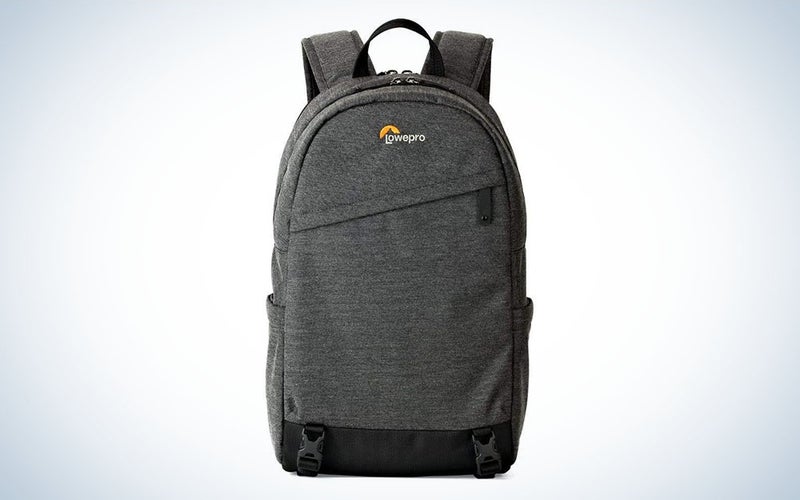
The Lowepro m-Trekker is the perfect backpack for photographers who are constantly on the go. The bag is sturdy, with thickly cushioned walls, to keep all of your equipment safe. The front opening drops completely down, so you can easily access all of your gear at once. In addition to its mesh side pockets, which are great for color cards, hard drives, memory cards, filters and other flat objects, the camera bag also has adjustable hook-and-loop walls in it’s open center. These walls allow you to adjust the space to keep any gear of any size secure, so no matter which lenses or cameras you want to bring, making space is simple. If you’re planning on bringing a tripod with you, it easily clips to the straps at the bottom of your bag.
While this backpack is amazing for packing essentials, if your camera is especially large you may want to choose a travel bag for your gear that is less compact.
Best waterproof hard case: Pelican 1510 Carry-On Camera Bag
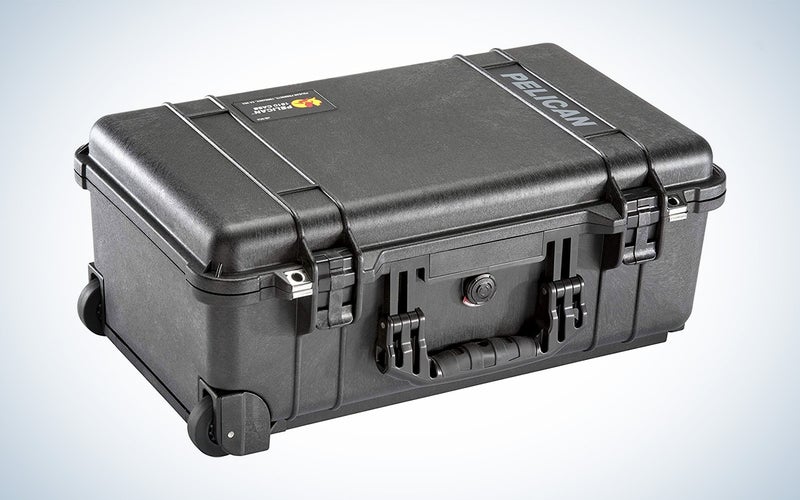
Pelican cases are rugged and ready for impact, and meet military grade standards when it comes to protecting your camera gear. This case is the size of a standard carry-on suitcase, making it perfect for travel. The interior is built with both foam, and adjustable dividers, so you can properly and securely carry all of your important equipment how you best see fit.
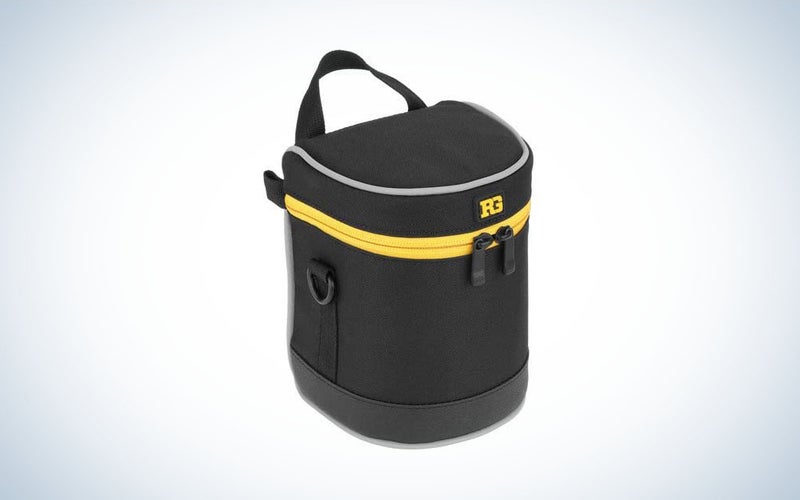
With dense foam walls and water resistance, this lens case from Ruggard is ideal for traveling with your camera lenses. It’s guarded-zipper keeps your lens safe from dust as well. It’s built with handles, hook loops, shoulder strap, and an attachment to connect to your belt, so you’ll be able to integrate it easily into your journey no matter how you choose to carry your photography gear.
Best fashion case: ONA Camera Messenger Bag
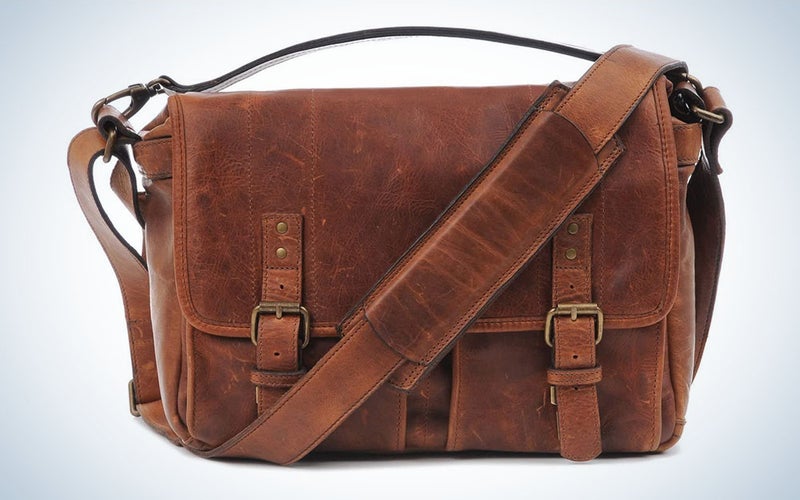
This Italian Leather camera bag looks more like a business-casual briefcase with its antique brass closures and adjustable shoulder strap. Inside it has pockets galore, as well as padded adjustable dividers to make room for everything in your kit. Even better, this bag is designed with a top flap to protect your camera gear from rain you may encounter during your travels.
It doesn’t necessarily read immediately as a camera bag, which is a nice feature in and of itself. Sometimes you’ll go to locations in which a bag that screams “I’m full of pricy gear!” isn’t ideal.
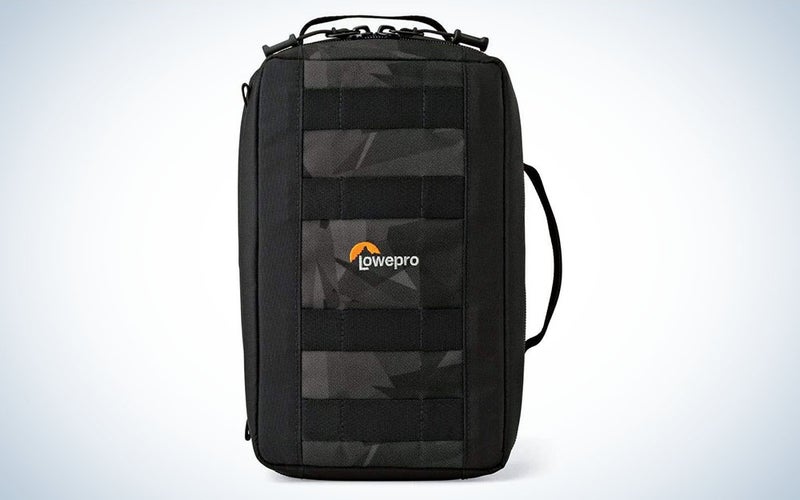
This dedicated GoPro case has room enough inside to hold several GoPro cameras if you’re working on a complex video. It also has dedicated slots for memory cards, batteries, and mounts so everything is easily accessible in a hurry. Even if you only own a single GoPro camera, you can arrange the rest of the bag to hold more accessories or even larger camera gear within its customizable padded dividers.
Things to consider before buying the best travel cases for camera gear
Looking for a backpack to carry all of your essential gear .
The best travel case for your camera might be a camera backpack. These types of bags are great for trekking, and also great if you’re a one-person-band shooter who works at a wide variety of locations.
If this sounds like the right product for you, first you should consider the safety of your gear. Some backpacks for camera gear are flimsier than others, and the last thing you want is for your even most expensive camera gear to break because your much cheaper camera bag didn’t properly do its job. A broken strap or a busted zipper can cause catastrophe. Look for bags with sturdily built outer walls that hold their shape even when empty; many backpacks will have cushioned walls for extra support.
Secondly, you’ll want to consider organization. Think about what you plan on carrying. You’ll want to be able to fit each of these items in your bag so that they are secure, and don’t jostle around or rub against each other. This is important to keep your camera gear safe during travels.
Does your camera gear need extra protection?
If you’re a professional—or even just really into photography—the photography equipment in your camera bag could cost tens of thousands of dollars. Are you about to put your $3,000 pro zoom Lens into a dinky piece of fabric and just cross your fingers that nothing bad happens? Over your dead body and gut-wrenching insurance claims you will. So if you have camera gear that needs protection in addition to transportability you’ll need to keep a few things in mind.
First of all, look for a case with a hard outer shell. You’ll want to look for cases that have solid and thick plastic walls with airtight and waterproof locking mechanisms.
You’ll also want the inside to be cushy and organized, because if your camera gear isn’t secure inside it will just tumble about. Some cases will have foam or plastic walls that adjust in size and position so that you can change them over and over again as necessary. Other cases will come with one giant block of foam, in which you can carve out the specific shape you need to safely suspend your camera equpment with protection all around. If your photography gear situation ever changes you can always buy a new foam block filling and cut it to fit your new requirements.
Are you looking to protect your lenses individually?
One of the most expensive parts of any camera gear set tends to be the lenses, so it makes sense that many photographers want the best travel case for these.
Similarly to other bags listed in this category, you’ll want a thick layer of protection around your lenses, so that they don’t jostle against hard surfaces while you move them about. You’ll also want to make sure that you order the proper size of case for the specific lens you want to protect, so that it doesn’t rattle about within the case as it’s being transported.
Also make sure everything is dust proof, as any debris could potentially damage your lenses, or could even result in scratches on your glass, creating an odd artifact in your final images.
Is fashionability a factor for you?
Wanting to shoot in style is nothing to be ashamed of. After all, you’re a photographer — who knows better than you the importance of aesthetics? Of course you want your camera bag to look nice, but you don’t want to compromise to do so. When it comes to looks, you may want to consider something timeless such as leather or neoprene materials, as well as neutral colors. Think about how much photography equipment you want to carry and whether or not the bags you’re looking at will be able to sufficiently pack all of your things. This includes not only your camera, but also your lenses, your accessories such as filters and memory, and maybe even your laptop.
And don’t forget safety! The last thing you want is for something to happen to your camera gear. Make sure there is plenty of padding to protect your equipment, as well as any relevant weather protection you may need.
A GoPro case to grab and go
Action cameras have come a long way since their extreme sports origins. Modern GoPro cameras have robust feature sets and downright incredible image stabilizations, which make them appealing to anyone who wants to shoot cool video on the road.
Anyone who has ever owned a GoPro , however, knows that they come with loads of accessories, which can be tricky to keep in check. The best GoPro case will have room to hold the camera as well as its arsenal of mounts, grips, batteries, cards, and probably at least one energy drink.
Q: Can I bring my camera bag on a plane?
This depends on a couple of factors. In theory, yes. Photographers and videographers alike travel with their photography equipment on flights all the time. Be sure that your packed case is the proper size and weight to meet your airline’s requirements for either carry on or checked luggage. If you’re carrying some more intense photography gear, such as v-mount batteries or other bricks, you may also want to consider checking the TSA’s current policies in advance to make sure all of your equipment is permitted. Just be sure you’re under the size limit. You don’t want the airline to force you to gate check a bag full of pricy gear.
Q: How do you pack camera gear for travel?
Make sure everything is as secure as possible. Organize your camera equipment so that things stay tightly in place, even if you move your case around. You may even want to use extra cloths or cushions to softly hold your camera gear in place, and to protect it from its surroundings. Items like lenses and cameras need to have their own caps, and memory such as SD cards will be more safe if they have a case for their own homes too. Starting with a checklist can help when you’re packing and when you’re repacking once the trip is over.
Q: What makes a good camera case?
The best camera case is one that keeps your equipment safe as well as organized. Keeping your equipment safe will mean that every compartment of your bag is cushioned, and fits the shape of your pieces of gear so that nothing jumps around in your case as you travel around. To keep your bag organized look for a case that has adjustable internal walls, and plenty of slots and pockets so that each category of gear and each individual item has a proper home.
Final tips on shopping for the best travel cases for camera gear
Picking a bag can be tricky. The best travel case for camera gear means many things to different people. Putting in the legwork now, however, could make all the difference when it comes to getting your gear home safe and sound after an adventure.
Want more photography techniques, camera reviews, and inspiration?
Sign up for Popular Photography's newsletter and join the club.

The Best Travel Photography Accessories in 2021
This post contains affiliate links, which means we may receive a small commission, at no additional cost to you, if you make a purchase through these links. See our full disclosure here .
Whether you’ve booked that photography trip you’ve been waiting for, or just want to up your Insta game with perfect shots of your adventures around the world, one thing’s for sure: you need to pack your bag with the right stuff.
To really enhance your travel photography and make it more comfortable, you’re going to need more than just some extra batteries, spare memory cards, or a wireless remote shutter. If you’re into landscape photography and spend a lot of time in remote areas, you can’t leave home without a lightweight, high-quality tripod, or a powerful portable charger. On the other hand, a great gimbal will elevate your filmmaking to the next level, while a clever portable LED light will expand your creative possibilities.
The best photography gear should be compact, light, and portable, but also durable enough for the outside world, functional for your needs, and, if possible, as versatile as you are.
From everyday camera essentials to cool gizmos that will make your craft stand out, we’ve rounded up the best travel photography accessories in 2021.
Best Backpack: McKinnon Camera Pack 35L
Best Tripod: Peak Design Carbon Fiber Travel Tripod
Best Backup Solution: Gnarbox 2.0 SSD
Best Portable LED Light: Lume Cube Panel Go
Best Cleaning Kit: ZEISS Lens Cleaning Kit
Best Power Bank: Anker PowerCore+ 26800
Best Gimbal: DJI Ronin-SC
Best Camera Strap: Peak Design Leash
Best Drone: DJI Mavic Air 2
Best UV Filter: Carl ZEISS T* UV Filter
Best Photography Backpack: NOMATIC McKinnon Camera Pack 35L
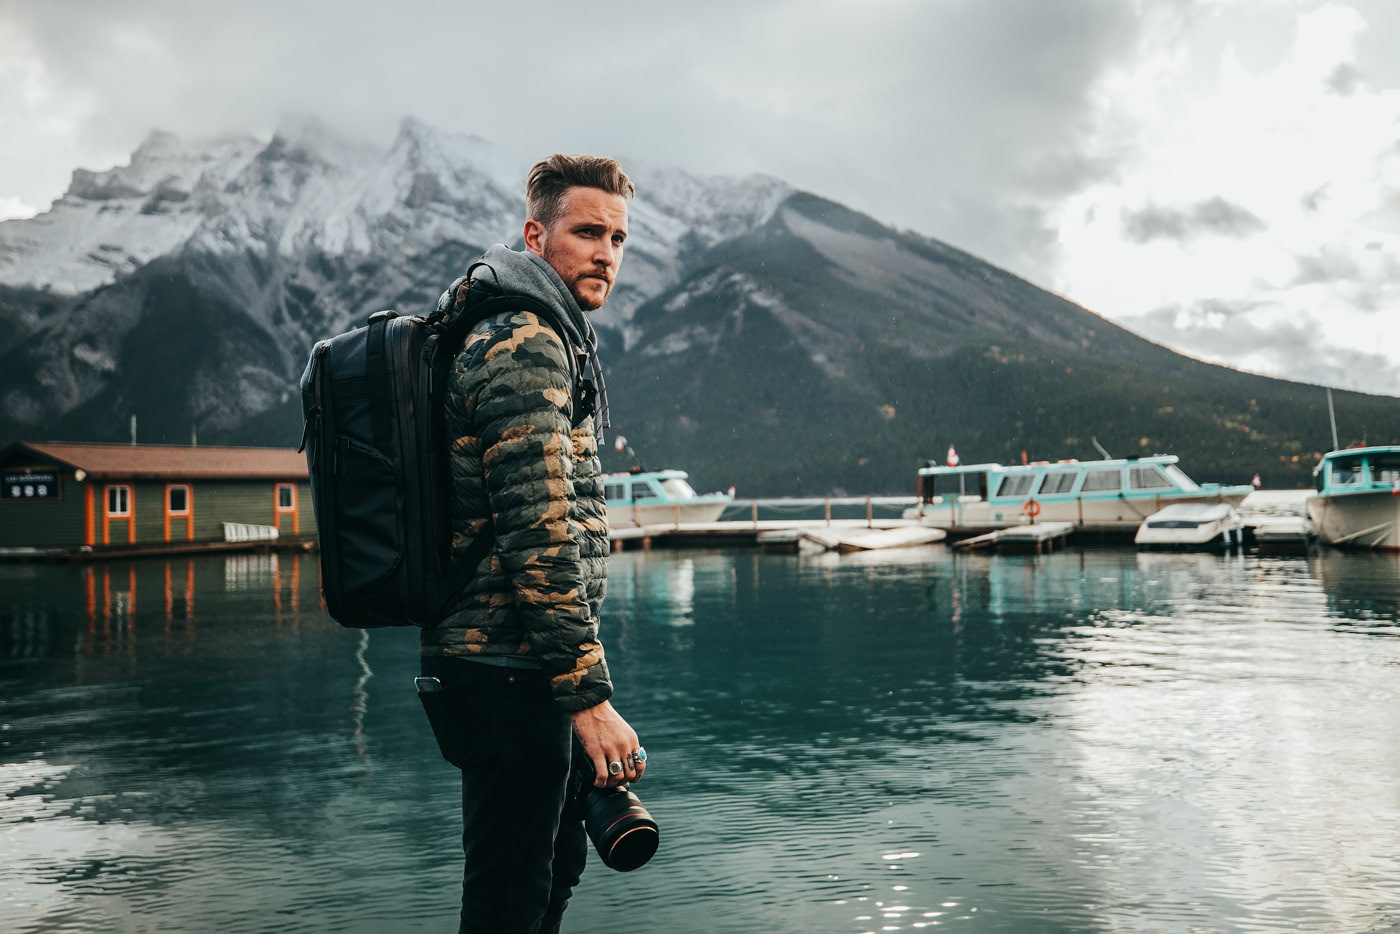
As a photographer, one of the first things that you should have in your arsenal is a good quality bag to hold all your precious camera gear essentials and then some.
Meet the McKinnon Camera Pack 35L , a top-notch photography equipment backpack created in collaboration with renowned photographer and filmmaker Peter McKinnon. With its thoughtful, expandable design, dedicated clothing compartment, and endlessly customizable folding dividers, the functionality and versatility of this bag is second to none. Add in quick camera access, an external 15-inch laptop pocket, and a full internal suspension system designed to lighten the load, and you have the best camera backpack for travel. As a plus, it’s tough as hell, meets carry-on size limits, and looks awesome!
Best Travel Tripod: Peak Design’s Carbon Fiber Travel Tripod
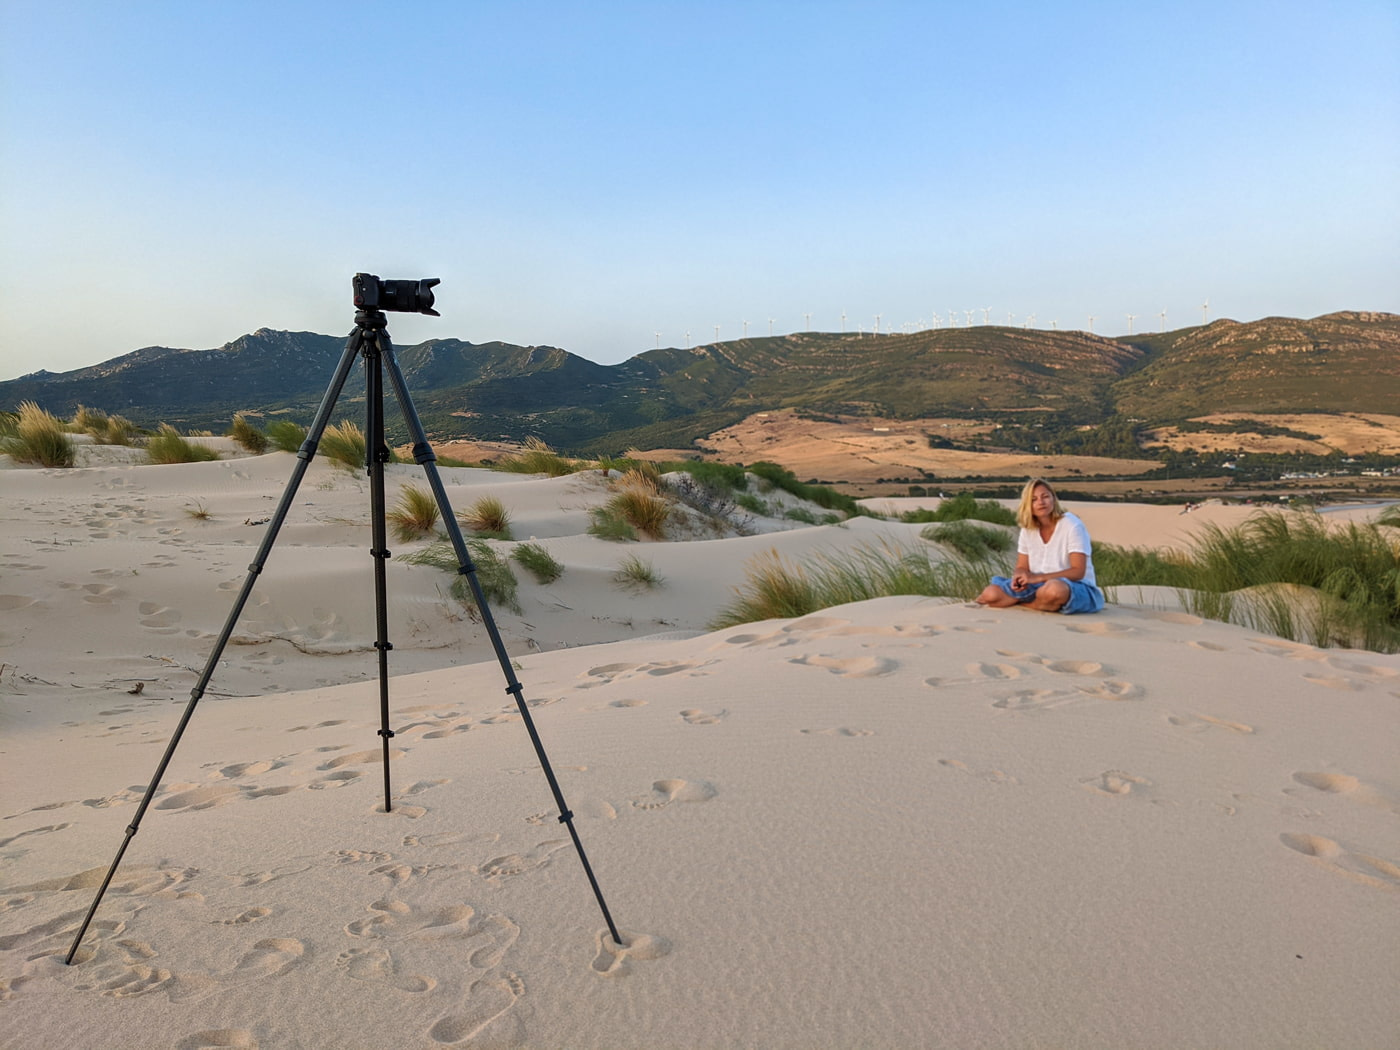
Whoever told you travel tripods might not offer the same levels of stability as regular ones, probably never got the chance to use Peak Design’s Travel Tripod .
The guys at Peak Design are known for creating some of the most clever and innovative travel products and camera accessories out there, and their first-ever tripod is unlike any other on the market. I have been testing the shockingly light carbon version for a few weeks now, and it certainly exceeded all my expectations.
Four years in the making, this brilliant tool mixes high performance with ultra-portability, making it an ideal photography tool for professionals and amateurs alike. Its revolutionary design prioritizes spatial efficiency and makes deploying and setting up a breeze (under 20 seconds). It also incorporates a unique, low-profile ball head that offers 360-degree adjustment, a tiny quick-release Arca-Swiss plate, and a hidden smartphone mount. Though not much bigger than a water bottle when folded down, it extends to 58.5 inches tall and can support up to 20 pounds.
Sexy, steady, and extremely easy to maneuver/carry, it’s the absolute must-have product in my camera bag and I cannot imagine a photography trip without it. Stay tuned for a full review coming soon!
Best Backup Device: Gnarbox 2.0 SSD
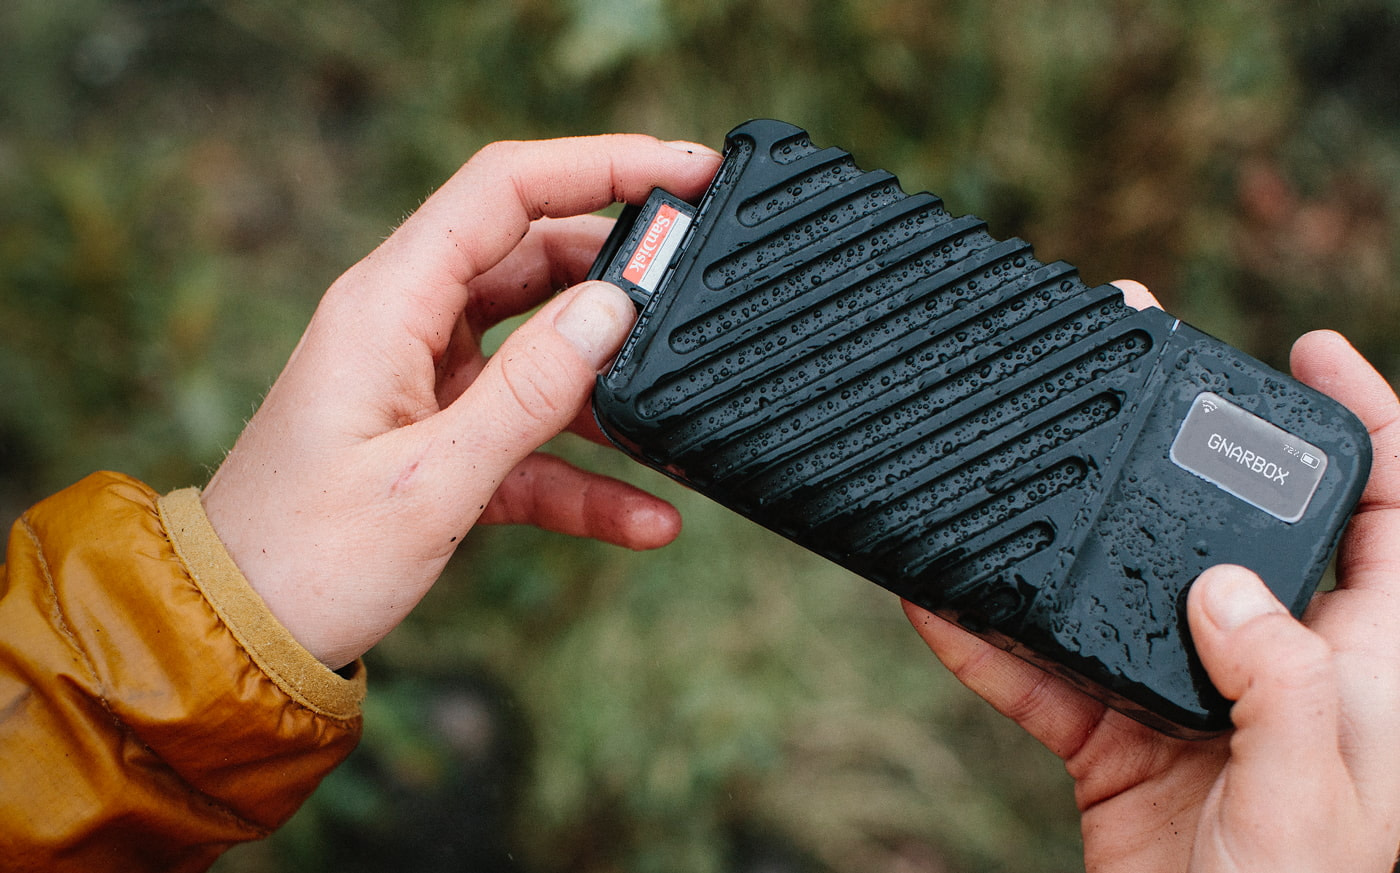
Keeping your digital images safe on the road is a big deal, that’s why a backup device is a must-have photography accessory. And while there are tons of external storage solutions on the market, few of them are as badass as the GNARBOX 2.0 SSD .
Designed to work independently of a computer, this rugged, versatile gadget is dust/splash resistant and packed with clever features like a removable battery, a built-in Wi-Fi connection, and a mini OLED screen for on-device management. Much more than just a simple portable drive, it comes with a fully integrated processor and a couple of apps that enable instant content editing in the field. As well as storing files and preview RAW images, you can also organize your files and view high-definition images and videos on any HDMI-accessible screen.
The GNARBOX 2.0 SSD is available in 128GB, 256GB, 512GB, or 1T capacities and is equipped with two USB-C ports, an SD card reader, and a micro HDMI port. It also syncs with Dropbox and integrates with third-party apps like LumaFusion and Adobe Lightroom for easy on-the-go editing.
Best Portable Photography Lighting: Lume Cube Panel Go
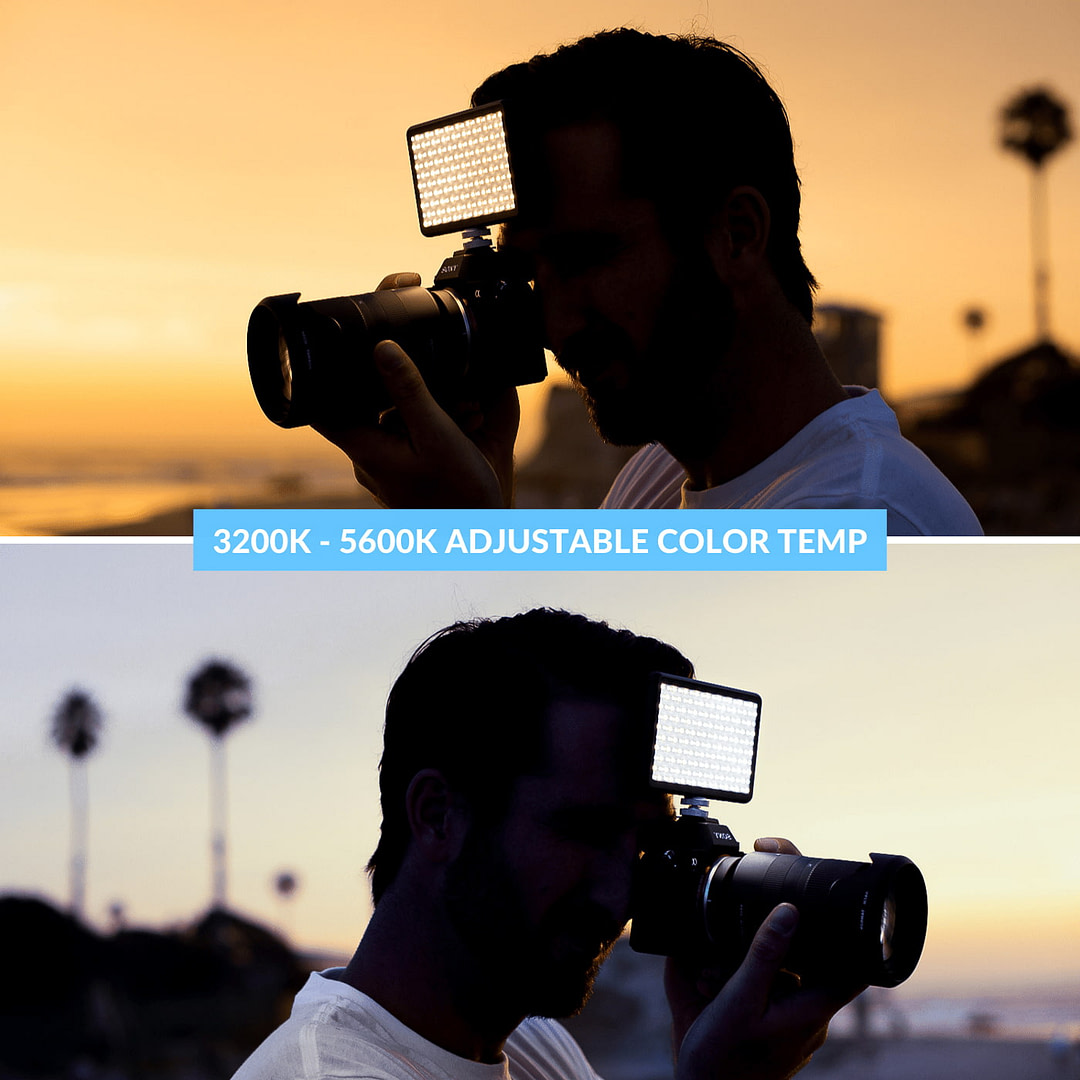
Lighting is one of the most important elements in photography. At the same time, different photographic situations require different lighting kits. For example, if you’re on location with no access to an electrical outlet, you’ll need a portable lighting solution. That’s where the Lume Cube Panel Go comes in.
Designed with traveling content creators in mind, this battery-powered bi-color LED light is roughly the size of a smartphone but packs a punch. It offers 3200K to 5600K light adjustable in increments of 5% and comes with an intuitive LCD control screen that shows battery level, color temperature, brightness, and run time. At 100% brightness, the light runs for approximately 90 minutes, and on low power for up to 16 hours. More than that, the pocket-size device doubles as a power bank for charging your phone and camera, which makes it a must-have in your travel photography arsenal.
Best Camera Cleaning Kit: ZEISS Lens Cleaning Kit
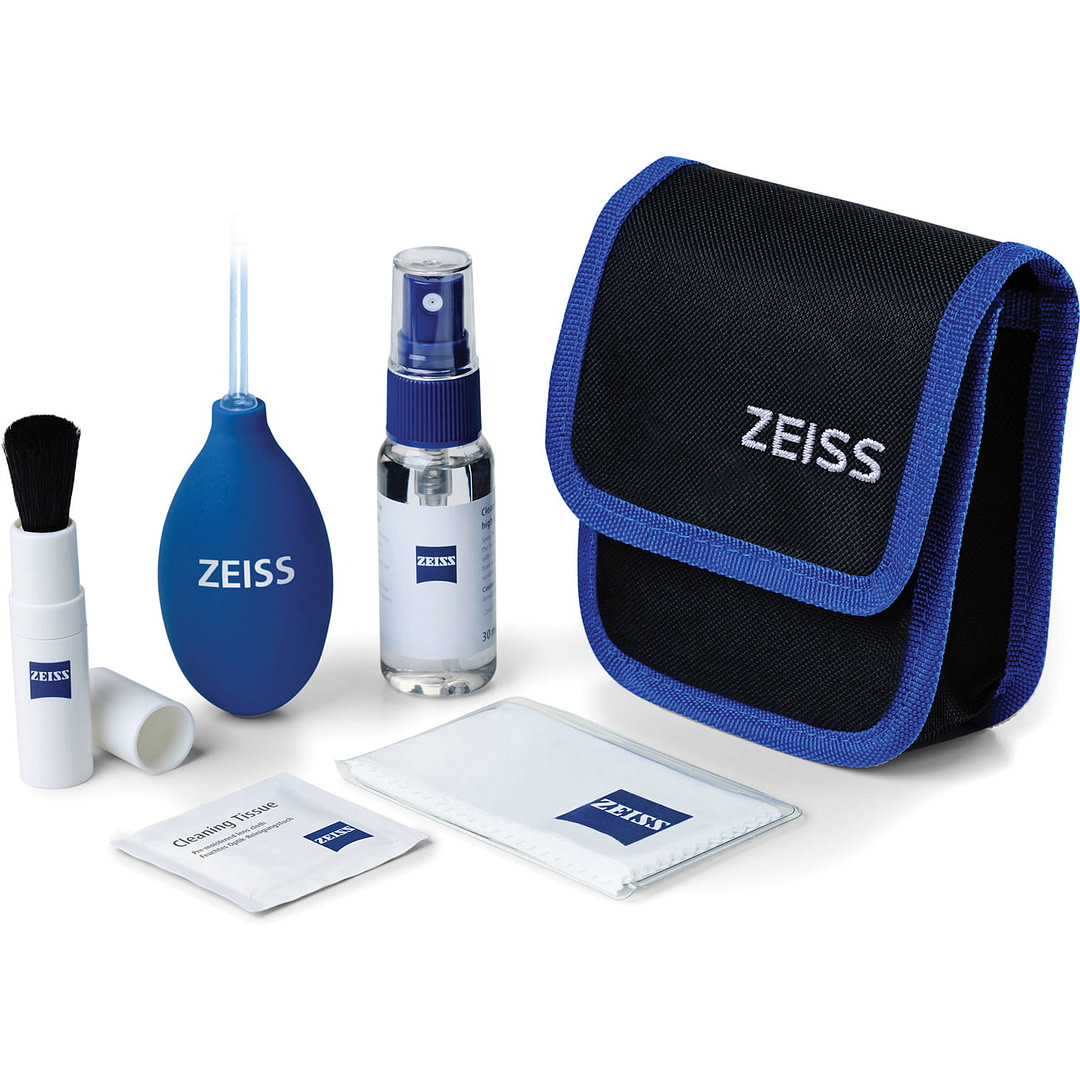
When you’re out and about capturing the perfect landscape photo, the last thing you want is a fingerprint or a grain of sand compromising the quality of your work. My favorite solution to this problem is the ZEISS Lens Cleaning Kit .
This complete set comes from the world’s leading manufacturer of precision optics, contains everything you need to professionally clean your lenses, and is accompanied by a practical travel case for hygienic storage during trips. In addition to a 1 oz bottle of cleaning fluid and a microfibre cleaning cloth, there’s an air blower and a lipstick-style cleaning brush to keep your camera dust-free, as well as 10 individually wrapped moistened lens wipes ideal for on-the-go use.
Best Portable Charger: Anker PowerCore+ 26800
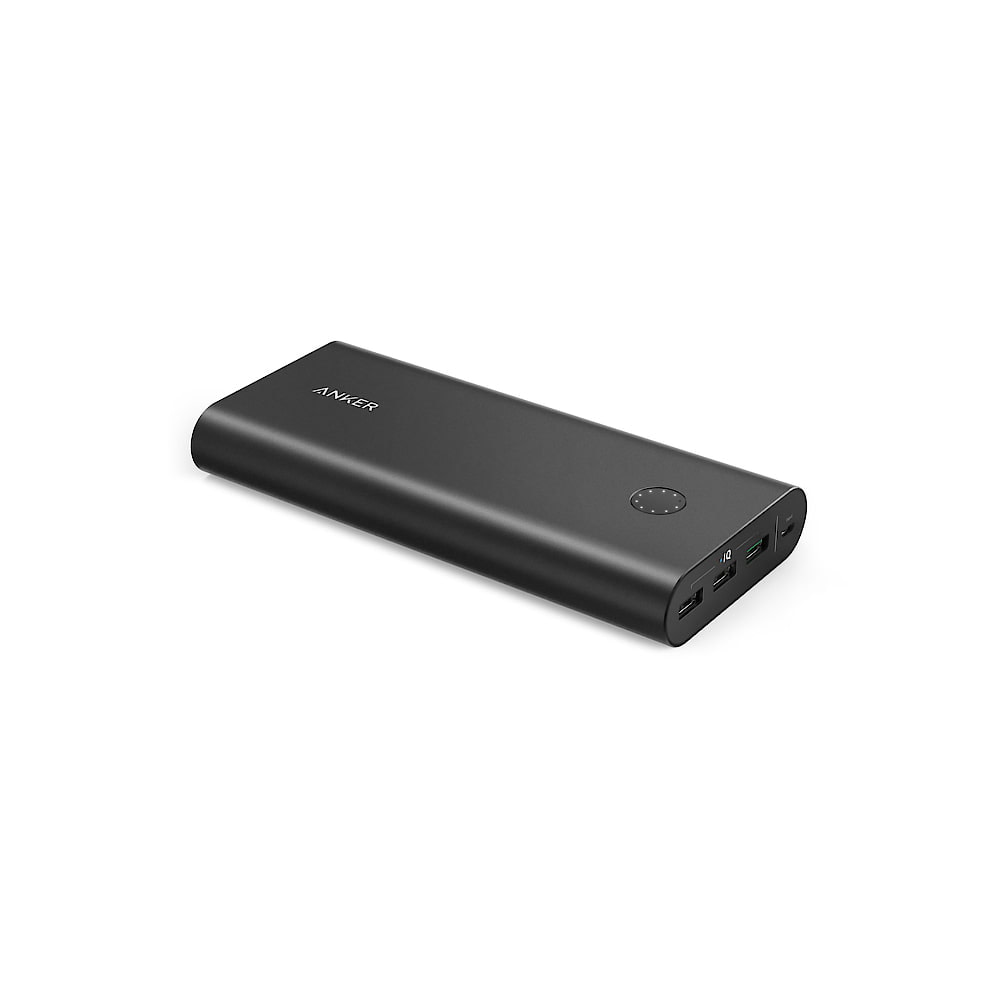
When you’re heading out for a day (or more) of shooting, a portable charger is as essential as your camera. Equipped with advanced fast charging technology and a whopping 26,800 mAh, the Anker PowerCore+ 26800 will make sure you never run out of power on an off-grid photography trip.
Aside from being one of the world’s highest capacity portable chargers, the power bank is able to recharge twice as quickly as its counterparts and allows compatible devices to charge 85% faster. It powers up 3 outlets at the same time and includes a Micro USB cable.
Best Gimbal Stabilizer: DJI Ronin SC
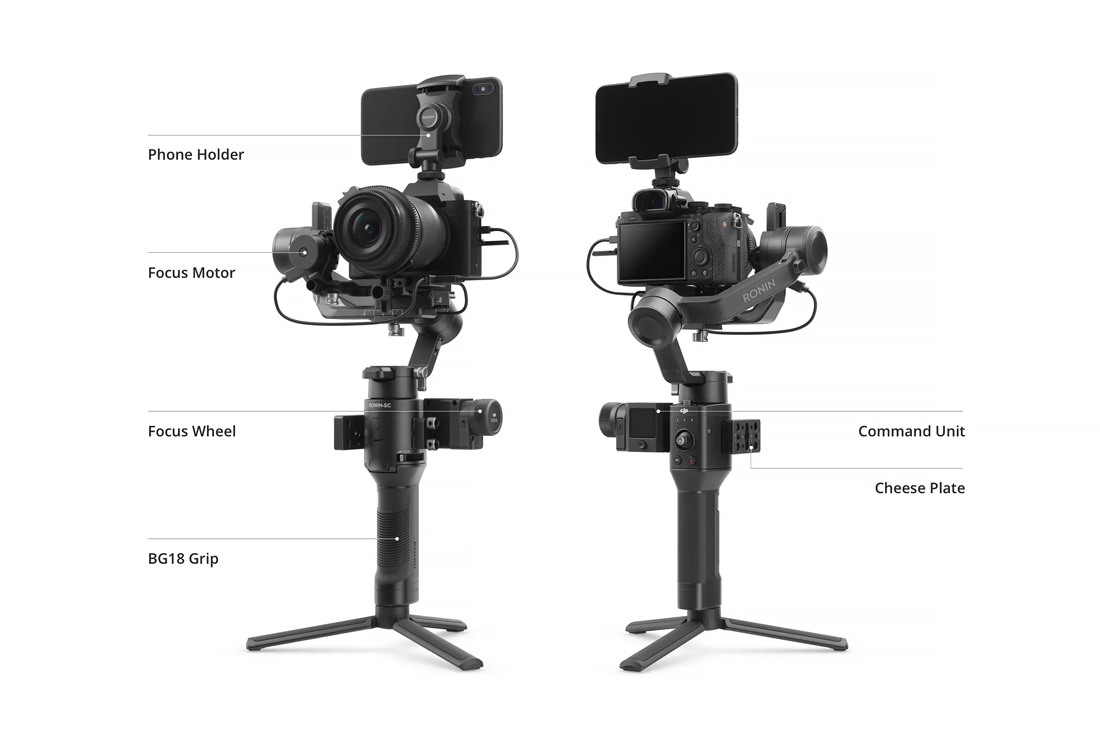
An indispensable camera accessory for traveling vloggers, videographers, and filmmakers, DJI’s smallest and lightest gimbal hits the sweet spot between power and portability and is packed with clever features.
The Ronin SC is a 3-axis camera stabilizer aimed at content creators using smaller mirrorless cameras. Intended to be used with one hand, it only weighs 2.7 pounds and has a compact modular design which makes it easy to operate, pack, and carry around.
As for performance, this gimbal provides smooth, professional-looking stabilized video, plus a couple of creative modes for shooting time-lapses or fast-paced action. Another impressive feature is the Active Track 3.0., which lets you track subjects automatically via your phone’s camera and the DJI app.
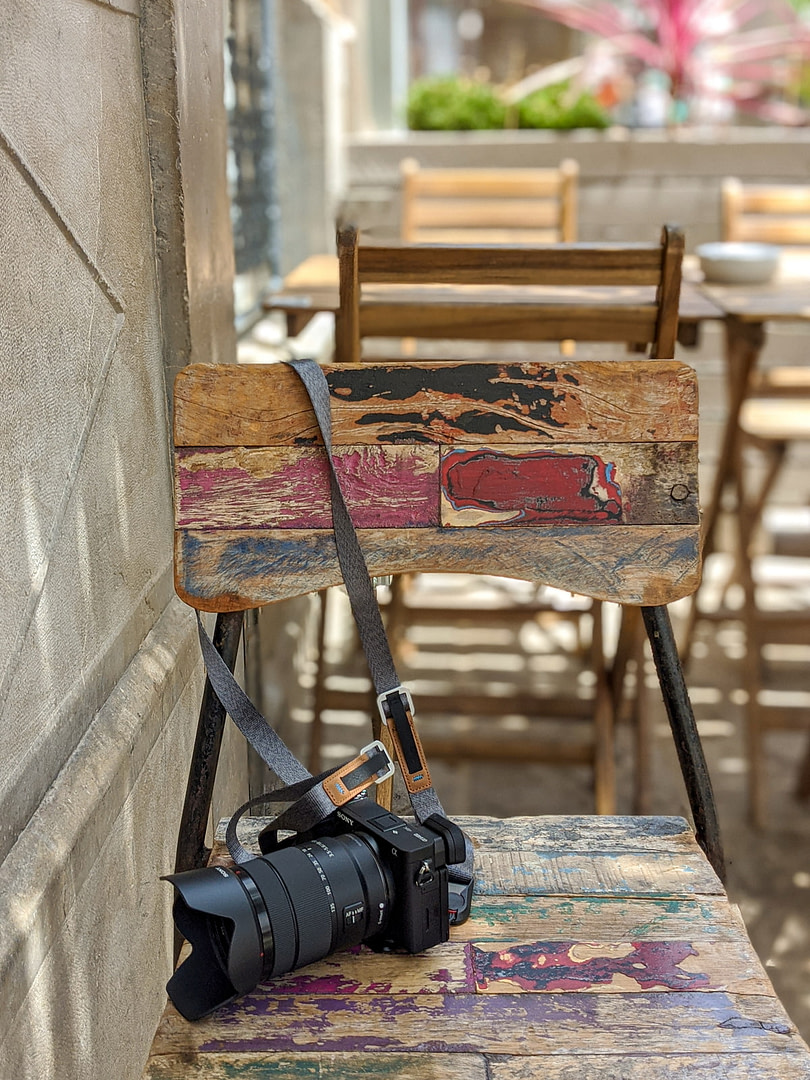
A great camera strap makes photography easier and more comfortable. Whether you’re looking to shoot for hours without experiencing neck or shoulder pain, or just want to keep your camera safe and within reach, make sure it’s one of the first things you add to your inventory of essential photography gear items.
Although I am a big fan of Peak Design’s Cuff, especially when I am doing urban photography, I gotta say the Leash is the most practical camera strap I’ve ever used. Slim, stylish, and extremely comfortable, it’s constructed from premium materials and adapts to any shooting situation thanks to its adjustable design and unique Anchor Link system.
Designed to be worn as a neck, shoulder, or crossbody strap, this lightweight camera accessory will fulfill your every wish without adding much extra weight to your kit.
Best Travel Photography Drone: Mavic Air 2
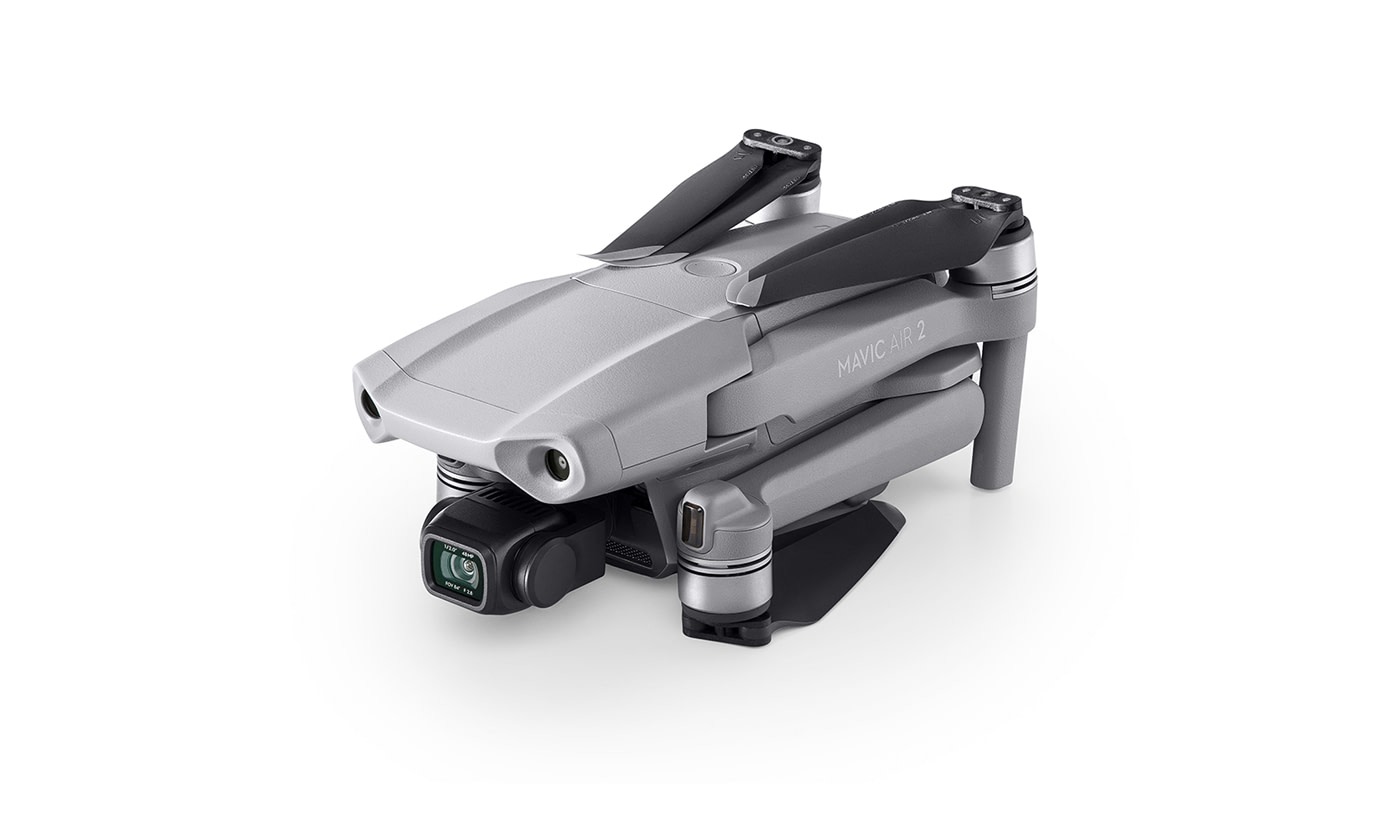
Drones are the ultimate travel gadget, but with so many models available on the market, it’s tricky to find the best one for your needs.
When it comes to drones for travel, however, DJI has no equal, and their folding-style Mavic Air 2 is the perfect photography accessory for stunning aerial content. Combining ease of flight with long battery life, this little guy is capable of shooting marvelous 48MP photos and excellent 4K video at speeds up to 60 frames per second. Add improved obstacle avoidance, a newly designed remote controller, and a suite of intelligent shooting & tracking modes and you have the best drone under $1,000.
Best Camera UV Filter: Carl ZEISS T* UV Filter
Whether you’re looking to protect the front element of your lens or to improve the quality of your image when shooting outside, a UV filter is one of the most popular camera accessories these days.
Fabricated using high-quality optical glass, along with the company’s patented anti-reflective coating, the Carl ZEISS T* UV Filter will not only help reduce light mist from your photographs, but will also allow greater clarity and color saturation in certain scenarios (e.g., when shooting long-distance, in high altitudes, or by the sea).
This slim-profile standard filter is easy to change and can be used in combination with lens shades, which makes it ideal for all types of analog and digital cameras.

Never Miss A Story
I consent to receive email updates from Travel Away
What's in My Camera Bag? 16 Must Have Camera Accessories
Travel photography is not just about being in the right place at the time. It is also about carrying the right camera at the right time and with the right accessories. Whether you are a newbie or an experienced photographer, having the right camera accessories with you does impact a lot on the quality of your images. It’s no wonder that travel photographers carry a kit bag that is large enough to make you wonder what is inside. Well, it’s not a secret anymore; we are here to tell you all about the must-have travel accessories that you should carry along to begin your travel photography career like a pro.
Let’s take a look at the must-have camera accessories that you should carry on the next travel photography gig.
Compact tripod.
Taking long-exposure shots without a tripod can ruin the images. Even for regular shots, tripods can help you click a perfect, sharp image. Tripods are a photographer’s best friends and solve many problems that you would face shooting outdoors. Often, tripods are complicated to use and cumbersome to carry. Choose a tripod designed for travel photography. They are light in weight, sturdy, compact in size, and perform best with a professional camera with a long lens.
Memory Card Case
Do not forget to carry a few additional memory cards with you. You never know when you need extra space to capture striking moments around you. Hence, stay prepared with additional memory cards and keep them properly stored in a memory card case so that they are safe and you don’t lose any valuable data.
One good habit that many experienced photographers have is carrying a hard drive with them. Photography is a profession where you can’t expect to work with exact numbers. You might need hundreds of clicks of the single thing; hence it is good to have additional backup storage. So, in case you get blown away by the wind of inspiration, consider carrying a hard drive in your bag.
Lift Straps
It is not going to be an easy walk. Travel photography might take you to the mountains to mines. Hence, always use camera lift straps to save yourself from the soreness and stiffness of carrying heavy cameras. There are multiple straps in the market, allowing you to carry your heavyweight cameras comfortably. So, don’t forget to have good quality straps before you head out.
Carry On Case
When you are traveling from one place to another. It is risky to store your expensive DSLR and lenses in regular carry bags. If you have a high-end collection of lenses, it is time to invest some money in a carry-on-case specially designed to store cameras with multiple lens pockets. Ordinary people spend money on their luggage bags but, professional photographer prefers investing money in good quality camera backpack or a carry bag such as the Peak Design Travel Backpack . Carry-on-case protects your device no matter where you go.
Waterproof Case
You cannot control the weather, but you can always have good protection ready. For travel photography, it is a must to carry a waterproof camera case so that your high-end lenses and camera doesn’t get drench in the pouring rain. Moreover, many professionals don’t want to miss the shot at any cost, so having a waterproof camera case enables you to fulfill your passion without any interruption.
When you are out, it is difficult to keep your lenses clean all the time, as there will be dust accumulation on the lens. In such cases, a lens pen is the best accessory to carry. It makes lens cleaning very easy and convenient. It is effective to use compared to microfiber wipes. It comes with a cap so that it doesn’t attract dirt when not in use. Also, no spray is needed to clean the lenses.
Camera Clip
Professional Photographers who are always traveling need to stay fully equipped with all the necessary tools for capturing the perfect shot irrespective of what condition, where or when. You might never know when the right moment strikes hence most pros love to stay ready all the time. A good quality Camera Clip is the perfect tool to keep your camera handy and easy to access. The strap or belts are strong enough to carry your camera weight easily and, you can get different qualities based on your camera type.
A smart device - goTenna
If you are a travel photographer who loves to go on hiking, goTenna is an excellent device for you. This device helps you to make a call and text while you are on your expedition without using your mobile phone. In times of emergency, this device is a lifesaver. You can contact another person using this device to exchange the message. The device has its app, which includes offline maps for almost every place in the world, which can be easily used. Not to mention, the device is equipped with GPS location so that you don’t lose your track. You can buy them in pairs, and they are waterproof. The battery backup of goTenna is up to 24 hours.
Travel Cable Organizer
When you are in a photography profession, it is normal to carry numerous cables of multiple small devices that you have. However, these tiny cables are too delicate to keep loose. Therefore, carry a nice cable organizer to protect and save your time untangling them. Organizing bags with many pockets for different sized electronic devices are a great help for anyone who carries many wire and cables. It will sort your life and save your time spent searching for that charger cable.
Tripod isn’t a practical choice every time. So if you are an extreme photographer, include this amazing gear to your kit. GorillaPod is one of the best camera accessories to get a perfect shot. It is compact in size, lightweight, and easy to use. It can be a band as per your desired angles. Also, you can wrap it to any desired surface to hold your mirrorless camera with ease. Isn’t this great addition to your gearbox?
Extra Batteries
When you work in a creative field where inspiration strikes at any moment, you can’t afford to lose your camera’s battery life. Hence, one of the essential accessories that every travel photographer must-have in this bag is extra batteries. You can buy batteries in bulk from online stores and apply coupons code to get good deals. This way, you will always have plenty of batteries to avoid battery situations in the middle of your work.
Pelican 1525 Air Carry-On Case
Specially optimized for travel photography, this is one of the action camera accessories you must have. This case will keep your cameras, lenses, and other small accessories secure. The Pelican case is watertight, dust, and crushproof. This case build of light polymer is easy to carry, and some versions of it even come with a wheel.
Lens Filters
Lens filters are one of the basic camera & optic accessories that you need as a travel photographer. The different lens filters which you will need are a polarizing filter, neutral density filter, and the graduated filter. The polarizing filter will help you in reducing the reflections from water and other places. It will also boost the blues and greens. The neutral density (ND) filter will reduce the amount of light coming into the camera. So, when you are looking to create a smooth flow of water, the ND filter will help you in that. Graduated filters come in handy when you are photographing a place that has two different intensities of light, where one is brighter than the other. The graduated filter will balance the light and give you a well-lit picture.
Polaroid Camera Accessories
If you are using a polaroid camera, some of the polaroid camera accessories will also come in handy for you. The Polaroid ZIP Instant Photoprinter is one of those where you can print your photos instantly. Another useful accessory is the tripod, which is specially built for a polaroid camera. There are other similar accessories like a tripod, which will help you mount your camera in a stable way.
Phone Camera Accessories
With phone camera quality getting better every day, the phones are becoming an easy to use tool in photography. Companies like Moment have built some incredible mobile add-on lenses which can take your photography to a whole new level. Another important mobile camera accessory you can have is the DJI Osmo Mobile 2. This stabilizer is great for taking videos and photos with providing great stabilization and maneuverability.
Looking to get equipped with these accessories so that you can start your travel photography expeditions? There are several online sites which offer these accessories at discounted rates. One of the best places to get promo codes is Couponobox .
Photographers spend their life traveling and searching for the right moment to capture. Being unprepared when a once-in-a-life shot presents itself can be the worst feeling of your life. So, if you are working on becoming a travel photographer, start preparing and equip yourself with the right tools that would aid you in your quest.
Try Pixpa - the easy, all-in-one portfolio website builder loved by photographers & creators.
Explore More Articles See all articles
Top-rated by creatives for 10+ years
All-in-one website builder for creatives.
Build Your Website
Start an Online Store
Sell Images
Marketing Tools
Client Galleries
Photo Gallery Apps
Start a Blog
Creatives love Pixpa
15-day free trial. No credit card required.
Beautiful Templates Made for Creatives Awesome Support Really Easy to Use Affordable Pricing
Rated as top website builder by creatives for 10+ years.
What's new on Pixpa
The best travel camera for 2024: the finest choices for your adventures
The best travel cameras for your next big trip
- Best overall
- Best-looking
- Best action cam
- Best tough camera
- Best premium compact
- Best small full-frame
- Best hybrid vlogger
Best for moving subjects
- Best superzoom
How to choose
- How we test
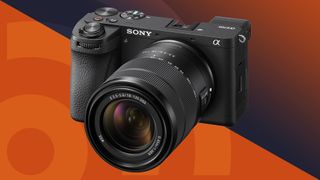
1. The list in brief 2. Best for most people 3. Best value 4. Best-looking 5. Best action 6. Best tough 7. Best premium compact 8. Best small full-frame 9. Best hybrid travel vlogger 10. Best for moving subjects 11. Best superzoom bridge 12. How to choose 13. How we test
Road trip or flyaway vacation, the best travel cameras let you capture incredible images of your holiday adventures. From action cameras to compact mirrorless models, we've extensively reviewed the top travel-friendly cameras and rounded up our recommendations in the expert guide below. Whatever your itinerary, this is list is your ticket to the ideal travel camera.
Based on our tests, we think the best travel camera overall is the OM System OM-5. A portable, weatherproof Micro Four Thirds model, it shoots higher quality images than a smartphone while offering the useful flexibility of interchangeable lenses.
Whatever your expectations and budget, you'll find a travel camera to fit the bill below. Our list includes some of the best mirrorless cameras , as well as some of the top compact cameras . Our expert reviewers have spent many hours testing the best options, using them in the real world to assess how well they perform when traveling. You'll find the results distilled in the list below, together with buying advice to consider when choosing a travel camera.

Tim is TechRadar's Cameras editor, with over 15 years in the photo video industry and most of those in the world of tech journalism, Tim has developed a deeply technical knowledge and practical experience with all things camera related. He’s also worked in video production with clients including Canon, and volunteers his spare time to consult a non-profit, diverse stories team based in Nairobi.
The quick list
If you don’t have time to read our full list of the best travel cameras, you can read the round-up below for a shortcut to the top options for your needs and budget. If you find one that takes your fancy, use the links to jump to our full write-up.
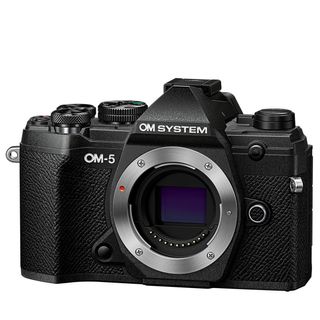
The best travel camera overall
Squeezing a host of features into a compact, weatherproof body that’s compatible with a range of lenses, the OM-5 is the ideal travel camera.
Read more below
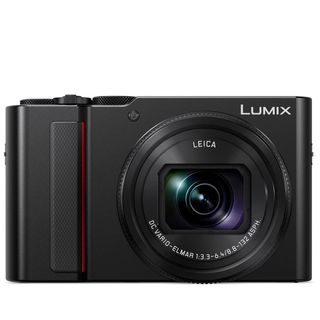
The best value travel camera
With a large 1-inch sensor and useful 15x optical zoom, the Panasonic TZ200 puts smartphone-beating performance in your pocket.
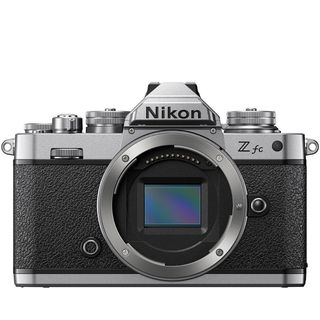
The best-looking travel camera
Don’t be fooled by its lovely retro looks: the Nikon Z fc is every bit the modern travel camera, with a useful touchscreen and top image quality.
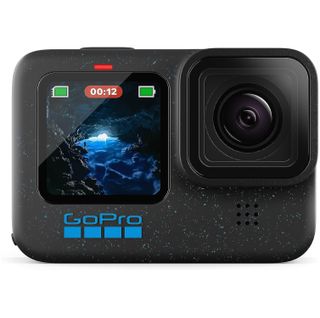
The best action camera for travel
The GoPro Hero 12 Black is the best all-round action camera available ideal for capturing your adrenaline-filled travels, with 8:9 sensor ideal for sharing travel videos to social.
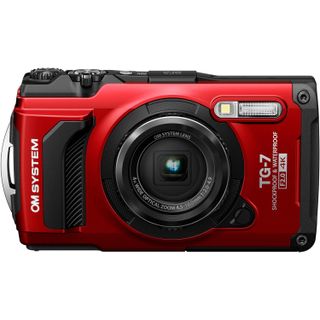
The best tough travel camera
For rough and tumble travels you'll want a tough camera and they don't come much better than the OM System Tough TG-7.
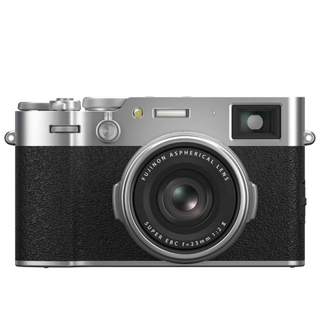
The best premium compact
With a large sensor, fixed 23mm focal length, small form factor, retro design and film simulations, the X100VI is a powerful tool for street photography and documenting your travels.
Load the next 4 products...
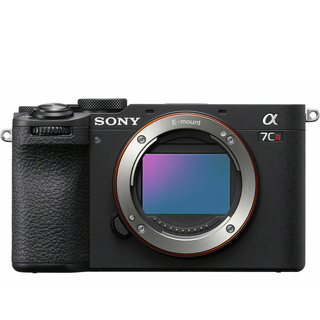
The best small full-frame camera
Combining a small form factor with a high-res 61MP sensor and fantastic autofocus, the Sony A7C R is the best full-frame camera for travel photography.
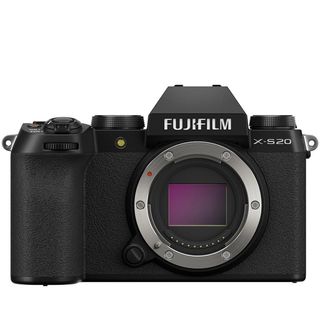
The best hybrid for travel vlogging
A capable sensor and automated settings, including a Vlogging mode, make the Fujifilm X-S20 an accessible tool for stills and video on the go.
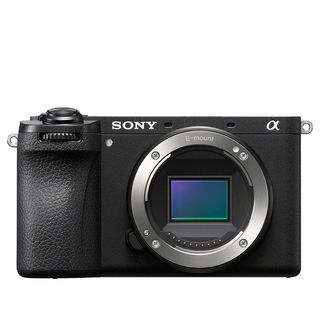
The best for moving subjects
The compact A6700 uses AI-powered autofocus to reliably snap on to animals, insects, cars and more. The Fuji X-S20 is better for video, though.
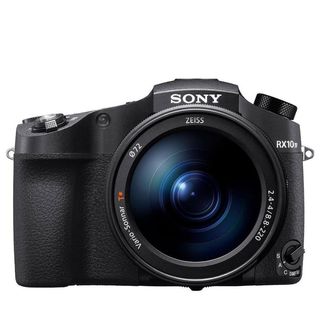
The best superzoom camera
Even with a 1-inch sensor, the Sony RX10 IV delivers sharp stills and video, with the added versatility of a generous 24-600mm zoom range.
The best travel cameras in 2024
Why you can trust TechRadar We spend hours testing every product or service we review, so you can be sure you’re buying the best. Find out more about how we test.
Below you'll find full write-ups for each of the best travel cameras in our list. We've tested each one extensively, so you can be sure that our recommendations can be trusted.
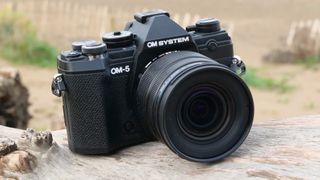
1. OM System OM-5
Our expert review:
Specifications
Reasons to buy, reasons to avoid.
✅ You want a robust travel camera: Light enough to travel with but tough enough to deal with bad weather, the OM-5 is a ruggedly dependable camera. ✅ You shoot handheld a lot: The OM-5 has excellent image stabilization for stills, meaning you can cross a tripod off your packing list.
❌ You want the best image quality: Its Micro Four Thirds sensor is decent enough, but some rivals offer more pixels and better low light performance. ❌ You have large hands: Handling is surprisingly good for a small camera, but the grip is not very deep, especially for those with bigger hands.
The OM-5 is only a relatively minor update of the Olympus OM-D E-M5 Mark III , but its combination of talents make it an ideal travel camera in our book – particularly if you want the flexibility of interchangeable lenses. It shoehorns a lot of features into a compact, weatherproof body that's compatible with a wealth of equally small lenses. Most of its skills, including excellent in-body image stabilization and computational photography modes, are also designed with travelers and adventurers in mind.
Our tests found that the OM-5 delivers excellent video and stills quality for its size, helped by a stabilization system (good for 6.5-stops of compensation) that gives you a high hit-rate of keepers. We also enjoyed the high-quality feel of the camera's dials, as well as in-camera software tricks, like Live ND and in-camera focus stacking, which are ideal for macro shots or blurring skies for an ethereal effect. Less good are the fairly average EVF resolution, 4K /30p limit for video and relative limitations of its smaller sensor, but these are all acceptable trade-offs considering this camera's size and price.
Read our in-depth OM System OM-5 review
- ^ Back to the top
The best-value travel camera
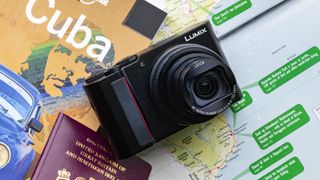
2. Panasonic Lumix ZS200 / TZ200
✅ You want an all-in-one compact: You can’t beat the TZ200 for portability, but it’s also a feature-packed option with a useful zoom range and 1.0-inch sensor. ✅ You want a large zoom range: At 15x optical zoom, the TZ200 offers the versatility to shoot all sorts of subjects on your travels.
❌ You like an ergonomic grip: The Lumix TZ200 has plenty of manual controls on the metal body, but there’s not much of a grip to get your fingers around. ❌ You want a cheap camera: Its generous feature set makes the TZ200 excellent value, but its still pretty pricey for a premium compact.
With smartphones now raising the bar for point-and-shoot photography, compact cameras have to offer something special to justify their place in your travel bag. The ZS200 / TZ200 does that with its large 1-inch sensor and versatile 15x optical zoom. It might be towards the upper end of the compact camera market, but Panasonic 's travel zoom continues to offer great value.
Its large 1in sensor produces better natural image quality than most smartphones, despite the latter's advances in multi-frame processing. Our tests found colors to be nice and punchy, with the dynamic range allowing you to recover lost shadow detail with post-processing if needed. Even at 24mm, vignetting and distortion is nicely controlled. There's also a handy built-in electronic viewfinder, which makes it easier to compose images in bright light. It's still quite pricey, but this is still the best travel zoom compact camera available right now.
Read our in-depth Panasonic Lumix ZS200 / TZ200 review
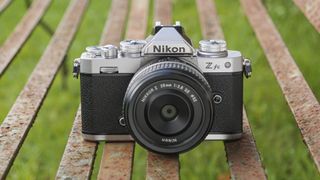
3. Nikon Z fc
✅ You care about camera design: From the retro dials to the circular viewfinder, the Nikon Z fc channels classic style to fantastic effect. ✅ You like manual exposure control: Dedicated dials for ISO, shutter speed and exposure, complemented by a lens control ring, give excellent manual control.
❌ You need a wide choice of lenses: There are only a handful of Z-series kit lenses designed for the APS-C format, limiting your options for expansion. ❌ You want a rugged camera: Although it looks like the sturdy FM2, the Z fc isn’t weather-sealed, so it’s not one to take on rainy adventures.
Travel photography is all about capturing memories and Nikon’s Z fc fully embraces the concept of nostalgia: it’s a stunning homage to the 30-year-old Nikon FM2 – complete with retro styling, dimensions and dials. Despite the throwback design, it’s a very modern camera inside, sharing many of its specs with the capable Nikon Z50. While some photographers might wish for a full-frame sensor, the Z fc’s APS-C number does a stellar job of capturing stills and 4K video, aided by reliable tracking autofocus. Our tests found that its 20.9MP sensor had an excellent handle on noise, especially under ISO 800, while dynamic range was impressive.
Its vari-angle touchscreen is also a brilliant addition, making it easy to frame travel selfies – or folding away completely for a leather-back look that lets you pretend it's the Eighties. The Nikon Z fc isn’t as sturdy as the camera that inspired it (there’s no weatherproofing, for example), but it’s still a beautifully unique camera for casual use. And with dedicated dials for ISO, shutter speed and exposure, plus a customizable lens ring, it’s also an easy one to control on the go.
Read our in-depth Nikon Z fc review
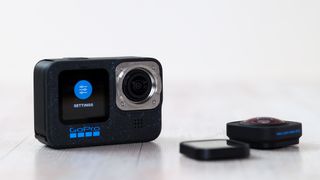
4. GoPro Hero 12 Black
✅ You want a rugged travel camera: Waterproof down to 10m, the GoPro Hero 12 Black is a great choice for capturing action-packed travels. ✅ You plan to share on social: The 8:7 aspect ratio of its sensor gives you lots of flexibility to crop footage for social, including vertical videos.
❌ You plan to shoot in low light: Its 1/1.9in sensor shoots sharp footage, but it still struggles with noise handling in lower lighting conditions. ❌ You want a hybrid for stills: While the sensor can shoot 27MP stills, you’ll get a better photography experience from a standard alternative.
If you're looking for a high resolution action camera for your travels that's as comfortable shooting smooth videos as it is crisp photos, then the GoPro Hero 12 Black tops the bill. It was an underwhelming update of the Hero 11 Black, but that's not necessarily a bad thing because that camera was already highly capable. There's the same 1/1.9in sensor with versatile 8:9 aspect ratio – you can reframe footage for different social channels without sacrificing quality, and its max resolution of 5.3K/60p beats the DJI Osmo Action 4. You can capture dramatic TimeWarps at the full 5.3K resolution, shoot photo sequences as a rapid 30fps, and pull 24.7MP stills from 5.3K video.
Design-wise, there's no change to the Hero 11 Black, the two rugged models are physically identical and come with a large Enduro battery as standard, giving more time between recharges on the road. The same interface lets you tweak the user experience, with ‘Easy’ and ‘Pro’ modes to suit your skill level. Superior Horizon Lock and HyperSmooth 5.0 smarts do a remarkable job of stabilizing handheld video. Minor updates from the Hero 11 Black are mainly for pros, including flat Log color profiles, 10-bit video, and multi-channel audio capabilities. For most people however, there's little reason to upgrade or to pick the Hero 12 Black over its predecessor which could save you a little money.
Read our in-depth hands-on GoPro Hero 12 Black review
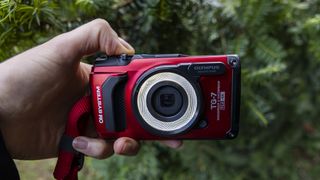
5. OM System Tough TG-7
✅ You want a hardcore camera: With a case that’s waterproof, shockproof and freezeproof, the OM System Tough TG-7 is built to take a beating. ✅ You like a simple interface: Premium features include RAW shooting and 4K video, but the camera itself is easy to operate, even in tricky conditions.
❌ You want the best image quality: Results from the 1/2.3in sensor are fine, but the TG-7 tends to overexpose, and detail is lost at the telephoto end. ❌ You like using a viewfinder: The Tough TG-7 doesn’t have a viewfinder, and the 3-inch LCD screen has limited visibility in bright sunlight.
The biggest change in the OM System Tough TG-7 and the camera it replaces is in the name – since OM System acquired Olympus, it has wrought extremely minor upgrades to key models from the Olympus range, including the TG-6. None-the-less, we haven't seen another tough camera to better the TG-6 in that time, and so if you want the best tough camera available today, the TG-7 now tops the list.
Tough cameras like the TG-6 are freeze-proof, shockproof and waterproof and can therefore be used in scenarios that you simply wouldn't consider with your phone or expensive camera, and for that reason the TG-7 is still one of the best travel cameras you can buy. Its industrial design feels reassuringly rugged, while large buttons make it convenient to operate beneath the waves or while wearing gloves, plus its 3-inch LCD display offers decent visibility in most conditions.
We found image quality to be reasonable for a camera with a 1/2.3-inch sensor, with nice, rich colors – although there was a tendency to overexpose and blow out highlights. An equivalent zoom range of 25-100mm is fair, plus the inclusion of 4K video and raw shooting enhance flexibility. Its image quality might not match your phone for regular photos, but the TG-7 will allow you to be capturing extreme travel memories when you otherwise couldn't, plus there's a range of useful accessories such as a ring light for close up photography.
Read our in-depth OM System Tough TG-7 review
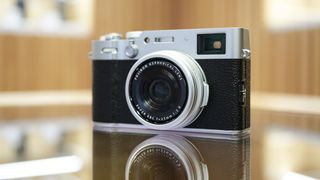
6. Fujifilm X100VI
✅ You're exploring the city: With a fixed 23mm f/2 lens, Fujifilm's best autofocus, tilt screen and hybrid viewfinder, the X100V is a fantastic choice for street photography. ✅ You want a premium camera: From its retro design to its metal body, the X100V feels well-made and looks the business.
❌ You don’t want a fixed focal length: The 23mm lens is fantastic, but some users will find it limiting, especially if you value the ability to zoom. ❌ You’re on a tight budget: The X100VI is a popular but niche premium camera, and its increased price will put it out of budget for many.
We'd class the Fujifilm X100VI as a niche premium compact camera, but the range has grown in popularity since its inception in 2010 and is more popular than ever. The sixth generation model keeps the fixed 23mm f/2 lens and retro design that's been inspired by 1950s analogue cameras and despite its single focal length and no zoom it is one of the best travel cameras you can buy if it's in your price range.
The X100VI keeps all that users have grown to love about the X100-series; sharp fixed lens, large sensor, retro design, and unique hybrid viewfinder, but then builds on the X100V with a higher-resolution 40MP sensor and in-body image stabilization. The result is a significantly more versatile camera, for example the digital teleconverter can crop into the full image for 50mm (at 20MP) and 70mm (at 10MP) focal length looks, while stablization lets you shoot slower shutter speeds in low light.
Other key improvements over the X100V include more detailed 6K video and Fujifilm's best-ever autofocus that includes advanced subject detection for photo and video. You can rely on the X100VI as a discreet everyday camera to document the world around, especially your travels, and it comes with 20 film simulation color profiles inspired by actual Fujifilm 35mm film that you can customize with recipes to develop your own style.
Read our in-depth Fujifilm X100VI review
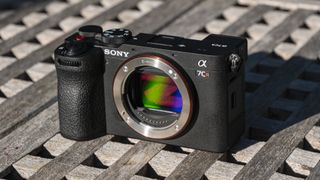
7. Sony A7C R
✅ You want the sharpest stills: With a 61MP full-frame sensor, you won’t get sharper travel snaps from any other camera in this list. ✅ You want a small, powerful camera: Despite the full-frame sensor inside, the A7C R is very compact and fits neatly in the hand.
❌ You value good handling: The small design has drawbacks, including a compromised viewfinder and absent AF joystick. ❌ You plan to use big lenses: Its compact proportions mean the Sony A7C R is mismatched with larger telephoto lenses.
By combining a small, travel-friendly form factor with a 61MP full frame sensor and fantastic autofocus, Sony has created arguably the ultimate travel camera. Successor to the Sony A7C – already one of our favorite travel photography tools – and announced alongside the A7C II , the A7C R fits nicely in the hand, while a flip screen and new dials offer welcome control.
Equipped with Sony’s top-grade autofocus and AI-powered subject tracking, the A7C R can cleverly and reliably track a broad range of subjects. You won’t find a better full frame sensor, either: borrowed from the A7R V , it captures stunning, pin-sharp stills in all conditions. Cropping potential is vast, and video footage is decent too.
There are trade-offs, though. In testing, we found that the A7C R’s compact proportions come with handling compromises, especially compared to the traditional design of the A7R V. The viewfinder feels small and fiddly, and we wish Sony had included an AF joystick. It’s also not a camera to pair with large telephoto lenses. But the real kicker is the cost: it’s significantly more expensive than the A7C II. That premium means it’s only a camera to consider if you need absolutely the best possible image quality on your travels.
Read our in-depth Sony A7C R review
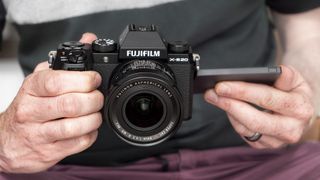
8. Fujifilm X-S20
✅ You value longevity: The X-S20 has double the battery life of the X-S10, making it a great choice for long days of travel photography. ✅ You shoot video, too: Capturing sharp 26MP stills and 6K/30p open gate video, the Fujifilm X-S20 is a true mirrorless hybrid.
❌ You need weather proofing: Build quality of the X-S20 is good, but you’re better off with the Sony A6700 if you need a weatherproof camera. ❌ You have a limited budget: Its additional features come at the cost of a steep price hike compared to the Fujifilm X-S10, which makes it a harder sell.
Channelling everything we liked about the X-S10 – including a compact, well-balanced body – the Fujifilm X-S20 cements its position as a fantastic mirrorless cameras for travel. It handles comfortably, with simplified dials making it accessible for beginners. In testing, we found new novice-friendly features – such as a dedicated Vlogging mode – also make the X-S20 a forgiving camera for touring first-timers.
The X-S20 is blessed with a proven shooting system, utilising the same 26.1MP sensor as the X-S10 and X-T4 to produce quality stills. It also eases the way for beginners with an automatic scene detection mode, which harnesses the power of Fuji’s latest X-Processor 5 to reliably choose the correct settings. From our first impressions, it works better than the automatic subject tracking, which was a little hit and miss.
With 6K/30p 4:2:2 10-bit internal video recording also on offer, plus in-body image stabilization that worked well in testing, the Fujifilm X-S20 is a solid option for content creators on the move. The lack of weather-sealing will discourage adventurous travellers, while the price tag means it isn’t one to leave in an unattended bag. But at just 26g heavier than its predecessor, the X-S20 is a very capable all-rounder for travel.
Read our in-depth Fujifilm X-S20 review
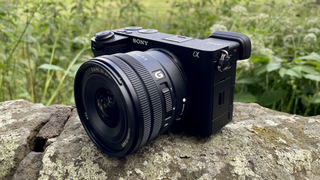
9. Sony A6700
✅ You want a capable travel hybrid: A sharp APS-C sensor, five-axis stabilization and AI autofocus make the A6700 a great all-rounder to take on the road. ✅ You like to get hands-on: A more ergonomic grip and lots of direct-access buttons make the A6700 a nice camera to handle and use.
❌ You shoot mostly video: The A6700 can record sharp video, but there’s a heavy 1.6x crop on 4K/120p slow-mo and Active SteadyShot stabilization isn’t the best. ❌ You like simple menus: The interface on the A6700 has quite a learning curve, and it can be tricky to navigate when shooting out and about.
It's a close-run thing between the Sony A6700 and the Fujifilm X-S20 above, but if you shoot a lot of moving subjects then the Sony should be your choice. Like the Fuji, it has a 26MP APS-C sensor and comes in a compact, travel-friendly form. And like the Fuji, it's a genuine hybrid, offering decent video options to go with its stills prowess. But there are some key differences.
First, the good: the A6700 has the same AI-powered chipset as the far more expensive Sony A7R V , and this helps it deliver incredible subject tracking; seriously, this camera will lock on to humans, animals, insects, cars, trains, aircraft and more, then follow them unerringly around the frame. However, its video chops aren't as impressive as those of the Fuji. 4K 120p slow-mo footage is subjected to a heavy 1.6x crop, while the five-axis stabilization doesn't work as well when filming as it does when shooting stills. The complex menu system also leaves something to be desired.
Still, it handles well, has a great battery and would make an excellent all-rounder for your next trip - so long as you're slightly more focused on images than video.
Read our in-depth Sony A6700 review
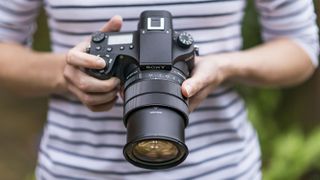
10. Sony Cyber-shot RX10 IV
✅ You like to zoom in: With a sharp, fast 24-600mm, the RX100 IV offers fantastic versatility to capture a range of subjects on your travels. ✅ You want an all-in-one option: The RX100 IV is a high-end bridge camera with a big zoom range, high-quality EVF and capable AF system.
❌ You want a small camera: While it ticks most of the boxes for travel photography, the RX100 IV is bigger and heavier than many rivals. ❌ You like a slick touchscreen: Its tilting touchscreen is a useful addition, but you can’t use it to navigate menus or swipe through images.
In terms of offering something for everybody, the RX10 IV ticks a lot of boxes. It's like having a bag full of lenses, but with the benefit of never having to change them. There's a very long zoom (going all the way from 24-600mm), while the maximum aperture is pretty wide throughout the lens.
The RX10 IV's sensor might not be as a large as the ones you'll find on a mirrorless camera or DSLR, but Sony's 20.1MP one-inch chip proved itself to be very capable in our tests. Noise was well-controlled, and you'd have no problem making an A3 print from one of its files (particularly if you shoot at under ISO 800).
You also get 24fps shooting, cracking 4K video quality and handling to rival a DSLR. The major downside? The high price – if your budget is tighter, don't forget about this camera's predecessor, the RX10 III .
Read our in-depth Sony Cyber-shot RX10 IV review
How to choose the best travel camera for you
Picking the right travel camera can be trickier than finding affordable flights. You’ll want a shooting tool that’s compact enough to conveniently carry on your travels, yet still capable of capturing sharp stills and stable video of your jet-setting adventures.
There are a few key things to keep in mind when choosing your ideal travel camera. Among the most important is size. While pocketable compacts offer convenience, the quality of your travel snaps will be boosted by the bigger sensors of larger mirrorless models.
If your adventures are likely to involve going off the beaten track, it’s worth considering a travel camera with rugged credentials. This could be one of the best action cameras , such as the GoPro Hero 11 Black – perfect if you plan to shoot quick, slick travel clips. Or it could be a sturdy compact such as the Olympic TG-6, which is one of the best waterproof cameras .
It’s also worth thinking about what subjects you might be shooting on your trip. A long zoom range will be handy on safari , while something light and fast is better for capturing street snaps on a city break. Travel compacts, such as the Panasonic Lumix ZS200 / TZ200, usually use a zoom lens to cover a range of shooting scenarios. Interchangeable lens cameras like the Fujifilm X-T30 II can similarly offer the flexibility of both worlds, but only if you’re happy to travel with extra barrels in your backpack.
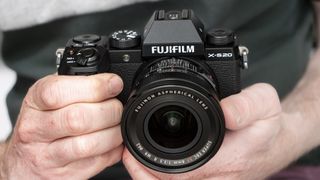
Which type of camera is best for traveling?
Travel cameras come in a range of shapes and sizes. Which style is best for you will depend on how you like to travel, what you like to shoot and how much gear you’re willing to cart around.
Travel zoom compacts such as the Panasonic Lumix ZS200 / TZ200 are pocket friendly, yet offer a broad scope for capturing a range of subjects. Thanks to generous zoom ranges, they give you the opportunity to get close to the action, or to shoot wide. The trade-off for having all of this flexibility in a compact body is generally a smaller sensor, which is less useful for shooting in low light.
If you’d like neat proportions but don’t need the versatility of a zoom lens, premium compact cameras could be worth considering. Models such as the Fujifilm X100V sacrifice zoom range in favour of larger sensors that are better at gathering light – usually a one-inch or, in the case of the X100V, an APS-C chip.
Between compacts and mirrorless cameras is where you’ll find bridge cameras. Bulkier than a standard compact, they offer more comfortable handling and a large zoom range, but without the need to carry different lenses. New bridge cameras are increasingly rare, but the Sony Cyber-shot RX10 IV remains a great example.
If you don’t mind traveling with multiple lenses, many of the best mirrorless cameras have been specifically designed with travel in mind. In the case of models like the OM System OM-5 , that means a portable, weatherproof body, useful image stabilization for shooting on the move, plus a versatile Micro Four Thirds sensor that balances size and performance. And with lots of different lenses to choose from, you can pack different optics depending on the type of trip you’re taking – or opt for a reliable all-round option.
Is a DSLR or mirrorless camera better for travel photography?
When it comes to travel photography, most photographers look for a balance between portability and performance. If this is the combination you’re after, mirrorless cameras will almost aways have the edge over their DSLR rivals. Mirrorless models are generally smaller and lighter than DSLRs, making them easier to wield and travel with.
Despite their more compact proportions, many of the best mirrorless travel cameras can also match or outclass DSLR cameras when it comes to image quality, as well as autofocus abilities and video features. This makes them versatile tools for shooting on the move, especially if you choose a model with in-body image stabilization for sharp handheld results. If you pick a mirrorless camera with an established lens mount system, you’ll also find no shortage of glass to pack for your trip.
That said, there are reasons why you might still want to consider a DSLR camera for travel. Some photographers prefer the chunkier ergonomic grip for which the DSLR format is famous, especially if they plan on shooting for hours on end. The best DSLR cameras also offer superlative battery life, which can be useful if your travel plans include days away from electricity.
Budget might also be a factor, especially if you’re concerned about taking an expensive camera on your travels. Older DSLR cameras can offer great value, as can second-hand mirrorless models. It’s also worth looking at our round-up of the best cheap cameras , which includes some options that are a good fit for travel photography.
- Read our in-depth DSLR vs Mirrorless comparison
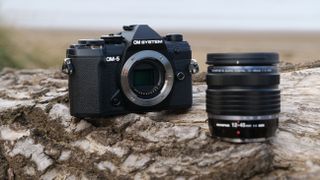
How we test travel cameras
Buying a camera these days is a big investment, and travel cameras are no different – so every camera in this guide has been tested extensively by us. For travel cameras in particular, real-world tests are the most revealing way to understand a camera's performance and character, so we focus heavily on those, along with standardized tests for factors like ISO performance.
To start with, we look at the camera's design, handling and controls to get a sense of how suitable it is for life on the road, and any particular features that might be particularly useful for globe-trotters. When we take it out on a shoot, we'll use it both handheld and on a tripod to get a sense of where its strengths lie, and test its startup speed.
When it comes to performance, we use a formatted SD card and shoot in both raw and JPEG (if available). For burst shooting tests, we dial in our regular test settings (1/250 sec, ISO 200, continuous AF) and shoot a series of frames in front of a stopwatch to see if it lives up to its claimed speeds. We'll also look at how quickly the buffers clears and repeat the test for both raw and JPEG files.
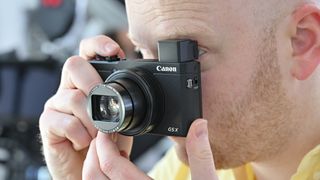
In various lighting conditions, we also test the camera's different autofocus modes (including Face and Eye AF) in single point, area and continuous modes. We also shoot a range of photos of different styles (portrait, landscape, low light, macro/close-up) in raw and JPEG to get a sense of metering and its sensor's ability to handle noise and resolve fine detail.
If the camera's raw files are supported by Adobe Camera Raw, we'll also process some test images to see how we can push areas like shadow recovery. And we'll also test its ISO performance across the whole range to get a sense of the levels we'd be happy to push the camera to.
Battery life is tested in a real-world fashion, as we use the camera over the course of the day with the screen set to the default settings. Once the battery has reached zero, we'll then count the number of shots to see how it compares to the camera's CIPA rating. Finally, we test the camera's video skills by shooting some test footage at different frame-rates and resolutions, along with its companion app.
We then take everything we've learned about the camera and factor in its price to get a sense of the value-for-money it offers, before reaching our final verdict.
Get daily insight, inspiration and deals in your inbox
Get the hottest deals available in your inbox plus news, reviews, opinion, analysis and more from the TechRadar team.

Tim is the Cameras editor at TechRadar. He has enjoyed more than 15 years in the photo video industry with most of those in the world of tech journalism. During his time as Deputy Technical Editor with Amateur Photographer, as a freelancer and consequently editor at Tech Radar, Tim has developed a deeply technical knowledge and practical experience with cameras, educating others through news, reviews and features. He’s also worked in video production for Studio 44 with clients including Canon, and volunteers his spare time to consult a non-profit, diverse stories team based in Nairobi. Tim is curious, a keen creative, avid footballer and runner, and moderate flat white drinker who has lived in Kenya and believes we have much to enjoy and learn from each other.
- Chris Rowlands
- Mark Wilson Senior news editor
Sony FE 16-25mm F2.8 G review: small and mighty?
Canon cameras and lenses just got a lot cheaper thanks to these big cashback deals
Prime Video movie of the day: Invasion of the Body Snatchers is still scary in our increasingly divided age
Most Popular
- 2 Lenovo's new ThinkPad P1 Gen 7 weighs less than 2Kg and is powered by a Core Ultra 9 185H CPU
- 3 Collection agency data breach affects millions of users
- 4 X-Men 97 episode 8 is full of fan favorite Marvel superhero cameos – here are 5 of the best
- 5 Angry Netflix UK and Canada fans threaten to close their accounts over permanent Basic tier removal in early June
- 2 Tesla EVs could get a massive range boost from new battery tech that promises a 373-mile range from a 10-minute charge
- 3 Cameras are back – why they’ve grown for the first time in 13 years, despite the power of iPhone and Android phones
- 4 Another major pharmacy chain shuts following possible cyberattack
- 5 Star Wars: Skeleton Crew isn't out on Disney Plus yet, but it's already got a lot of convincing to do
- Making web photographs
- about.alfredklomp.com
- photo.alfredklomp.com
- www.alfredklomp.com
Articles, essays, misc
- Collector's books
- Russian fakes
- Guide to flea markets
- Goirle and Krasnogorsk
- Introduction to the Soviet system
- Introduction to KMZ
- My beef with LOMOgraphy
- Russian factory logos
- Moscow 1980 olympic models
- Rangefinder adjustment
- Film scanner?
- British importer TOE
- Strange combos
- Some production figures
- Homebuilt panoramic camera
Non-Russian
- ActionSampler
- Agfa Optima 1535
- Bilora Bella
- Carl Zeiss Werramatic | samples
- Diana toy camera
- Ikoflex-IIa
- Nippon AR-4392FH
- Voigtländer Bessa-L | samples
- Nikon F50 | repair
- Yashica-635
- Yashica Electro 35
- Radioactive FEDs?
- LOMO Lubitel-2 | manual
- LOMO Lubitel-166U | manual
- LOMO Voskhod
Zenit series
- FS-12 | manual
- Fotokomplekt
- Zenit-E | parts | repair | manual
- Zenit-EM | manual
- Zenit-TTL | manual
- Zenit brochure
Zorki series
- Zorki-S | repair | repair (2)
Misc Russian
- Horizon-202 | samples
- Horizont manual
- Siluet Elektro manual | dutch
- Shkolnik manual
- Smena 8M | manual
- Smena SL | manual
- Start | snaiper
- Universal viewfinder
- Leitz VIOOH viewfinder
Light meters
- Leningrad-7 | manual
- Leningrad-8 manual
- Sverdlovsk-4 | manual
The Moskva-5
This page is no longer actively maintained. ( Pardon? )
Always on the lookout for Russian cameras, I spotted my Moskva-5 in the window of a small antiques shop in Essen, Germany. It was December 1999, and I was there to visit the Christmas market (don't ask...:). I walked past the shop, looked in the window, saw some old folding cameras, looked closer, and saw a Moskva-5. Ofcourse I went inside immediately, and inquired what the guy wanted for it. One hundred and sixty Deutschmark, he said (which is some $80). I thought that these cameras were very rare and expensive, and pondered it for a minute. I decided to buy it, and then had to cross all through town to find a cash machine. When I finally found one, it was already half past four, and the shop closed at five. I was back at the shop at quarter to five, superficially checked the camera quickly, and for DM160, it was mine.
In hindsight this was perhaps the worst deal of my life (to put it dramatically). On the way back home, I checked the camera out a bit better. It turned out that the rangefinder was defect, that the leatherette had coloured totally brown from years and years of direct sunlight, and that the camera was just dirty in general. And it also turned out that these cameras weren't very rare at all. What was really frustrating, is that I don't have a big budget anyway, and that for considerably less money, I could have gotten a rare and fully operational aluminium-top Moskva-4 at a local camera shop. This Moskva-5 was an impulsive buy if there ever was one, and since I've seen better Moskva-5's in Prague for almost half the price, I wish I had kept my money in my pocket. But I guess that there's no use crying over spilt milk, and that I now have to face the fact that I own this Moskva-5. A bit too expensive, but still.
Before this review begins, a slight word of caution. My Moskva-5 is in a very bad state, and the only accessory I got with it, was the brown leatherette case. My experiences with this camera aren't so good, so overall, I'm not too happy with it. But this isn't to say that what I remark on this page, goes for all Moskva-5's. Like with most Soviet-Russian equipment, there are good examples and there are bad examples. Mine is a bad one, and as such not representative.
The first Moskva to be produced was the 1948 Moskva-1, that was at first produced with Zeiss Ikonta 6×9 pieces, and wth the help of Zeiss tools. Some 31.000 of this model were made until 1949.
The Moskva-2 was produced from 1947 to 1956, and over 197.000 of them were made. Where the Moskva-1 was assembled from original Zeiss Ikonta pieces, this one was made with original Super Ikonta pieces (which incorporates an uncoupled rangefinder).
From 1950 to 1951, the rather rare Moskva-3 was produced (only 11.385 made). This model resembled the original Moskva-1 in that it didn't have a rangefinder or a viewfinder. The strange thing about this camera is, that it wasn't meant for 120-film, but took sheet and plate film.
The Moskva-4 was produced from 1956 to 1958. Essentially a Moskva-2, it was equipped for both 6×9 and 6×6 photography, and was supplied with a 6×6 insert mask. Small numbers with Moskva-5 style tops were made.
From the Moskva-4 series 2, the Moskva-5 evolved. This was essentially the same camera as the former model, but it had an Industar-24 10.5cm f/3.5 instead of an Industar-23 11.0 cm f/4.5, and a Moment-24S shutter instead of a Moment-23S. Essentially still a Zeiss Super Ikonta copy, this camera has the advantage of a dual-format system, a good lens, a coupled rangefinder, an excellent finish, a self-timer, and a proper viewfinder.
The Moskva-5 stayed in production until 1960. A grand total of 216.457 (according to Princelle ) were produced. Princelle also mentions that these cameras generally have an exemplary finish, something that I'm willing to take his word for.
The Moskva-5 has rather modest dimensions. It's as thin as a small 35mm camera (a feature that is still appreciated today among outdoor photographers), it's only slightly higher than a medium format roll, and it's not much longer than the 6×9 format. Ofcourse it's a medium format camera, and the large roll needs to go somewhere, but its dimensions are altogether modest.
When closed, the camera handles somewhat like a normal 35mm camera, but with some peculiarities. For starters, the viewfinder is to the top right of the camera, which is a good thing if you're left-eyed, but a nuisance if you take pictures with your right eye, since your nose could get in the way. The rangefinder window is to the left of the viewfinder window, and the Moskva-5 doesn't have a combined viewfinder/rangefinder.
Secondly, the shutter release button is not on the usual place (ie. on the top right of the camera), but on the top left! There is a knob on the top right where the shutter release normally is, but that's the bellows release button...
Compared to most cameras, things here are inverted. A lucky stroke if you're a left-handed, left-eyed photographer, but a less lucky one if you're right-eyed and right-handed, as most photographers seem to be...
The camera folds open by pressing the small button on the top right of the camera. The bellows and the lens clap out with some speed and force due to a couple of springs inside. When unfolded, the bellows should click themselves into position. If they don't, then click them in manually, because otherwise the lens isn't aligned planparallel to the film surface, and the sharpness plain would be uneven.
The camera has a small foot underneath the hatch, that can flip up, and act as a support foot for putting the camera exactly level in vertical position. Unfortunately the side of the hatch doesn't have a similar foot, so placing the camera level horizontally requires a tripod. But that is easier said than done: the Moskva-5 has a German screw tripod thread, but most modern tripods have English screw. There are adaptors and special plates available, but it's not ideal.
Incidentally, I believe that German thread (3/8") is a much better system than English thread (1/4"), because of the larger support base. But somehow the German thread got suppressed by the English one in the 1960's, which I think is an eternal shame. Lenses like a 600mm Canon shouldn't be screwed onto a tripod with a small, brittle rod, but rather with a large and solid screw, preferably German thread. Anyway, this is fighting a lost battle...
When the camera has folded open, don't forget to turn the auxiliary rangefinder window into place, so that it aligns with its pal on the body! Otherwise the rangefinder system will be mute.
The Moskva-5 is a true dual format camera. It was designed for 6×6 and 6×9 photography, and both types are equally well manageable. On the top plate, there is a format switch, but the only thing it does, is place or remove a 6×6 mask in the viewfinder. There is another switch in the pressure plate. Setting that switch to either format, blocks the red window for the other format shut. The wind system does not know of any formats: you wind on the film yourself, and check the red window to see when the next exposure is reached. By the way, you need a 6×6 insert to take pictures in that format, and it's an often lost accessory. Moskva-5's without this standard piece are worth less than those that have theirs. Because of the special insert, it's not possible to change formats in mid roll, like with the Hasselblad XPan, for example. Which is quite a pity.
The Moskva-5 doesn't bother with either a film counter or an automatic wind system. The film counts itself, in a way, because through the appropriate red window in the back, you can see at just which exposure number the film is now. In a way, this camera is very low-tech. Unlike the Iskra for example, nothing's automated.
Like I said earlier, the wind system knows nothing about formats. You just wind until the next number appears in the red window. However, the wind system does know something about incomplete winds and double exposures! After you press the shutter release button (on the top of the camera, but connected with rods and things to the shutter up front), the exposure system blocks until one 6×6 image has been advanced. A small dot next to the advance button turns red after taking a picture, and only when it turns white again after sufficient winding, is the film fully advanced for 6×6. The exposure system also blocks when the shutter is uncocked, and when the lens assembly is collapsed. It's not much, but enough of a system to avoid double exposures.
Placing a film is not very difficult in this kind of roll film camera. First you place the 6×6 insert, if you want 6×6 negatives. Then you place the film on the right, making sure that there is an empty spool in the left bay. Feed the paper lip from the right to the left spool, stick it into the crease in the center, wind on a bit, and make sure that the paper stays neatly in the middle of the spool. Then wind the film on a bit with the back open, to make sure it stays in place. Then set the lever on the pressure plate to 6×6 or 6×9, depending if the insert is applied or not, and close the back. Closing the back is done by dropping the left of the back over the hinge-like rim on the left of the camera, and slowly pressing it into place. It should click shut at the end. If you need to apply force, you've probably hung the back wrongly in the hinge, so give it another try, without forcing anything excessively. Anyway, after the back is properly closed, you wind on the film with the red window open, until the number '1' appears in the window. There: the Moskva-5 is now set for the first exposure.
Taking pictures goes as follows. First, open the camera's door with the knob on the top right. Then cock the shutter, by moving the small lever on the shutter assembly upwards. Only then can you change shutter speeds. Set a speed and an aperture (the aperture scale goes to f/32, and its needle is located behind the 'Moment-24S' type plate), and focus the lens by turning the focusing scale, and checking focus through the rangefinder window. The subject is in focus when the two superimposed images fall together. Then, handle the camera like a normal 35mm RF, but keep in mind that the shutter release is to the left. Frame the image in the proper viewfinder, and take the picture. Then, wind on the film with the large knob on the left, until the next number appears in the red window on the back. Then cock the shutter, set the shutter speeds, etc etc etc, until you reach the end of the film (the twelfth picture with 6×6, and the eighth with 6×9).
When the film is full, simply wind it on and on and on, until all the film and all the paper backing has been transferred from the right roll to the left one. You should feel pressure when you reach the end of the film, and suddenly it 'll shoot loose. Then open the back, take out the film spool, wind on the last end tightly, and seal it shut like a stamp, by moisturizing the gummed strip, and using it to seal off the roll. Then just take it like that to the photo store, and have it further developed.
The Moskva-5 has an Industar-24 10.5cm f/3.5. As is the case with most Russian cameras and lenses, there are good ones and there are bad ones. There are Moskva-5's with excellent, sharp, brilliant Industar-24's, and there are the ones with Monday morning lenses. Sadly for me, mine is one of the latter, although I don't quite know for sure. The only roll of film I ever shot with my Moskva-5, was a roll of FP4 that had expired by over five years, and that I developed in a used one-shot Rodinal mixture. I shot the pictures under poor light conditions and leaden skies, with 1/25s and f/5.6, without a tripod. It's not difficult to understand that the pictures came out looking truely miserable. If I were to go by those, I would think that the Moskva-5 is only capable of producing gritty, out-of-focus images with no brilliance and sharpness at all; and that clearly isn't the case. I reckon that if I use colour slide film, a tripod, a cable release and a light meter, and I shoot something happy under a clear blue sky, I would appreciate my Moskva-5 a lot more. But for now I can't say anything sensible about lens quality, other than that that of mine is very disappointing. But don't let that mislead you: the wildest stories roam about this lens, telling about the fabulous and miraculous quality of the Industar-24, and personally I believe some of it is probably true. I prefer to think that my Moskva-5 is a poor home-market example...
The Moskva-5 has no light meter, but its wind dial incorporates a memo dial. You can set three film types, and with each film type, four film speeds. There are:
- Tsvetnaya (colour film): 22, 32, 45, 65 GOST
- Panchrom (b/w film): 32, 45, 65, 90 GOST
- Izopanch. (b/w film): 32, 45, 65, 90 GOST
The whole memo dial rotates, and when you load the camera, you are supposed to align the arrow on the rim with the correct film type and sensitivity.
Perhaps interesting is the way in which the rangefinder system works. Having a rangefinder with a collapsible camera is a problem, since how do you make a coupled rangefinder system onto a collapsable lens? KMZ's solution (or actually, that of ZEISS), was to attach a separate rangefinder 'agent' to each lens. It folds up with the lens, but when the lens is retracted, it aligns with one of the rangefinder windows on the body, and voila: a coupled, yet collapsable, rangefinder system.
When you focus the lens, two images in the rangefinder move apart from each other. One is stationary, but the other one can move sideways. By focusing the lens, you can make that one overlap the stationary image. When there is full overlap, the subject is in focus.
An interesting question is, how on earth the rangefinder images move separately from each other. Think about this. In a normal Leica-style 35mm rangefinder, a rotatable mirror rotates as the lens focuses. But on the Moskva-5, there are no rotatable mirrors. Inside the camera's top, everything is stationary. But how can the rangefinder images then move sideways? The 'agent' fixed to the lens doesn't move... The only thing moving in the whole rangefinder system, are two lenses in the 'agent'. They rotate opposite from each other: the one clockwise, the one counterclockwise. They don't move in or out, nor to the left or the right, but only rotate opposite to each other. Somehow this must translate into a sidewards movement of the rangefinder image, but I'm not sure how it works. Mirrored glass? Polarized glass? Small prisms? I don't know...
The Moskva-5 was undoubtedly designed as an expensive professional camera, and not as an amateur model. It was built in an age (1956–1960) when 35mm photography was already suppressing 120-film, and only professionals still insisted on using the larger format. Its dual-format characteristics, rangefinder and excellent lens and finish indicate professional use also. Apparently these cameras were used until very late (the 1980's?) by Moscow street photographers. Even today these are often used as portable travel cameras, because when collapsed, they are very small. If you are lucky enough to find one in good state and with a good, sharp Industar, then you gain not only a nice collector's piece, but also a well-useable camera.
Incidentally, the Moskva-5 was followed up in 1960 by the Iskra. The Iskra was a sort of Moskva-5, but then much improved. If didn't have dual format, okay, but it had a Zorki-4 like viewfinder with combined rangefinder, it also had a collapsable lens, it had a better rangefinder system (KMZ got rid of the 'agent'), and an automatic film transport. I own an Iskra-2 myself, and personally think it's a better picture taker than the Moskva-5. But there's no arguing about taste, I guess... Until then, the Moskva-5 remains a popular Russian user camera, and rightly so.
Last modified: Aug 12, 2006
Moscow - what's the risk of mugging / having camera stolen in 1 day layover?
So, I have a 1 day layover in Moscow next month where I need to transfer from one airport in the early hours of the morning to another late in the evening. On the way through the city, I thought I might as well visit the red square and any other easily accessible tourist sights / sites.
I have a choice between carrying a "larger" camera (Sony A7RIII and 24-105) or "smaller" (Panasonic GX85 and 14-140, or maybe just a Panasonic GM5 and 12-32). With either kit I'll also take a faster prime in case I go inside anywhere.
I am unsure whether Moscow is generally considered "safe" to carry large camera equipment in the street, or whether it's better to avoid the risk of pickpockets / muggers by carrying something more discrete. I add "safe" in inverted commas because I know it's all relative- I'm sure some people have walked around with thousands of dollars of of medium format equipment with no issues, and others have probably had everything stolen the minute they left the airport. But I'm wondering if there's a general consensus?
For comparison, I generally feel safe walking around pretty much any city I've been to in Asia with a camera around my neck, but in Cape Town or Rio, for example, I was warned not to, and just took a GM5 that I kept hidden in a bag except when I was actually taking a photo. The only time I've ever actually been mugged is in London, in my home country, and I'm not paranoid about it, but I also don't want to take unnecessary risks. I'm not sure where Moscow falls on the safety spectrum?
Obviously, I'd prefer to take the better camera since I'm not sure when I'll go back and might as well get the best photo IQ I can, but I've travelled a lot with just micro four thirds gear and it's no huge issue if I take that instead. One small note: I'll be taking luggage (plan to leave it in train station left luggage), so although I'll be doing my best to stay alert of my surroundings I'll obviously be a tourist and stand out a bit.
(PS: just doing this as a poll for the novelty value, please ignore and just post a reply if you prefer)
(PPS: to anyone reading this and thinking of doing the same, don't forget to check if you need to a transit visa to go from one airport to the other. Best to organize this well in advance and not at the last minute, the way I did! )
Hi Jonathonj, I live in Moscow, been here for 11 years. I really consider Moscow safer than a lot of European capitals that I've been too. Especially in the centre of Moscow. Of course, if you're going to hang out at the train stations far from the centre you'll have problems. If you're going to spend the day in Moscow and go sightseeing, take photos of people and buildings, monuments, you shouldn't have a problem, even with a bigger camera. There are always a lot of people walking around the centre with big and small cameras, and not just tourists either.
I would still exercise some caution anyway; don't leave your bags open, don't put your bags down (although I've seen people do this on Red Square with no negative consequences), don't put your camera down on the bench next to you when you sit etc. You know the drill.
Just be aware that tripods are forbidden in a lot of places, including Red Square and inside the metro stations (which you must visit, at least the circle line, they're stunning) as far as I remember.
Come, enjoy, take photos, experience the beauty of Moscow. But take notice of your surroundings and look after your possessions as you would do in any big city.
I was about to give an angry reply (as i am originally from Moscow myself), but realised Cheril already answered well in informative and clearly more balanced way then i planned :). Moscow is not anyhow more dangerous than any other big city - don't go in obviously dodgy places with obviously dodgy people and you will be perfectly ok. Plan in advance what you want to see/to shoot, use metro to reach it (sorry for being trivial here), metro is easy to use and network is well developed, all stations and line names are translated in English, lines are also colour-coded - should be easy to navigate. If need taxi - Uber is very popular and fast to arrive. At the end of story - camera choice in case of Moscow is about convenience and weight (sight-seeing may be exhausting!), not security.
Kind regards,
- PS: Good luck taking photos in Moscow, by the way! If you have chance - share them here, i am sure many will be interested to see.
Thank you! Some very helpful advice here and I appreciate it !
http://www.jonathan-jones.com/photography https://www.flickr.com/photos/jonathan_jones_photography/ C&C always welcome on any photos I post!
Thank you, and hope I didn't cause any offence, some cities are genuinely more risky than others but I'm happy to hear Moscow is not an extreme case here. I'll try and post some pics when I get back!
Been there 5~6 years ago in a group tour. Was told by tourist agent not to trust policeman in uniform or not. At that time, it was general knowing that policeman might come up to a tour, ask to check their I.d. like passport etc, and when they have it, will only return for a payment. We ate asked to keep a photocopy of our PP with us, and the urinal in hotel safe ...
Pocket picker should not be much worse than any other European countries in the west. Mugging should not be as severe as in Ho Chi Minh City...
I would just add in regard to whether to bring or not to a city you consider 'dicey'. Remember out of sight out of mind. There is a big difference between walking around with a DSLR hanging from your neck or your shoulder and being discreet with camera under jacket, inside a waste pack, canvas grocery bag or some item when not in use. Keeping the camera out of sight and having a place to put it away to when you want it to vanish from sight can make a huge difference, it's simple and it opens the door to taking it anywhere.
Thanks, Mike https://www.instagram.com/mikefinleyco/
I was in Moscow in 2014 on my own for 6 days and I had no problems at all (while "let normal sense rule").
The biggest problem might be, that Moscow is by far to big for one day.
Just for a couple of hours I would recommend the Kreml and the red square.
For more information and questions just go to:
https://www.lonelyplanet.com/thorntree/forums/europe-eastern-europe-the-caucasus/russia
Not been to Moscow but been to St Petersburg lately.
Never felt unsafe even at night while walking with a child.
What irritated me was that some touts persistently trying to sell stuff/their service even though I firmly said not interested.
The most difficult bit was communication - most people don't understand English. An offline map in phone helped with navigation.
https://www.instagram.com/holidzf/
Yes, I would like to stay longer to see the city properly, but unfortunately time doesn't permit it...
Thanks to all for the responses above.
Moscow has a big history that any photo is just too small to frame in it. I think you are talking with negative sign about it and you should reconsider. Even the interior of the metro is decorated with gold. So many places to visit and see architecture of buildings, the Vakhtangov theater and more. So, good luck.
Frankly, I'd think Moscow would be safer then most of the other large European cities.
Latest sample galleries

Latest in-depth reviews

The Fujifilm X100VI is the sixth iteration of Fujifilm's classically-styled large sensor compact. A 40MP X-Trans sensor, in-body stabilization and 6.2K video are the major updates, but do they make the camera better?

The Panasonic Lumix S5II launched the second generation of Panasonic’s full-frame mirrorless camera system and was the first Panasonic to feature phase detect autofocus. As our review reveals, it’s a heck of an all-around camera for both still and video shooters.

The latest Lumix puts a Four Thirds sensor in a full-frame body with boosted AF and a wealth of stills and video capabilities to create a Swiss Army Knife of a Micro Four Thirds camera.

The fourth camera in Leica's SL series of full-frame mirrorless cameras sees the 60MP BSI sensor from the Q3 and M11 models arrive with a significant interface redesign.

The Nikon Zf is a 24MP full-frame mirrorless camera with classic looks that brings significant improvements to Nikon's mid-price cameras. We just shot a sample reel to get a better feel for its video features and have added our impressions to the review.
Latest buying guides

What’s the best camera for around $2000? This price point gives you access to some of the most all-round capable cameras available. Excellent image quality, powerful autofocus and great looking video are the least you can expect. We've picked the models that really stand out.

What's the best camera for travel? Good travel cameras should be small, versatile, and offer good image quality. In this buying guide we've rounded-up several great cameras for travel and recommended the best.

If you want a compact camera that produces great quality photos without the hassle of changing lenses, there are plenty of choices available for every budget. Read on to find out which portable enthusiast compacts are our favorites.

'What's the best mirrorless camera?' We're glad you asked.

Above $2500 cameras tend to become increasingly specialized, making it difficult to select a 'best' option. We case our eye over the options costing more than $2500 but less than $4000, to find the best all-rounder.

- Gear Patrol
- Work for us
- Advertise with us
- Feedback / Contact us
- Camera reviews
- Lens reviews
- Printer reviews
- Buying guides
- Sample images
- Editorial enquiries
- Camera search
- Camera comparison
- Lens search
- Product timeline
- Browse all products
- Community Guidelines
- My Settings
- My GearList

- Toys & Games
- Remote & App Controlled Vehicles & Parts
- Quadcopters & Multirotors
Add an Accessory:

Image Unavailable

- To view this video download Flash Player
DJI Mavic 3, Drone with 4/3 CMOS Hasselblad Camera, 5.1K Video, Omnidirectional Obstacle Sensing, 46 Mins Flight, Advanced Auto Return, 15km Video Transmission, FAA Remote ID Compliant, Gray
DJI Mavic 3
DJI Mavic 3 Cine Premium Combo
DJI Mavic 3 Fly More Combo
About this item
- Imaging Above Everything - With a 4/3 CMOS Hasselblad Camera, the sensor provides a 12.8-stop dynamic range that retains more details in highlights and shadows, upgrading your work to a professional level..Max Flight Distance : 30 km, Max Service Ceiling Above Sea Level : 6000 m. Operating Temperature : -10° to 40° C (14° to 104° F).
- 46 Minutes of Flight Time - Stay in the air longer and capture more with a breathtaking max flight time of 46 minutes. This lets you get all the shots you want on just a single battery.
- Fly Safer - DJI Mavic 3 drone with camera is equipped with advanced Omnidirectional Obstacle Sensing. This lets you fly confidently and safely wherever you are.
- Explore and Capture more - the DJI Mavic 3 drone offers a 15-kilometer max transmission range, which means you can fly farther to explore and capture more. And with the O3 Plus Transmission system, live feeds are smooth and stable.
- Smart Return to Home - With a new Advanced RTH system, Mavic 3 camera drone can return to its home point on a fast, safe, and optimized route. Whether activated by low battery or the pilot, getting the quadcopter drone back to you during flight is easier than ever.
There is a newer model of this item:

Similar items that may deliver to you quickly

Fly responsibly
Top brand: dji, from the brand.

Portable Power Station
Visit the Store

Camera Drones

Handheld & Action

Professional Handheld

Top Accessories
From the manufacturer, dji mavic 3: imaging above everything.

Additional Features
High-speed quicktransfer, activetrack 5.0, mastershots, which is the best for you, product description.
Overview Capture stunning imagery with the legendary Hasselblad drone camera and enjoy a smooth flight with omnidirectional obstacle sensing. Every improvement on Mavic 3 sets a higher standard for aerial photography. Fly with Mavic 3 and discover imaging above everything. Features Tele Camera Pro Mode With Pro mode, the tele camera of Mavic 3 supports manual parameter adjustments and RAW photos. The tele camera offers unique camera language to make your footage more expressive and dynamic. Smart Return to Home Mavic 3 can fly to a designated altitude and then find a safe and efficient route back to its home point, combining the advantages of Advanced RTH and traditional RTH, allowing users to choose the best option according to their environment. Adjustable Aperture for Every Scene Aperture is adjustable according to the needs of different scenes. In low-light environments, the f/2.8 aperture lets more light in; when the lighting is sufficient, aperture can be adjusted to lower the shutter speed for recording smoother, more natural footage. Wider FOV to See the Bigger Picture Weighing less than 13 g, the 24mm equivalent lens not only supports autofocus, it also has an 84° FOV to capture more in every frame. Focusing is Faster with VDAF Technology The Hasselblad camera on Mavic 3 drone features Vision Detection Auto Focus (VDAF) technology, which works with multiple vision sensors to utilize distance data and optimize focusing speed. FHD High-Frame-Rate Transmission with Visible Smoothness Mavic 3 is DJI’s first-ever camera drone able to transmit a 1080p/60fps live feed. This means the camera view is displayed at specifications close to what the camera actually records. It also makes Mavic 3 more responsive to your control. Note 1. Unobstructed, free of interference, and when FCC-compliant. Maximum flight range specification is a proxy for radio link strength and resilience. Always follow local rules and regulations and fly your drone within your visual line of sight unless otherwise permitted. 2. DJI Mavic 3 Cine supports Apple ProRes 422 HQ, Apple ProRes 422, Apple ProRes 422 LT, and H.264/H.265 encoding, while Mavic 3 only supports H.264/H.265 encoding. FAQ 1. Compared to DJI Mavic 2, what major upgrades does Mavic 3 have? DJI Mavic 3 is DJI's next-generation flagship consumer camera drone. Compared to Mavic 2, major upgrades include: -Mavic 3 offers significantly improved imaging performance thanks to its 4/3 CMOS Hasselblad camera and 24mm-equivalent lightweight lens. It can record up to 5.1K/50fps or 4K/120fps videos. -Mavic 3 Cine even supports Apple ProRes 422 HQ, Apple ProRes 422, and Apple ProRes 422 LT encoding, offering higher image quality and greater flexibility during post-processing. -The flight experience has also been comprehensively improved with the flight time extended to 46 minutes. And thanks to incredibly stable O3+ technology, video transmission can reach up to 15 km. -DJI Mavic 3 is equipped with an omnidirectional obstacle sensing system and supports the upgraded APAS 5.0 and Advanced RTH, letting creators enjoy safe flight with peace of mind. 2. What's the difference between the combos? Compared with the standard Mavic 3 combo, DJI Mavic 3 Fly More Combo includes two additional Intelligent Flight Batteries, one Battery Charging Hub, one Convertible Carrying Bag, and one ND Filters Set (ND4/8/16/32) to help you explore and shoot in more scenarios. Compared with the DJI Mavic 3 Fly More Combo, the DJI Mavic 3 Cine Premium Combo includes a Mavic 3 Cine aircraft that supports Apple ProRes 422 HQ, Apple ProRes 422, and Apple ProRes 422 LT encoding and has a built-in 1TB SSD, an upgraded DJI RC Pro with a high-bright display, one ND Filters Set (ND64/128/256/512), a 10Gbps Lightspeed cable, and other accessories that help facilitate professional-level imaging.
Product information
Technical details, additional information, warranty & support, what's in the box.
- DJI Mavic 3 ×1 DJI RC-N1 Remote Controller ×1 DJI RC-N1 Remote Controller Control Sticks (pair) ×1 DJI RC-N1 RC Cable (USB Type-C Connector) ×1 DJI RC-N1 RC Cable (Standard Micro-USB Connector) ×1 DJI RC-N1 RC Cable (Lightning Connector) ×1 DJI Mavic 3 Intelligent Flight Battery ×1 DJI Mavic 3 Low-Noise Propellers (pair) ×3 DJI 65W Portable Charger ×1 DJI Mavic 3 Storage Cover ×1 Type-C Cable ×1
Product guides and documents
Compare with similar items, looking for specific info, customer reviews.
Customer Reviews, including Product Star Ratings help customers to learn more about the product and decide whether it is the right product for them.
To calculate the overall star rating and percentage breakdown by star, we don’t use a simple average. Instead, our system considers things like how recent a review is and if the reviewer bought the item on Amazon. It also analyzed reviews to verify trustworthiness.
Customers say
Customers like the performance, quality and ease of use of the unmanned aerial vehicle. For example, they mention it's a high-performance drone that's well worth the price. They appreciate the image quality, saying it takes amazing video and pictures. They also appreciate the speed and control. That said, opinions are mixed on battery life and zoom.
AI-generated from the text of customer reviews
Customers are satisfied with the performance of the drone. They say it's a really good drone when it' s functional, amazing, and high-performance. They appreciate the camera capabilities, flight performance, and safety features. Some mention that the drone is very pricey, but definitely a nice flying drone.
"...The DJI Mavic 3 excels in its flight capabilities . With remarkable stability and precision, it handles wonderfully, even in windy conditions...." Read more
"What can I say? This bird is sensational . Only two minor gripes. First, they have to put the mini SD card slot somewhere else...." Read more
Customers are satisfied with the image quality of the unmanned aerial vehicle. They mention that it takes amazing video and pictures, with an extraordinary zoom and video camera. The pictures are breathtakingly detailed, making their aerial photography and videography incredibly professional.
"...The images are crisp , vivid, and detailed, making my aerial photography and videography incredibly professional...." Read more
"...So far I have only used it in auto mode but it has done a great job. Clear , crisp photos and videos that are professional quality...." Read more
Customers are satisfied with the quality of the unmanned aerial vehicle. They mention that the build quality is robust, the design sleek and modern, and the camera quality is amazing. They also appreciate the clear, crisp photos and videos that are professional quality. Customers also appreciate its reliability, stability, and performance in a drone. They say that it holds its own in high winds.
"...The DJI Mavic 3 excels in its flight capabilities. With remarkable stability and precision, it handles wonderfully, even in windy conditions...." Read more
"...- Awesome camera quality . So far I have only used it in auto mode but it has done a great job...." Read more
Customers find the unmanned aerial vehicle easy to use. They say the sheer quality of footage and ease of use make every penny worth it for both hobbyists and professionals. They also say the app has a better user interface and the controller is better. Customers also mention that the pre installed software is alright for basic shots.
"...'s a bit of a learning curve with the DJI Fly app, I found it to be intuitive and feature-packed once I familiarized myself with it...." Read more
"...I was nervous to fly it for the first time but it is so easy to initiate take-off and control.-Awesome camera quality...." Read more
Customers like the speed of the unmanned aerial vehicle. They mention that it's fast, has an impressive flight time, and is a significant improvement over other models.
"...The flight time is impressive as well - a significant improvement over other models I've used in the past...." Read more
"...Took me a bit to realize that in Sport mode, the drone can travel much faster (up to 47 mph!)...." Read more
Customers are satisfied with the control of the unmanned aerial vehicle. They mention that the ActiveTrack and Spotlight features offer incredible control and flexibility in capturing. They also appreciate the full control over custom settings for the 3 modes, cine, sport, and the interface with the app. Overall, most are happy with the level of control and stability this drone offers.
"...and options available, including ActiveTrack and Spotlight, offer incredible control and flexibility in capturing dynamic shots...." Read more
"...The level of control and stability this drone offers is unparalleled, making it a dream to fly even in challenging conditions...." Read more
Customers are mixed about the battery life of the unmanned aerial vehicle. Some mention it has good battery life, while others say it wouldn't take a charge.
"...- Good battery life . I love how it shows down to the minute how much battery is left.-Different modes...." Read more
"...Fly More (or buy the battery dock separately), there is no way to charge your battery outside of the drone..." Read more
Customers are mixed about the zoom of the unmanned aerial vehicle. Some mention that it zooms from 0-14x very smoothly, while others say that it stopped working.
"...Second gripe, the zoom feature. It zooms from 0-14x very smoothly , but when you go past 14x (to 28x) jerks directly from 14x -28x and nothing smooth..." Read more
"...It is also near impossible to zoom with your finger on the app and do other things smoothly (especially if you have a hood on your tablet), which is..." Read more
Reviews with images

- Sort reviews by Top reviews Most recent Top reviews
Top reviews from the United States
There was a problem filtering reviews right now. please try again later..
Top reviews from other countries
- Amazon Newsletter
- About Amazon
- Accessibility
- Sustainability
- Press Center
- Investor Relations
- Amazon Devices
- Amazon Science
- Sell on Amazon
- Sell apps on Amazon
- Supply to Amazon
- Protect & Build Your Brand
- Become an Affiliate
- Become a Delivery Driver
- Start a Package Delivery Business
- Advertise Your Products
- Self-Publish with Us
- Become an Amazon Hub Partner
- › See More Ways to Make Money
- Amazon Visa
- Amazon Store Card
- Amazon Secured Card
- Amazon Business Card
- Shop with Points
- Credit Card Marketplace
- Reload Your Balance
- Amazon Currency Converter
- Your Account
- Your Orders
- Shipping Rates & Policies
- Amazon Prime
- Returns & Replacements
- Manage Your Content and Devices
- Recalls and Product Safety Alerts
- Conditions of Use
- Privacy Notice
- Consumer Health Data Privacy Disclosure
- Your Ads Privacy Choices
- Los Angeles
- Pulp Magazine
- WALLCOVERING

- Pulp Home Fragrance
- PULP DESIGN STUDIOS for S.HARRIS TEXTILE COLLECTION II
- Pulp Design Studios for S.Harris Collection I
Carry on Cocktail Kit – The Moscow Mule
— $ 24.00
DESCRIPTION
This kit includes the tools to mix two Moscow Mules mid-flight, including a bold and spicy small-batch ginger syrup.
Kit Components:
- Carry On Tin – 3.125 in. (W) x 4.25 in. (H) x 1 in. (D)
- Recipe Card
- 1/2 oz. Jigger
- Ginger Syrup
- Linen Coaster
Additional Information
Out of stock
Related Products
Eye of Ra Matte Black Coaster Set
Starburst Pull Hardware Matte Brass
Eye of Ra Rose Gold Coaster Set
Interested in seeing how we can transform your home? Book a complimentary call to discuss how we can help!
Wherever You Are
We work all across the country, designing primary residences, pied-à-terres, and vacation homes, for our clients near and far.


IMAGES
VIDEO
COMMENTS
Panasonic Lumix TZ220. The Panasonic Lumix TZ220 is Panasonic's flagship compact camera and is nicknamed the company's Ultimate Travel Companion. While it is technically a little more expensive than the Olympus OM-D E-M10 Mark IV, the built-in 15x zoom means you won't need to spend more on lenses.
If they both have the same size sensor, the 12MP camera is actually going to be your better option. Sensor size is a very important puzzle piece in picking the best camera for you. Most phone cameras will have a sensor that is ⅓ of an inch, but some have up to an inch. The iPhone XS, for example, is ⅓ of an inch.
Polarizer filters are one of the coolest camera accessories and essential to any professional photography kit. Polarizer filters are like UV filters in that they're circular and attach to the front of the lens. There are a number of key differences between UV and polarizer filters though.
Mavic Air 2 Drone. When it comes to the best travel camera gear having a drone is a must these days. The epic aerial photos and videos really boost what you can create and add a whole new dimension to your travel filming and photography - especially if you're looking to monetise or work with brands. For me the ultimate travel drone is the ...
Best Overall: Thule Camera Bag Backpack at B&H Photo Video ($180) Jump to Review. Best Overall, Runner-Up: Peak Design Everyday Backpack 20L at Amazon ($280) Jump to Review. Best Budget: Bagsmart Photo Camera Backpack at Bagsmart.com (See Price) Jump to Review.
Best Overall: Peak Design Everyday Backpack 20L at Amazon ($280) Jump to Review. Best for the Outdoors: Shimoda Adventure Backpack at Amazon ($385) Jump to Review. Best Organization: Nomatic ...
Camera Accessory Travel Kit (HERO7 Black/HERO7 Silver/HERO7 White/HERO6 Black/HERO5 Black/HERO (2018) - GoPro Official Accessory. 4.7 out of 5 stars. 1,395. ... 50 in 1 Action Camera Accessory Kit Compatible with GoPro Hero 12 11 10 9 DJI OSMO 4 3 2 Insta360 X3 X2 GO 3 SJCAM DBPOWER AKASO VicTsing APEMAN WiMiUS QUMOX Lightdow Campark Sony ...
1. A zoom lens and a fast prime. (Image credit: Lucas Favre for Unsplash) Choosing which lenses to pack is perhaps the most difficult part of packing for a trip. There are so many scenarios to think about and each lens has its own advantages.
Product Details. Includes Shorty mini extension pole + tripod, Magnetic Swivel Clip, mounting buckle, thumb screw and compact case. Get an awesome deal on two versatile accessories perfect for capturing your journeys. Shorty (Mini Extension Pole + Tripod) extends up to 8.9in (22.7cm) and can be propped up on any level surface. With Magnetic ...
Best waterproof hard case gear: Pelican 1510 Carry-On Camera Bag. Best for camera lenses: Ruggard Lens Case. Best fashion travel camera case: ONA Camera Messenger Bag. Best GoPro case: Lowepro Hardside CS 80.
Best Backpack: McKinnon Camera Pack 35L. Best Tripod: Peak Design Carbon Fiber Travel Tripod. Best Backup Solution: Gnarbox 2.0 SSD. Best Portable LED Light: Lume Cube Panel Go. Best Cleaning Kit: ZEISS Lens Cleaning Kit. Best Power Bank: Anker PowerCore+ 26800. Best Gimbal: DJI Ronin-SC. Best Camera Strap: Peak Design Leash.
GoPro Camera Accessory Travel Kit (HERO7 Black/HERO7 Silver/HERO7 White/HERO6 Black/HERO5 Black/HERO (2018) - GoPro Official Accessory . Visit the GoPro Store. 4.7 4.7 out of 5 stars 1,373 ratings | 18 answered questions . $31.95 $ 31. 95. FREE Returns . Return this item for free.
If you have an L-Bracket on your camera, I would suggest to get the more compact and lighter RRS TFA-01 with the BC-18 Microball. If you have regular plates, I would get the kit with the BH-25 as pictured above. Multi-Clamp Kit. Another amazing accessory that I take with me when traveling abroad is the RRS Multi-Clamp Kit with BC-18 Micro Ball ...
Travel Kit . Grab a sweet deal on gear that's perfect for selfies, group shots and more while you're out exploring. This kit includes the ultra versatile Shorty (Mini Extension Pole + Tripod) and a Magnetic Swivel Clip for clipping your GoPro to your backpack strap or gear, or use the magnet and stick it to metal surfaces ¹. 360 swivel lets you turn the camera to frame the perfect shot.
2. If you're a travel photographer, it's probably common for you to travel in the dark. Having an LED light is perfect to light your path to your vantage point for that perfect shot. Safety ...
Phone Camera Accessories . With phone camera quality getting better every day, the phones are becoming an easy to use tool in photography. Companies like Moment have built some incredible mobile add-on lenses which can take your photography to a whole new level. Another important mobile camera accessory you can have is the DJI Osmo Mobile 2.
2. Mefoto Backpacker Tripod. Kim Magaraci / ViaTravelers. It took me a while to end up with a Peak Design tripod because this budget-friendly Mefoto has been sitting in my camera closet for at least five years. The MeFOTO BackPacker Classic Aluminum Travel Tripod Kit is an underrated alternative for anyone on a budget.
Combining a small form factor with a high-res 61MP sensor and fantastic autofocus, the Sony A7C R is the best full-frame camera for travel photography. 8. Fujifilm X-S20. A capable sensor and ...
The Moskva-5 is a true dual format camera. It was designed for 6×6 and 6×9 photography, and both types are equally well manageable. On the top plate, there is a format switch, but the only thing it does, is place or remove a 6×6 mask in the viewfinder. There is another switch in the pressure plate.
I have a choice between carrying a "larger" camera (Sony A7RIII and 24-105) or "smaller" (Panasonic GX85 and 14-140, or maybe just a Panasonic GM5 and 12-32). With either kit I'll also take a faster prime in case I go inside anywhere.
It comes with all the original accessories from DJI. See more. FREE delivery May 9 - 14. Details. Select delivery location. Only 1 left in stock - order soon. $ $2,049.00 2,049. 00 () Includes selected options. ... Imaging Above Everything - With a 4/3 CMOS Hasselblad Camera, the sensor provides a 12.8-stop dynamic range that retains more ...
Shop the The Carry On Cocktail Kit: Moscow Mule at Anthropologie today. Read customer reviews, discover product details and more.
This kit includes the tools to mix two Moscow Mules mid-flight, including a bold and spicy small-batch ginger syrup. Kit Components: Carry On Tin - 3.125 in. (W) x 4.25 in. (H) x 1 in. (D) Recipe Card Bar Spoon 1/2 oz. Jigger Ginger Syrup Linen Coaster ... Home / ACCESSORIES / ENTERTAINING / BARWARE / Carry on Cocktail Kit - The Moscow Mule ...